May 11, 2017 at 16:58
Beware of transparent pixels
- Transfer
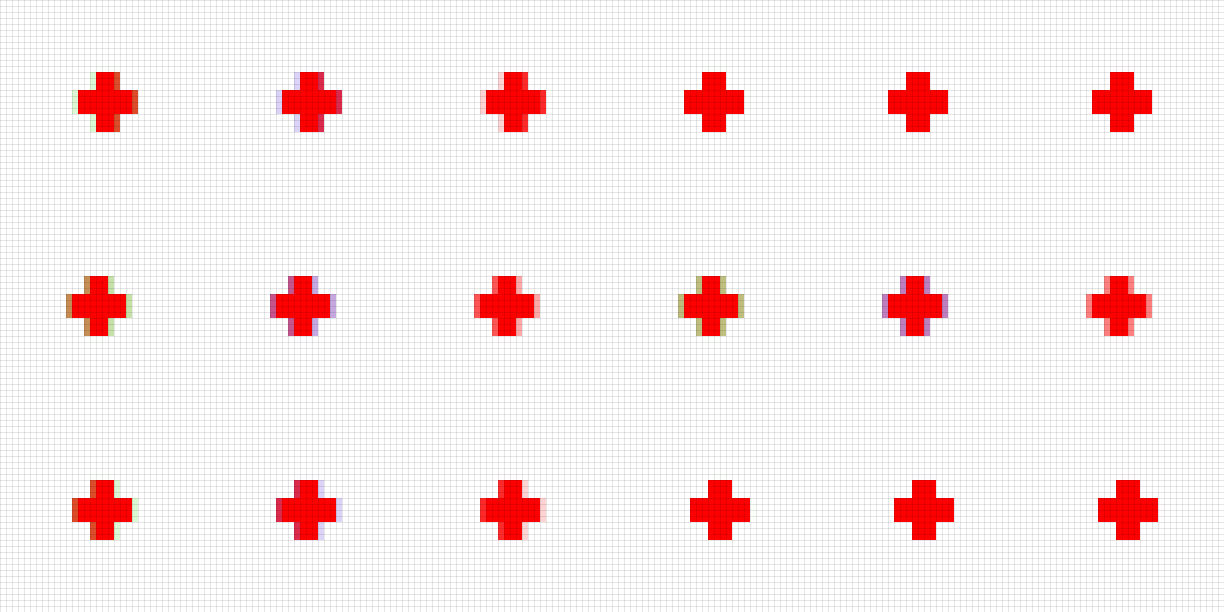
If you use sprites with transparency in your game (which usually happens, at least for the UI), then you probably should pay attention to fully transparent texture pixels (or “texels”).
Even if the alpha channel value is 0, the color value is still associated with the pixel. This color does not affect anything, right? In the end, the pixel is completely transparent, who cares about its color ...
So, in fact, this color is important, if you do not understand this, then you can get artifacts that are noticeable in many games. Most often, distortions are very small and not noticeable, but sometimes they are really striking.
Distortion example
It's time to give an example from real life! Here is the XMB of my PS3 (main menu), with demos of several games.
First Limbo is selected , then I just press "up" to move to The Unfinished Sawn
(by the way, both games are great).

Start.

I press down. Limbo goes down.

The background turns white.
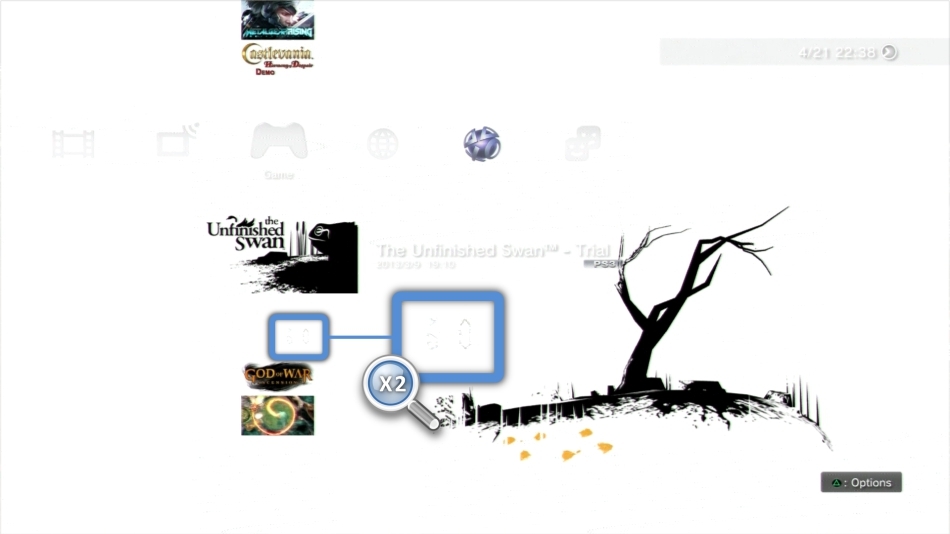
Artifacts.
See what happened to the Limbo logo area ?
The background has changed to The Unfinished Swan's white background and, as a result, the “absolutely white” Limbo logoDrawn on top of the background, which is also completely white. This area should be completely white, then where did these strange gray pixels come from?
Most likely, the distortion occurred due to the fact that the Limbo texture uses the wrong RGB colors for fully transparent pixels.
Texture filtering
Artifacts actually arise from the way the video processor filters the texture when rendering the sprite on the screen. Let's look at his work with a simple example.
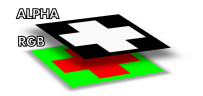
Here is a small pixel texture with a red cross 12x12 in size:


And here is its enlarged image, the chess cell simply shows that it is a completely transparent area with an alpha channel value of 0.
You can use this sprite as an icon to display in the health UI or as a texture for the game model first-aid kits. ( Although not! Actually, this is not worth it! )
Let's create three versions of this sprite by simply changing the color value of the pixels with zero alpha transparency.
Transparent area: green. What the image looks like:


Transparent area: blue. How the image looks:


Transparent area: red. How does the image of:
(You can download the files and check the RGB values of transparent pixels)
The three sprite appear on the screen exactly the same, right? This is logical: we just changed the color value of the transparent pixels, which will still be invisible.
But let's see what happens when these sprites are in motion. Here is an enlarged image to better see screen pixels:
We see distortions here! Brown in the first sprite and purple in the second. The third is all right, that’s how it should look.
Let's look at the blue version:
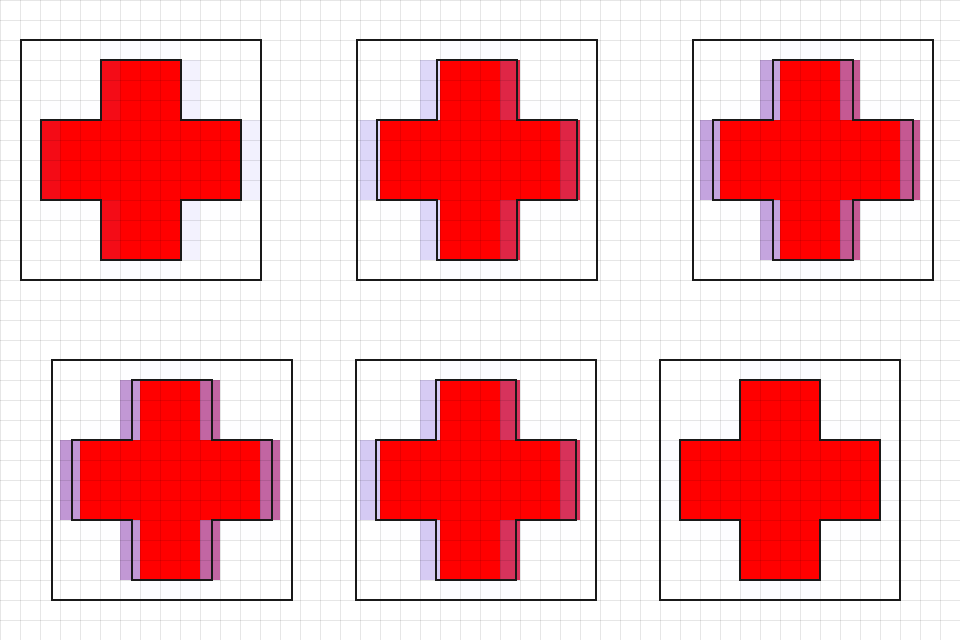
As we can see, the problem occurs when the position of the texture does not correspond to pixel by pixel screen pixels. This can be explained by the bilinear filtering that the video processor performs when rendering the sprite on the screen: when sampling the texture, the video processor averages the color values of the nearest neighboring pixels with the requested coordinates in the vertical and horizontal directions.
Consider the case when the position of the sprite does not coincide exactly half the pixel:
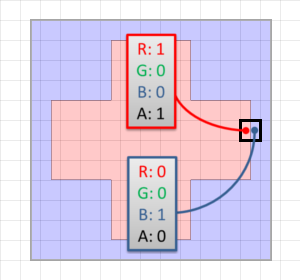
Each screen pixel samples the sprite texture exactly between two texels. This is exactly what happens with the pixel that is visible in the image: it selects a sprite texture in the middle between a solid red texel and a transparent blue texel. The average color is as follows:And this is partially transparent purple, something like this: █
This color, returned by the texture sampler, will now be mixed into the alpha channel of the rendering result (solid white).
The mixing equation has the form:

This does not suit us. The correct result (which we got when the transparent pixels were red) would be like this:
Is a bilinearly interpolated value, which is then mixed and obtained Pixel on the screen is as follows: █
How can we avoid these unpleasant artifacts?
How to avoid this problem
If you are an artist: let everything leak out!
If you are responsible for creating graphic resources, then secure your work and do not trust programmers and the engine.
It is very likely that at some stage of the conveyor, the colors of the transparent pixels will “leak” onto the graphics surrounding them. We have already seen how this happens with bilinear filtering of textures, but this can also happen with the generation of MIP textures ...
You can deal with such color leakage ... additional leakage !

Source sprite

RGB only
By this I mean that before exporting graphics to disk, you must first make sure that all opaque pixels “leak” into the RGB values of adjacent transparent pixels (this is also called flood-filling oredge-padding ). In this case, when transparent pixels leak to their opaque neighbors during the game, they will at least leak with the correct color.
The images above show an example from the real world: an atlas of vegetation sprites extracted from GTA V , with and without an alpha channel.
Notice the border around pixels with non-zero transparency: transparent pixels borrow the colors of their closest visible neighbors. Rockstar did not accidentally do all this work.
In this process, we can help tools: in Photoshop has a plug Solidify ,
also exists for Gimp plugin ...
Also, be careful when exporting RGB values of transparent pixels, for example, when saving PNG: many programs by default discard RGB data of transparent pixels and replace them with solid color (white or black) when exporting to improve compression.
If you are a programmer: use Premultiplied Alpha!
If you are a programmer, then you already know that you should not blindly trust graphic resources created by artists. Fortunately, programmers have more options to deal with this problem.
You can use the color leakage automation tool that we talked about earlier. It should be used when importing resources. But we have a much better and more reliable solution: premultiplied alpha.
I will not talk about it in detail, because other people have written good descriptions, for example here and here .
I also highly recommend Tom Forsyth's posts: 1 and 2 on this topic.
The idea is very simple: instead of storing the texture as need to store it as RGB components are simply multiplied by the alpha transparency value of the pixel. The original color can still be easily obtained by dividing the value by alpha transparency.
So you can turn the sprite:

Original

Premultiplied Alpha
It is also necessary to change the mixing equation, because our texture now contains the result of the first multiplication, and it does not need to be multiplied again by the alpha transparency value:

glBlendFunc(GL_SRC_ALPHA, GL_ONE_MINUS_SRC_ALPHA)⇒ glBlendFunc(GL_ONE, GL_ONE_MINUS_SRC_ALPHA)Back to our sprite with a red cross shifted by half a pixel. In the case of the Premultiplied Alpha mode, the bilinear interpolator will look for the average betweenThis correctly and fairly well solves all our problems! The end result is exactly the same as what we would expect with “traditional mixing,” except that we got rid of all the artifacts. You will notice that when working with premultiplied alpha, a fully transparent pixel always has an RGB value of black, so we don’t need to worry about what really is in the transparent areas of the sprite. Premultiplied alpha also avoids headaches when generating chains of MIP textures and layering several translucent sprites one above the other.
To summarize
So, back to the original topic: was the Limbo logo problem really caused by garbage in RGB transparent pixels?
There is only one way to find out, so I extracted the PNG file from the demo package
/PS3_GAME/ICON0.PNG. At first glance, the image looks great, but let's remove the alpha channel to visualize the full RGB values:

Original

RGB only
So it is: instead of a solid white color, the letters “B” and “O” contain incorrect RGB values that “leak” and cause the graphic bug we saw before.
The problem with these artifacts is that they are difficult to detect. I didn’t notice anything strange with the Limbo logountil it is rendered on a white background. Not everyone knows about this problem, so familiarization with the topic will be useful.
If you are an artist, then you are the first line of defense, pay attention to the colors that are inside the transparent pixels. If you are a programmer, then consider using premultiplied alpha.