Lazarus - simple animation using the TImageFragment component
- Tutorial
Instead of the preface
In my recent article, Lazarus - writing a component for animating sprites, I described the process of creating a simple TImageFragment component that allows you to display a given image fragment.
Continuing the chosen theme, in this article I want to show how you can easily make the animation of sprites in the development environment of Lazarus ( official website ) using this component.
With this approach, separate animation frames in different projections are placed on one image, and the component for displaying the sprite shows only one selected fragment of this image, using the OffsetX and OffsetY properties(offset of the upper left corner of the image fragment horizontally and vertically).
Many such ready-made images can be found on the Web - for example, on this site .
Select (and prepare) the image
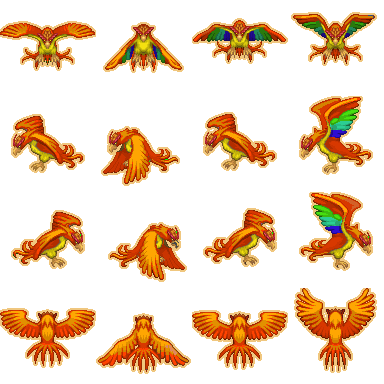
For my example, I chose this image:

- this Phoenix bird flaps its wings very much.
As you can see, each row contains 4 frames for each of the 4 projections. Changing only OffsetX , you can make the bird flap its wings, and to change the projection, you only need to change OffsetY . This separation of frames by rows greatly simplifies animation programming.
The size of this image is 384x384, and the size of each frame is 96x96. Unfortunately, the direct use of this image has grieved us with artifacts: some image frames are placed so that their edges fall on adjacent frames, and during the animation, yellow strokes flash on the edges of the sprite.
To eliminate these defects, I used the free GIMP cross-platform image editor ( official website ). All that had to be done was to remove the protruding pixels of the images in the places where they fall on the next frame.
The corrected file looks like this:
- with the naked eye the differences are not noticeable, but the second option works without artifacts.
Create a new project
1. Create a new project such as "Application".
By default, the IDE creates a project called “project1”, which immediately creates one software module called “unit1”, describing the class named “TForm1” and declaring its instance named “Form1.”
In general, when creating new objects, the IDE assigns them similar names, consisting of the name of the object type and the sequence number. I consider it a good style to rename all such objects, giving them meaningful names reflecting the role or purpose of the object.
Thus, our project will be called not “project1” but “Phoenix” - by name selected sprite .
2. Keeping our new project.
It is advisable to save each project in a separate directory with the same name as the project. In the process of saving, we specify the directory to save (if necessary, create it right there), then the name of the project file and the file name of the program module. I created the “Phoenix” folder and saved the project file (“Phoenix.lpi” instead of the proposed “project1.lpi”) and the program module file (“UnitMain.pas” instead of the proposed “unit1.pas”).
Nuance with the case of characters
Версия Lazarus для Windows приводит название файла программного модуля к нижнему регистру: «unitmain.pas», но программное название модуля сохраняет оригинальный регистр символов: «unit UnitMain;». С файлом проекта этого не происходит, имя файла сохраняет оригинальный регистр символов.
3. Rename the form and change its title. The newly
created form is called “Form1” (the Name property ), is an instance of the “TForm1” class and contains the “Form1” header (the Caption property ). Change the Name property of the form to “FormMain”, and the class name will change to “TFormMain”.
The Caption property is changed to “Phoenix” so that the title of the project is displayed in the window title.
4. As a result, I got the following text of the module unitmain.pas:
unit UnitMain;
{$mode objfpc}{$H+}interfaceuses
  Classes, SysUtils, FileUtil, Forms, Controls, Graphics, Dialogs;
typeTFormMain = class(TForm)
  privatepublicend;
var
  FormMain: TFormMain;
implementation{$R *.lfm}end.
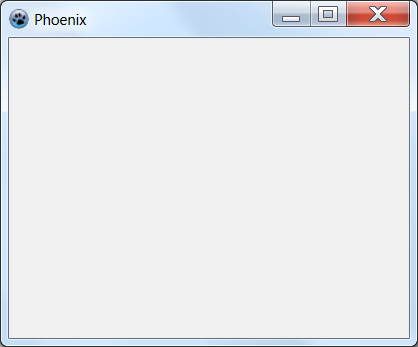
5. Compile, run the project (<F9> key):
Put the sprite on the form
Assuming that you have already installed the TImageFragment component described in my previous Lazarus article , we write the component for sprite animation , select the Game tab from the component palette and add the TImageFragment component to the form.
Using the Picture property , we load an image into the component (a corrected version of the Phoenix bird). In addition, we also change the following properties of the new object:
- set the Height and Width properties to 96
- Left and Top properties are set to 0 (convenient for matching with my screenshots)
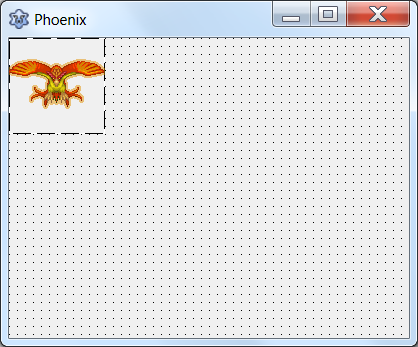
- Name property is changed from the inconvenient “ImageFragment1” to the simple and clear “Sprite”
If everything is done correctly, the component will show the first frame of the image:
In the text of the UnitMain module , minor changes will occur:
- the ImageFragment module will be added to the uses clause
uses
  Classes, SysUtils, FileUtil, Forms, Controls, Graphics, Dialogs,
    ImageFragment;
- a new object will appear in the class declaration
TFormMain = class(TForm)
    Sprite: TImageFragment;
  privatepublicend;
Adding animation - flapping wings
1. Add a new TTimer component to the form .
This component is located on the System tab of the component palette. You can post it in any convenient place on the form, since it is not displayed in the running application.
2. Rename the added object.
The new object is automatically named Timer1, but we rename it to TimerLive. It is often convenient to give objects such two-part names: the first reflects the class of the object, and the second its purpose.
3. Change the Interval property from 1000 to 100.
Let the frames of this animation change each other every 100 milliseconds, that is, 10 times per second. In the future, this property can be changed to slow down or speed up the wing's wing - at the discretion of the programmer.
4. Add an OnTimer event handler.
The easiest way to do this is to double-click on the icon of a new TimerLive object . As a result of this action, the IDE itself adds a new procedure to the form class declaration, a link to this procedure to the object properties, and the body of the new procedure will be added to the implementation section (and the cursor will be placed inside this new procedure, between the begin and end keywords ).
5. Add one line of code to the new procedure.
Sprite.OffsetX := (Sprite.OffsetX + 96) mod384;
As a result of these actions, the class declaration should look something like this:
TFormMain = class(TForm)
    Sprite: TImageFragment;
    TimerLive: TTimer;
    procedureTimerLiveTimer(Sender: TObject);privatepublicend;
And the new procedure - the OnTimer event handler should look like this:
procedureTFormMain.TimerLiveTimer(Sender: TObject);begin
  Sprite.OffsetX := (Sprite.OffsetX + 96) mod384;
end;
After compiling and running the application, you can watch the Phoenix bird flapping its wings.
This happens because the timer event handler every 100 milliseconds cyclically changes the offset of the displayed fragment, and the selected frame is shifted horizontally, sequentially displaying 4 frames of the top line of the loaded image. The mod operation — getting the remainder of the division — prevents the bias from moving beyond the image size, and as a result, the 4th frame again follows the 1st frame.
Add sprite moving around the window
1. Add the Math module to the uses section
uses
  Classes, SysUtils, FileUtil, Forms, Controls, Graphics, Dialogs, ExtCtrls,
    ImageFragment, Math;
2. Add a new variable and a constant to the class declaration.
To save the vector of movement of the sprite around the window, add a variable of type TPoint
private
    FVector: TPoint;
In the same place, we declare a constant for specifying the module of the velocity of movement.
const
    Speed = 10;
3. Add another TTimer class component to the form .
Let me remind you: this component is located on the System tab of the component palette.
The new object again automatically gets the name "Timer1", and we rename it - this time to "TimerMove". The purpose of the second timer is to control the movement of the sprite. I didn’t bind both processes (animation and movement) to the same timer so that each of the timers could be adjusted separately - for example, slowing the frequency of wing flies without slowing down the movement, and so on.
4. Change the Interval property from 1000 to 100.
Let this timer also work every 100 milliseconds, that is, 10 times per second. In the future, this property can also be changed to slow down or speed up the frequency of drawing the fact of moving the sprite.
5. Add an OnTimer event handler .
For a change, this time I propose to do this by double-clicking the opposite of the OnTimer event on the “Events” tab of the new TimerMove object . Like last time, as a result of this action, the IDE will add a new procedure to the form class declaration, a link to this procedure to the object properties, and the body of the new procedure will be added to the implementation section (and the cursor will be placed inside this new procedure, between the key begin wordsand end ).
6. Add two lines of code to the new procedure.
  Sprite.Left := Max(0, Min(Width - Sprite.Width, Sprite.Left + FVector.x));
  Sprite.Top := Max(0, Min(Height - Sprite.Height, Sprite.Top + FVector.y));
Using the Max () and Min () functions prevents the sprite from leaving the form (the main application window).
It is for the use of these functions that we connected the Math module to the uses clause . 7. Add an OnKeyPress event handler . Select the form (click the gray rectangle of the window layout outside of all added components) and in the Events tab we find the OnKeyPress event . Double-click the empty value of the event handler to create and assign a new procedure - the event handler. 8. Add a few lines of code to the new procedure.
if Key = 'a'then
    FVector := TPoint.Create(-Speed, 0)
  elseif Key = 'd'then
    FVector := TPoint.Create(Speed, 0)
  elseif Key = 'w'then
    FVector := TPoint.Create(0, -Speed)
  elseif Key = 's'then
    FVector := TPoint.Create(0, Speed)
  elseif Key = ' 'then
    FVector := TPoint.Create(0, 0);
As a result of these actions, the class declaration should look something like this:
TFormMain = class(TForm)
    Sprite: TImageFragment;
    TimerMove: TTimer;
    TimerLive: TTimer;
    procedureFormKeyPress(Sender: TObject; var Key: char);procedureTimerLiveTimer(Sender: TObject);procedureTimerMoveTimer(Sender: TObject);private
    FVector: TPoint;
  const
    Speed = 10;
  publicend;
And the new procedures — the OnTimer and OnKeyPress event handlers should look like this:
procedureTFormMain.TimerMoveTimer(Sender: TObject);begin
  Sprite.Left := Max(0, Min(Width - Sprite.Width, Sprite.Left + FVector.x));
  Sprite.Top := Max(0, Min(Height - Sprite.Height, Sprite.Top + FVector.y));
end;
procedureTFormMain.FormKeyPress(Sender: TObject; var Key: char);beginif Key = 'a'then
    FVector := TPoint.Create(-Speed, 0)
  elseif Key = 'd'then
    FVector := TPoint.Create(Speed, 0)
  elseif Key = 'w'then
    FVector := TPoint.Create(0, -Speed)
  elseif Key = 's'then
    FVector := TPoint.Create(0, Speed)
  elseif Key = ' 'then
    FVector := TPoint.Create(0, 0);
end;
After compiling and launching the application, you can move the Phoenix bird around the screen using the “a”, “w”, “s”, “d” keys and stop it with the space bar.
We use different projections of the sprite
Add the following code to the end of the TFormMain.FormKeyPress procedure
if FVector.x < 0then
    Sprite.OffsetY := 96elseif FVector.x > 0then
    Sprite.OffsetY := 192elseif FVector.y < 0then
    Sprite.OffsetY := 288else
    Sprite.OffsetY := 0;
Changing the OffsetY property depending on the displacement vector causes the image to rotate in the direction of movement.
All text of the UnitMain module
unit UnitMain;
{$mode objfpc}{$H+}interfaceuses
  Classes, SysUtils, FileUtil, Forms, Controls, Graphics, Dialogs, ExtCtrls,
    ImageFragment, Math;
type{ TFormMain }TFormMain = class(TForm)
    Sprite: TImageFragment;
    TimerMove: TTimer;
    TimerLive: TTimer;
    procedureFormKeyPress(Sender: TObject; var Key: char);procedureTimerLiveTimer(Sender: TObject);procedureTimerMoveTimer(Sender: TObject);private
    FVector: TPoint;
  const
    Speed = 10;
  publicend;
var
   FormMain: TFormMain;
implementation{$R *.lfm}{ TFormMain }procedureTFormMain.TimerLiveTimer(Sender: TObject);begin
  Sprite.OffsetX := (Sprite.OffsetX + 96) mod384;
end;
procedureTFormMain.TimerMoveTimer(Sender: TObject);begin
  Sprite.Left := Max(0, Min(Width - Sprite.Width, Sprite.Left + FVector.x));
  Sprite.Top := Max(0, Min(Height - Sprite.Height, Sprite.Top + FVector.y));
end;
procedureTFormMain.FormKeyPress(Sender: TObject; var Key: char);beginif Key = 'a'then
    FVector := TPoint.Create(-Speed, 0)
  elseif Key = 'd'then
    FVector := TPoint.Create(Speed, 0)
  elseif Key = 'w'then
    FVector := TPoint.Create(0, -Speed)
  elseif Key = 's'then
    FVector := TPoint.Create(0, Speed)
  elseif Key = ' 'then
    FVector := TPoint.Create(0, 0);
  if FVector.x < 0then
    Sprite.OffsetY := 96elseif FVector.x > 0then
    Sprite.OffsetY := 192elseif FVector.y < 0then
    Sprite.OffsetY := 288else
    Sprite.OffsetY := 0;
end;
end.
Instead of an afterword
This simple example does not claim high speed or usability ratings. If someone, like in the last article , wants to tell in the comments that the animation should be done wrong - welcome, write your article. And the topic of this article is how to make animation in several lines of code, without using any special libraries, practically “on the knee”. This method has been tested in practice, it really works, so before you criticize and “minus”, please re-read what the article is about and why.