Arduino Laser Harp
What is the first association at the mention of the word harp? Wooden frame, strings, its sound. And what if you imagine dark room, smoke, laser and electronic music? Everything seems incomprehensible and intriguing.
Now there are several laser beams wrapped around the frame. But if you go beyond the limits of this idea, you can imagine the harp unlimited frame and made only on one laser beam.
What is illusion?
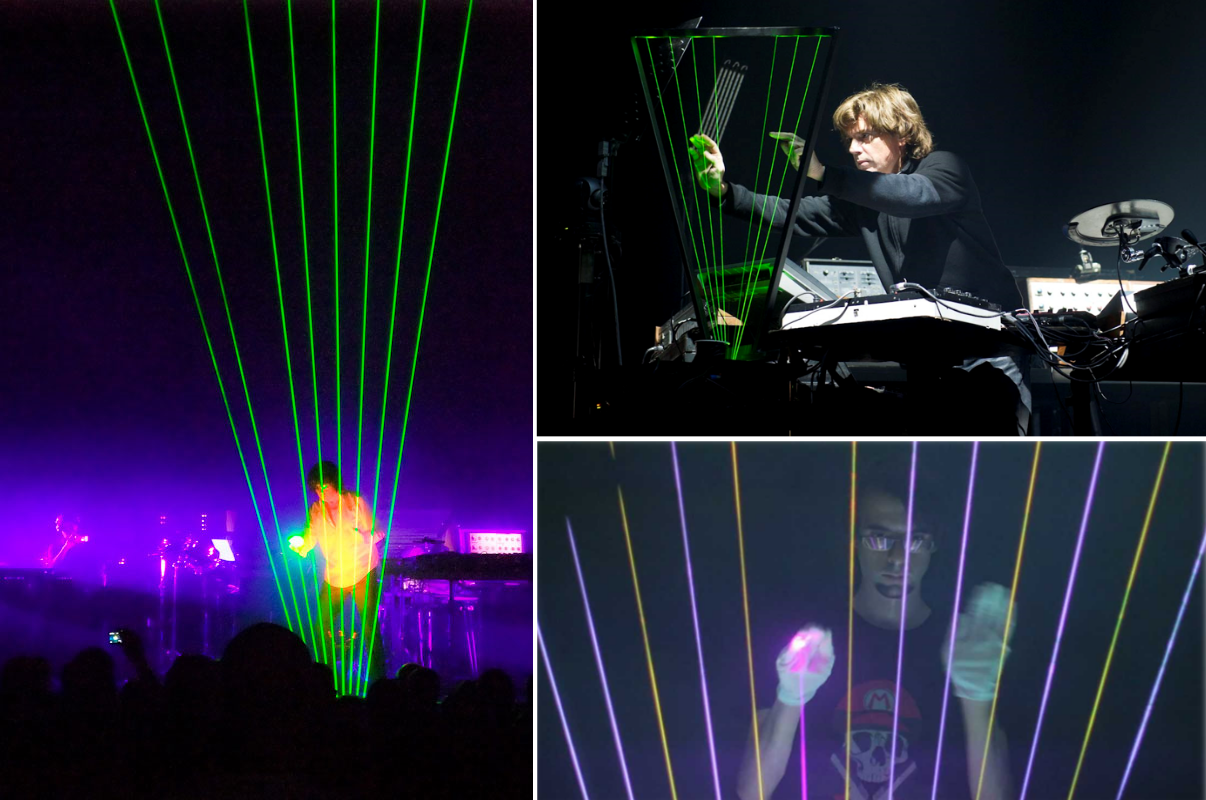
The light show of the French composer Jean-Michel Jarre led me to this idea. This show inspired me so much that I wanted to repeat it at home.
The laser harp was first used at a concert in China. The prototype of a laser harp was developed by the Frenchman Bernard Shiner in 1979. In 1981, when the instrument was first presented to the public, it was still under development. Since then, the harp has undergone many changes.
 The French engineer Philippe Guerre made radical changes to the device tool and its software. His laser harp was constructed from a laser and a rotating mirror that reflected the rays in different directions. Photoelectric sensors determined where exactly an obstacle stood in the way of the laser beam.
A laser harp of a similar design was used by Zharr. The intellectual part of the instrument is a microcomputer using the Laserharp program developed by Guerrom. Each beam can play different notes when Jarre touches the “light” strings. When he moves his hands up and down, the tone of the note changes. As Jarre takes his hand off the beam, the note stops playing.
At the moment, the idea has reached even a colored harp that looks, we admit, impressive. Guys, if you want to check out a lot more interesting things, I advise you to google Greig Stewart. The guy really does interesting things.
Justification of the elements of the scheme
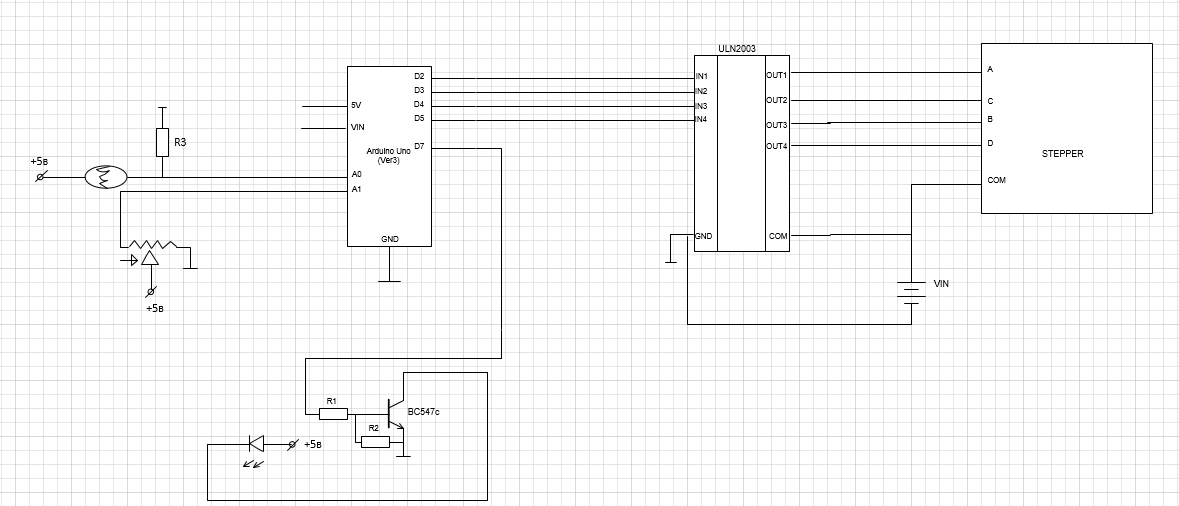
As you can see from the title of the article in the project, the Arduino Uno is used. Also needed:
- A sensor for reading the intensity of the reflected string. The usual photoresistor can fit, what else is he supposed to do;
- an element for setting up the system (convenient adjustment of the illumination threshold). The first thing that comes to mind is a potentiometer;
- motor with mirror for parallelization of strings. Well, here it is necessary to think and approach the question intelligently, because a lot will depend on this choice;
- a laser that will provide the necessary functionality of harp strings;
- MIDI signal handler, receiving the frequency of the strings.
If we talk about the last point, then there are two options: either to implement everything physically or virtually. I stopped at the second option.
To convert the signal selected application Hairless-midiserial , and to create a virtual MIDI port - loopMIDI . Further, the signal will be transmitted to FL Studio, which receives the signal for the selected musical instrument.
Now for the engine. If you do not have the slightest idea where to go in this topic, as I, in principle, earlier, and want to cool about this topic, then there is an excellent article by Ridiko Leonid Ivanovich “Stepper motors” . This is the best that can be found on the Internet.
Considering this question specifically, it was tempting to use the Nema 17 engine in the project. Who would not want to play around with that? Believe me, understanding how such “kids” work for an unprepared viewer can take more than one evening. At least it was with me. However, the unipolar PM55L-048 engine plus the ULN2003 driver was chosen. How to connect it, how this combination works can be easily found, so I will not repeat everything ten times. But! Do not attempt to run this design on a 28BYJ-48 engine. You will never accelerate it to the desired speed. And the problem will not be in your hands, but in the fact that it is simply not suitable for this purpose.
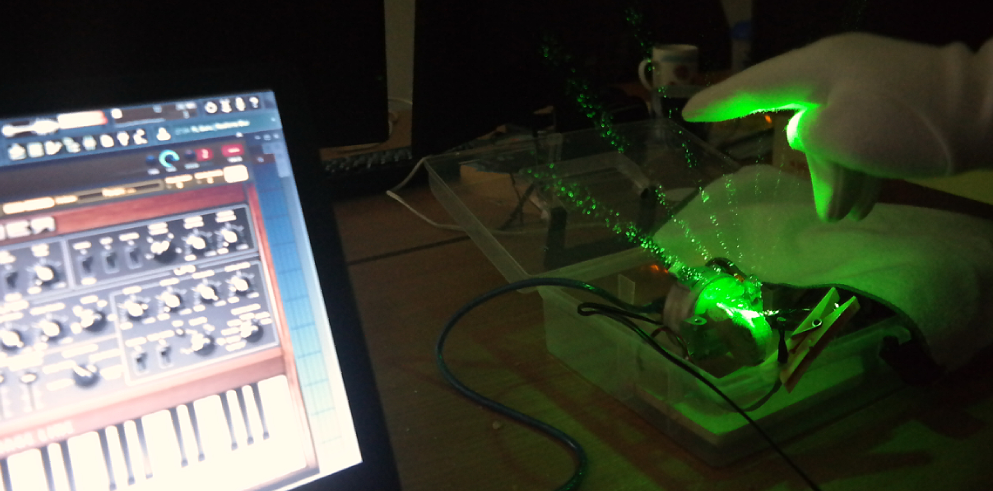
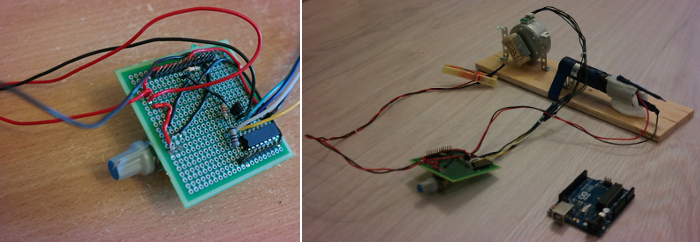
I can only say for a complete understanding of all of the above, that on the breadboard it all looked like this:
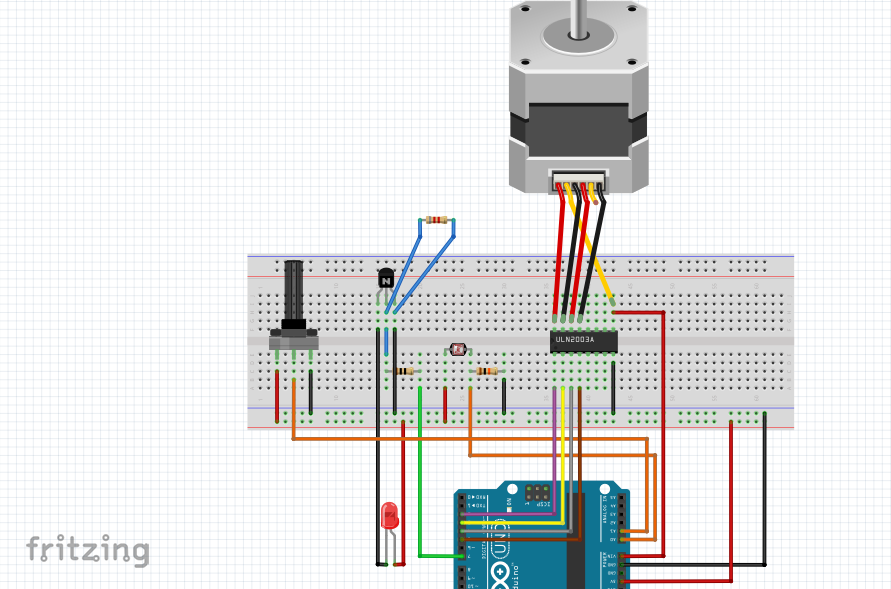
Maybe someone noticed that the circuit has a transistor, which was not mentioned. Well, it was introduced because the laser was turned on and off.
Assembly
If we consider the principle of operation in slow motion, then it looks like this: the
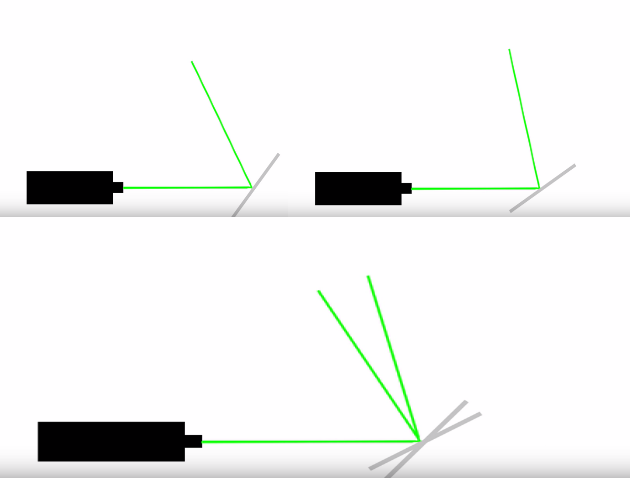 stepping motor makes a turn to the corresponding angle value, at this moment the laser turns on for a fraction of seconds and the photoresistor is polled. If the value from the photoresistor is greater than the threshold of the string, then we can assume that the string is interrupted and by the position of the motor we know which string. It remains to send a signal to the virtual midi-port for sound processing. If the photoresistor value does not exceed the threshold, then there are two options: either the string has not been interrupted, or the threshold value is too high. To change the threshold, you can turn the knob of the potentiometer, and the next time when the photoresistor is polled, its value will be compared with another threshold value.
Then the laser turns off and the motor moves back one step. The laser is switched on again, polling, decision making, turning off the laser and turning the motor are going on. When the motor makes steps one less than the number of strings, which can be set programmatically, the steps will begin in the opposite direction at great speed without turning on the laser. Visually, we will not notice this and it still seems to us that we see several strings at the same time.
 Oh yes, laser. Our Chinese friends are great at marketing. It’s convenient to write not the actual laser power itself, but something like the maximum output power does not exceed a certain number. As a result, the sellers, not really reading this fact, say with confidence that you will have a great powerful laser. It's funny to watch.
Since nothing more or less powerful could not be found, that which is, went to the expense. And there is really somewhere around 5 mW, which can not even light a match. As a result, the result is not exactly what I wanted. However, I didn’t want to take a setup for several watts, if, of course, it is possible to simply buy it. Beautiful, but somehow dangerous.
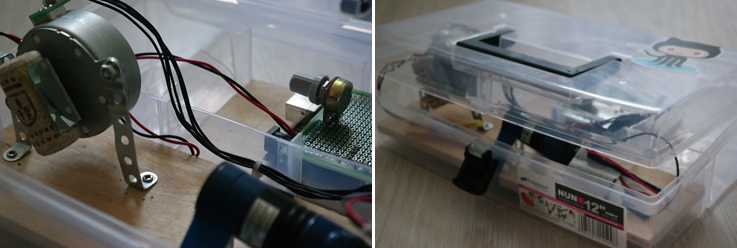
Yes, yes, looking at the photo above, you can think about etching the board. It seems like the second project already. Well, I will say that I thought about it, but have not yet decided on this feat.
Then you can see what a beautiful wrapper everything was wrapped. In order not to bother at what place to place one small photoresistor, and so that it always works, you can make a cascade of elements. But the system works and with one photocell well located near the mirror. Everything will depend only on the threshold that will be selected. To the note, the laser shines better from something white. I used white gloves. Complements the whole image.
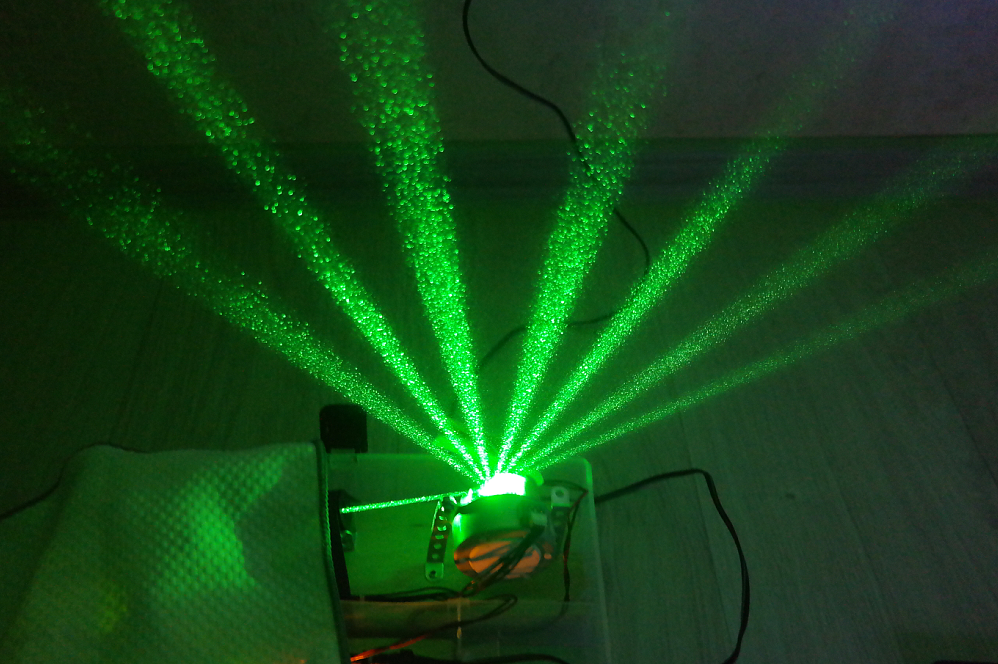
And, of course, the final result:
in the photo, the rays are clearly distinguishable due to the air humidifier (the noise of the Soviet unit is heard in the video): the more particles there are in the air, the better the laser is visible. Unfortunately, the video does not convey the whole effect. And in the afternoon rays are not visible at all.
So what is the illusion?
Yes, if the laser were more powerful, the effect would be more impressive. But what is, that is. In my opinion, it turned out very well.
And the illusion? Illusion is always created in tandem: skillful hands and a thinking head.

Link to source code .
Article author: Anastasia Bucket