August 25, 2016 at 18:26
Reverse engineering test crackme from Kaspersky Lab
Greetings to the community! A long time ago, in 2013, the post "Reverse engineering at the interview: how we hire for work" was published on Habré . It offered a test crackme for applicants for the position of a viral analyst. Having made sure that there is no complete analysis of the test file on the Internet, I decided to write my own analysis. So let's get started. Crackme 64-bit Run it in IDA Pro.
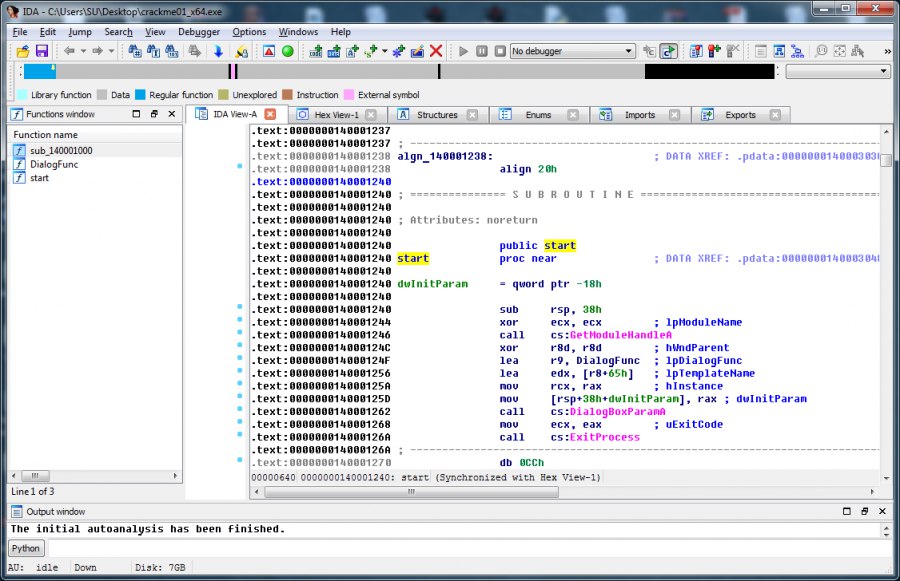
We see three functions on the left in the list of functions: start - the function with which the program starts, DialogFunc - this function communicates with us and some function sub_140001000. Consider the dialog function. We decompile it with Hex Rays.
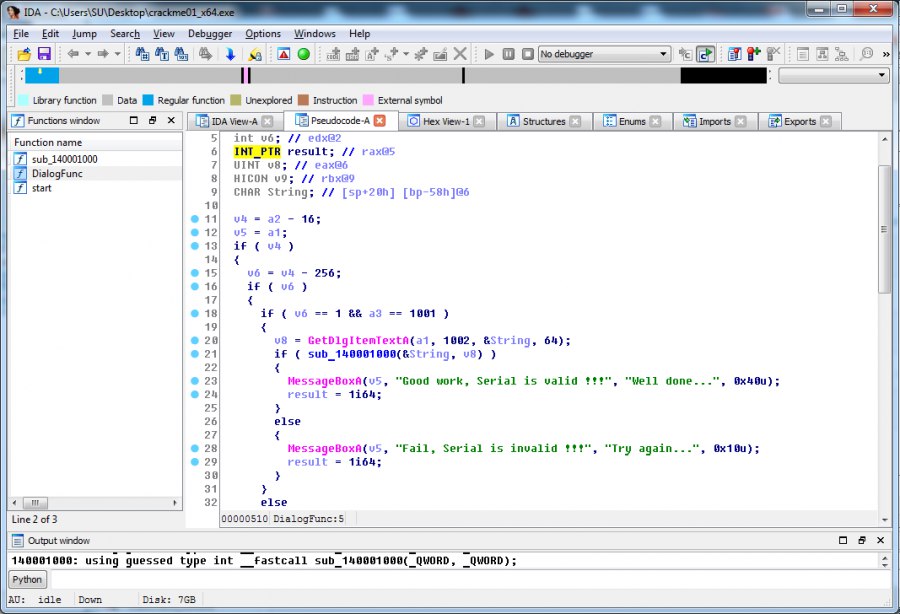
The branching of conditions catches your eye, according to which, if some sub_140001000 function returns TRUE, a message appears informing us of a job well done, otherwise it’s wrong. Let's analyze our treasured function sub_140001000. If we pass it through the decompiler, we will see that a pointer to just one value is passed as an argument. This value is probably taken from the dialog box and is the key to be entered. Now consider assembler listing. There is a first check of the condition of validity of the entered data. If the condition is fulfilled, then the program is executed further; if it is not fulfilled, then it returns from the subprogram.

Run our crackme under the debugger. We will use x64dbg . We put breakpoint on our first test. As the entered key, we use the set of numbers 1234567.
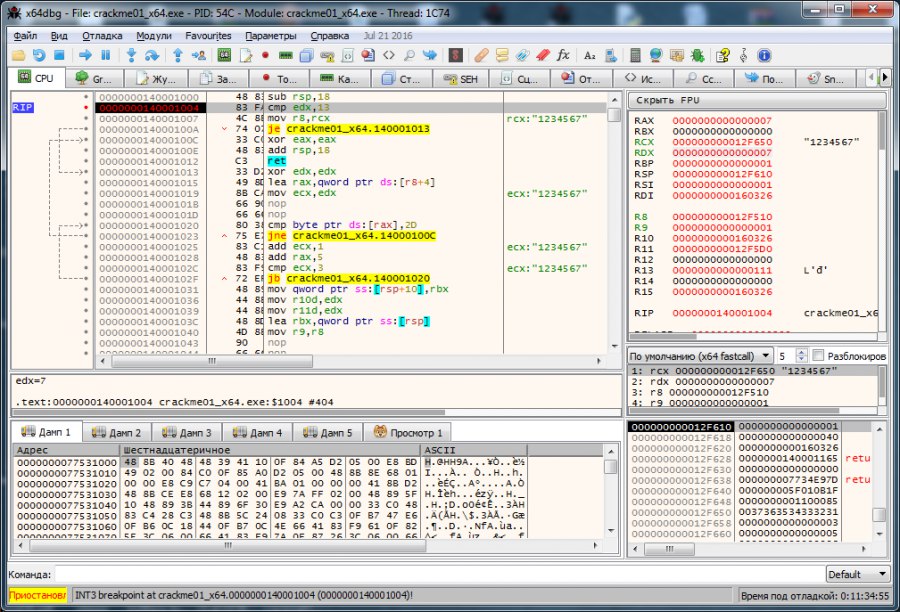
As you can see, the value of the register edx and the number 13h are checked (in decimal notation it is 19). This is probably a check for the number of key characters entered (we have 7 and the number in the edx register is 7). Let's try to enter a different number of characters. Run the debugger again. Enter 9 digits 123456789.
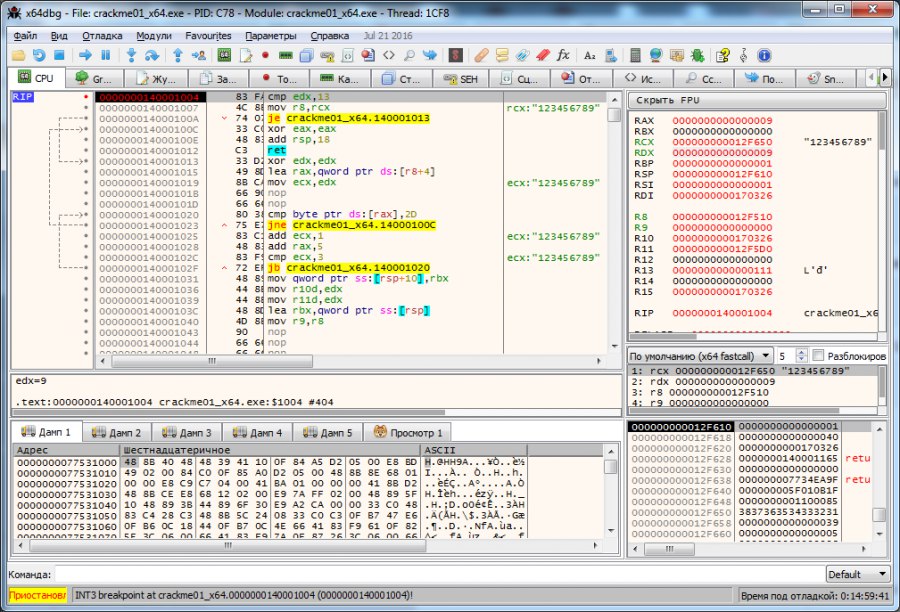
It seems that way it is. So our key must contain 19 characters. Enter 19 characters 1234567890123456789 and proceed to the next verification step.
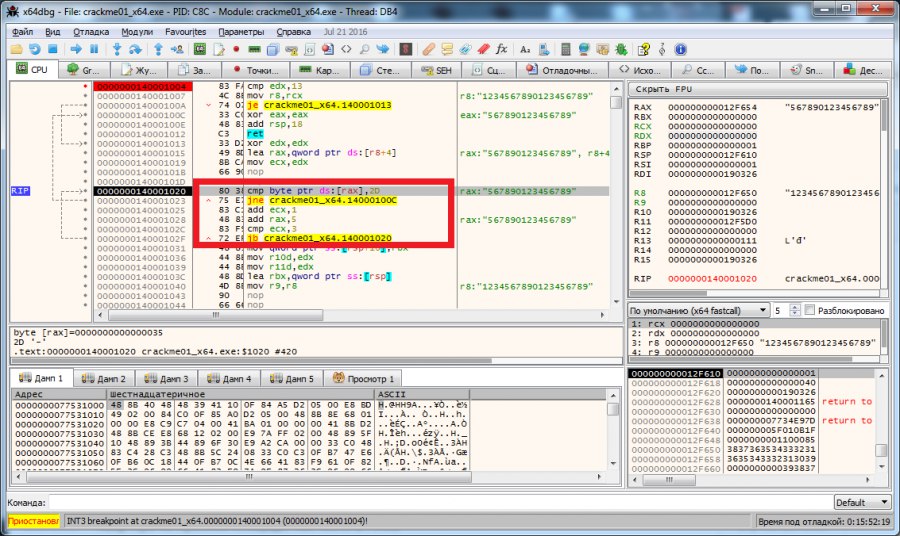
At this step, every fifth character of the key is checked for equality to the value of 2Dh. The fact is that the number 2Dh is the hexadecimal code of the "-" character. Those. our key should be xxxx-xxxx-xxxx-xxxx. We use 1234-5678-9012-3456 as the key and proceed to the next step.
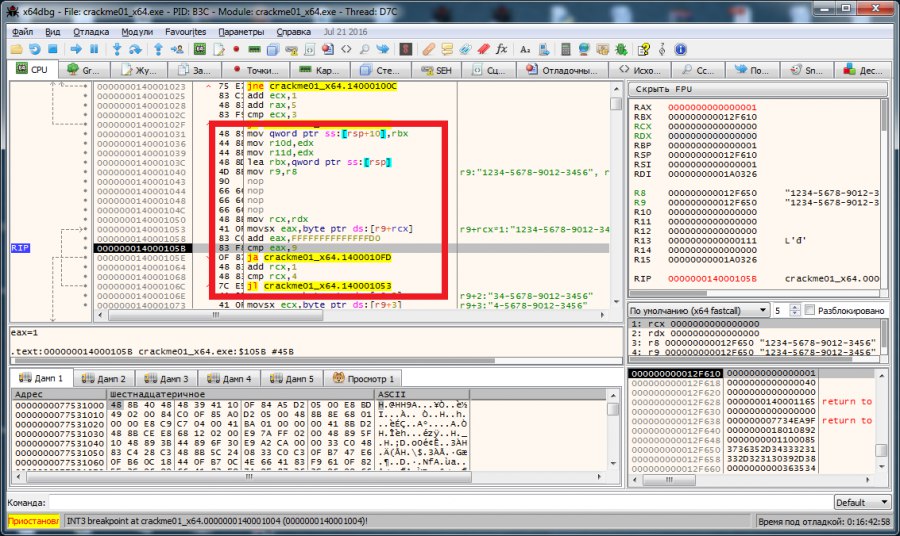
And at the next step, the characters are checked for numerical affiliation. The verification procedure is as follows: the character from the key is taken (every fifth character of the key does not count) and the number -30 is added to its hexadecimal code and the result is compared with the number 9. If less, then the next character of the key is taken for verification, if more, then A message is displayed that the key is incorrect. Move on.
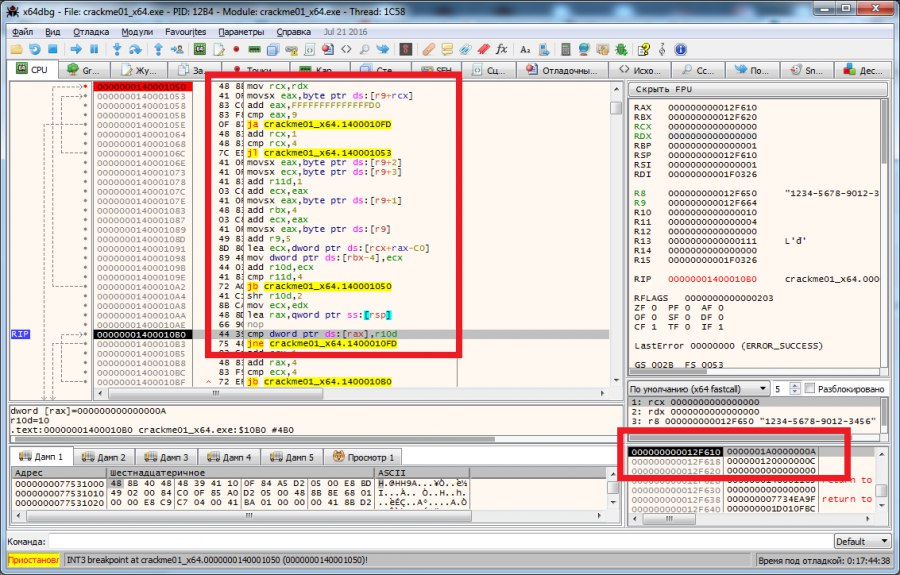
At this step, it is checked that the sums of numbers in the blocks are equal. In the figure above, a code block is selected that calculates the sum of numbers and the stack area where these amounts are entered. In parallel, the sums of the blocks are added together and entered into the register r10. Next is dividing the result in the r10 register by 4 (shr r10d, 2 - a shift by 2 digits is equivalent to dividing by 4) and comparing the values from the r10 register with previously entered values on the stack. Excellent. We make sure that the sums of the digits of each key block are equal (for example, 1122-0123-2112-0006) and move on to the next verification step.
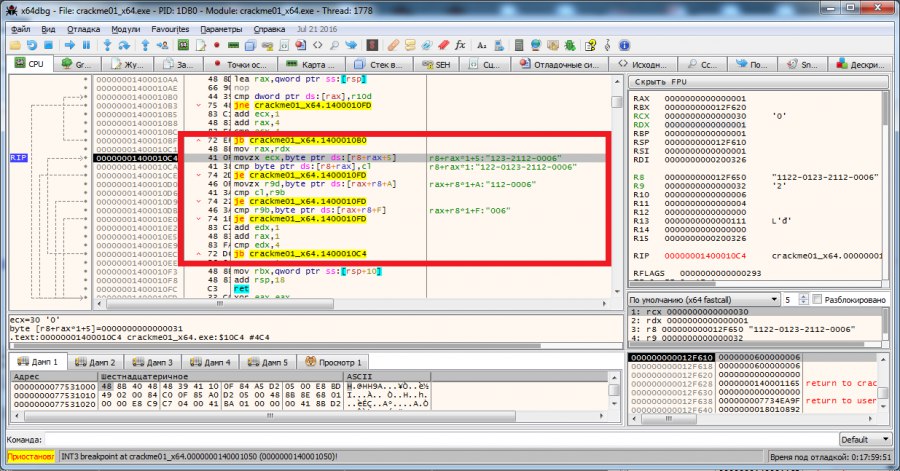
The code segment highlighted in the figure above verifies that the arrangement of characters in each subsequent block of the key does not coincide with the previous one . As a result, our key has the form 1478-7814-1478-7814. We check.

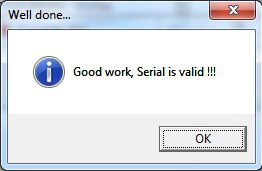
Great job!
We see three functions on the left in the list of functions: start - the function with which the program starts, DialogFunc - this function communicates with us and some function sub_140001000. Consider the dialog function. We decompile it with Hex Rays.
The branching of conditions catches your eye, according to which, if some sub_140001000 function returns TRUE, a message appears informing us of a job well done, otherwise it’s wrong. Let's analyze our treasured function sub_140001000. If we pass it through the decompiler, we will see that a pointer to just one value is passed as an argument. This value is probably taken from the dialog box and is the key to be entered. Now consider assembler listing. There is a first check of the condition of validity of the entered data. If the condition is fulfilled, then the program is executed further; if it is not fulfilled, then it returns from the subprogram.
Run our crackme under the debugger. We will use x64dbg . We put breakpoint on our first test. As the entered key, we use the set of numbers 1234567.
As you can see, the value of the register edx and the number 13h are checked (in decimal notation it is 19). This is probably a check for the number of key characters entered (we have 7 and the number in the edx register is 7). Let's try to enter a different number of characters. Run the debugger again. Enter 9 digits 123456789.
It seems that way it is. So our key must contain 19 characters. Enter 19 characters 1234567890123456789 and proceed to the next verification step.
At this step, every fifth character of the key is checked for equality to the value of 2Dh. The fact is that the number 2Dh is the hexadecimal code of the "-" character. Those. our key should be xxxx-xxxx-xxxx-xxxx. We use 1234-5678-9012-3456 as the key and proceed to the next step.
And at the next step, the characters are checked for numerical affiliation. The verification procedure is as follows: the character from the key is taken (every fifth character of the key does not count) and the number -30 is added to its hexadecimal code and the result is compared with the number 9. If less, then the next character of the key is taken for verification, if more, then A message is displayed that the key is incorrect. Move on.
At this step, it is checked that the sums of numbers in the blocks are equal. In the figure above, a code block is selected that calculates the sum of numbers and the stack area where these amounts are entered. In parallel, the sums of the blocks are added together and entered into the register r10. Next is dividing the result in the r10 register by 4 (shr r10d, 2 - a shift by 2 digits is equivalent to dividing by 4) and comparing the values from the r10 register with previously entered values on the stack. Excellent. We make sure that the sums of the digits of each key block are equal (for example, 1122-0123-2112-0006) and move on to the next verification step.
The code segment highlighted in the figure above verifies that the arrangement of characters in each subsequent block of the key does not coincide with the previous one . As a result, our key has the form 1478-7814-1478-7814. We check.
Great job!