Install service desk vsDesk 3.0 system
- Tutorial

Good day to all!
Once in the past, we decided to purchase a product for organizing the acceptance of IT applications in our company, and our choice fell on Russian development vsDesk. We bought it back in version 1.0, then successfully, during the first year of use, we upgraded to 2.0 PRO. Version 3.0 has now been released and the management is not ready to pay for the update, but my interest in the project has not faded away and I decided to install the Start version, which is distributed free of charge.
In this article I would like to describe the installation procedure for Ubuntu server, since the installation package for Windows does not require special skills, but I wanted to stretch my legs and remember the old admin skills.
To get the installation package, you still need to register on the system website and select the desired distribution for your platform. I’ll make a reservation right away that a Windows distribution that works on localhost right after installation is suitable for quick testing, and to give external access to the interface, you need to use the instructions from the Open Server platform site on which the distribution is built.
To install the system on an Ubuntu server, you must first configure the server itself and install the necessary packages and add-ons for PHP and Apache.
From the list of requirements on the system’s website, I decided to select Ubuntu server 14.04 LTS as the server. I will not describe the installation process of the server itself, the instructions are fully online.
System requirements include installing the basic elements with one command, if you did not choose to install LAMP when installing Ubuntu server:
sudo apt-get install lamp-server^
The official instructions indicate the requirements necessary for the operation of the PRO version, so we can safely install only those add-ons that are necessary for the START version to work:
sudo apt-get install php5-gd php5-curl php5-imagick
You only need one GD or IMAGICK library to work, but I installed both.
The next step, you need to make settings in the file php.ini error_reporting parameter settings correct for this, we need to once in two files to make changes:
/etc/php5/apache2/php.ini
/etc/php5/cli/php.ini
They need find the existing error_reporting parameter and replace the value with the following:
error_reporting = E_ALL & ~ E_NOTICE & ~ E_DEPRECATED & ~ E_STRICT
I made a mistake at the time and added this line to the end of the file without changing the existing record and got a bunch of errors in the end, do as I not worth it!
To increase the speed of work of PHP5 scripts, it would be better to include the OPCAHE mod:
sudo php5enmod opcache
There is still a point that is not specified in the official documentation, but it happens that after enabling opcache, you need to write the parameter in php.ini:
opcache.enable=1
The next step is to enable the mod_rewrite module:
sudo a2enmod rewrite
Another not obvious point is the .htaccess file lying in the root of the distribution, which I personally did not copy, because my graphical SFTP client did not display hidden files. Without this file, the system will not work!
After that, in the / etc / apache2 / sites-enabled directory we find the file named @ 000-default, and replace its contents with the settings below. Please note that these settings for HTTP without SSL:
Virtual Host Example File
        ServerAdmin webmaster@localhost
        ServerName vsdesk
        ServerAlias vsdesk.yourdomain.com
        DocumentRoot /var/www

                Options FollowSymLinks
                AllowOverride All

                Options Indexes FollowSymLinks MultiViews
                AllowOverride All
                Order allow,deny
                allow from all

        ScriptAlias /cgi-bin/ /usr/lib/cgi-bin/

                AllowOverride None
                Options +ExecCGI -MultiViews +SymLinksIfOwnerMatch
                Order allow,deny
                Allow from all

        ErrorLog ${APACHE_LOG_DIR}/error.log
        # Possible values include: debug, info, notice, warn, error, crit,
        # alert, emerg.
        LogLevel warn
        CustomLog ${APACHE_LOG_DIR}/access.log combined
After replacing the data, change ServerName, ServerAlias and the path to the directory (in the example / var / www) where you will install vsDesk on your own.
After all the manipulations, you must restart the web server:
sudo service apache2 restart
The next step is to create a database, which we will do with the following command:
sudo mysqladmin -u root -p create vsdesk
You had to set the ROOT password for mySQL when installing LAMP.
After that, we need to unzip the distribution downloaded from the system’s website and move the distribution files to the / var / www folder, or to ours, which is indicated in the virtual host file. When copying, do not forget to copy the hidden .htaccess.
After copying, we need to change the owner of the folders necessary for the system to work:
sudo chown www-data:www-data -R protected/runtime/
sudo chown www-data:www-data -R assets/
sudo chown www-data:www-data -R protected/config/
sudo chown www-data:www-data -R protected/data/
sudo chown www-data:www-data -R media/
sudo chown www-data:www-data -R protected/_backup/
The www-data user is the account under which apache is launched.
After you have successfully completed all the previous steps, you can start the installer web interface.
If there are no other virtual hosts on your server, you can enter the IP address in the browser, or add your hostname in DNS.

If all the requirements are met and the checks are passed, then we can continue the installation by clicking on the Next button. On the next page, we need to specify the parameters for connecting to the database that we created in advance.
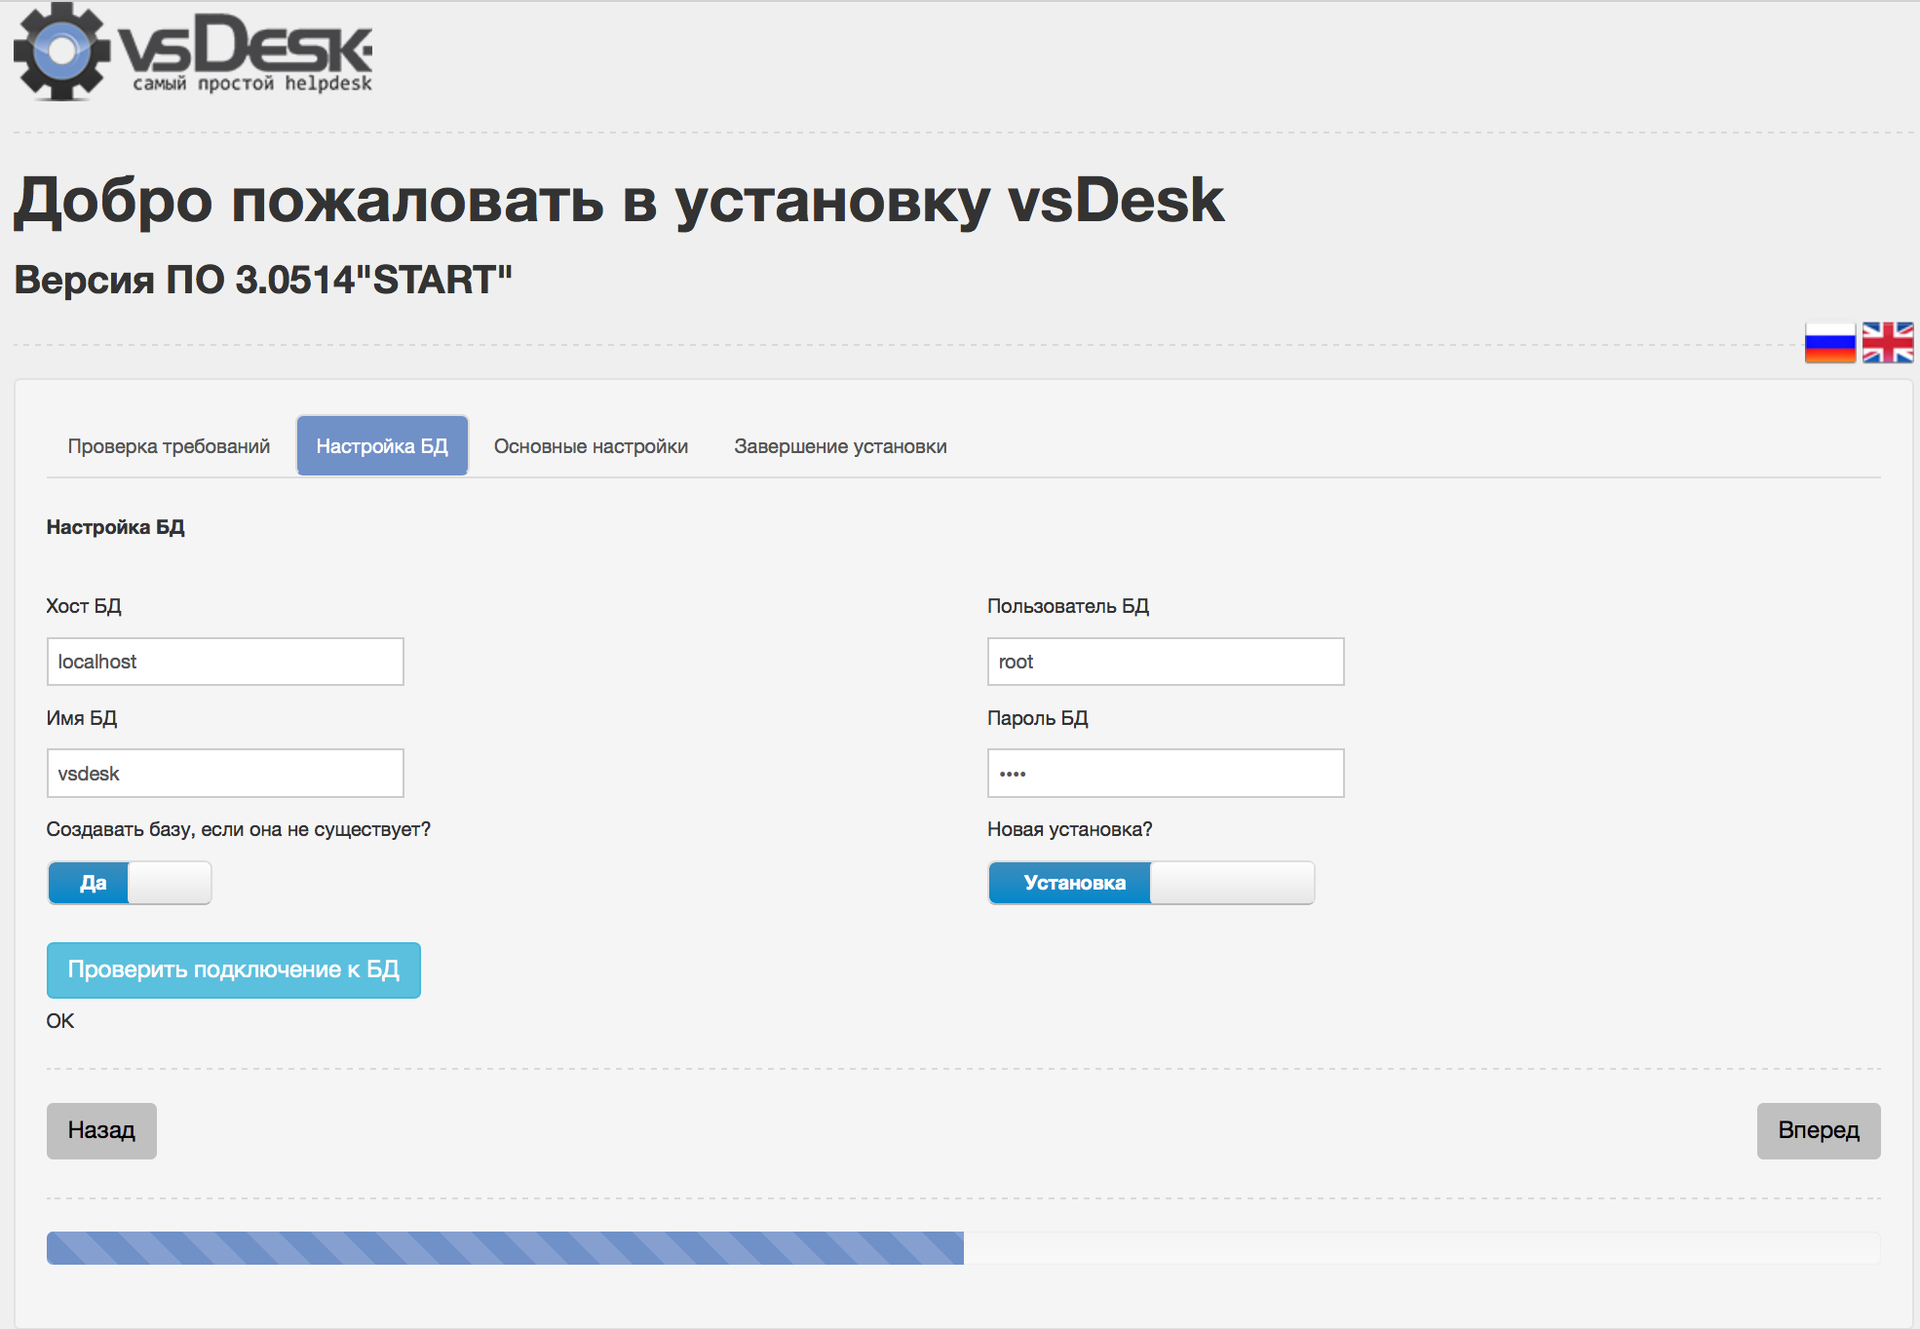
After entering your parameters, you can click on the button "Check database connection" to make sure that the connection is successful. There is a switch on the same page: “New Installation / Update”, if you select the update, you can essentially upgrade from Start 2.0 without any problems, but I have not tested it at the moment, so in our case we are considering a new installation.
In the next window, you need to specify the settings for connecting to the SMTP server, which will send notifications, but at the installation stage, you can leave the default settings specified in order to later take this issue more seriously, because SMTP configuration has some nuances that are described in the instructions that come with the software itself.
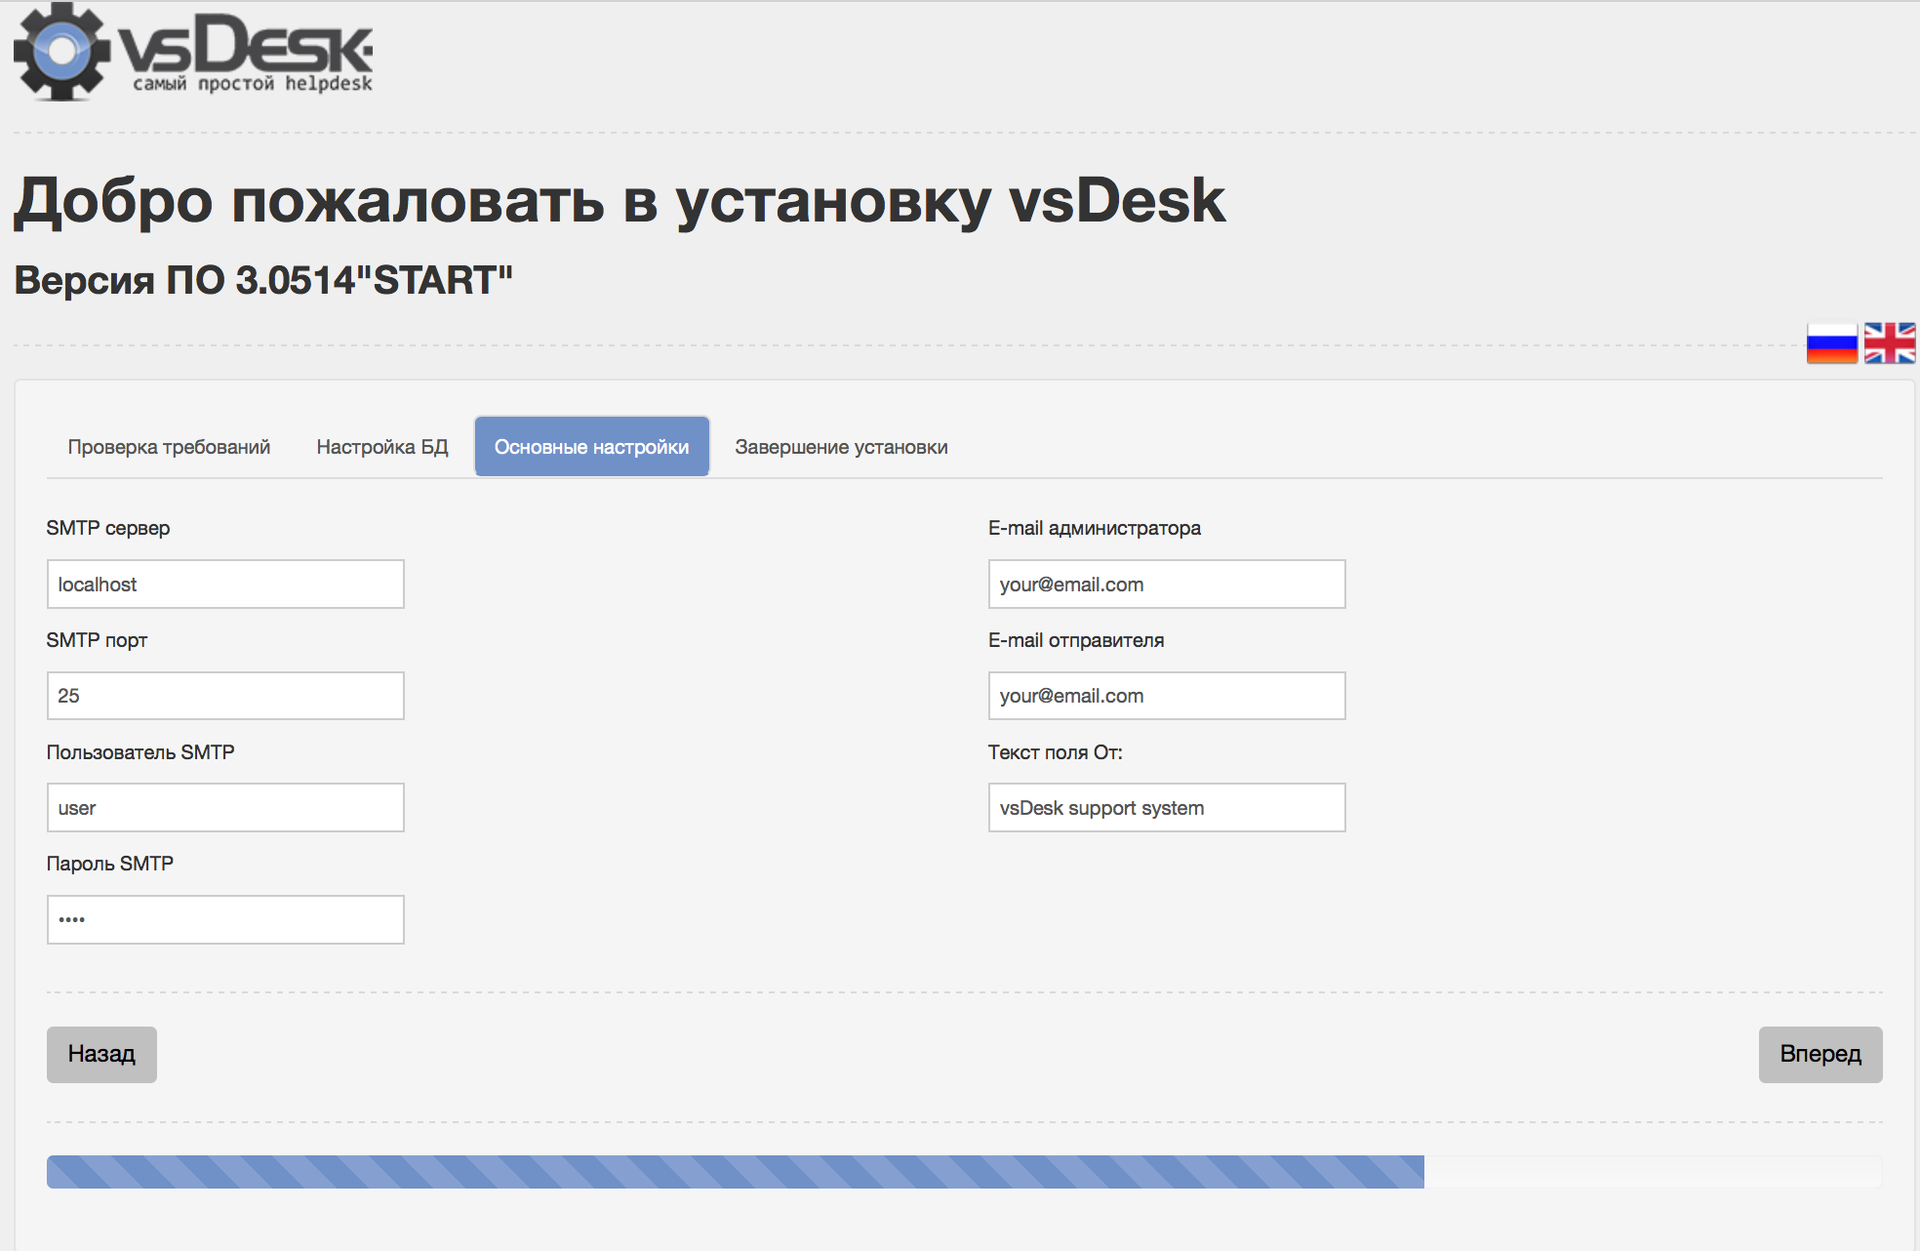
If everything was correctly indicated in the previous steps, then we will see the next window informing about the successful installation and offering to go to the system itself.

If everything went well, then by clicking on the link we will be taken to the login page:
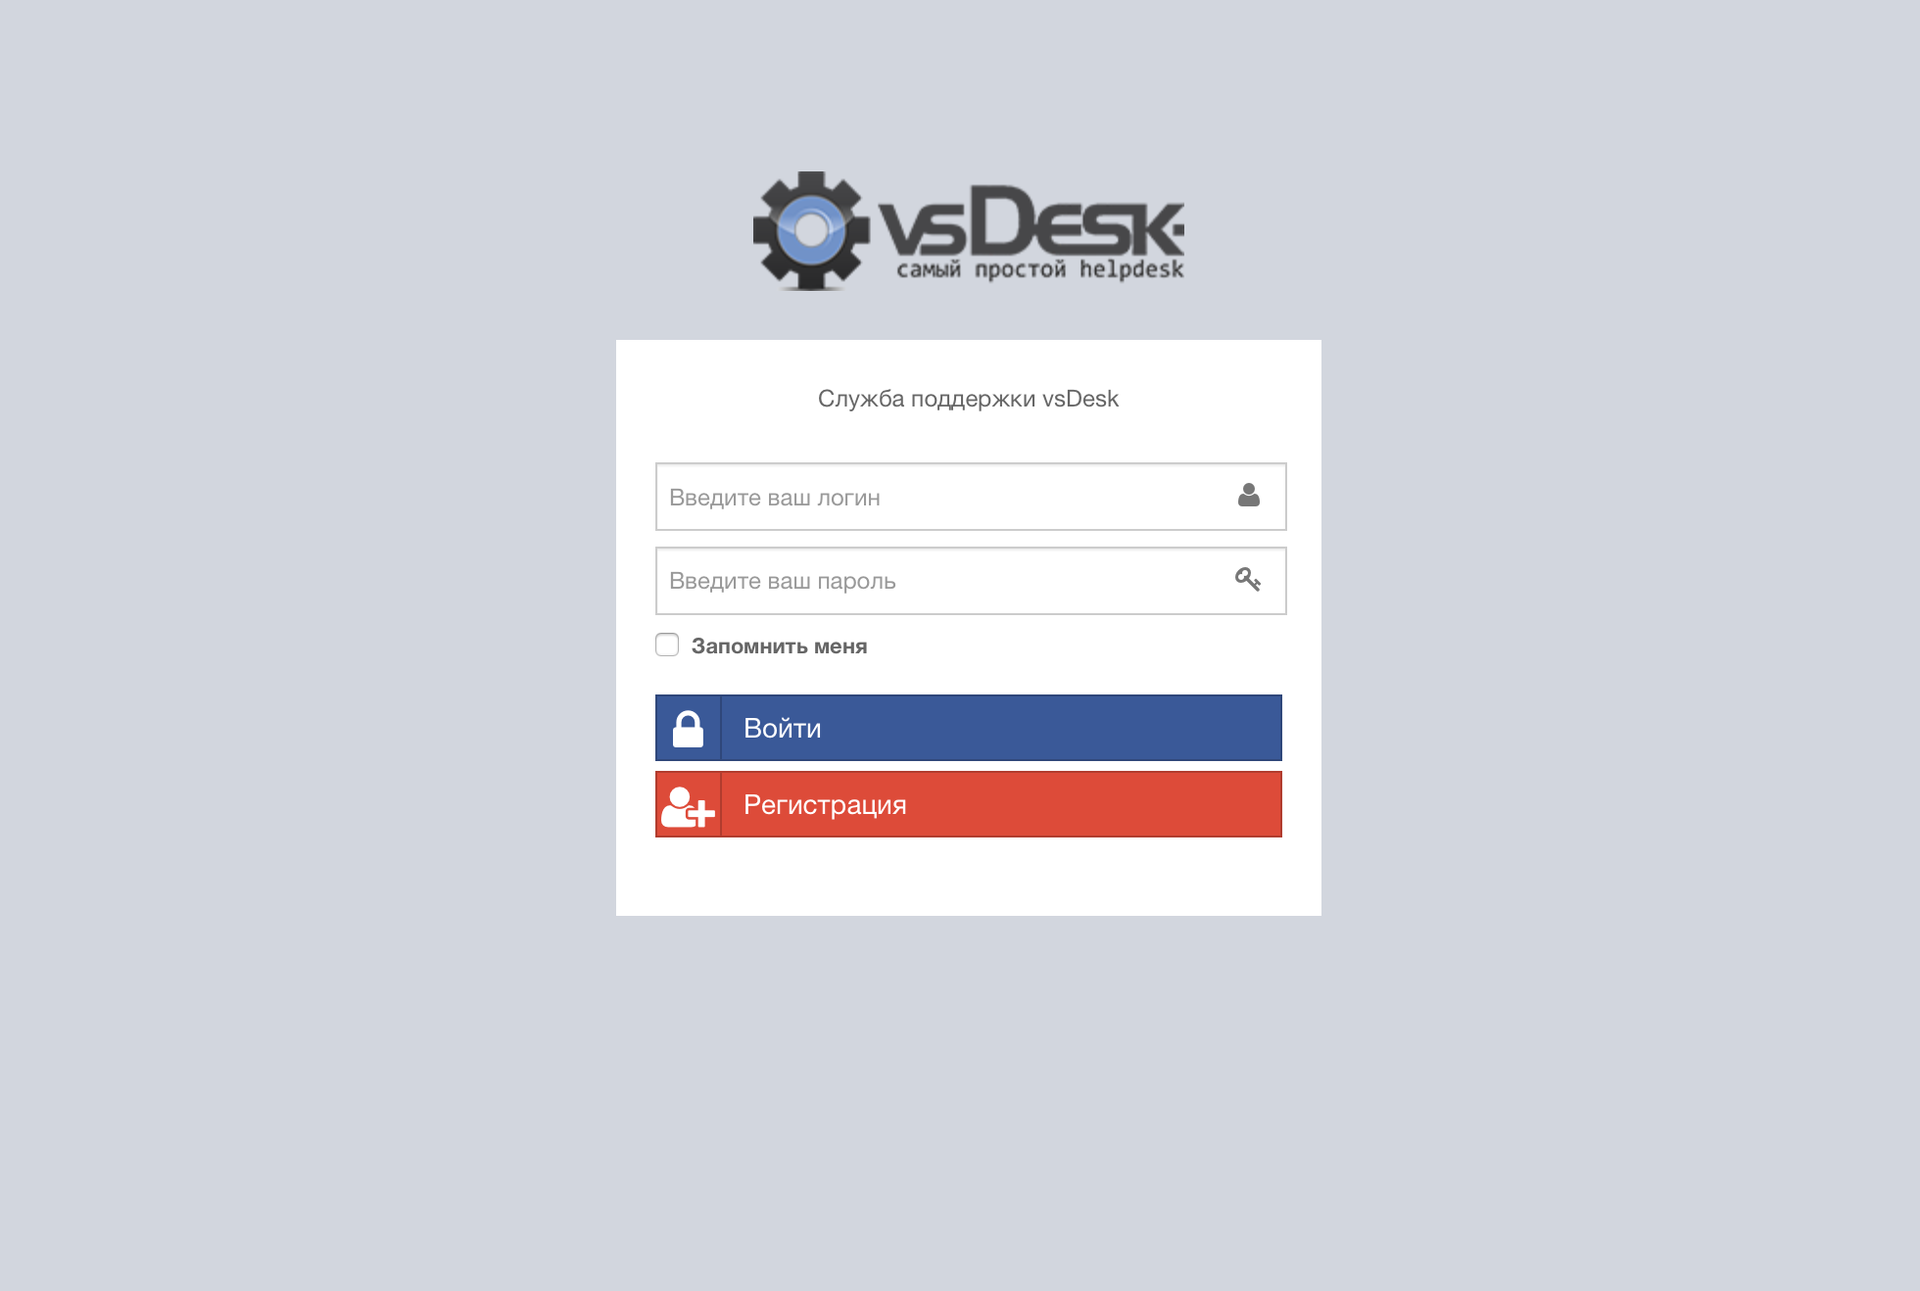
Default accounts for logging in to the system:
With the role of Administrator:
Login: admin
Password: admin
With the role of Contractor:
Login: manager
Password: manager
With the role of Customer:
Login: user
Password: user
That's the whole installation process, which is quite simple! If there is interest from the community, in the following articles I will try to talk about the basic principles of working with the system and functionality.