July 27, 2016 at 11:06
How to deploy Windows Nano Server (TP5) on vSphere
Microsoft's Windows Server 2016 release is coming closer, with which a new operating system will be introduced: Windows Nano Server, an ultra-light version of Windows Server designed specifically for the cloud. When we first heard about it, we immediately became terribly curious, because it reminds us in many ways of VMware ESXi: it is the same integrated system, taking up little space and controlled exclusively remotely. It is limited in application, but can act as a full-featured
We found several instructions for deploying Nano Server on vSphere, but they belonged to older versions of Server 2016 Tech Preview (TP) (after all, a lot could change in the current 5 preview), so we decided to introduce another version of the instruction. Nano Server cannot be installed from a bootable CD like other versions of Windows Server, but it comes with its Powershell-based deployment options.
The Windows WIM file or
All subsequent steps were tested on a Windows 10 workstation and on an ESXi 6.0 U2 host. Everything should work similarly with Windows 8.1 and ESXi 5.5.
Image building
1. Download Windows Server 2016 TP5 ISO
if you haven’t done so already, download the Windows Server 2016 Technical Preview 5 ISO file from the Microsoft Technet Evaluation Center. This will require a Microsoft account and quick and free registration.
2. Make sure you have the latest VMware vmxnet3 and pvscsi drivers
Download the latest version of VMware Tools for Windows (x64) in exe format (currently version 10.0.9). Administratively install the package using / a, for example:

This will not install Tools on your local system yet, but it will unpack all the files into the directory that you specify in the dialog box that appears:
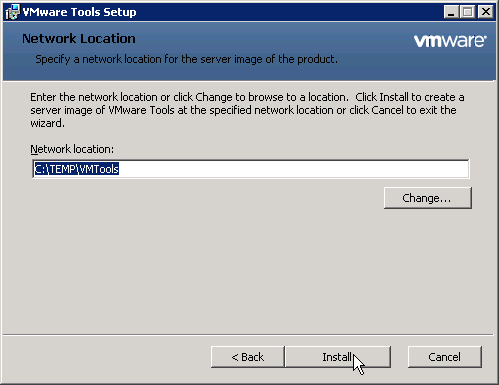
In this example, we use the directory C: \ TEMP \ VMTools. Make sure the C: \ TEMP folder exists, or use a different parent directory.
Now create a new directory C: \ TEMP \ Drivers and copy all the extracted pvscsi and vmxnet3 drivers into it. At the command prompt, do:

Now you can delete C: \ TEMP \ VMTools, this directory is no longer needed.
3. Running the script
Install Windows Server 2016 TP5 ISO to use it as a Windows drive (in Windows 8 and 10, double-click on it in Explorer).  The example below assumes that it is installed on drive E :.
Now open the Powershell window as Administrator and run the following commands:
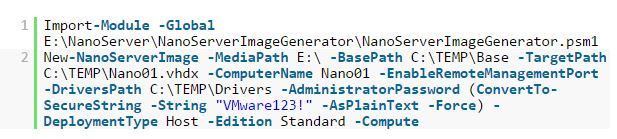
The first command imports the NanoServerImageGenerator Powershell module from TP5 ISO. The second command creates an image. Here is the meaning of the most important commands:
- -BasePath: Temporary directory for creating the build (created if necessary)
- -TargetPath: The full file name of the generated image (the format is determined by the extension: .wim, .vhd or .vhdx)
- -ComputerName: Nano Server Name
- -EnableRemoteManagementPort: enables the default Nano Server remote management port. You can also do this after deployment to the console.
- -DriversPath: directory with additional drivers to add. Here we clarify let the extracted VMware drivers
- -AdministratorPassword: admin password. In the example, we use VMware123 !.
- -DeploymentType: Both for Host and Guest. If you specify Guest here, it will automatically add
Hyper-V Integration Tools (equivalent to Microsoft's VMware Tools) to run the image as aHyper-V virtual machine . Since we want to do a deployment for vSphere, in our example, we specify Host (which would also be used for physical deployments). - -Edition: Version of Nano Server, Standard or DataCenter.
- -Compute: An option that adds the
Hyper-V role to the image .
... this is how it will look:
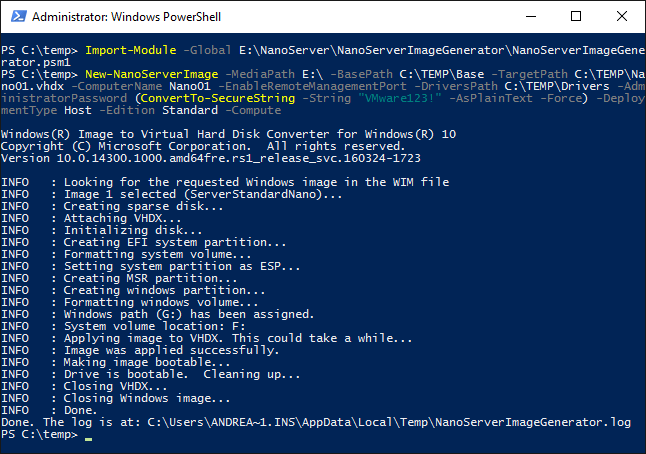
As you already noticed, we are creating a vhdx file, not a vhd file, because we need a more modern version: it uses the GPT and EFI formats. Using vhd would also work great.
4. Convert vhdx file to vmdk format
There is only one way to convert a vhdx file to VMware format: use the free Starwind V2V Converter Tool. When using it, select VMware ESX server image as the Destination image format:

As a result, two files will be created, a small metafile * .vmdk file and, in fact, a file * -flat.vmdk (4 GB in size).
Virtual machine deployment
Create a new VM on the ESXi host with the following parameters:
- The latest available virtual hardware version (11 for ESXi 6.0)
- Guest OS: Microsoft Windows Server 2016 (
64-bit ) - CPU and RAM according to requirements (a processor with two cores and 4GB RAM was used here)
- Vmxnet 3 network adapter
- VMware Paravirtual Controller (pvscsi) SCSI
- Do not add a hard drive during creation!
Once created, the virtual machine edits its Advanced Options / Boot Options and selects EFI's. as bootable firmware.
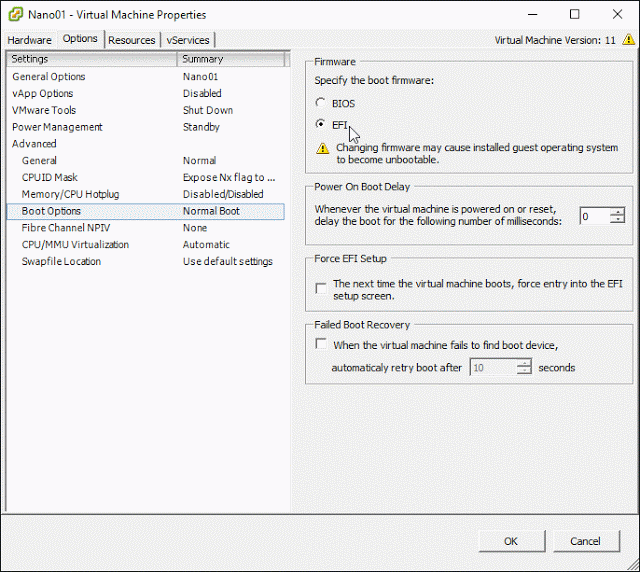
Now upload the two vmdk files created using the Starwind Converter tool to the ESXi directory created for your virtual machine. We edit the VM and add the loaded disk as Existing virtual disk and Virtual Device Node “SCSI (0: 0)”.
Finally, change the type of SCSI controller automatically added to VMware Paravirtual (pvscsi):
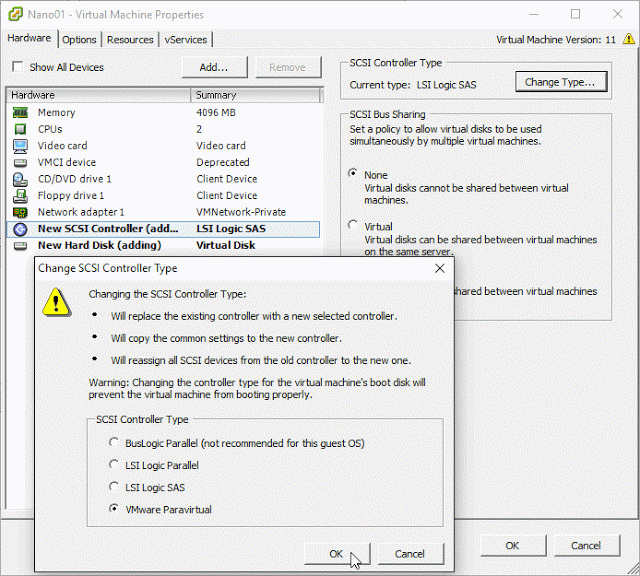
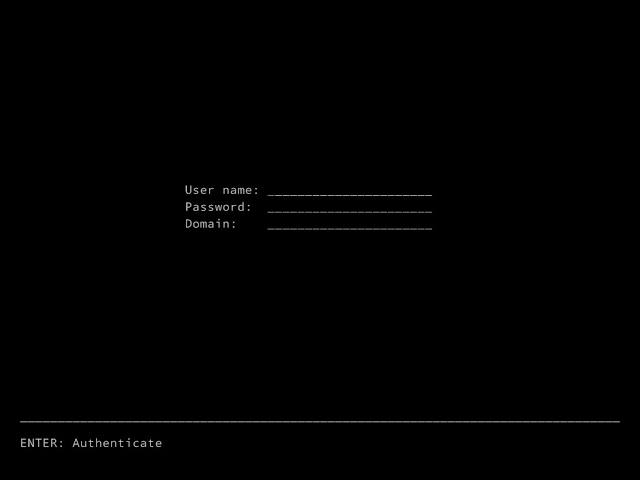
So, we created our first Nano Server virtual machine on vSphere, and it can already be started! It takes only a
Useful advice
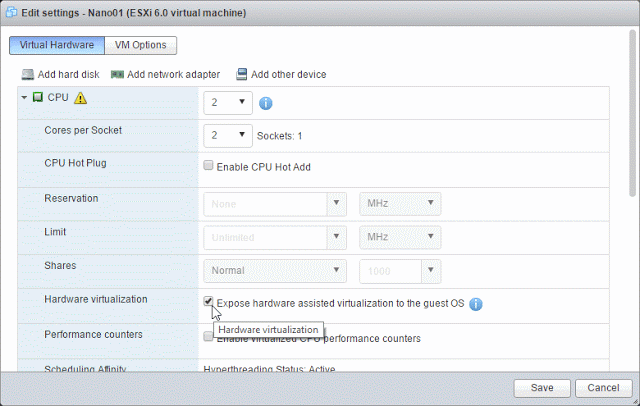
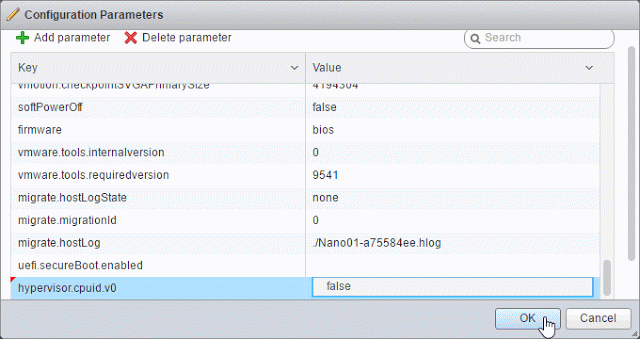
If you want to try using Nano Server as a
- By enabling hardware virtualization support for virtual CPUs and
- By adding the hypervisor.cpuid.v0 configuration parameter with the value false when the virtual machine is offline.
On individual ESXi hosts, this can be done using the new HTML5 Host Client (already included in ESXi 6.0 Update 2 and later):
We anticipate the question: is it possible to install VMware Tools on Nano Server? No, you cannot, because the MSI format is not valid for Nano Server. The rest .... forward!