 April 14, 2016 at 16:31
Automate application publishing on Google Play
If you have an android application that you are going to publish on Google Play or it has already been published, as well as if you are just developing it, and it is in closed beta testing, and the customer / testers periodically need to assemble and transfer the assembly by hand, it might be better automate this process
, you can independently deal with documentation in English, but if the process causes difficulty or something does not work, I hope the publication will be useful
before you start you need to manually publish ne -hand version of the application
Open the Google Play Developer Console and go to Settings → API access.
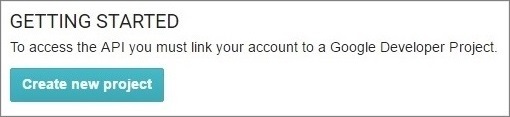
You need to associate the console with the Google API project. If you do not have a project, at the moment only the Create new project button will be available from the interface.
If there is, a list of these projects will be available. The link button, of course, connects them.

But let's look at an example of creating a new project. You can create it from the Google API Console or directly from the Google Play Developer Console, which you already have, click the Create new project button.
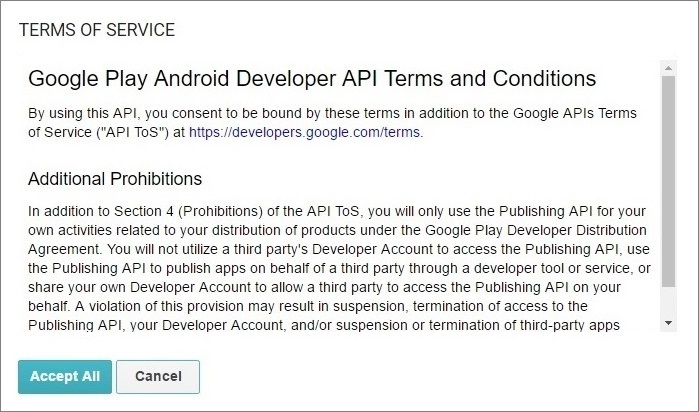
If this is your first time creating a Google API project, a popup window will appear, here Accept All
Well, now you have a project and a service account, which in this case is created automatically

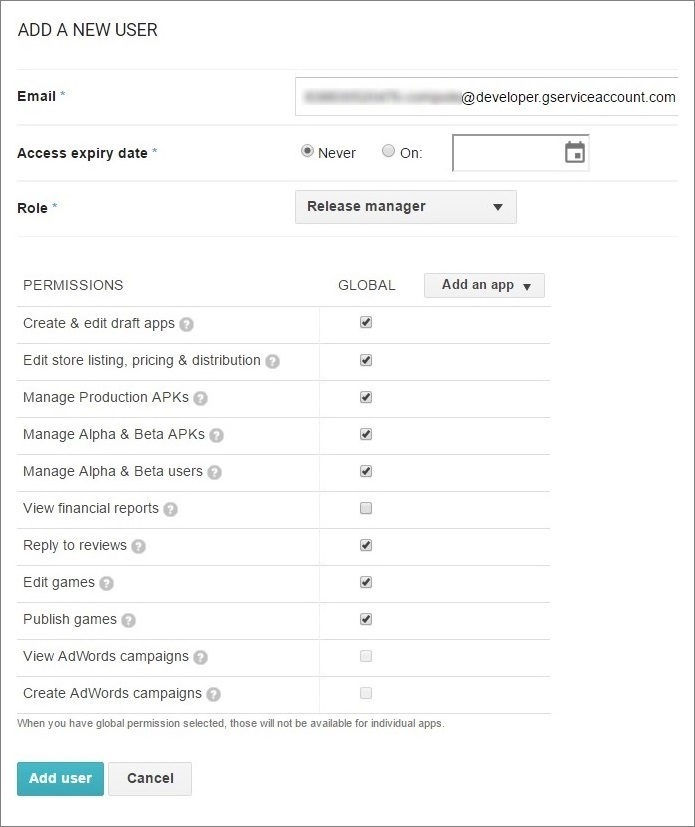
Now you need to allow this account to work with Google Play and give it a role. It can also be done right from here, click Grant access . You will be taken to the User accounts & right menu (visible in the background) and a popup window will open where email and other required fields will already be filled. Click Add user.
Now you see that your user has been successfully added.

Now you need to generate a pair of public and private keys so that you can work with libraries and publish new versions of the application. To do this, open the list of projects in the Google API Console and click on the desired one, by default it’s calledGoogle Play Android Developer

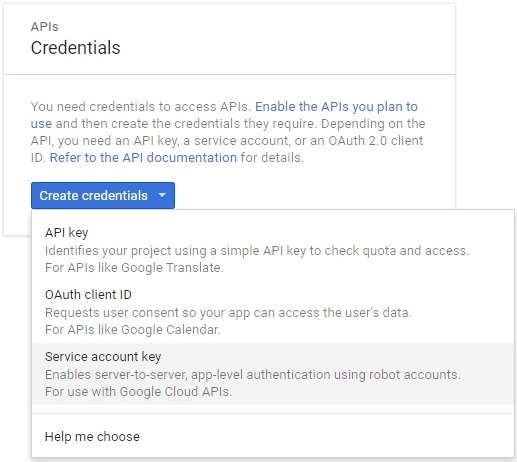
Next, click on the menu item Credentials → Create credentials , select Service account key.
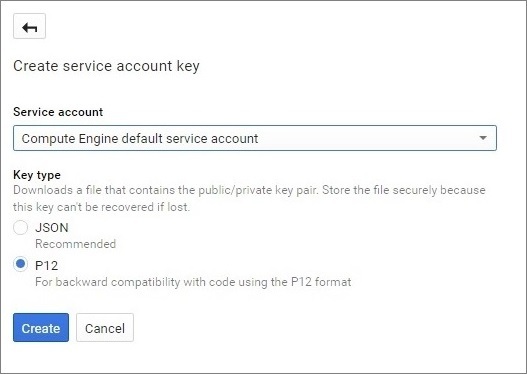
Select from the list Compute Engine default service account and switch the radio button to P12 . Click Create.
With the settings everything, a pair of public and private keys with the name Google Play Android Developer-% slice id% .p12 was saved on your computer


Now Google provides libraries in java and python to work with the Google Play Developer API. We will consider the option in java, for this, download the zip archive with libraries and examples.
Open your IDE and create a project, I named ProductionManager, connect the following libraries:
Copy the Google Play file Android Developer-% slice id% .p12 to the resource folder of your project, I renamed it so that there are no spaces, it seems I had an exception when trying to read it. If you will keep the source code of this project in VCS where many people have access, it is probably better to store the file on a continuous integration server, here is at your discretion.
Before building and publishing the application accordingly, I make a request to find out the latest version code (versionCode) and update it, because I like them to go in arithmetic progression with step 1 (those are just 1, 2, 3 ...), you can just substitute buildNumber from the CI server or revesionNumber from your VCS, also at your discretion
Compile executable jar. Now you need to configure the creation of the installation file and its publication on your CI server, I use TeamCity. It turns out that we will have 4 build steps:
Thanks for attention
, you can independently deal with documentation in English, but if the process causes difficulty or something does not work, I hope the publication will be useful
before you start you need to manually publish ne -hand version of the application
Access setting
Open the Google Play Developer Console and go to Settings → API access.
You need to associate the console with the Google API project. If you do not have a project, at the moment only the Create new project button will be available from the interface.
If there is, a list of these projects will be available. The link button, of course, connects them.
But let's look at an example of creating a new project. You can create it from the Google API Console or directly from the Google Play Developer Console, which you already have, click the Create new project button.
If this is your first time creating a Google API project, a popup window will appear, here Accept All
Well, now you have a project and a service account, which in this case is created automatically
Now you need to allow this account to work with Google Play and give it a role. It can also be done right from here, click Grant access . You will be taken to the User accounts & right menu (visible in the background) and a popup window will open where email and other required fields will already be filled. Click Add user.
Now you see that your user has been successfully added.
Now you need to generate a pair of public and private keys so that you can work with libraries and publish new versions of the application. To do this, open the list of projects in the Google API Console and click on the desired one, by default it’s calledGoogle Play Android Developer
Next, click on the menu item Credentials → Create credentials , select Service account key.
Select from the list Compute Engine default service account and switch the radio button to P12 . Click Create.
With the settings everything, a pair of public and private keys with the name Google Play Android Developer-% slice id% .p12 was saved on your computer
Let's start programming
Now Google provides libraries in java and python to work with the Google Play Developer API. We will consider the option in java, for this, download the zip archive with libraries and examples.
Open your IDE and create a project, I named ProductionManager, connect the following libraries:
- google-api-client-1.19.0.jar
- google-api-services-androidpublisher-v2-rev20141111-1.19.0.jar
- google-http-client-1.19.0.jar
- google-http-client-jackson2-1.19.0.jar
- google-oauth-client-1.19.0.jar
- jackson-core-2.1.3.jar
Copy the Google Play file Android Developer-% slice id% .p12 to the resource folder of your project, I renamed it so that there are no spaces, it seems I had an exception when trying to read it. If you will keep the source code of this project in VCS where many people have access, it is probably better to store the file on a continuous integration server, here is at your discretion.
Before building and publishing the application accordingly, I make a request to find out the latest version code (versionCode) and update it, because I like them to go in arithmetic progression with step 1 (those are just 1, 2, 3 ...), you can just substitute buildNumber from the CI server or revesionNumber from your VCS, also at your discretion
Version update
private Edits getApplicationEdits() throws Exception {
	String applicationName = "ApplicationName";
	String serviceAccountId = "и-го-го@developer.gserviceaccount.com"
	HttpTransport httpTransport = GoogleNetHttpTransport.newTrustedTransport();
	JsonFactory jsonFactory = JacksonFactory.getDefaultInstance();
	KeyStore keyStore = SecurityUtils.getPkcs12KeyStore();
	InputStream inputStream = ProductionManager.class.getResourceAsStream("/resources/key.p12");
	PrivateKey privateKey = SecurityUtils.loadPrivateKeyFromKeyStore(keyStore, inputStream, "notasecret", "privatekey", "notasecret");
	inputStream.close();
	GoogleCredential credential = new GoogleCredential
			.Builder()
			.setTransport(httpTransport)
			.setJsonFactory(jsonFactory)
			.setServiceAccountId(serviceAccountId)
			.setServiceAccountScopes(Collections.singleton(AndroidPublisherScopes.ANDROIDPUBLISHER))
			.setServiceAccountPrivateKey(privateKey)
			.build();
	AndroidPublisher androidPublisher = new AndroidPublisher
			.Builder(httpTransport, jsonFactory, credential)
			.setApplicationName(applicationName)
			.build();
	return androidPublisher.edits();
}
private void updateVersionCode() throws Exception {
	String packageName = "com.package.name";
	Edits edits = getApplicationEdits();
	String editId = edits
			.insert(packageName, null)
			.execute()
			.getId();
	ApksListResponse apksResponse = edits
			.apks()
			.list(packageName, editId)
			.execute();
	List versions = new ArrayList();
	List apks = apksResponse.getApks();
	if (apks == null) {
		throw new Exception("responsed list of apks is null");
	}
	for (Apk apk : apks) {
		versions.add(apk.getVersionCode());
	}
	if (versions.isEmpty()) {
		throw new Exception("previous versions are not detected");
	}
	int lastVersionCode = Collections.max(versions);
	if (lastVersionCode == 0) {
		throw new Exception("version is 0");
	}
	//TODO update version code
	//++lastVersionCode
}
Application Publications
private void publishApplication() throws Exception {
	String packageName = "com.package.name";
	String track = "beta";//release
	String setupFilePath = "/path/to/setup/file/app.apk";
	Edits edits = getApplicationEdits();
	String editId = edits
			.insert(packageName, null)
			.execute()
			.getId();
	FileContent mediaContent = new FileContent("application/vnd.android.package-archive", new File(setupFilePath));
	Upload uploadRequest = edits
			.apks()
			.upload(packageName, editId, mediaContent);
	Apk apk = uploadRequest.execute();
	List versions = new ArrayList<>();
	versions.add(apk.getVersionCode());
	edits
		.tracks()
		.update(packageName, editId, track, new Track().setVersionCodes(versions))
		.execute();
	edits
		.commit(packageName, editId)
		.execute();
}
Compile executable jar. Now you need to configure the creation of the installation file and its publication on your CI server, I use TeamCity. It turns out that we will have 4 build steps:
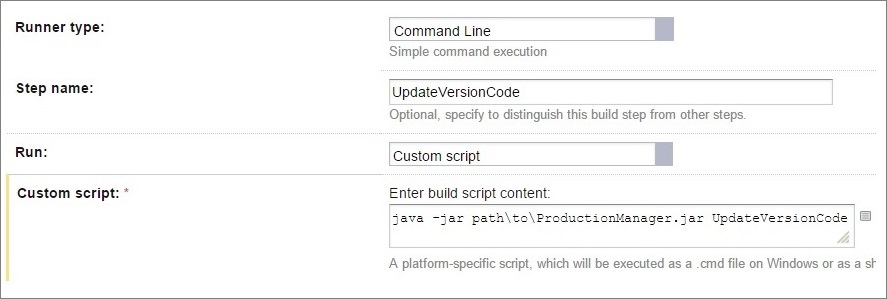
- Update versionCode. Run the jar file with the parameter you are processing and call the updateVersionCode () method. This is how it looks on TeamCity
- Update versionName
- Apk generation. You can use the command line, you can choose a special step, there is gradle and IntelliJ IDEA, in the second case you need to specify the name artifact
- Publish an application. Also run the jar file with another parameter and call the publishApplication () method
Thanks for attention









