February 9, 2016 at 13:37
Bind additional one-time passwords to the Windows login window
On a habr for a long time know about one-time passwords and OTP technologies (One Time Password). Even Yandex came up with its own solution. I want to tell you about how I screwed an interesting OTP implementation to the Windows Terminal Server login window.
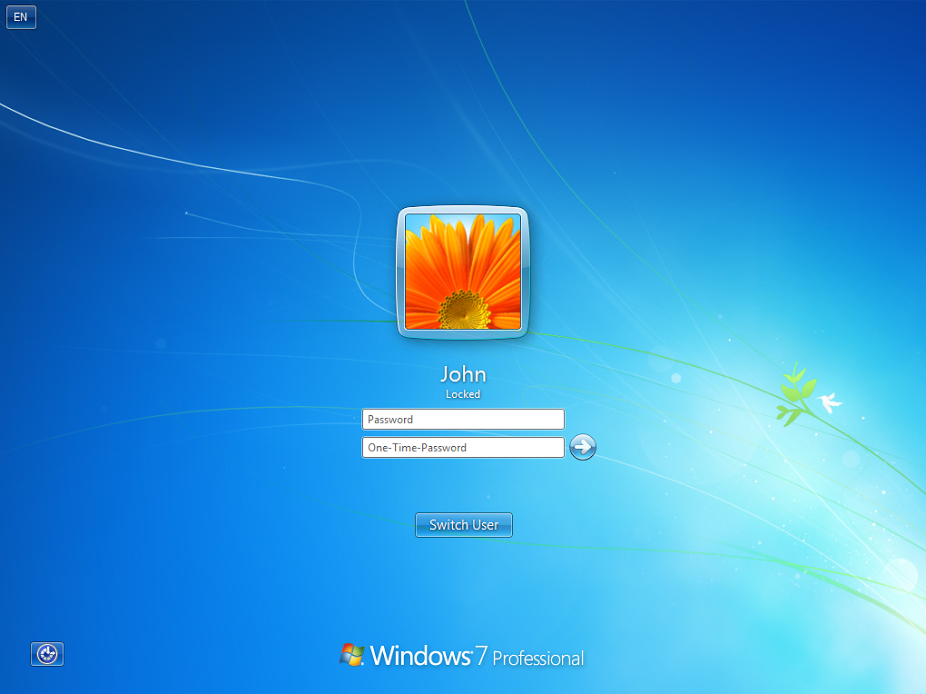
All the functionality of the solution rests on the wonderful multiotp project , open source PHP software that can work both with TOTP and HOTP , and even with OCRA . And you can run this beauty in * nix and in Windows. There is even a web interface and releases for virtualization systems, but it's up to you to dig yourself, we will outline the minimum set of actions necessary to start.
Binding mutltiotp to the Windows login window is done using the MultiOneTimePassword-CredentialProvider plugin .
The user will generate one-time passwords on his computer or mobile device.
The procedure is indicatedon the plugin page, but the syntax has changed in the latest multiotp version, so I will go through all the steps for you again.
Download multiotp and place it somewhere on the server. I will throw C: \ multiotp in the root of the system drive.
Then you need to create a key for each user wound up on the server. I emphasize - we are talking about local users. Multiotp has the ability to bind to ldap, but this is too big a topic for one article.
Creating users will require 160-bit HEX keys (i.e. 20 characters in hexadecimal notation). You can (and should) generate them yourself in a protected environment, for laboratory purposes I will offer you this generator . Indicate the key length (20) and the number of users in your system, he will do everything himself. Save these keys somewhere, they will be useful to us further.
The user creation command looks like this (by itself in cmd, go to the directory with unpacked multiotp):
% USERNAME% is the name of the user account in Windows;
% TOTP% - creating keys for TOTP technology (based on time stamp);
% KEY% - the key created in the previous step;
% PIN% - an additional permanent pin that the user will append before his temporary password (you can not use it, but the command requires you to specify some key);
% LENGTH% - the length of one-time passwords (6-character ones are recommended, since most applications generate them);
% LIVETIME% - expiration of one-time passwords (it is recommended to specify 30 seconds, since most applications generate them).
Example:
Now we need to somehow pass on the users key so that they can generate one-time passwords at home. The full multiotp functionality allows you to create a QR code through the web interface, which we shoot on our phones and continue to work with them. I show minimal functionality without an interface, so I have to work with my hands.
You will need the keys created in the second step to convert from a 160-bit HEX to Base32. Again, it’s better to do this in your own environment, to whom laziness is, here you have an online converter . It doesn’t even have https, so be careful with it. It seems to work clearly, pay attention to case when entering keys.
The converted keys must be given to the user. There are tons of mobile OS apps that can generate one-time passwords. I love Google Authenticator , it works on most OS. If you want to indulge and not clog your mobile device, you can put the plug- in in your browser.
The application or plug-in needs to specify the key created in the fourth step. There is nothing complicated, I think you will figure it out for yourself.
To check the correct operation of the multiotp service, you should test the generated keys on the command line as follows:
% GENERATED_TOKEN% - the key generated by the application on the mobile device (watch the time, you have only 30 seconds from the moment the password was generated) The
answer on the command line should look like this:
Little is left - download and install the plugin for Windows. The installer asks a few questions. You need to install the “Default Provider” component (otherwise it will not do anything), specify the path to multiotp and write a message for the Windows login window.
Done. You can check the work.
1) Be sure to create passwords for everyone, including for the administrator, otherwise he will not be allowed into the system.
2) Be sure to set the exact time on the server and on users' devices, otherwise your keys will not work. The point is not precisely in accuracy, but in the fact that time must coincide there and there.
3) Sometimes it does not show the result on the command line, but you can always read the log.
4) If you are interested in how to tie this beauty to the domain - tell me, I'll try and unsubscribe.
5) The functionality is huge, everything is on the multiotp wiki : SMS, QR, synchronization, backup, binding to anything.
Those who like to perceive information visually can be useful this video .
I received incredibly good comments and clarifications from a friend who wanted to remain anonymous:
1) At the very beginning of the server setup, enter the command:
2) With this command you can adjust bantime, for users who make a mistake with the password (30 sec by default):
3) What will be written in the google Authenticator application over 6 digits, called issuer, can be changed from the default MultiOTP to something else:
4) After the operations done, the user creation command becomes a little easier:
5) Each user can change the description (the text under the numbers in the Google Auth application):
6) QR codes can be created immediately in the application:
7) You can use not only TOTP, but also HOTP (not the current time, but the value of the incremental counter is fed to the input of the hashing function):
8) If the user has forgotten / lost the phone, you can generate a dozen one-time codes using the command:
9) And good explanations
How does it all work
All the functionality of the solution rests on the wonderful multiotp project , open source PHP software that can work both with TOTP and HOTP , and even with OCRA . And you can run this beauty in * nix and in Windows. There is even a web interface and releases for virtualization systems, but it's up to you to dig yourself, we will outline the minimum set of actions necessary to start.
Binding mutltiotp to the Windows login window is done using the MultiOneTimePassword-CredentialProvider plugin .
The user will generate one-time passwords on his computer or mobile device.
The procedure is indicatedon the plugin page, but the syntax has changed in the latest multiotp version, so I will go through all the steps for you again.
Install multiotp service
Download multiotp and place it somewhere on the server. I will throw C: \ multiotp in the root of the system drive.
Key generation
Then you need to create a key for each user wound up on the server. I emphasize - we are talking about local users. Multiotp has the ability to bind to ldap, but this is too big a topic for one article.
Creating users will require 160-bit HEX keys (i.e. 20 characters in hexadecimal notation). You can (and should) generate them yourself in a protected environment, for laboratory purposes I will offer you this generator . Indicate the key length (20) and the number of users in your system, he will do everything himself. Save these keys somewhere, they will be useful to us further.
Create custom keys
The user creation command looks like this (by itself in cmd, go to the directory with unpacked multiotp):
multiotp.exe -debug -create %USERNAME% %TOTP% %KEY% %PIN% %LENGTH% %LIVETIME%
% USERNAME% is the name of the user account in Windows;
% TOTP% - creating keys for TOTP technology (based on time stamp);
% KEY% - the key created in the previous step;
% PIN% - an additional permanent pin that the user will append before his temporary password (you can not use it, but the command requires you to specify some key);
% LENGTH% - the length of one-time passwords (6-character ones are recommended, since most applications generate them);
% LIVETIME% - expiration of one-time passwords (it is recommended to specify 30 seconds, since most applications generate them).
Example:
multiotp.exe -debug -display-log -create rdpclient1 TOTP 6696f39315f4c6388216 1234 6 30
multiotp.exe -debug -display-log -set user pin=
Key conversion for users
Now we need to somehow pass on the users key so that they can generate one-time passwords at home. The full multiotp functionality allows you to create a QR code through the web interface, which we shoot on our phones and continue to work with them. I show minimal functionality without an interface, so I have to work with my hands.
You will need the keys created in the second step to convert from a 160-bit HEX to Base32. Again, it’s better to do this in your own environment, to whom laziness is, here you have an online converter . It doesn’t even have https, so be careful with it. It seems to work clearly, pay attention to case when entering keys.
Key Generation Applications
The converted keys must be given to the user. There are tons of mobile OS apps that can generate one-time passwords. I love Google Authenticator , it works on most OS. If you want to indulge and not clog your mobile device, you can put the plug- in in your browser.
The application or plug-in needs to specify the key created in the fourth step. There is nothing complicated, I think you will figure it out for yourself.
Checking the service
To check the correct operation of the multiotp service, you should test the generated keys on the command line as follows:
multiotp.exe -display-log user %GENERATED_TOKEN%
% GENERATED_TOKEN% - the key generated by the application on the mobile device (watch the time, you have only 30 seconds from the moment the password was generated) The
answer on the command line should look like this:
0 OK: Token accepted
Connect authorization plugin in Windows
Little is left - download and install the plugin for Windows. The installer asks a few questions. You need to install the “Default Provider” component (otherwise it will not do anything), specify the path to multiotp and write a message for the Windows login window.
Done. You can check the work.
Nuances:
1) Be sure to create passwords for everyone, including for the administrator, otherwise he will not be allowed into the system.
2) Be sure to set the exact time on the server and on users' devices, otherwise your keys will not work. The point is not precisely in accuracy, but in the fact that time must coincide there and there.
3) Sometimes it does not show the result on the command line, but you can always read the log.
4) If you are interested in how to tie this beauty to the domain - tell me, I'll try and unsubscribe.
5) The functionality is huge, everything is on the multiotp wiki : SMS, QR, synchronization, backup, binding to anything.
Those who like to perceive information visually can be useful this video .
UPD:
I received incredibly good comments and clarifications from a friend who wanted to remain anonymous:
1) At the very beginning of the server setup, enter the command:
multiotp.exe -debug -config default-request-prefix-pin=0 display-log=1
2) With this command you can adjust bantime, for users who make a mistake with the password (30 sec by default):
multiotp.exe -debug -config failure-delayed-time=60
3) What will be written in the google Authenticator application over 6 digits, called issuer, can be changed from the default MultiOTP to something else:
multiotp.exe -debug -config issuer=other
4) After the operations done, the user creation command becomes a little easier:
multiotp.exe -debug -create user TOTP 12312312312312312321 6
5) Each user can change the description (the text under the numbers in the Google Auth application):
multiotp.exe -set username description=2
6) QR codes can be created immediately in the application:
multiotp.exe -qrcode username c:\multiotp\qrcode\user.png:\multiotp\qrcode\user.png
7) You can use not only TOTP, but also HOTP (not the current time, but the value of the incremental counter is fed to the input of the hashing function):
multiotp.exe -debug -create username HOTP 12312312312312312321 6
Example
HOTP can be used in situations where superiors love iron solutions, not software: for example, Yubikey is programmed to use HOTP and is suitable for this. We subsequently abandoned Yubikey + HOTP completely, because if the user clicked on Yubikey in the wrong window, his subsequent codes would be inappropriate (the yubikey counter will be one ahead) and you will have to synchronize them with the server:
multiotp.exe -resync user 061735 729371
8) If the user has forgotten / lost the phone, you can generate a dozen one-time codes using the command:
multiotp.exe -scratchlist username
9) And good explanations
regarding the stability of the solution:
It has been working for more than a year on several servers, there have never been problems with it. If there is any problem with multiotp (we prepared for this and tested possible options), then it is enough to load the server in safe mode: in this case, it will boot with the default credential provider (without multi-otp) and after that you will either disable the multiotp provider in the registry, or temporarily uninstall it by first making a backup copy of the c: \ multitop folder