 October 21, 2015 at 21:15
Creating a MySQL database as part of Microsoft Azure for students
- Tutorial
Most recently, Microsoft announced the provision of free Microsoft Azure cloud hosting for students . Under the program, students are available resources such as: websites, WebAPI and SignalR web services, CMS Joomla, as well as MySQL databases (yes, MS SQL is not yet available).
A series of video tutorials from shwars is available on the Microsoft Azure promotional site for students , dedicated to the basics of creating sites in WebMatrix, Visual Studio, and an example of site deployment on Joomla (which is also available in text version ).
In this article, I would like to supplement this series and describe how you can connect a MySQL database to a project on the .NET Framework. Since this process combines several entities (Azure, MySQL, and Visual Studio), it will be described as detailed as possible in pictures for beginner programmers.
Therefore, carefully traffic!
So, in order to achieve the desired goal - we need to perform a number of simple actions:
As you can see, the whole procedure is quite simple and transparent. I hope this article will be useful for beginners who are interested in web development or are planning to create their first backend for a mobile application.
Good coding and interesting projects!
UPD: Added spoilers, I hope so the abundance of images will cause less discomfort when scrolling.
In this article, I would like to supplement this series and describe how you can connect a MySQL database to a project on the .NET Framework. Since this process combines several entities (Azure, MySQL, and Visual Studio), it will be described as detailed as possible in pictures for beginner programmers.
Therefore, carefully traffic!
So, in order to achieve the desired goal - we need to perform a number of simple actions:
Step one: create and configure a database on the Microsoft Azure portal
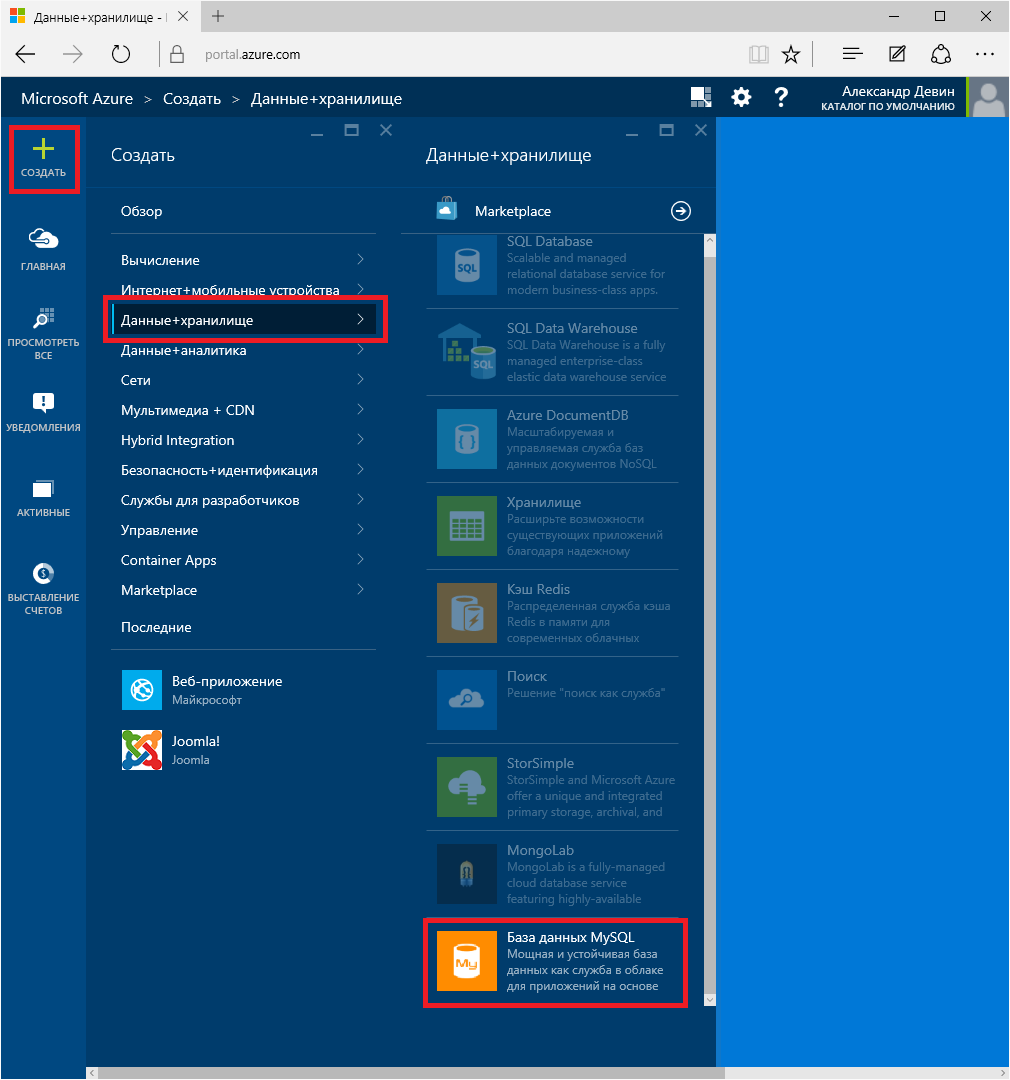
To add a database on the Microsoft Azure portal, you need to go to the menu for creating cloud resources and go to the "Data + storage" section. MySQL is at the very end of the list:
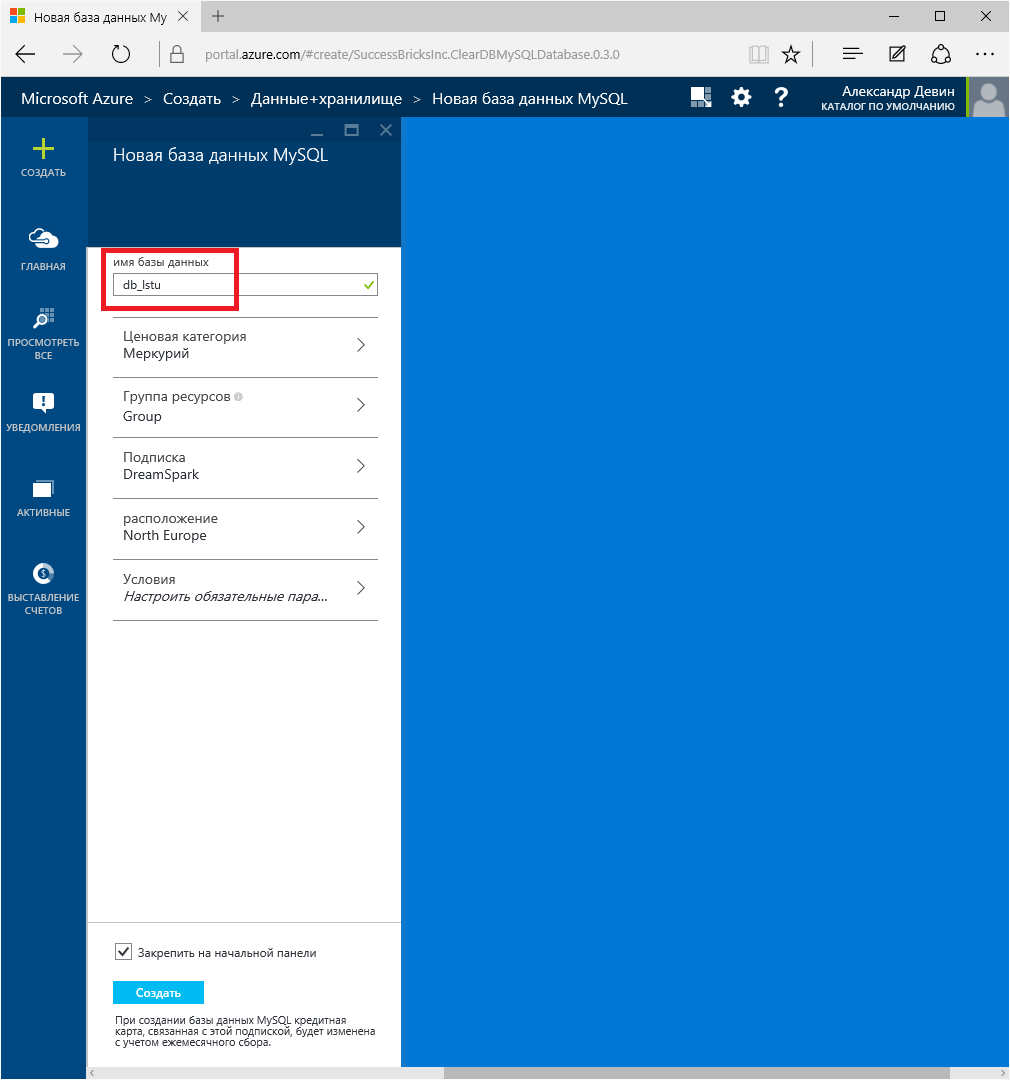
Next, you need to set a number of simple settings:
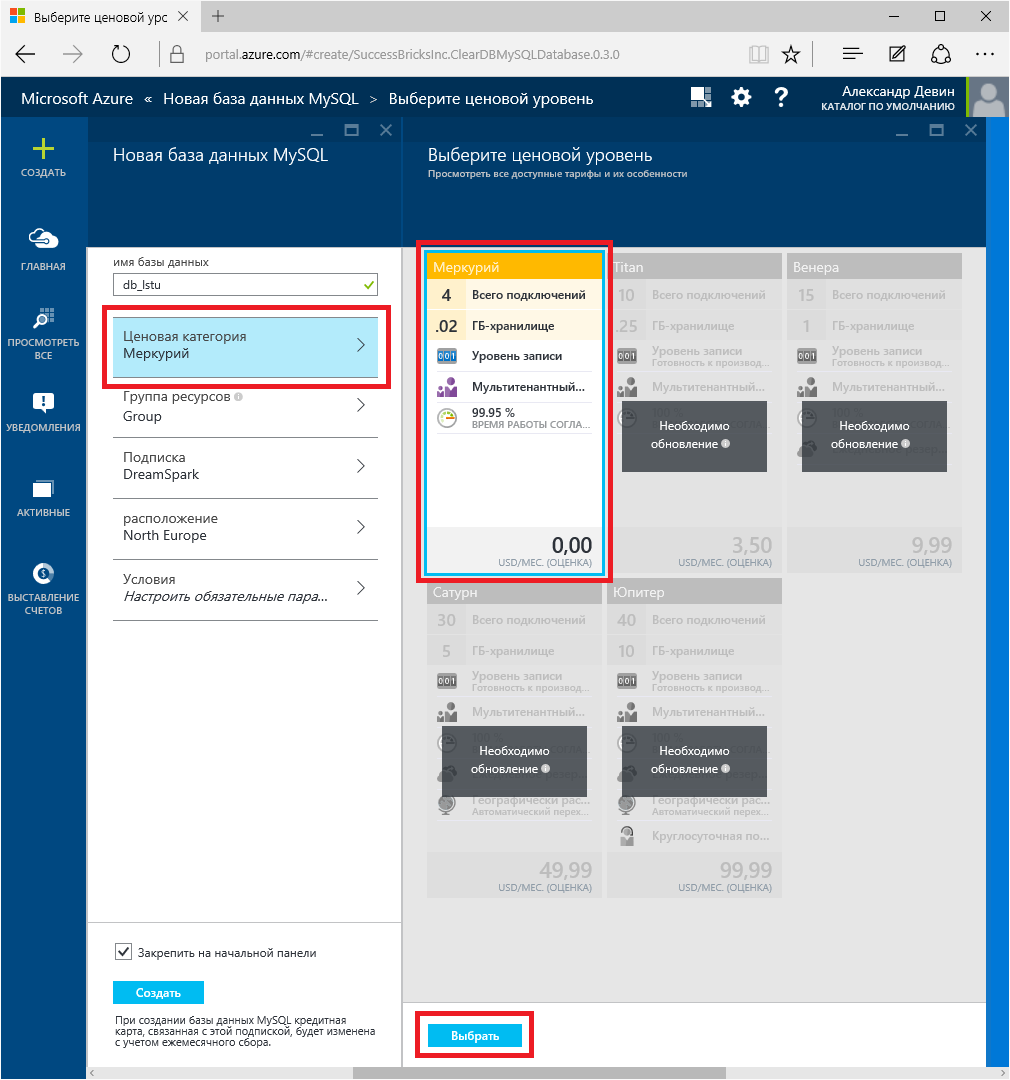
Price category (20MB available):
Each Azure resource must be in a resource group. If you don’t have such groups yet, create it:
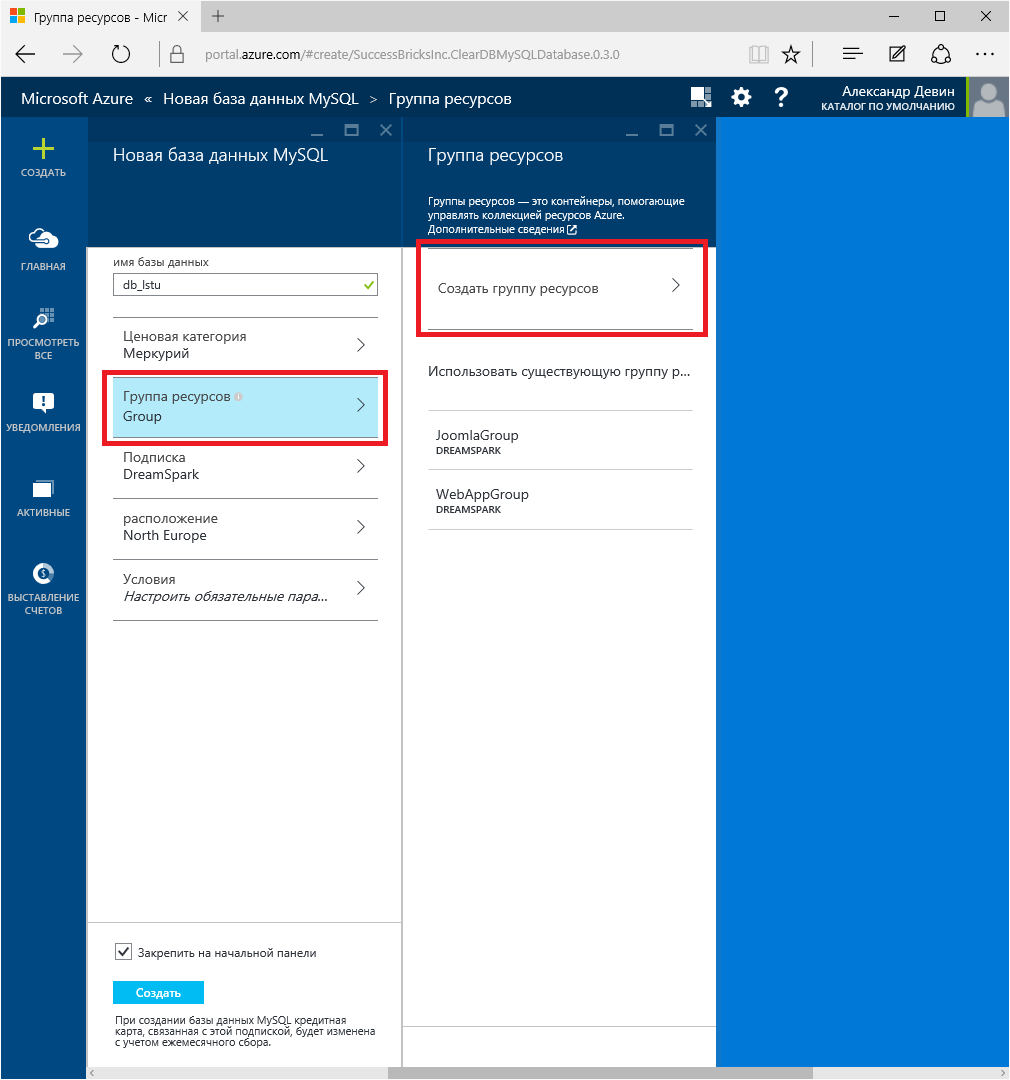
In our case, just give her a name unique to our account:
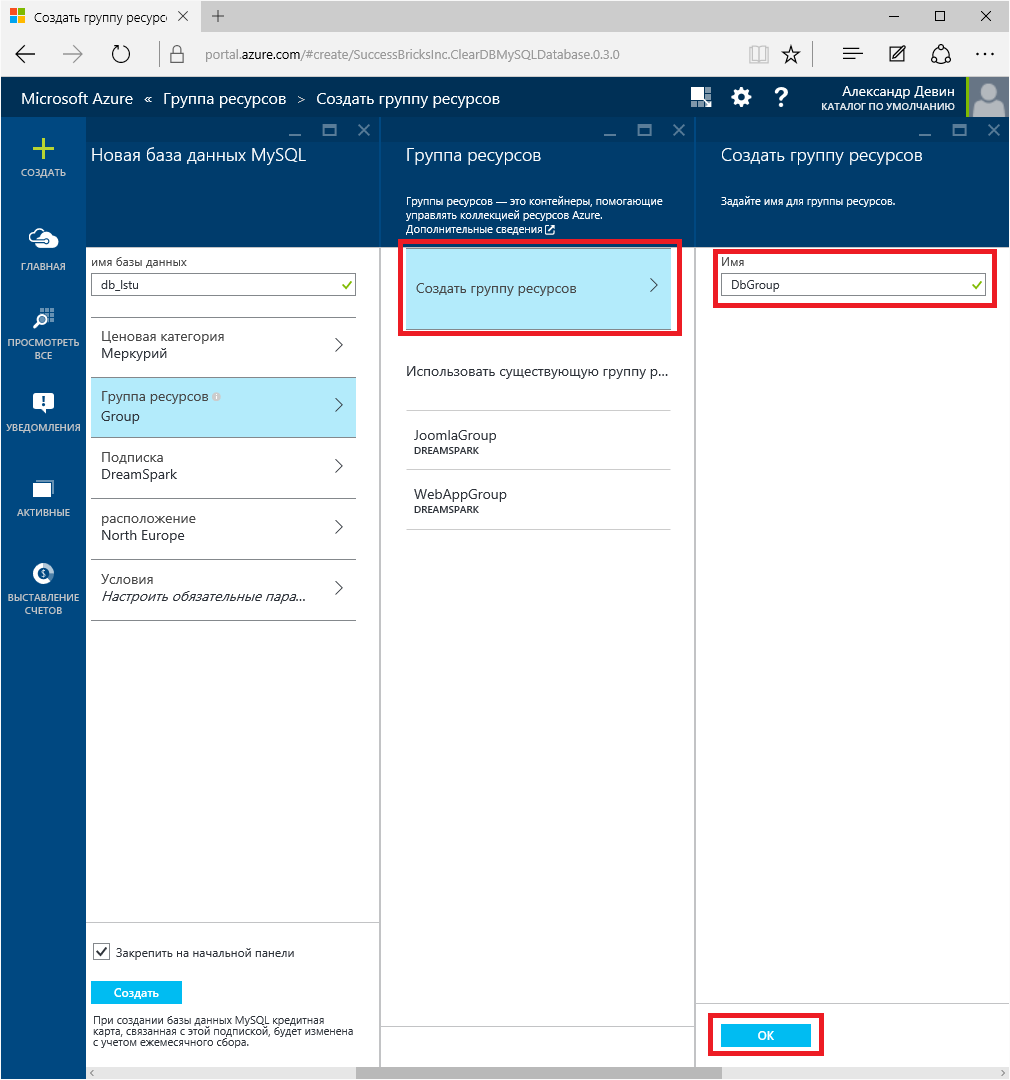
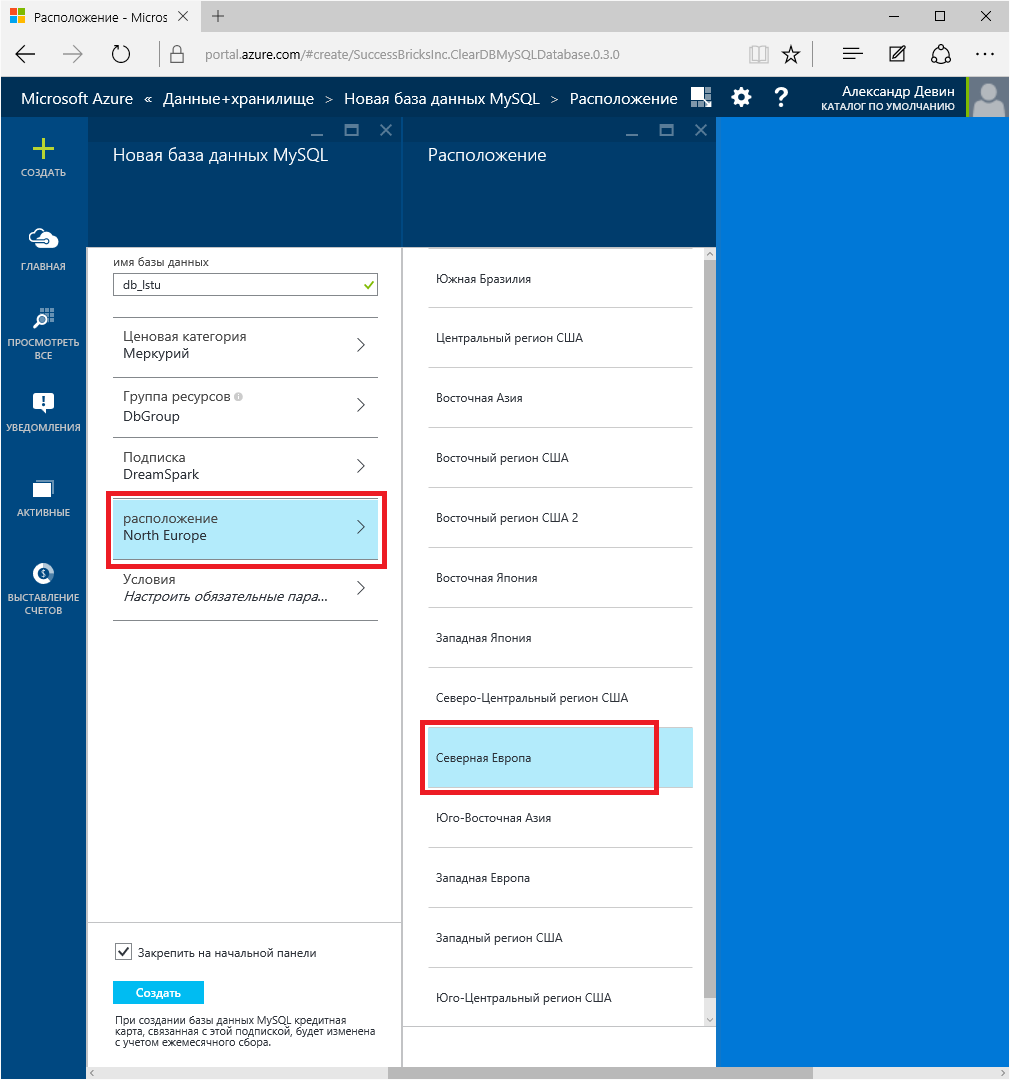
Geographical location - closest to us is Northern Europe: We will
familiarize ourselves with the “terms of use” and “privacy statement”:
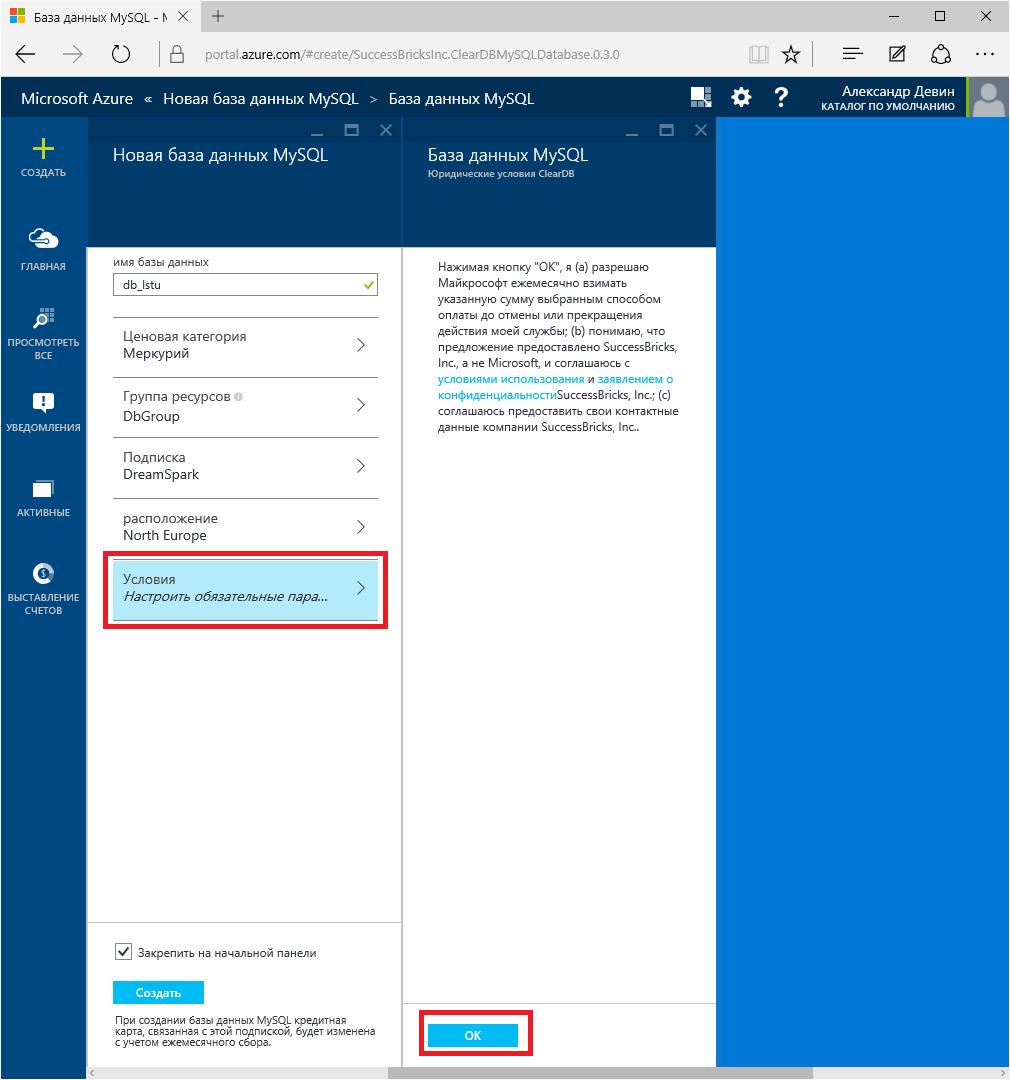
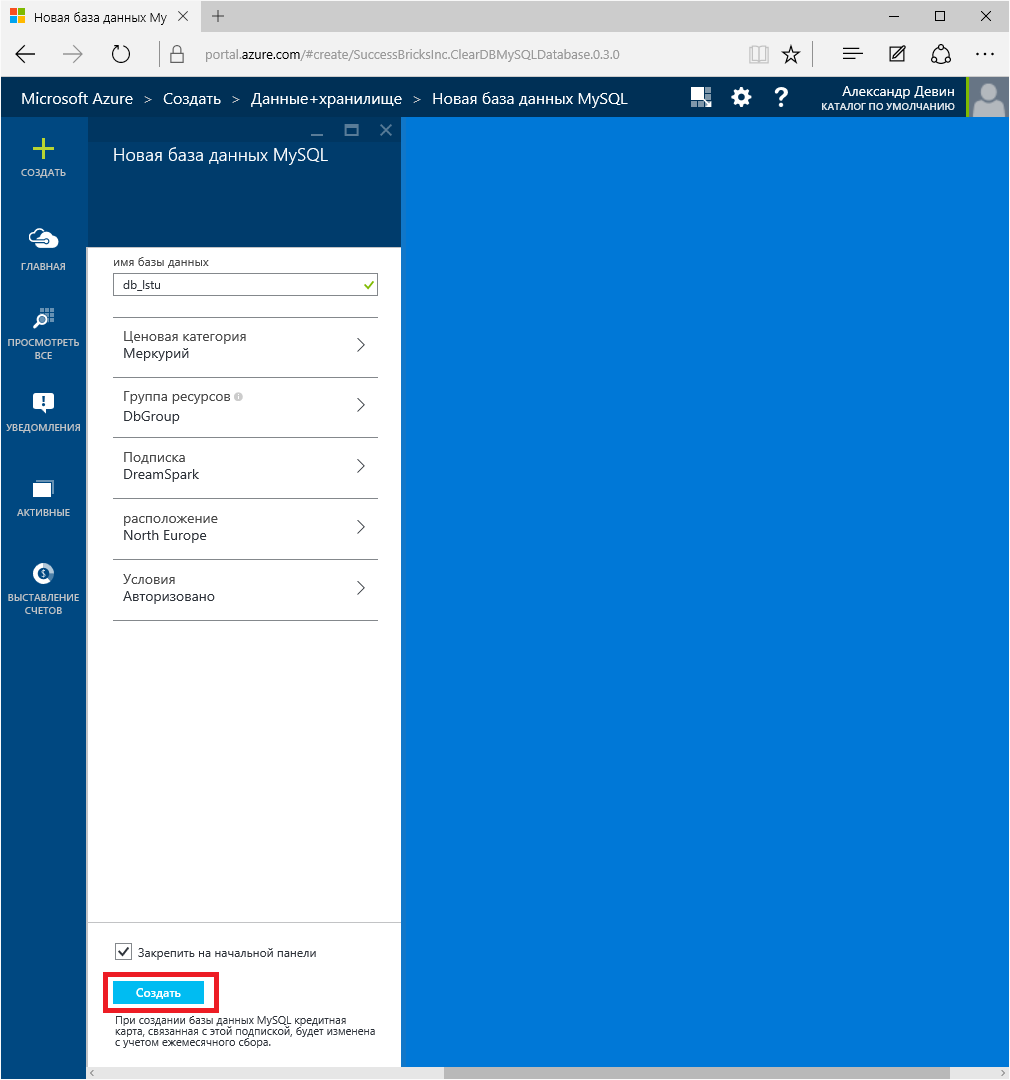
Excellent , we have entered all the necessary settings and we can create our database:
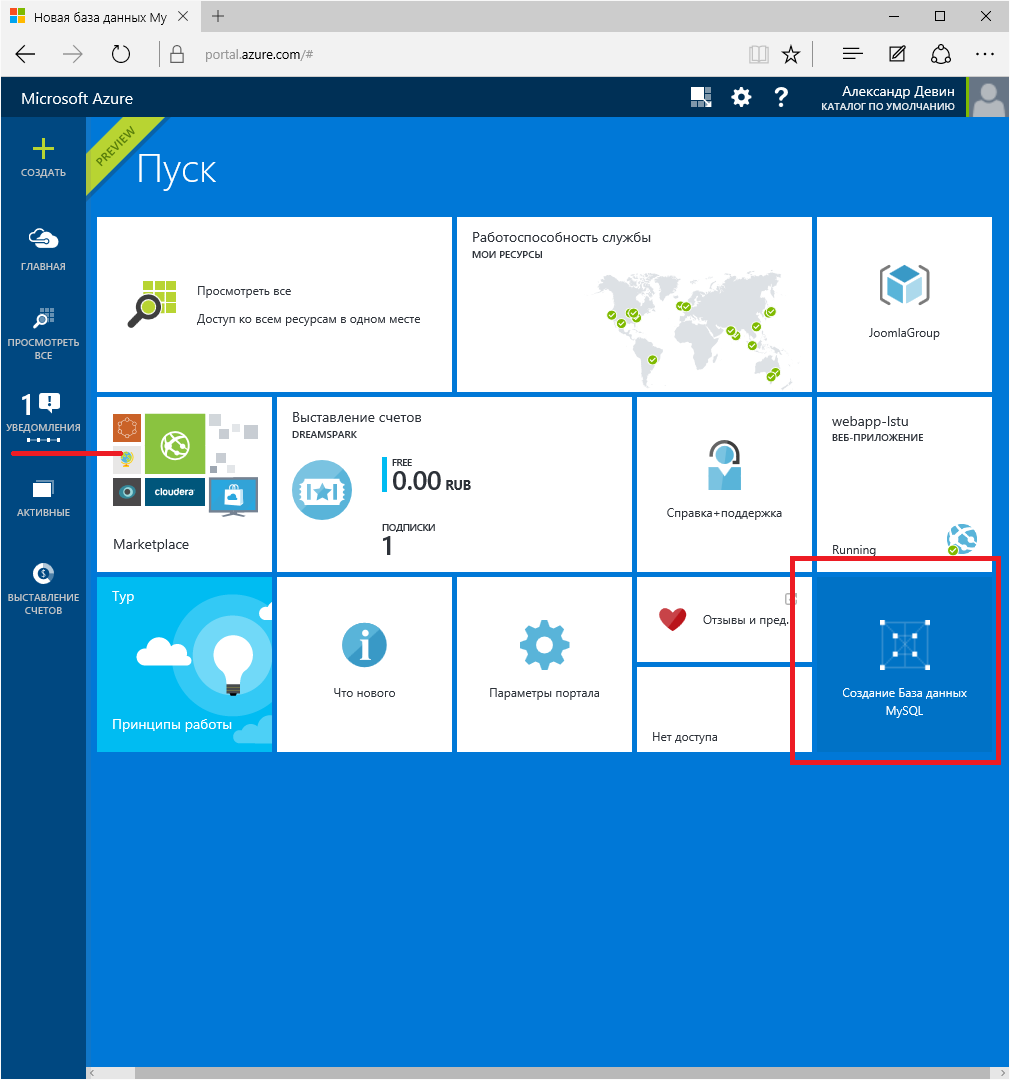
The creation process takes some time, and while the database is expanding, we see an animated icon:
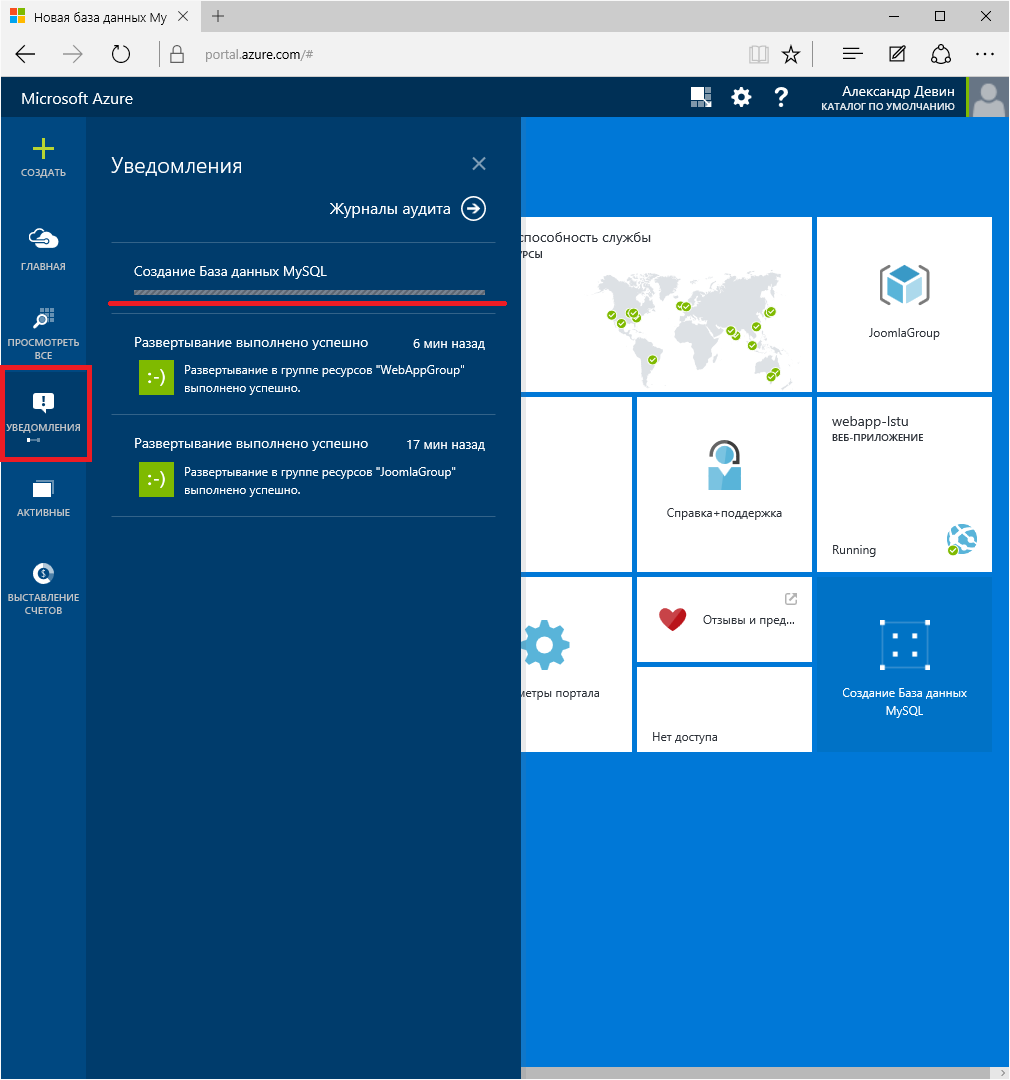
Also, in the section of operations that are being performed, we see similar information:
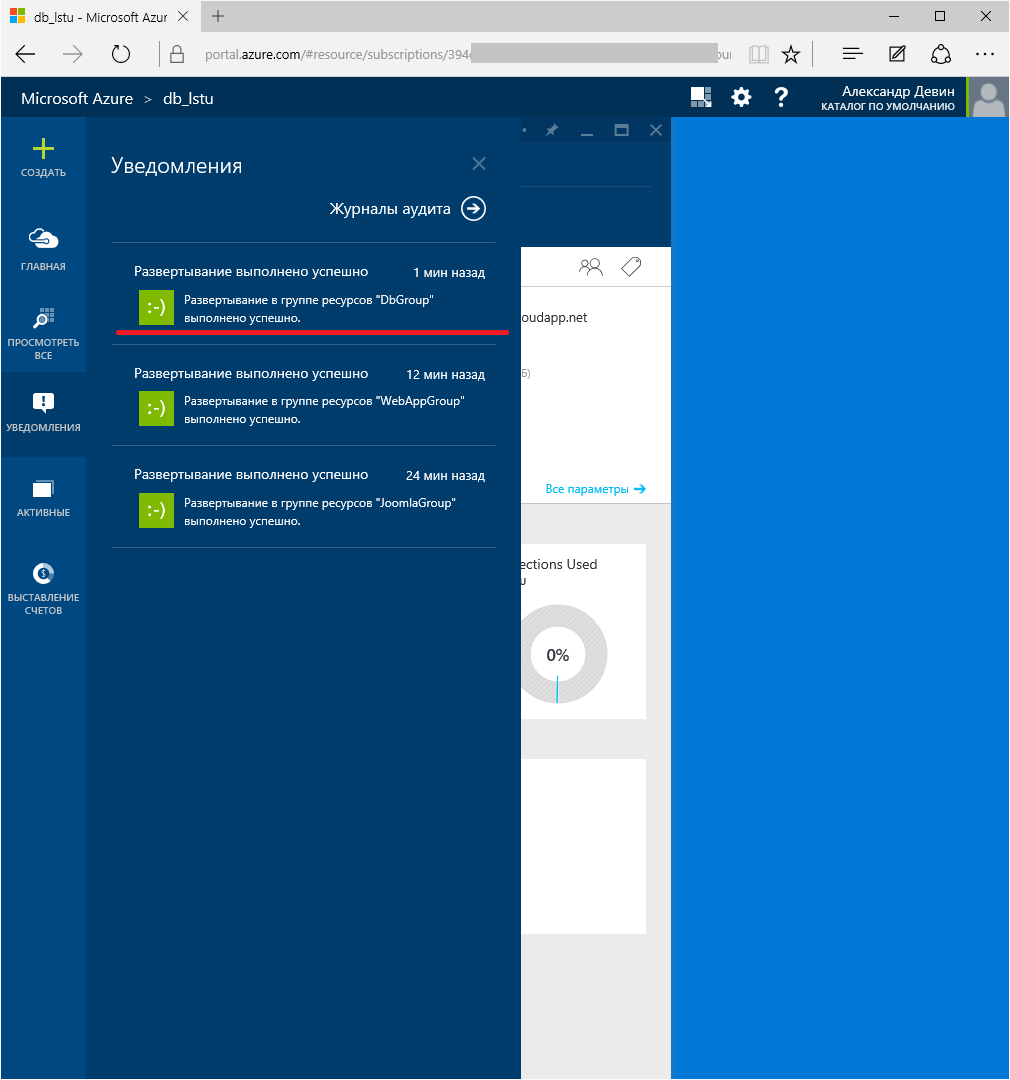
After the database is created, we will see a notification:
Using the tile on the main page , we’ll go to properties Databases:
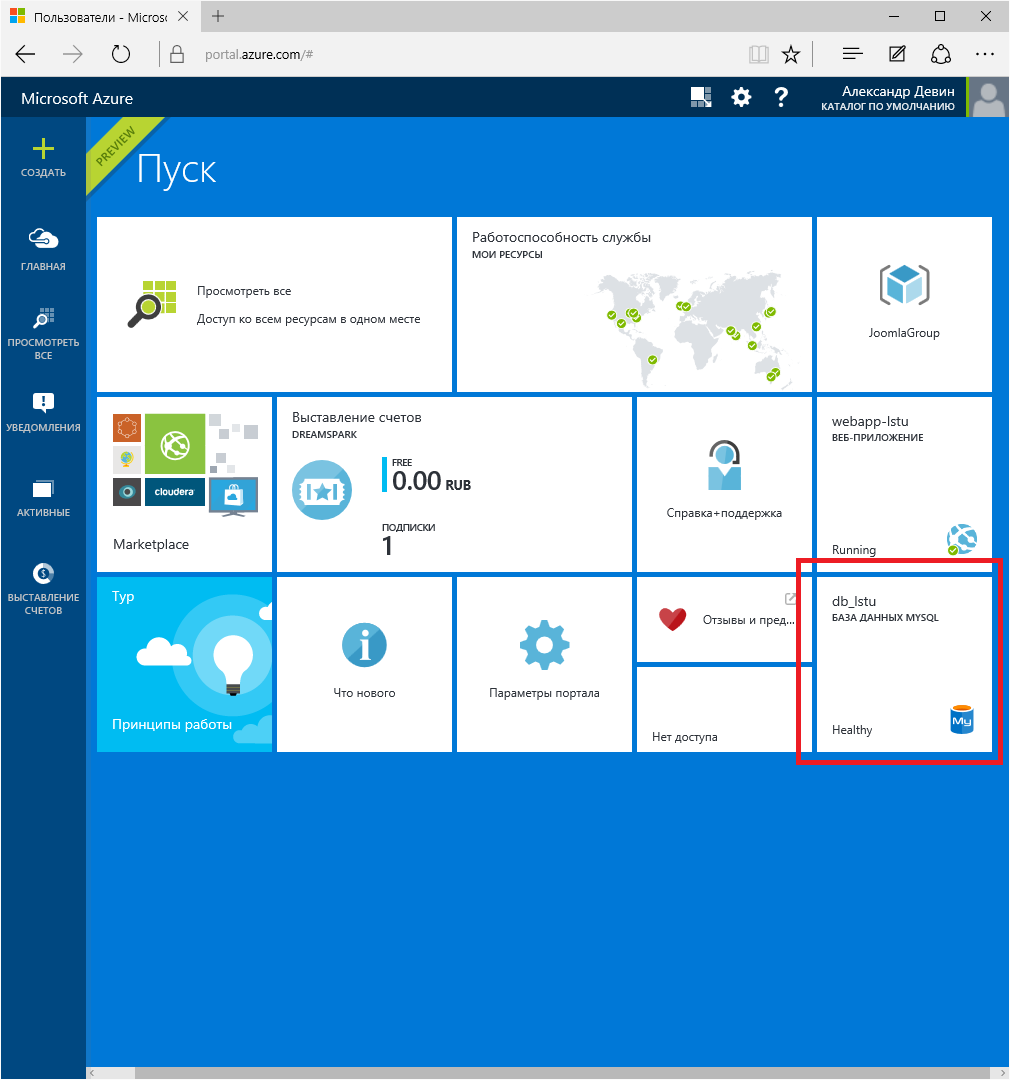
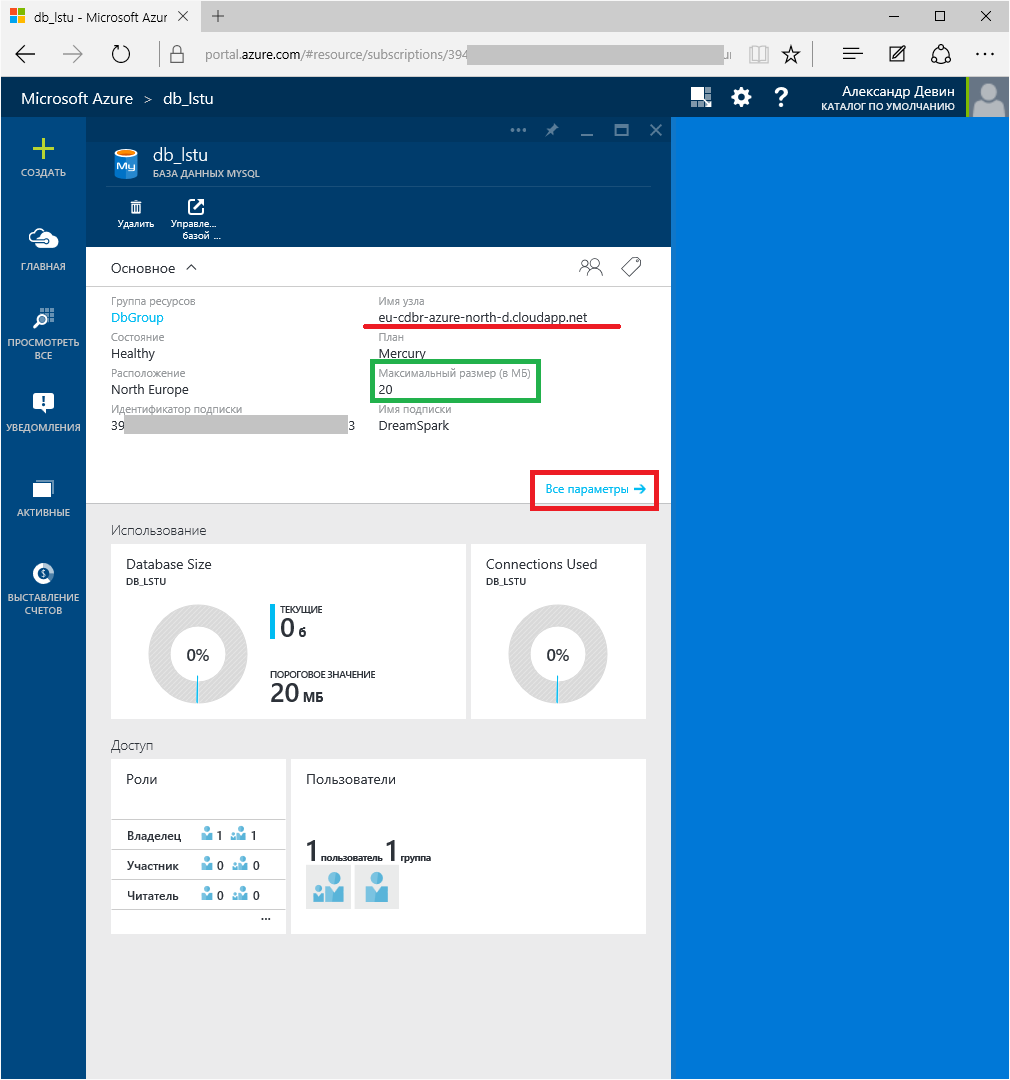
And let's move on to the full list of parameters:
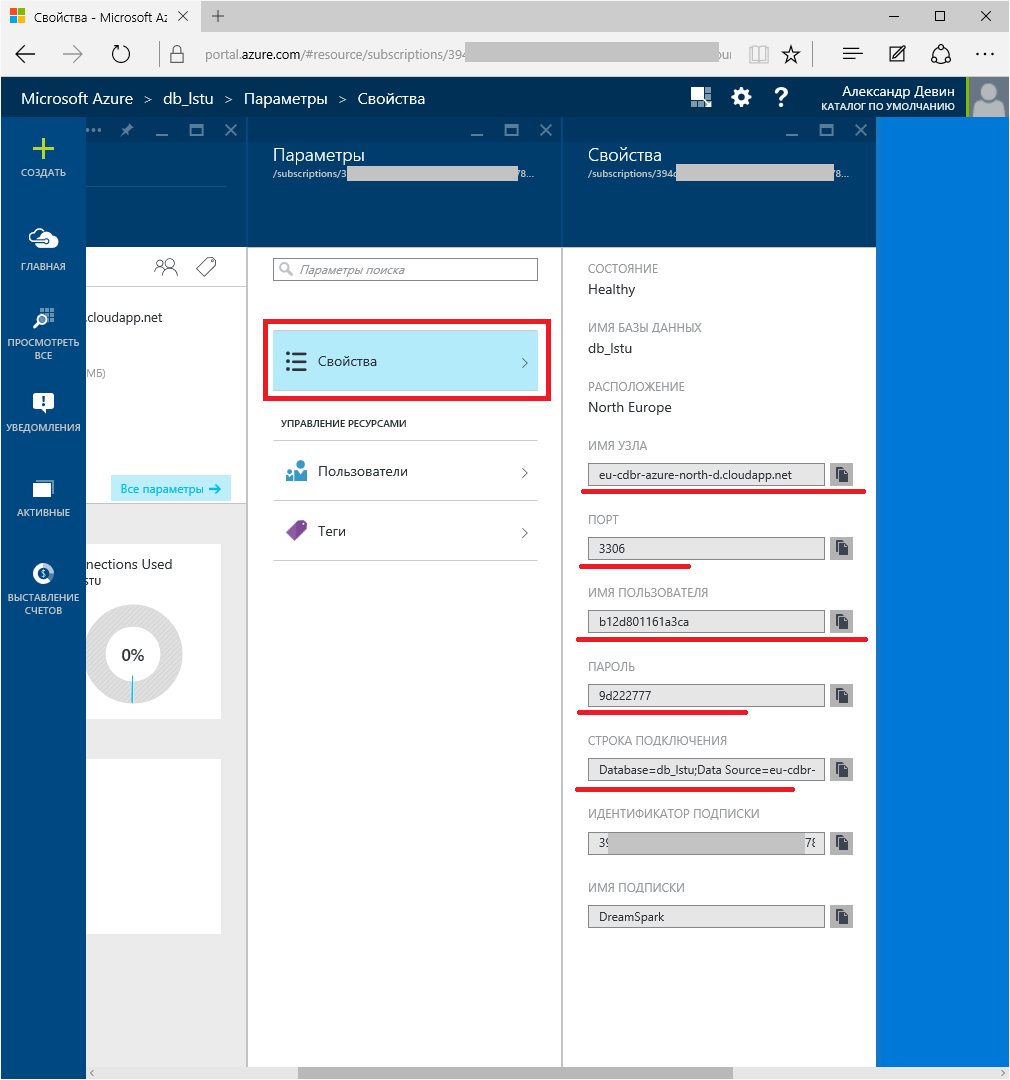
We are interested in “Host Name”, “Port”, “Username” and “Password”. We will need them to access the database.
Next, you need to set a number of simple settings:
Price category (20MB available):
Each Azure resource must be in a resource group. If you don’t have such groups yet, create it:
In our case, just give her a name unique to our account:
Geographical location - closest to us is Northern Europe: We will
familiarize ourselves with the “terms of use” and “privacy statement”:
Excellent , we have entered all the necessary settings and we can create our database:
The creation process takes some time, and while the database is expanding, we see an animated icon:
Also, in the section of operations that are being performed, we see similar information:
After the database is created, we will see a notification:
Using the tile on the main page , we’ll go to properties Databases:
And let's move on to the full list of parameters:
We are interested in “Host Name”, “Port”, “Username” and “Password”. We will need them to access the database.
Step two: install MySQL Workbench to work with the database
Working with MySQL is possible using the built-in tools of Visual Studio, however, I advise you to use the native tool for this database:
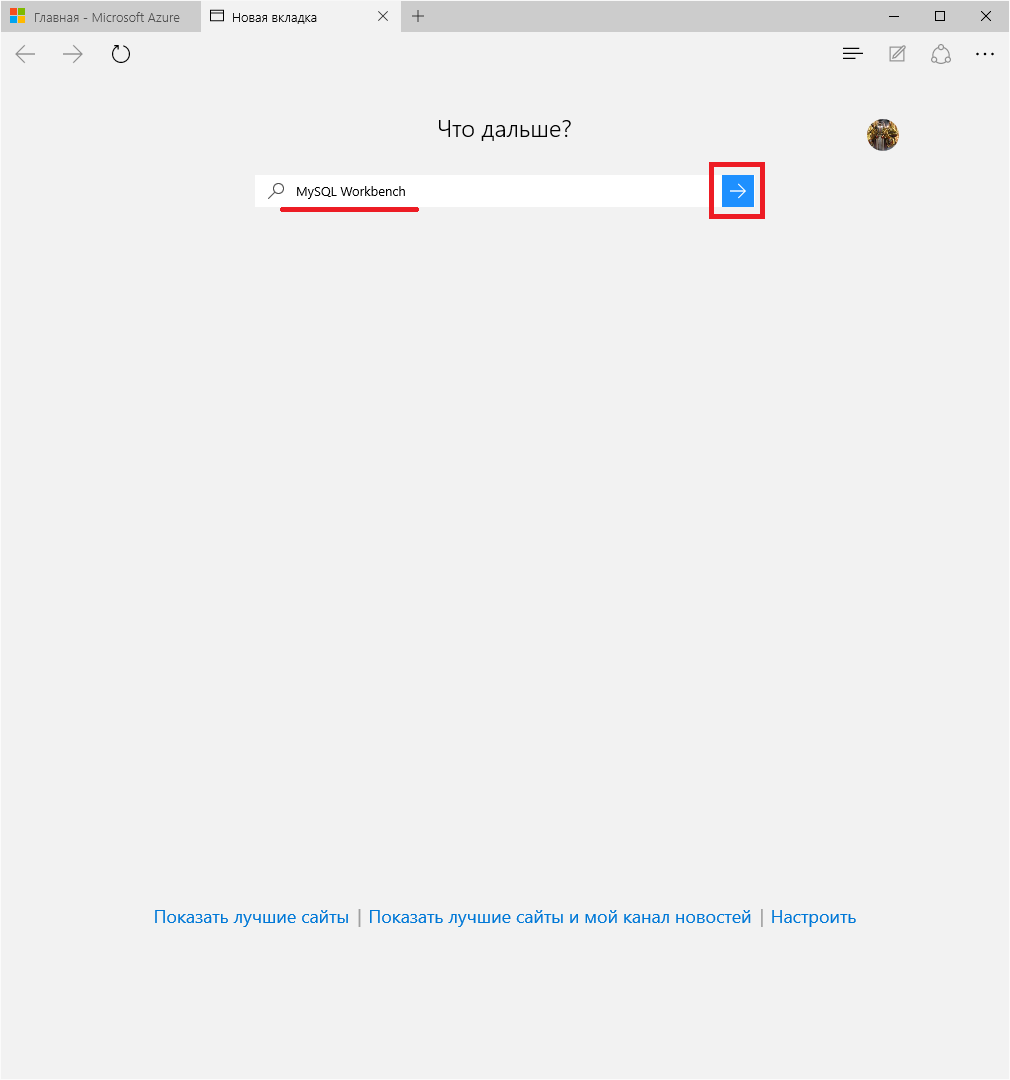
Click the desired link:
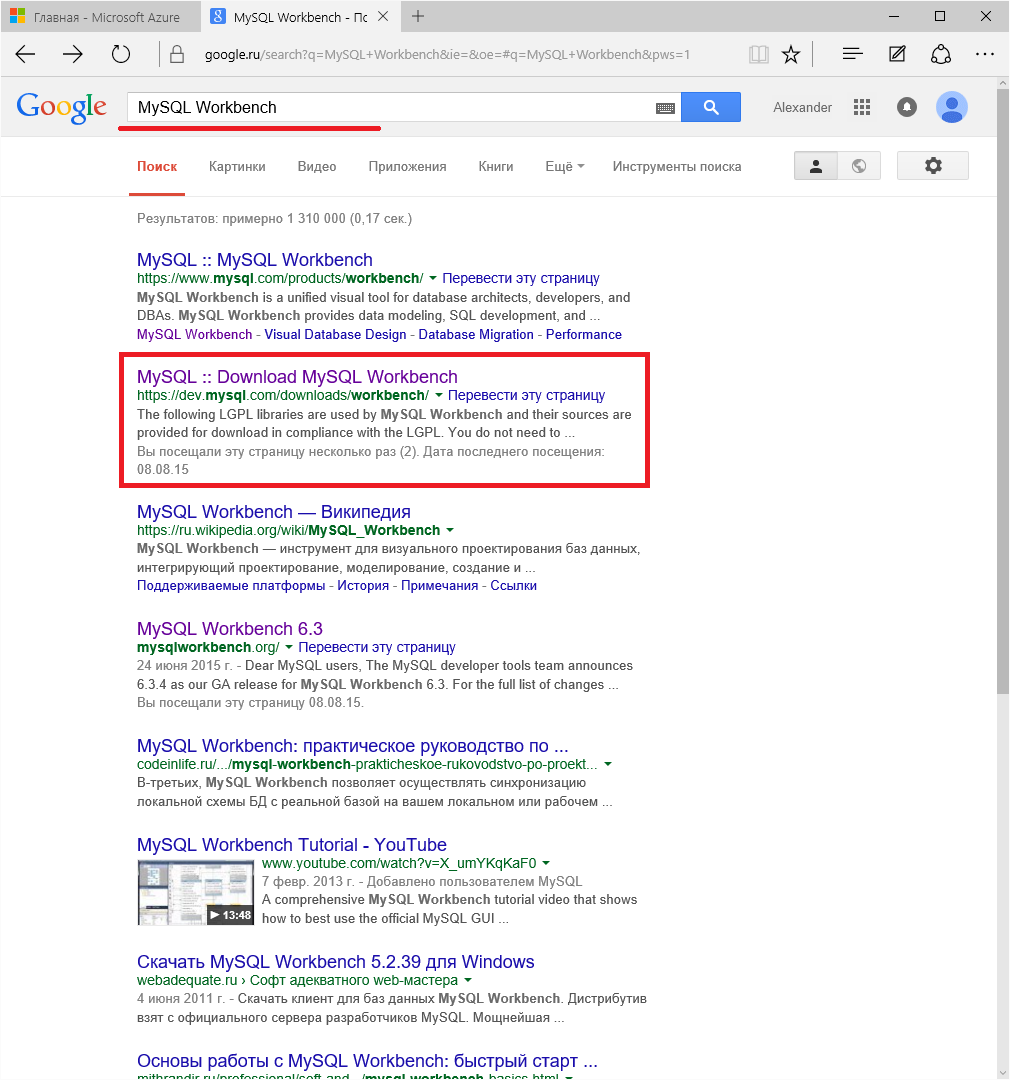
We get to the official download site. Scroll down:
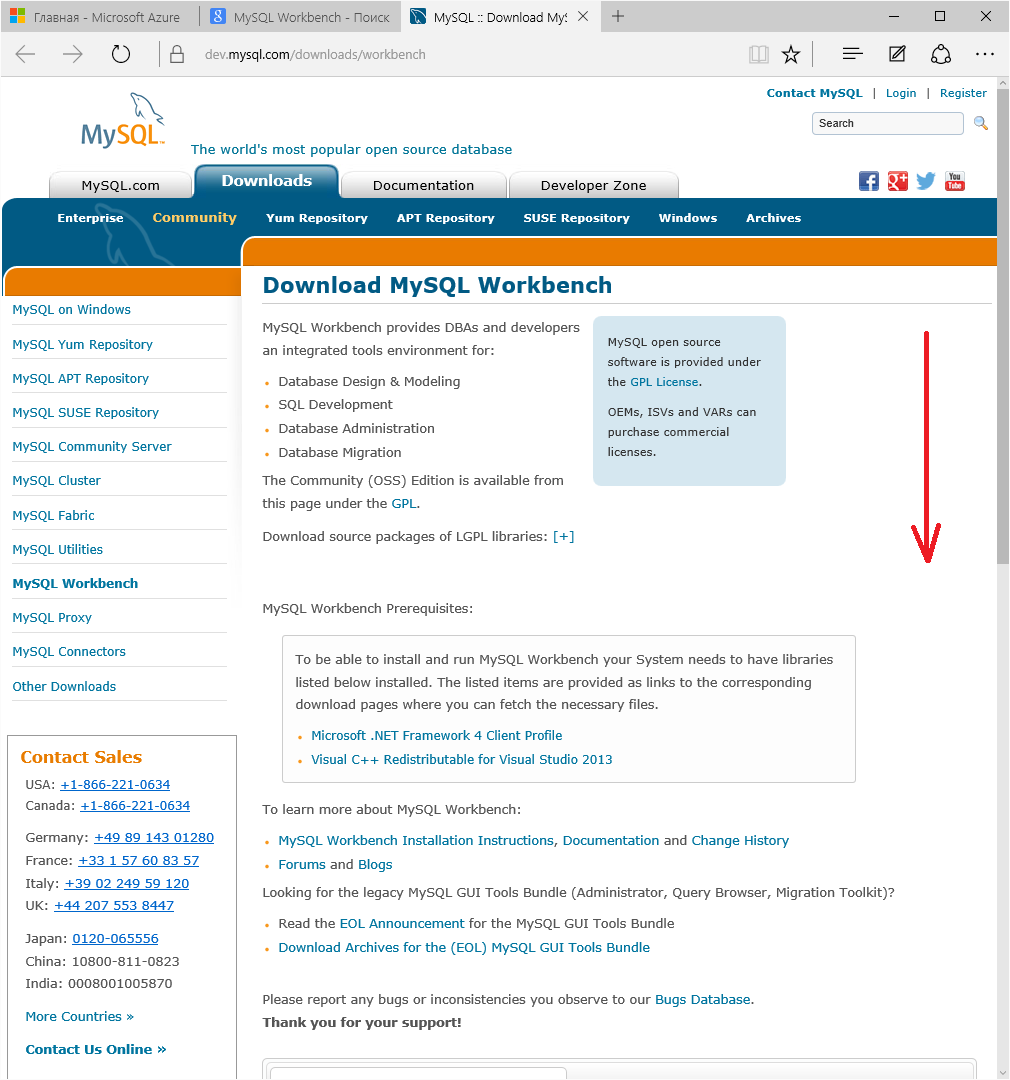
Choose the bit depth of your operating system:
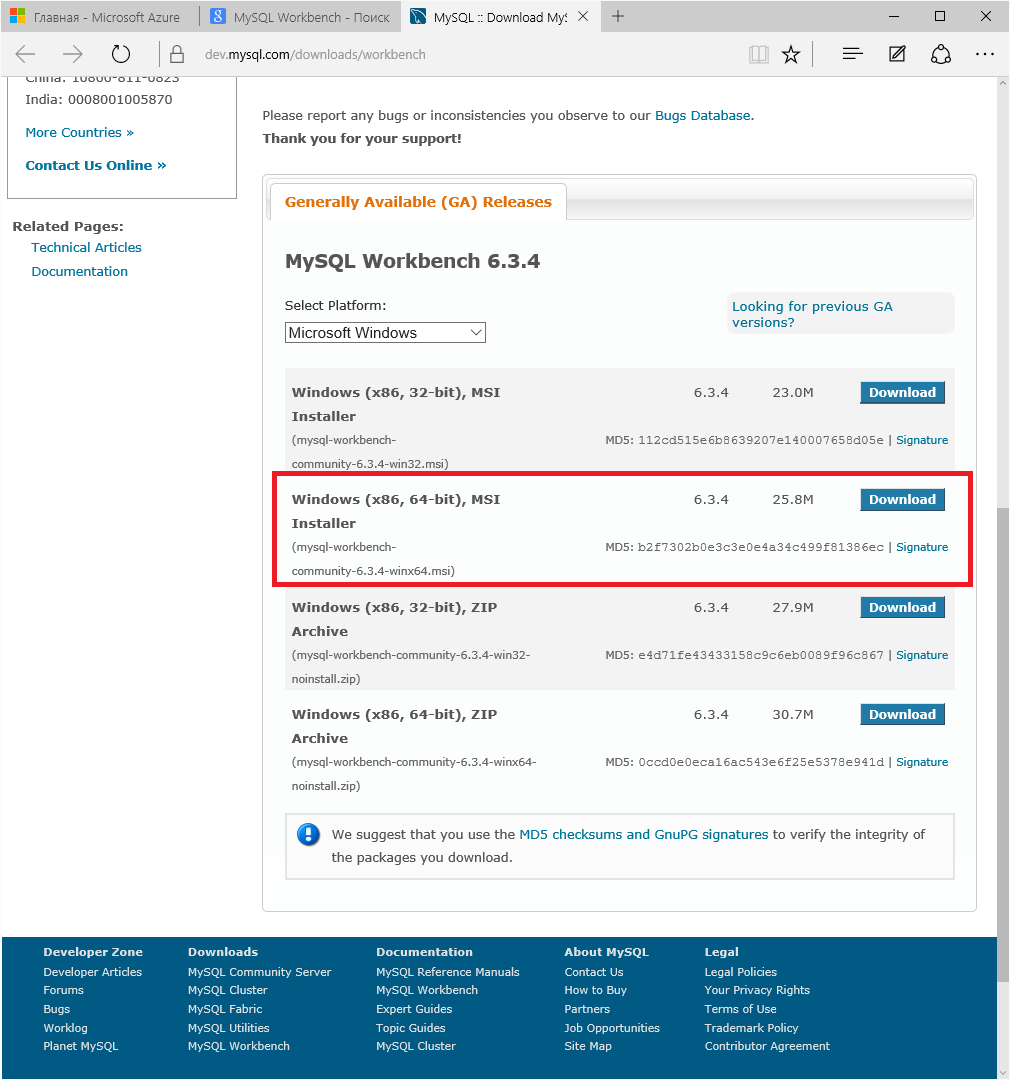
In my case, this is Windows 10 x64:
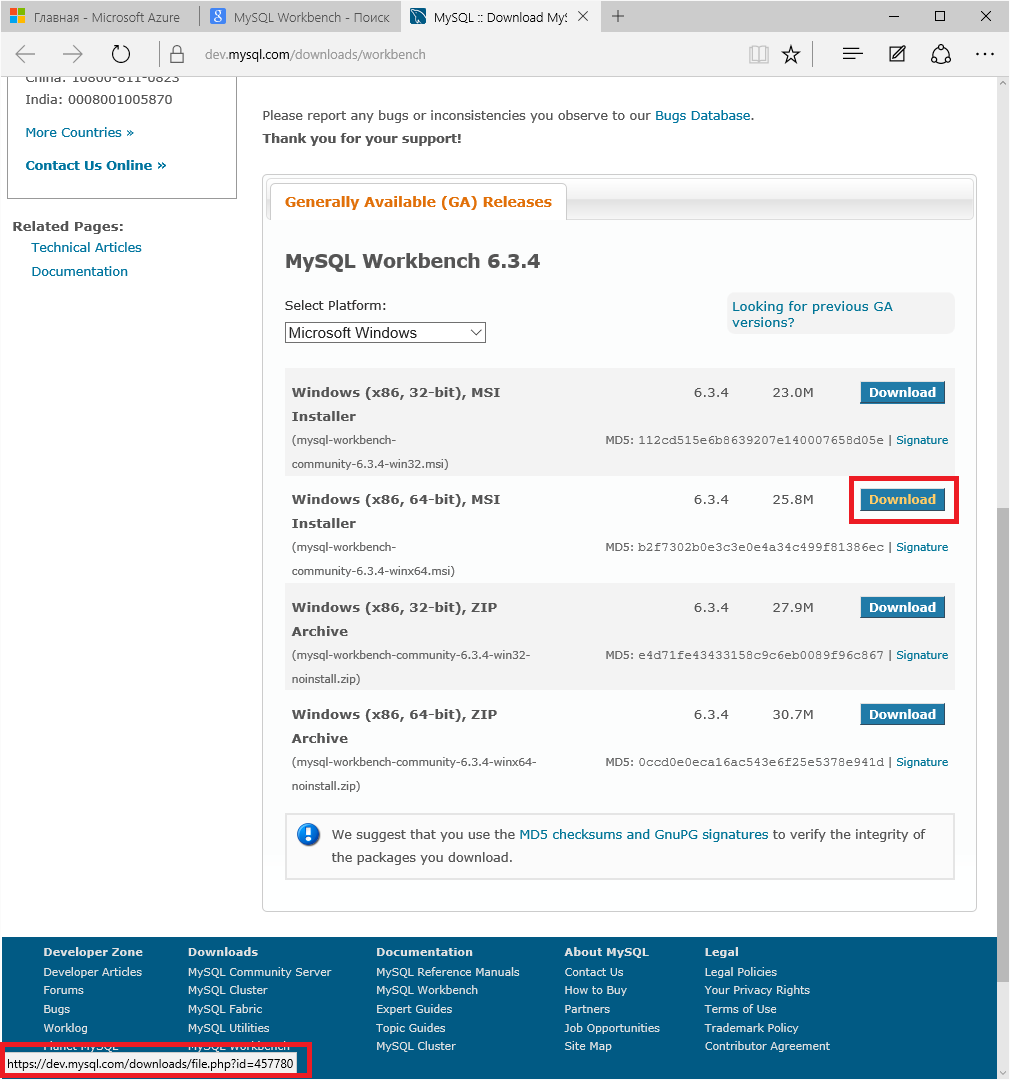
We will be kindly invited to join the community, but this is not necessary. We can immediately proceed to the download:
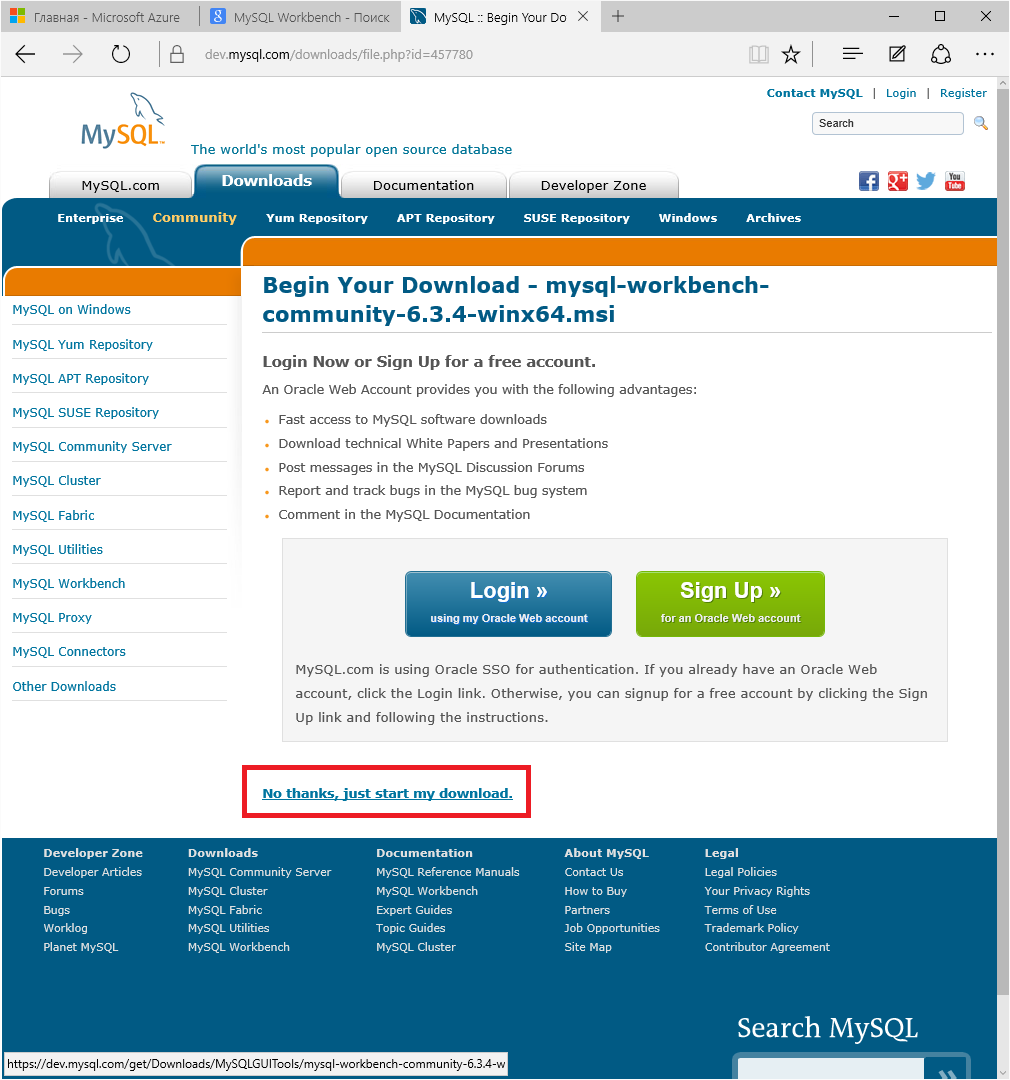
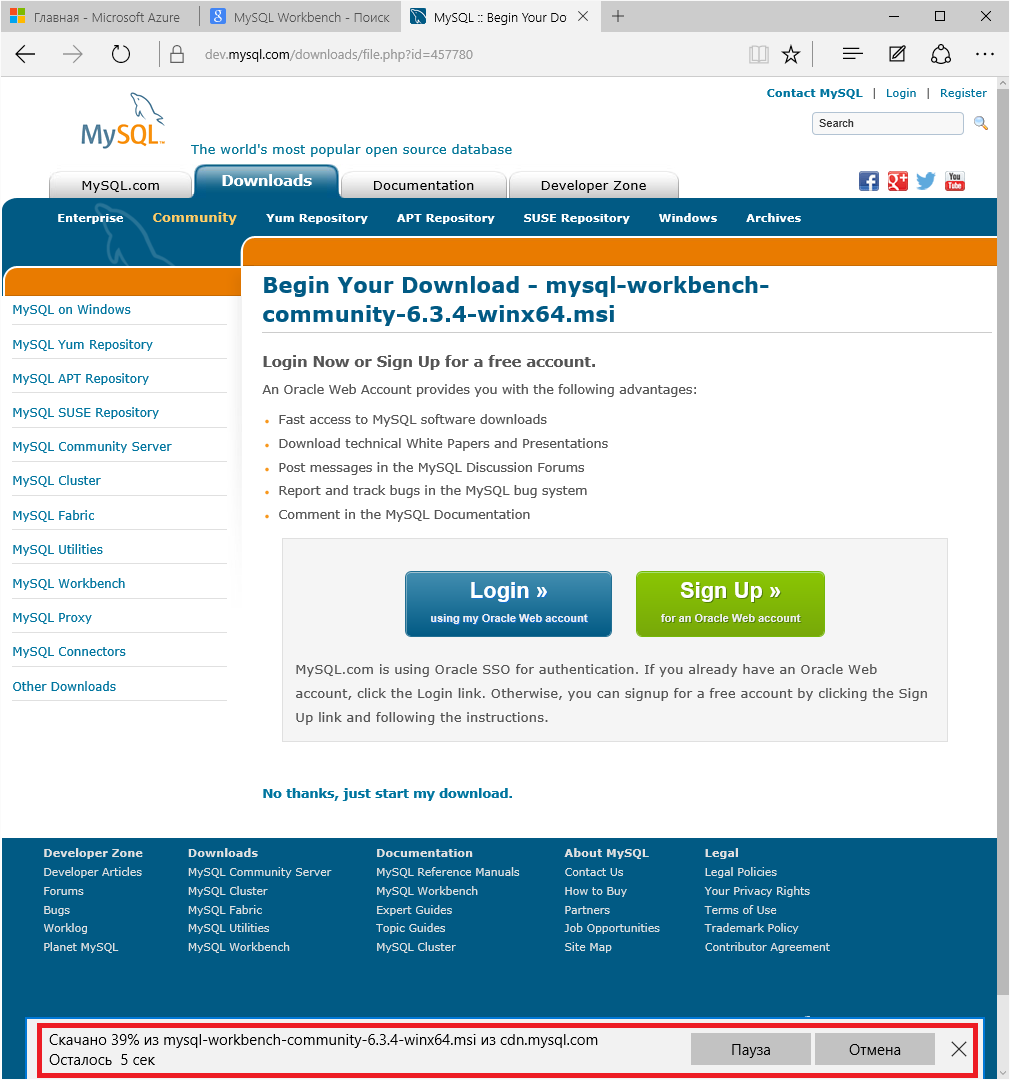
The download starts:
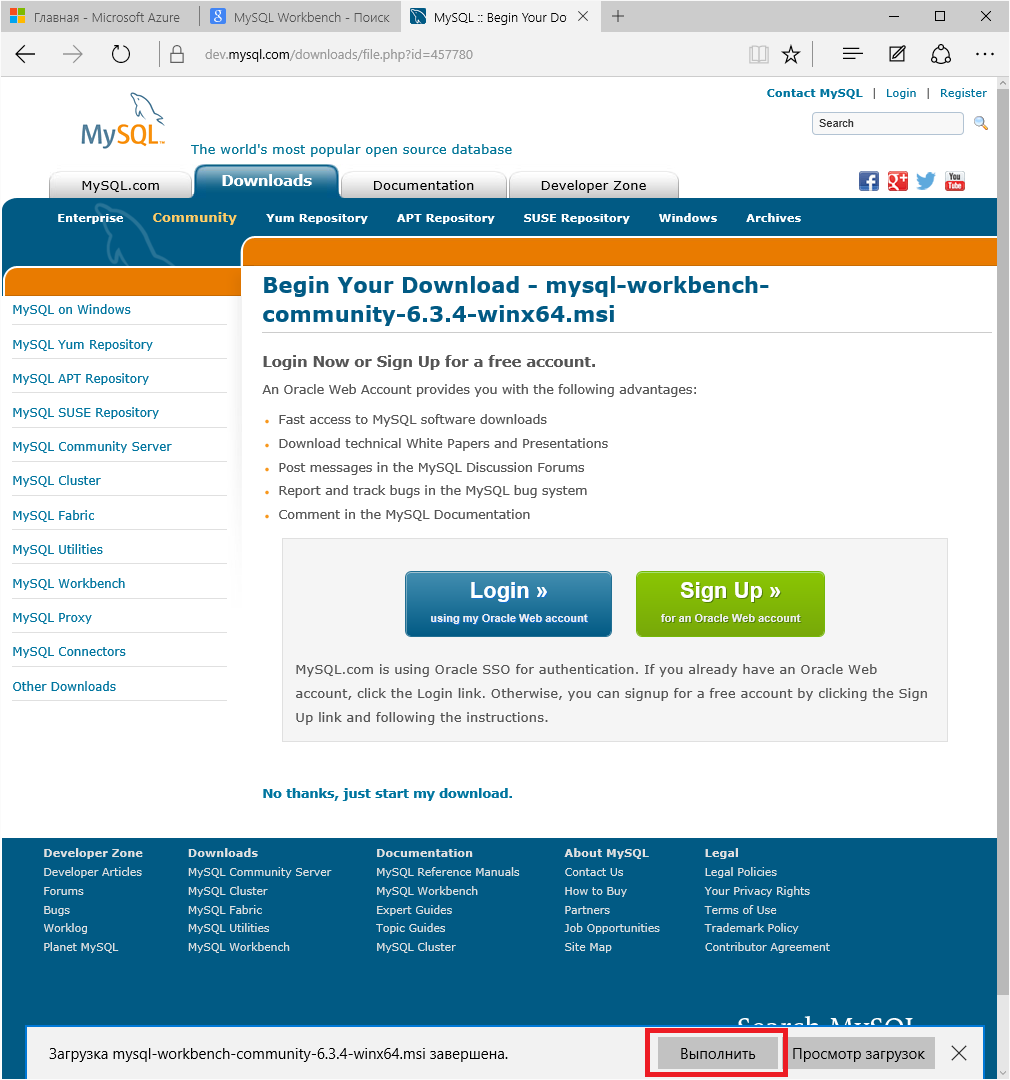
We start the installer:
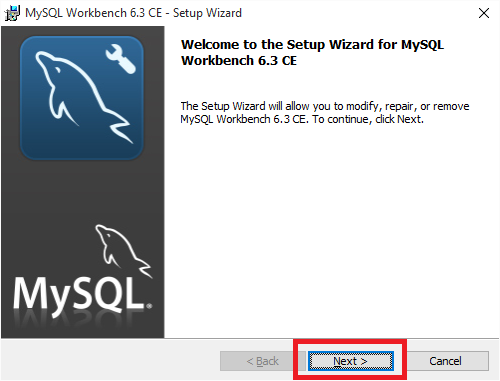
Click Next-Next, ticking along the lines:
When the installation is complete, start MySQL Workbench:
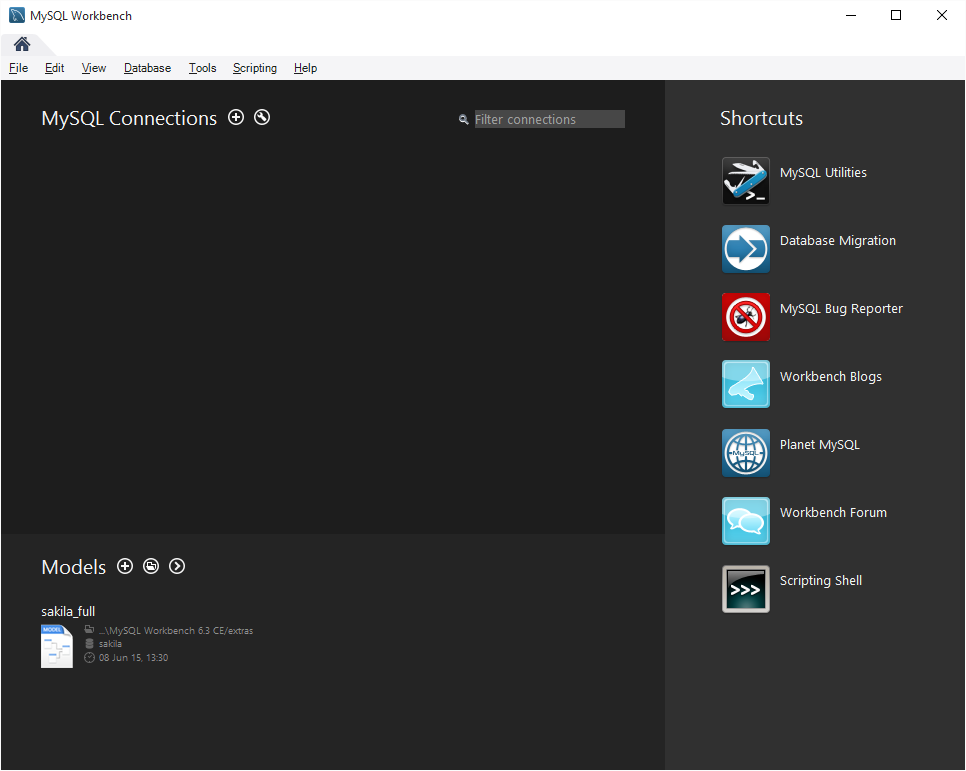
Since we will have to connect to MySQL more than once, create a connection template:
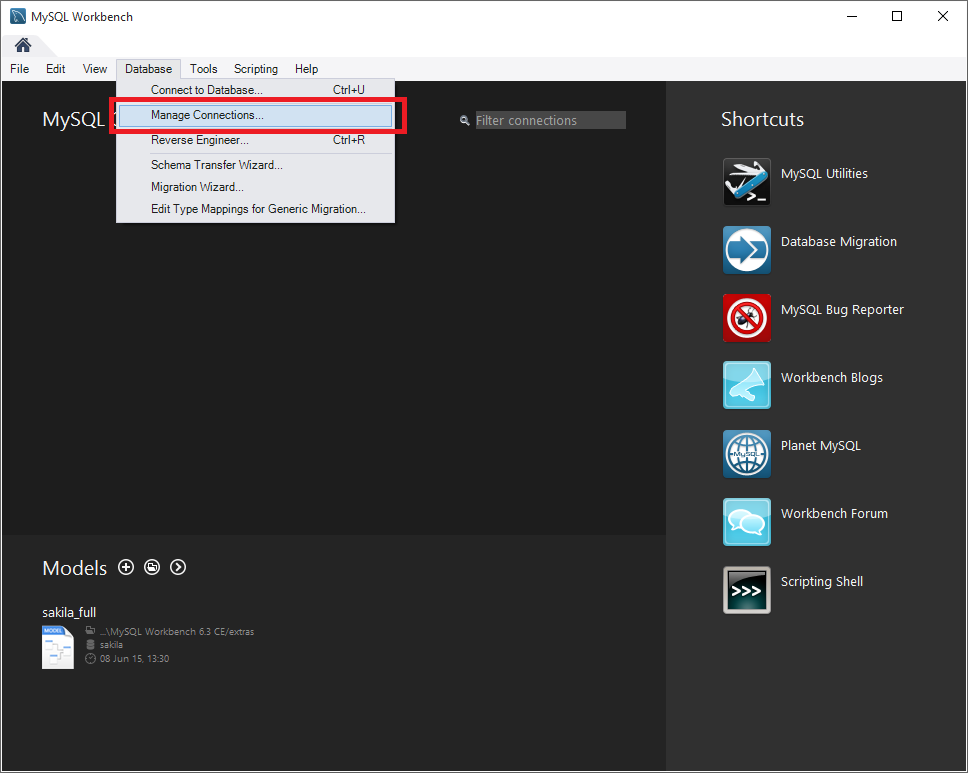
Create a new template:
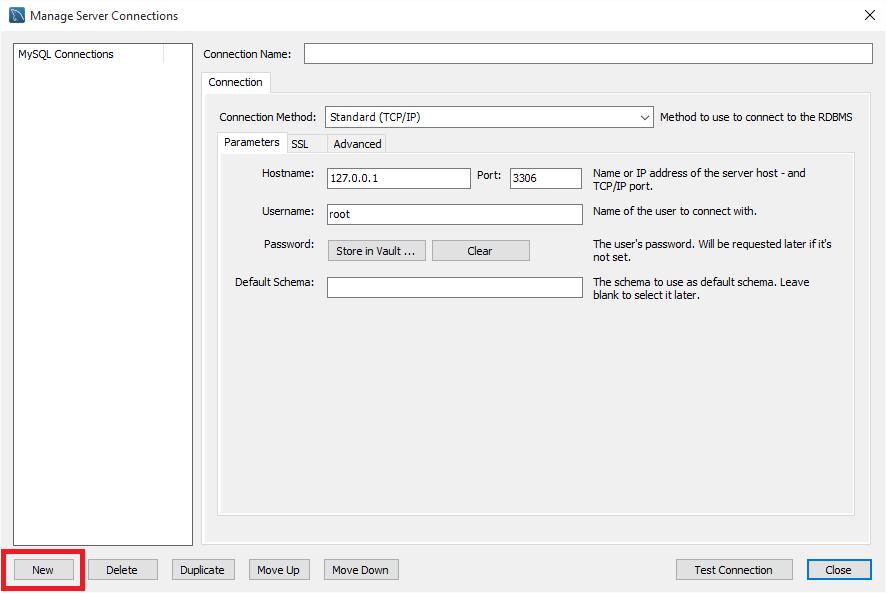
Go to connection parameters:
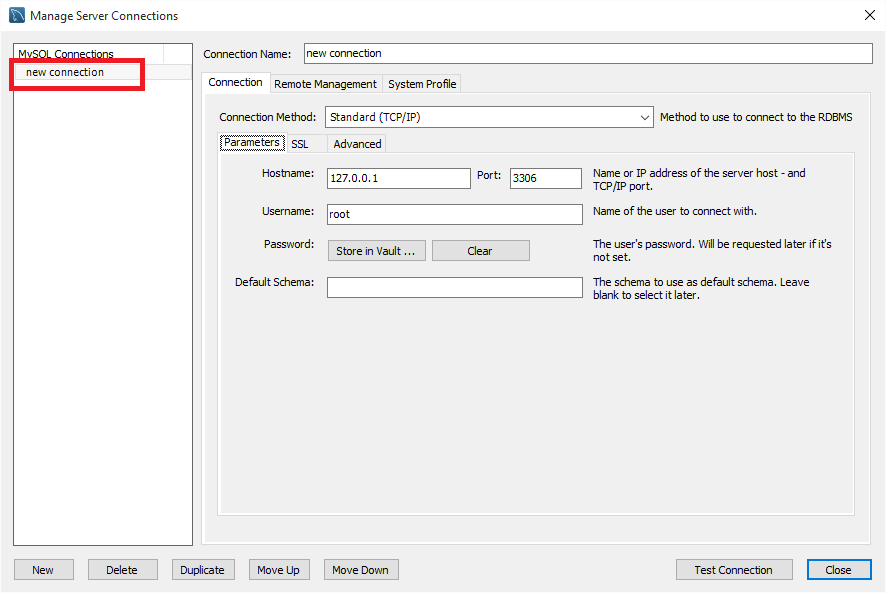
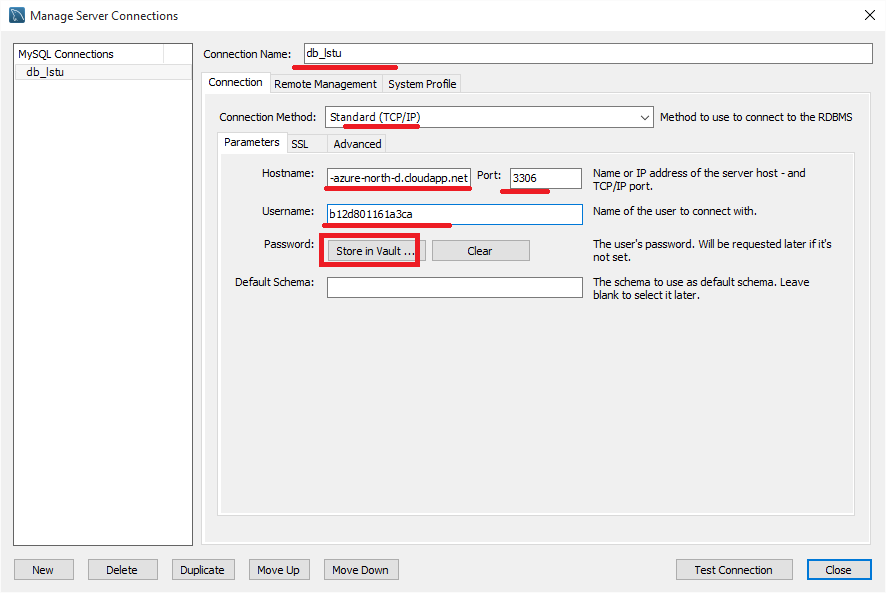
Now enter the data we saw on the Azure Management Console. And in order not to enter a password every time we connect, save it in the Workbench password store:
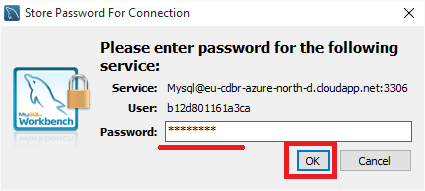
Enter the password:
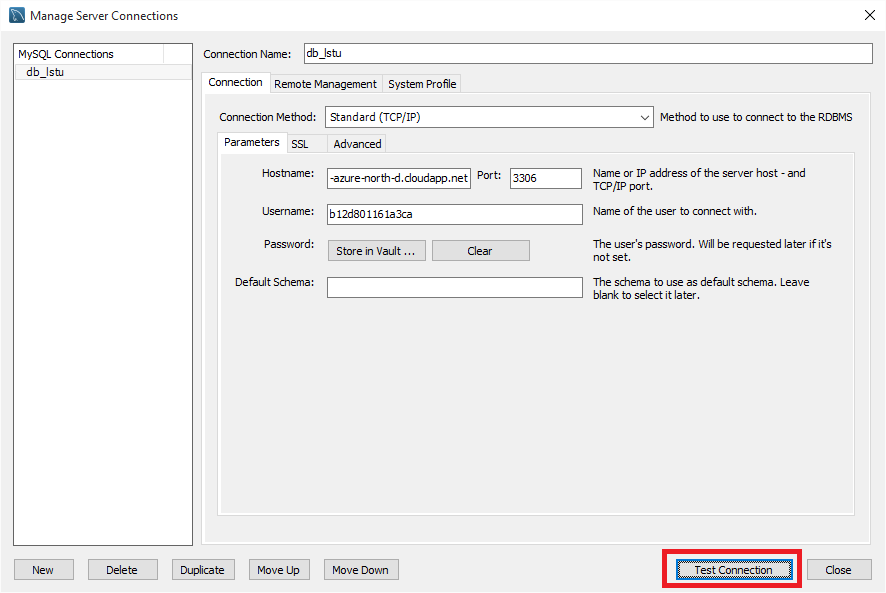
Now we can check if we entered everything correctly:
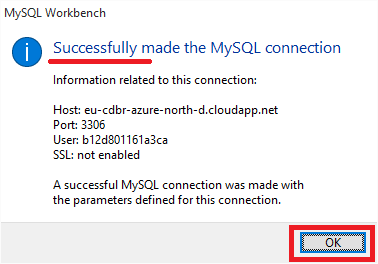
Great! Connection is established:
Now, when starting Workbench, we can connect to the database in one click:
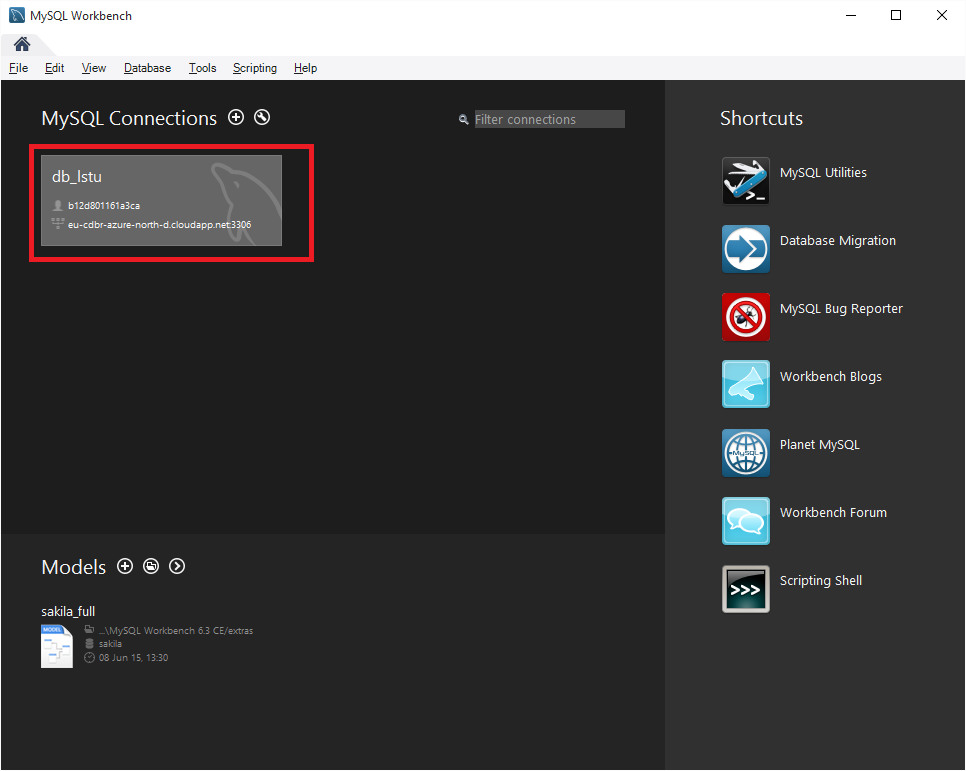
Wait a bit:
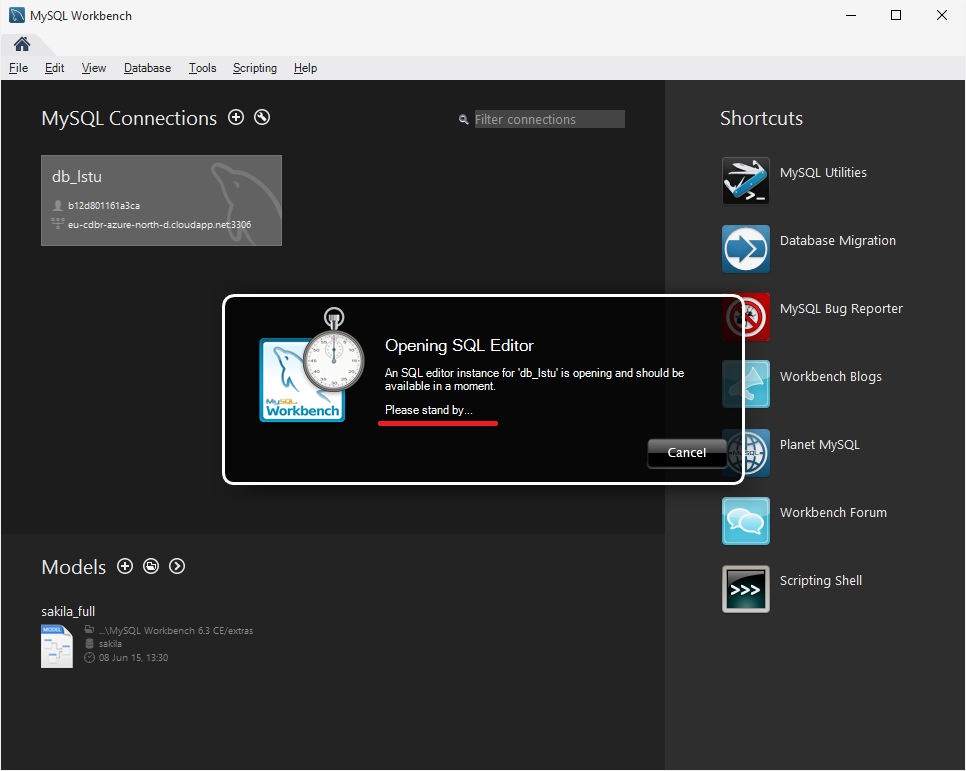
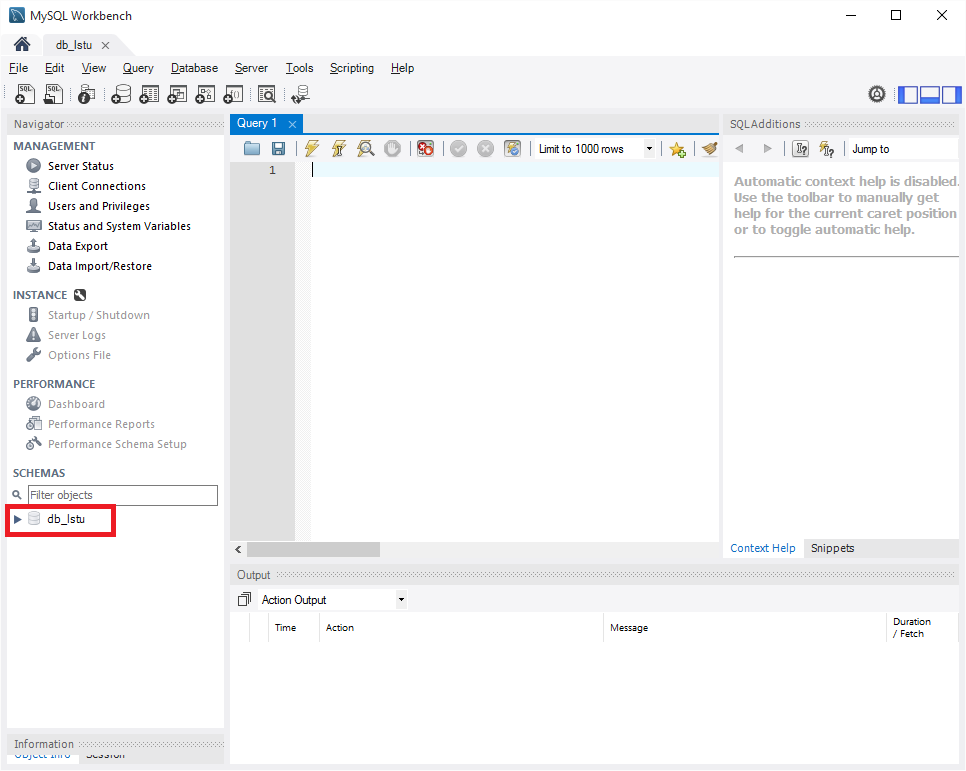
The classic database management environment will open. Let's move on to our database:
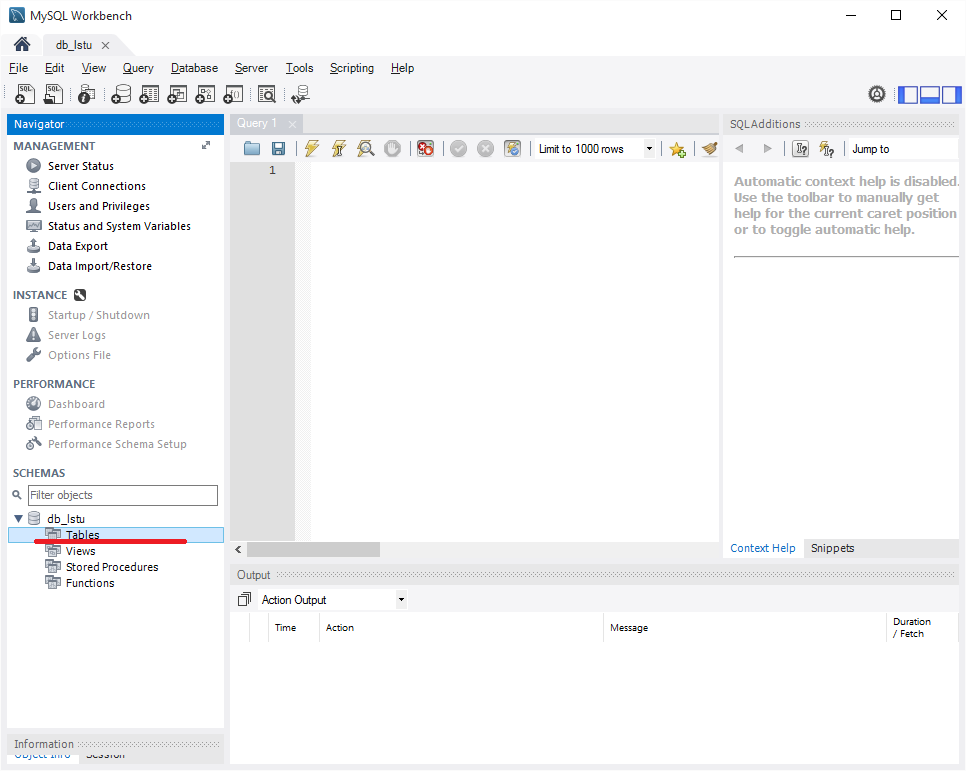
As you can see, the database is empty. You can create your first table using the SQL CREATE TABLE query in the Query window:
Click the desired link:
We get to the official download site. Scroll down:
Choose the bit depth of your operating system:
In my case, this is Windows 10 x64:
We will be kindly invited to join the community, but this is not necessary. We can immediately proceed to the download:
The download starts:
We start the installer:
Click Next-Next, ticking along the lines:
When the installation is complete, start MySQL Workbench:
Since we will have to connect to MySQL more than once, create a connection template:
Create a new template:
Go to connection parameters:
Now enter the data we saw on the Azure Management Console. And in order not to enter a password every time we connect, save it in the Workbench password store:
Enter the password:
Now we can check if we entered everything correctly:
Great! Connection is established:
Now, when starting Workbench, we can connect to the database in one click:
Wait a bit:
The classic database management environment will open. Let's move on to our database:
As you can see, the database is empty. You can create your first table using the SQL CREATE TABLE query in the Query window:
Step Three: Install MySQL Data Provider
Good. Now we need to install the correct Data Provider so that we can work with MySQL from .NET:
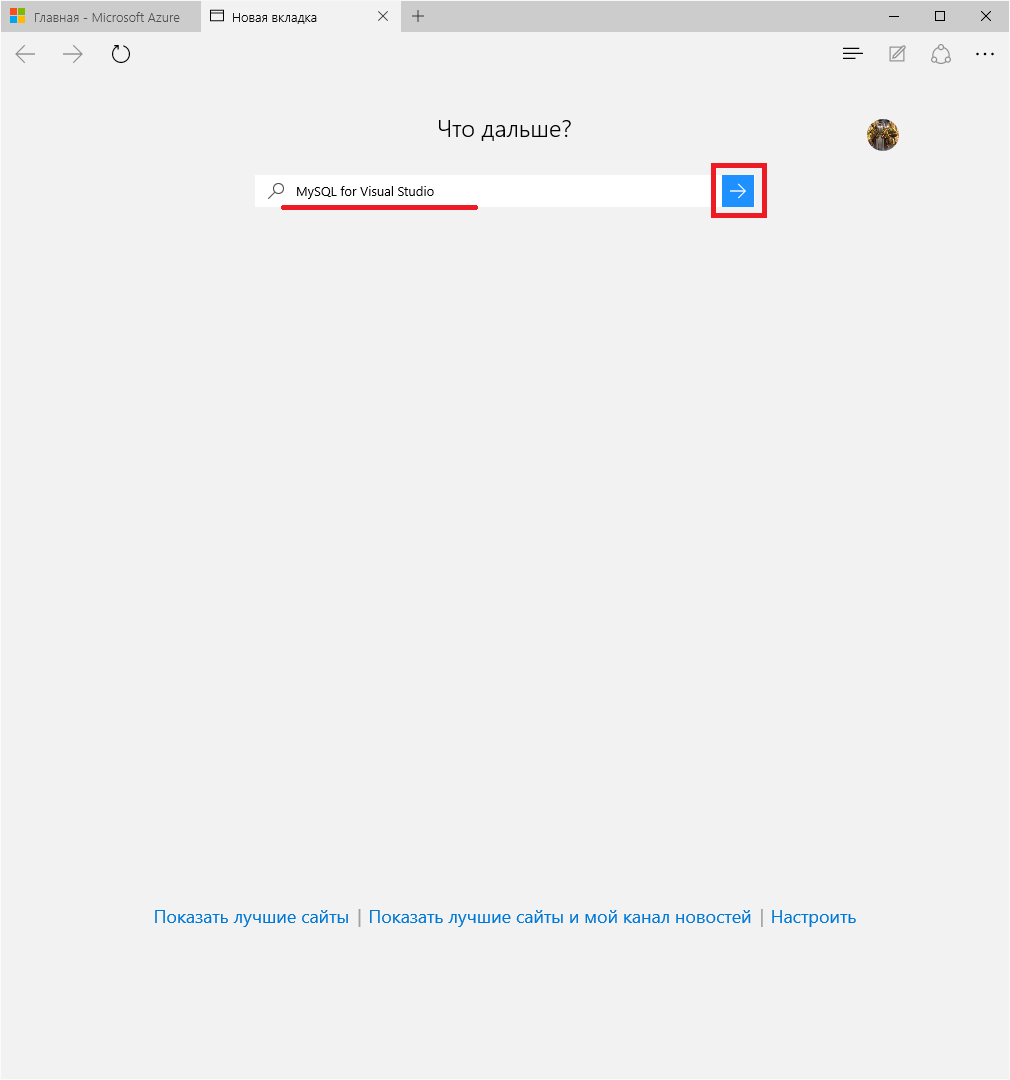
Click on the desired link:

Scroll down:
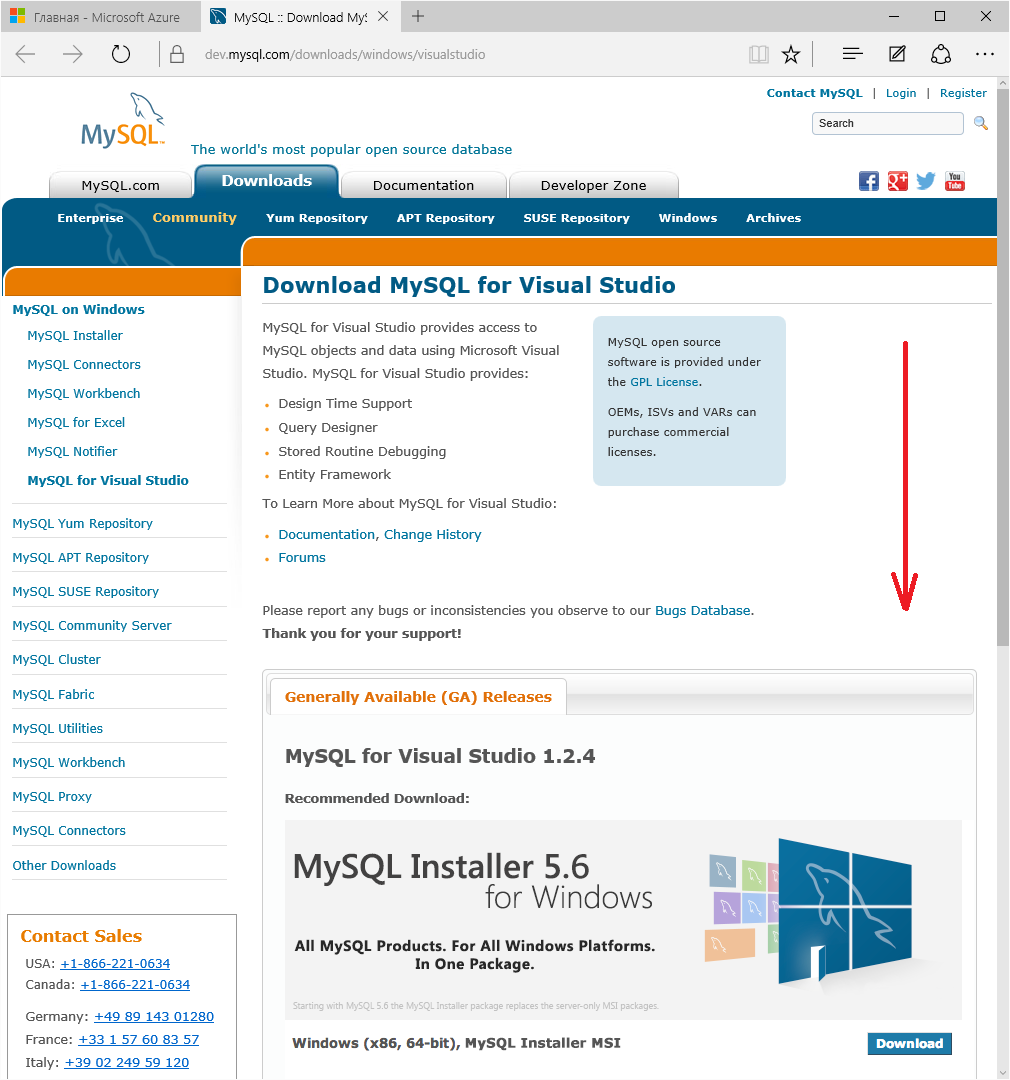
Choose the bitness of our operating system:
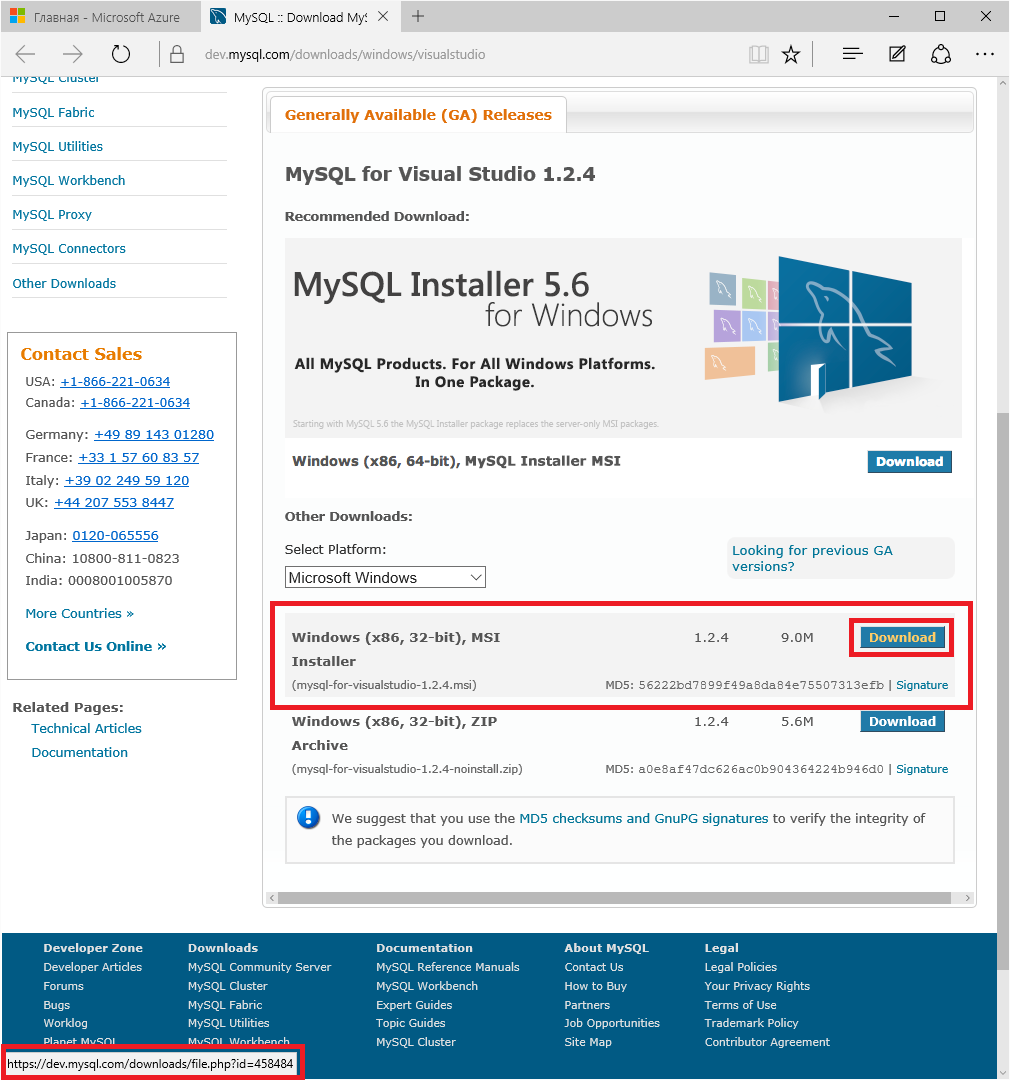
Go directly to the download: Download
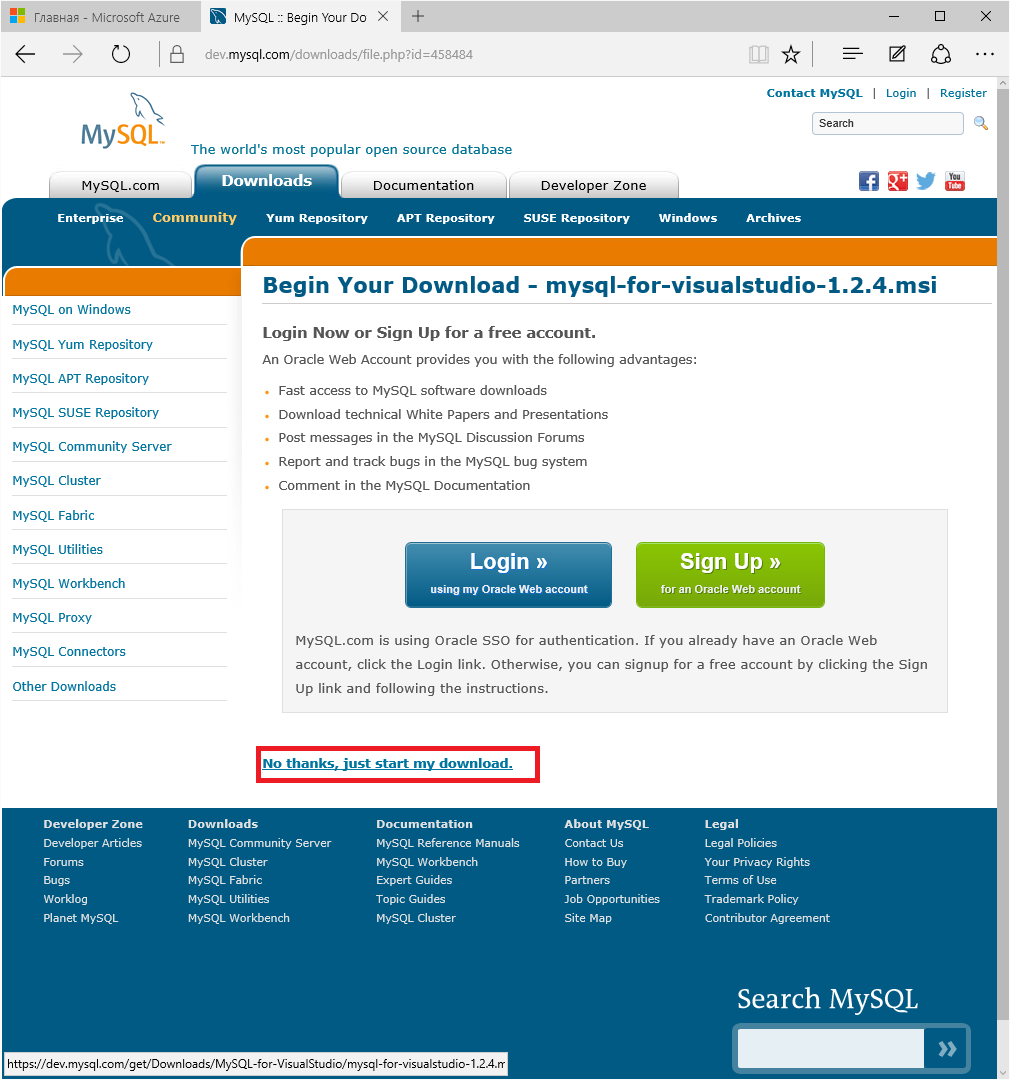
starts:
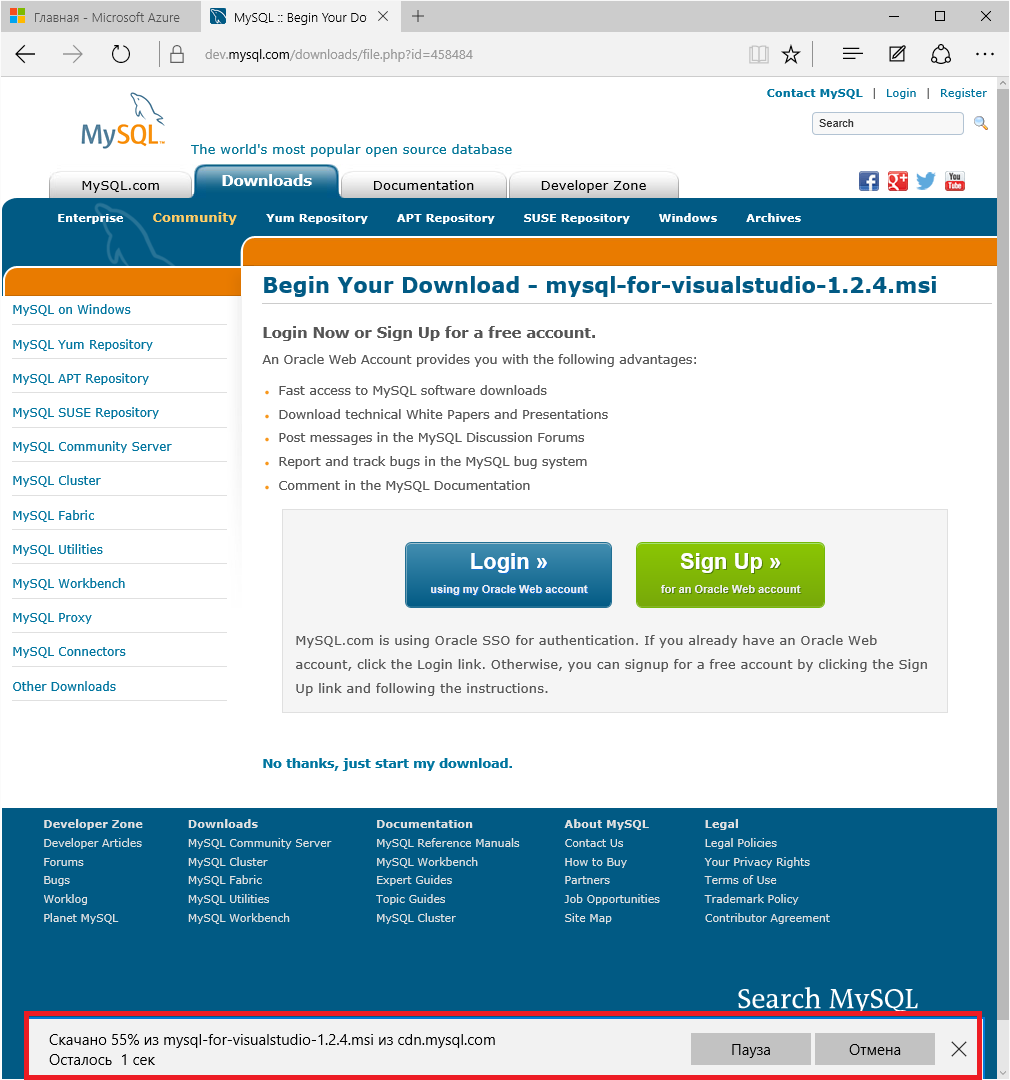
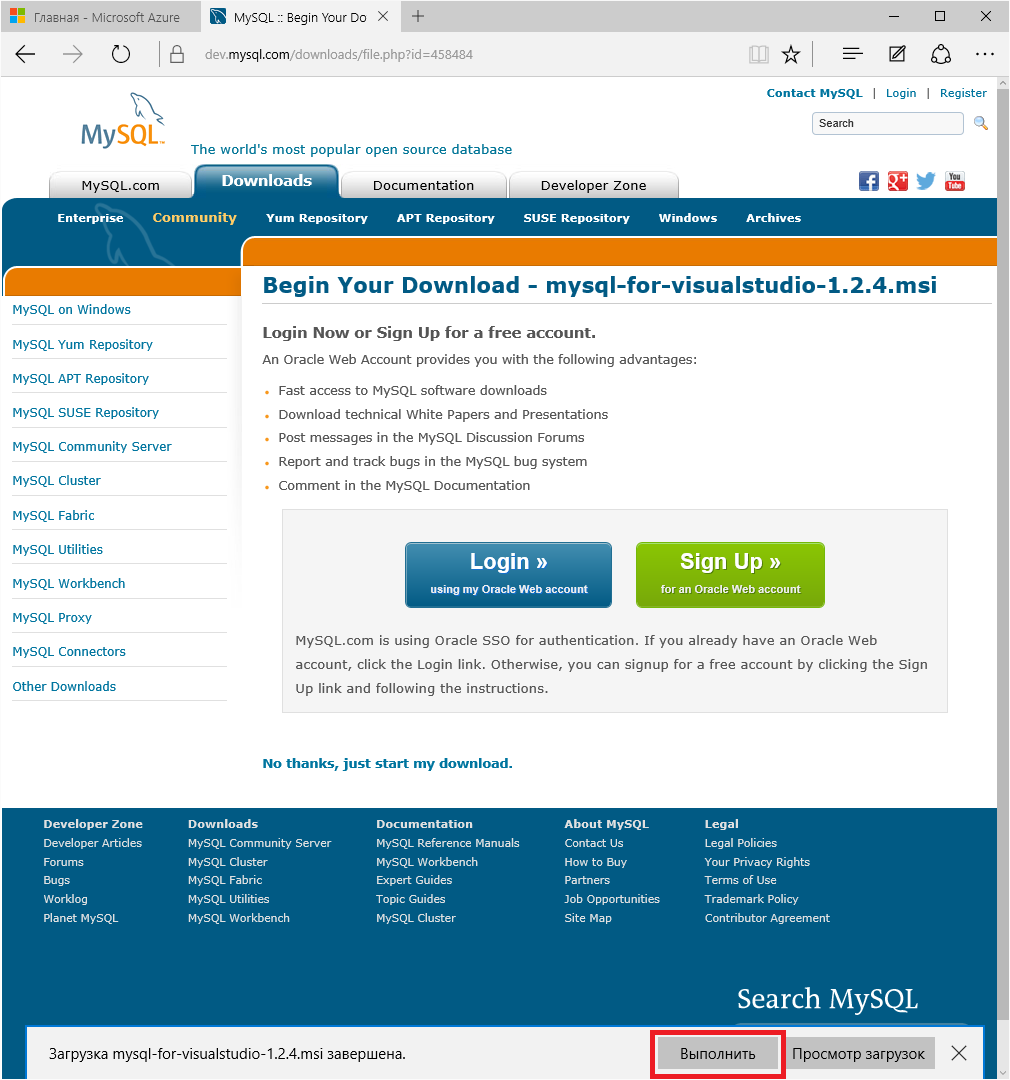
Run the installer:
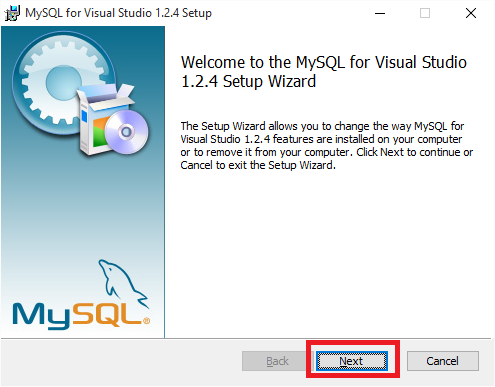
Click "Next, Next", by ticking along the way:
Click on the desired link:
Scroll down:
Choose the bitness of our operating system:
Go directly to the download: Download
starts:
Run the installer:
Click "Next, Next", by ticking along the way:
Step Four: Establish a MySQL Connection Through Server Browser in Visual Studio
Excellent! We are at the finish line. Launch Visual Studio:
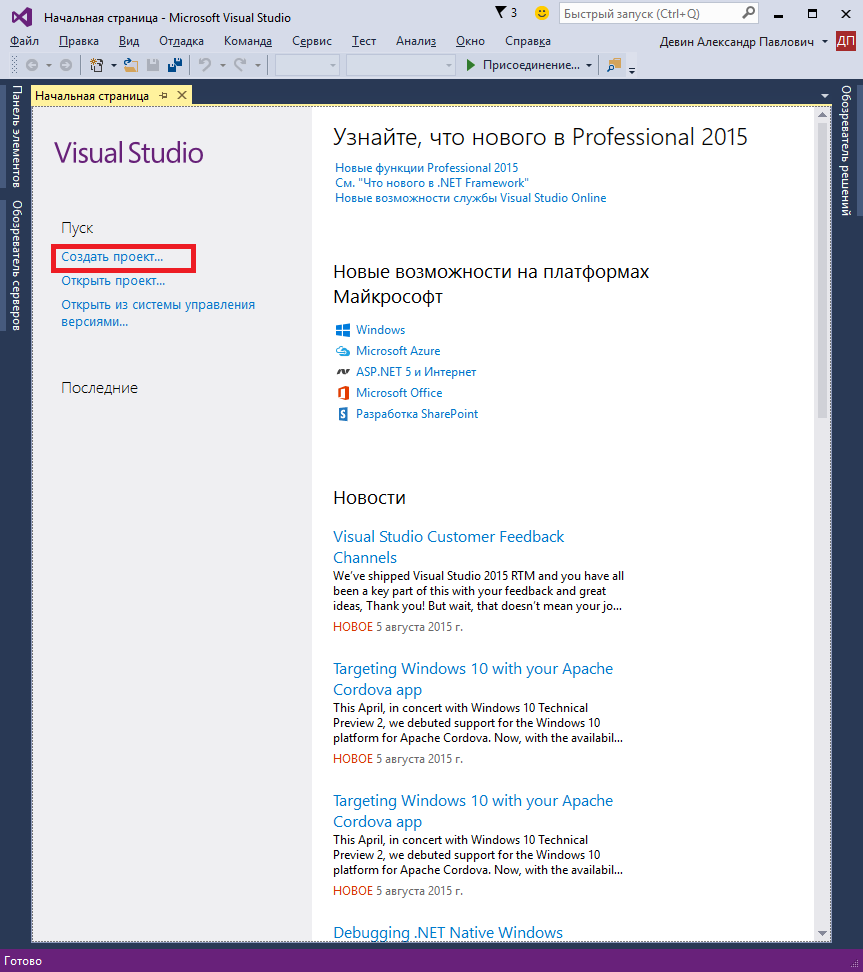
Create the simplest Web project:
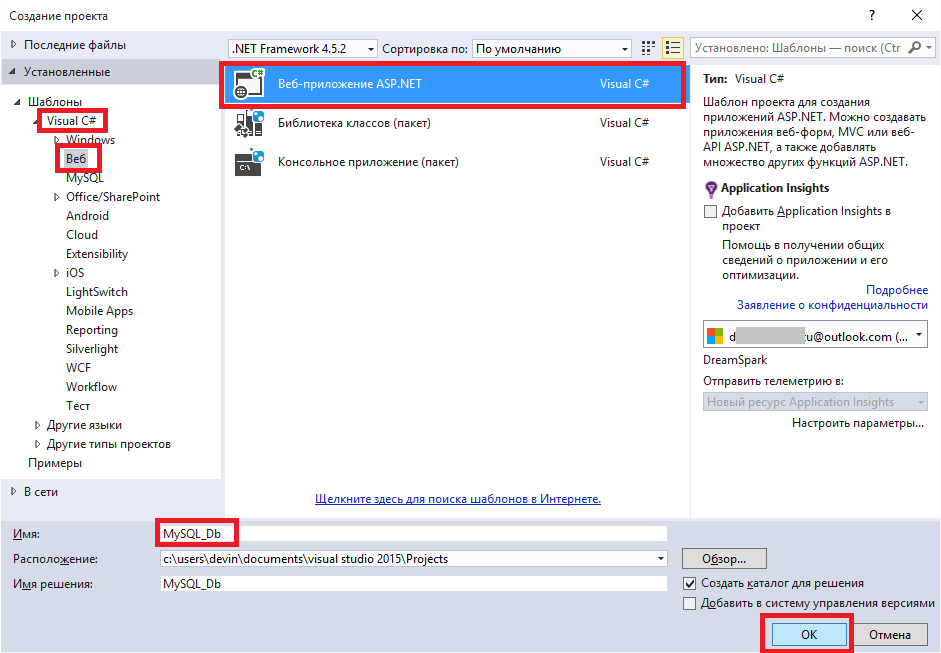
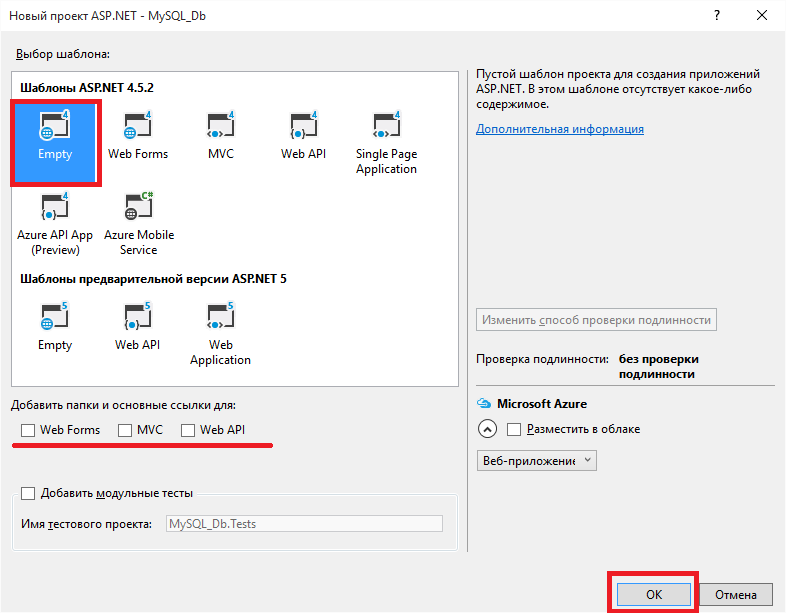
In my case, it will be an empty ASP.NET solution:
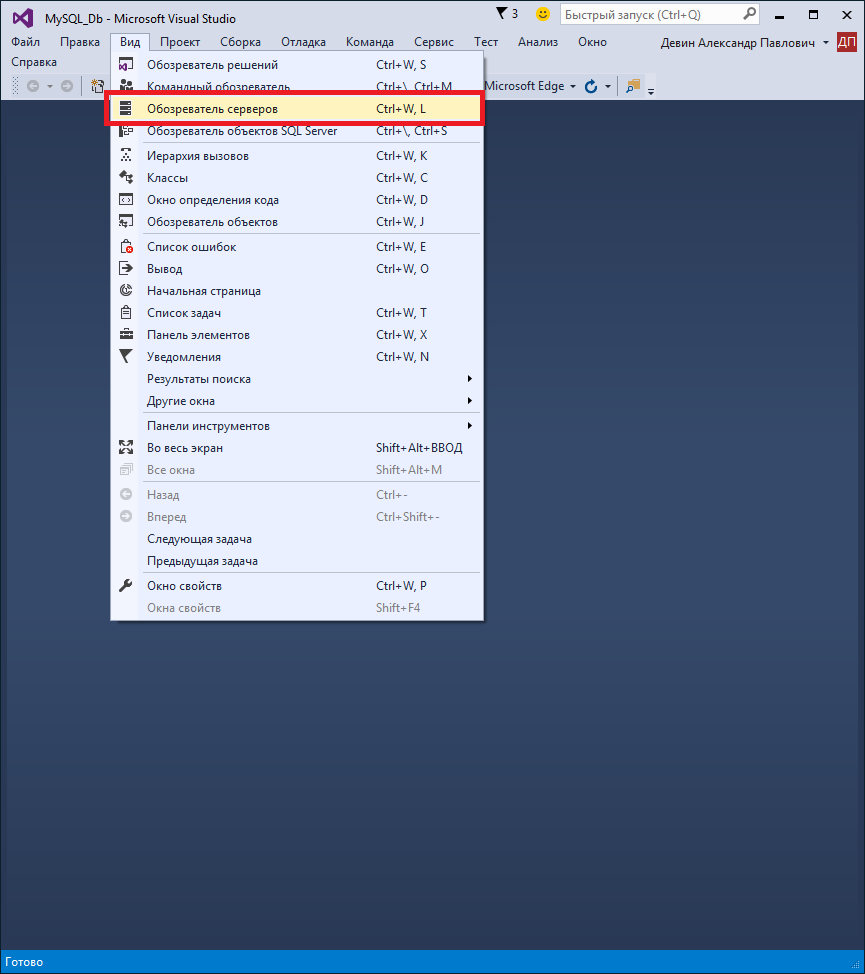
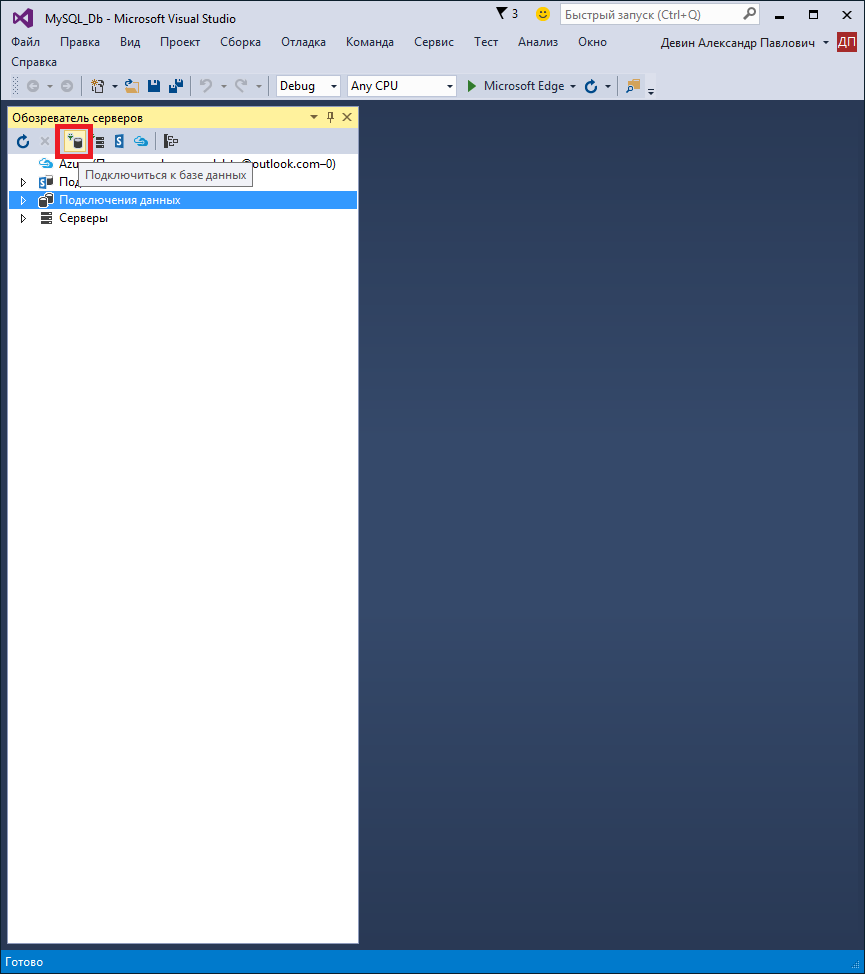
Now we will go to the “Server Browser” to establish a connection:
We
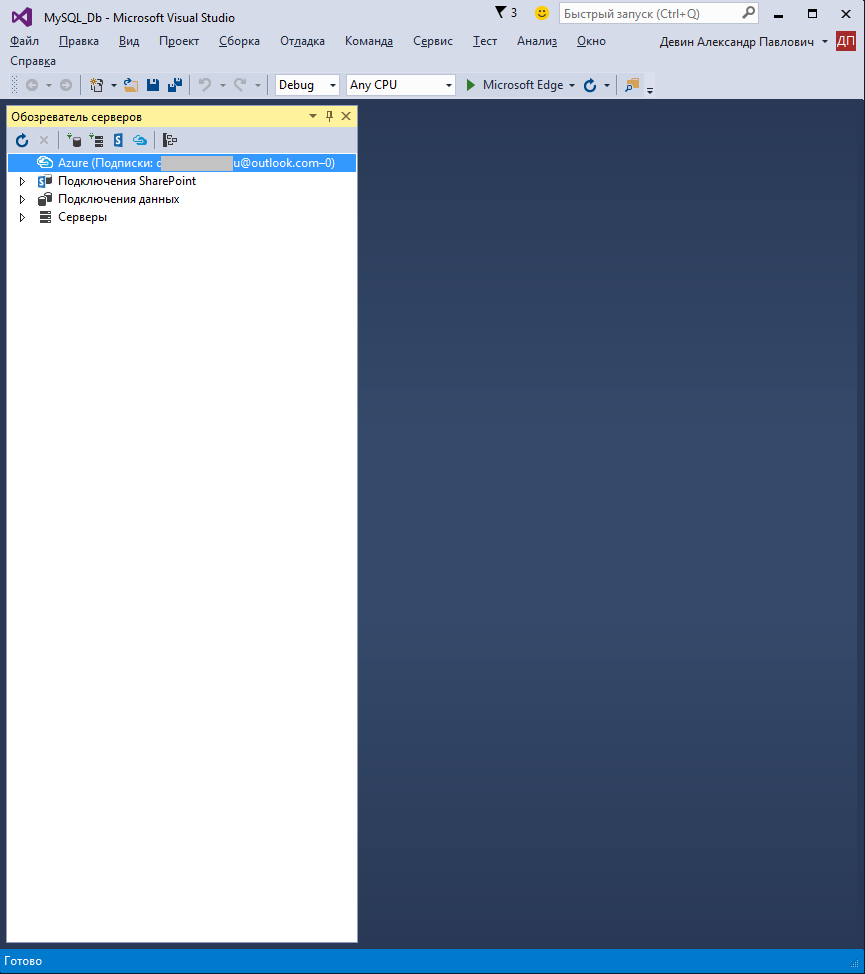
’ll see our subscription: Click on the “Connect to database” icon:
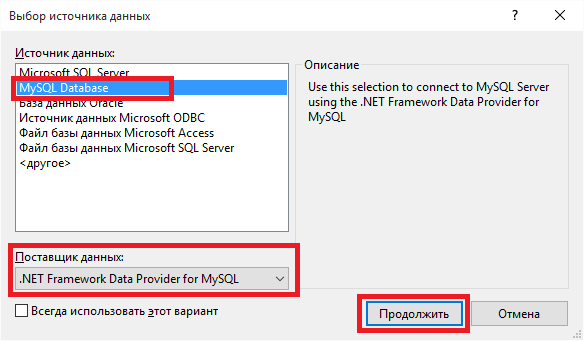
As you can see , now MySQL is available in the list of available providers:
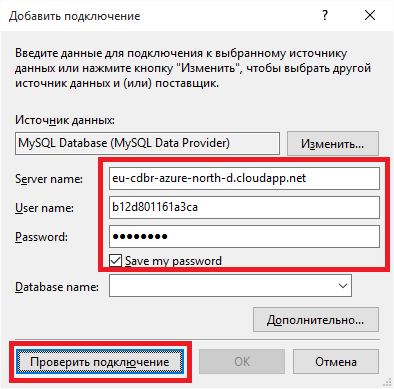
Enter our credentials from the Azure management console and check availability:
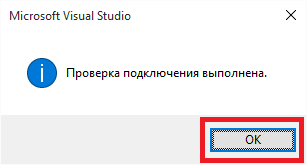
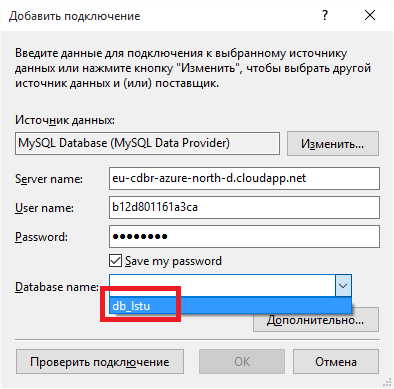
Now from the drop-down list we see our database:
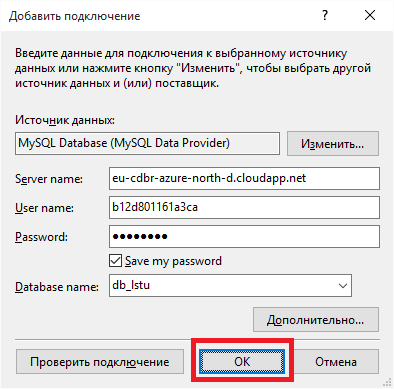
Establish a connection:
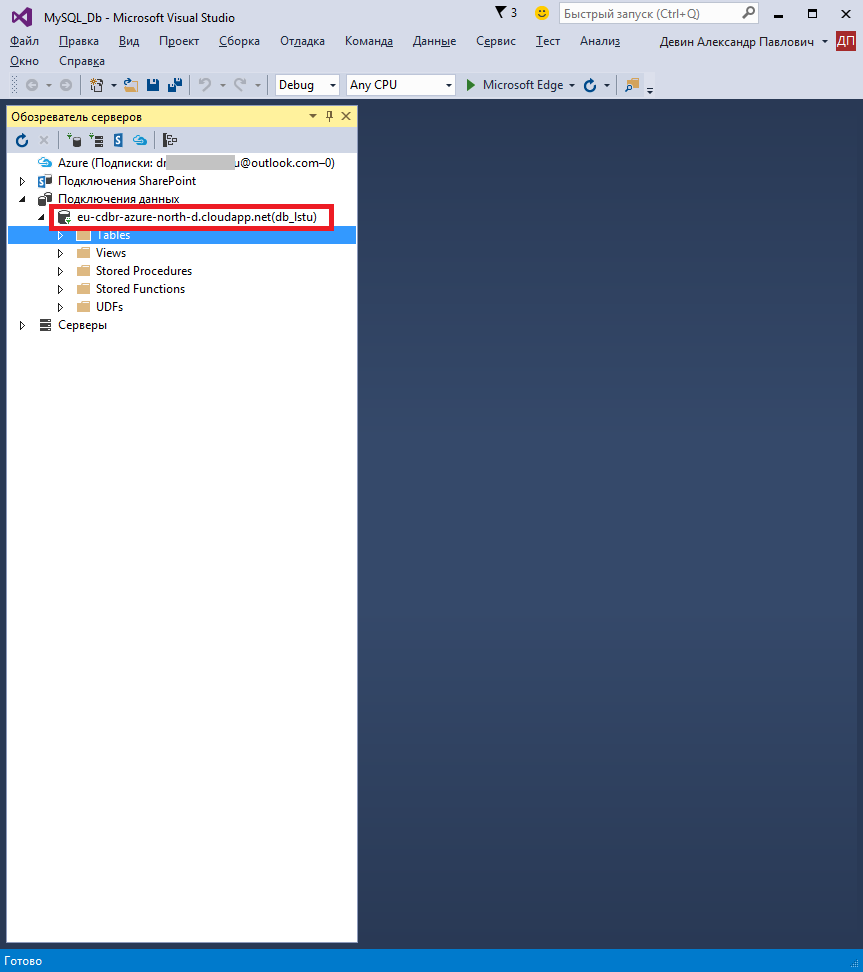
Great! Finally, we have full access to our MySQL database hosted in the Azure cloud from Visual Studio!
Create the simplest Web project:
In my case, it will be an empty ASP.NET solution:
Now we will go to the “Server Browser” to establish a connection:
We
’ll see our subscription: Click on the “Connect to database” icon:
As you can see , now MySQL is available in the list of available providers:
Enter our credentials from the Azure management console and check availability:
Now from the drop-down list we see our database:
Establish a connection:
Great! Finally, we have full access to our MySQL database hosted in the Azure cloud from Visual Studio!
As you can see, the whole procedure is quite simple and transparent. I hope this article will be useful for beginners who are interested in web development or are planning to create their first backend for a mobile application.
Good coding and interesting projects!
UPD: Added spoilers, I hope so the abundance of images will cause less discomfort when scrolling.









