 October 6, 2015 at 09:45
Export Terrain from WorldMachin to Unity3D

This article is a translation of the original instruction: “Terrain export from world machine to unity”, adapted for a modern editor .
World Machine can serve as a great terrain generator for Unity. Unity has native texture and splatmaps support. You can create and use several layers of terrain texture at the same time. Here is a simple working code to import into Unity locality from World Machine. Please note that although this method works for the main terrain in unity, many advanced users can create their own terrain shaders, which may require a different execution technique.
What you need to do to export to World Machine

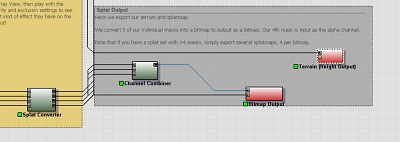 Set Height Output in your world. Remember this value .
- Create texture masks for the landscape based on any criteria (using: Height Selectors, Slope Selectors, Erosion masks and others).
- Use Splat Converter to control and maintain the weight of your splatmaps . You can also use Splat Converter, included in "New Examples for WM 2.3 \ Techniques"
- To convert individual maps in a bitmap, link them into a channel converter, which will produce RGB images for the first three channels. The fourth will be used as the alpha channel of the bitmap. The wiring of the received cards in one or more raster output devices create a splatmap of 4 channels. If you use more than 4 textures, just create some raster outputs and adjust the Splat converter accordingly.
- Select the format in File Output, which will be used to export from WM . In this case, you must use the RAW16 format.
- Build your world and export all files. Select Export Terrain files from the Files menu , which is the central location for such commands.
What you need to do to import into Unity3D
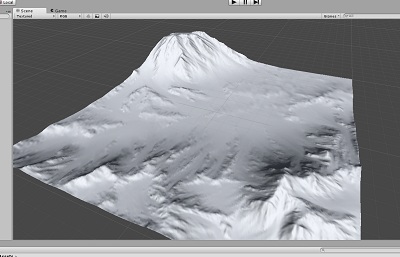 In your project, in the GameObject menu, select 3D Object -> Terrain .
- Select the Terrain object and component and open the Terrain Settings section . It is recommended to edit the values of Detail Resolutoin , Control Texture Resolution and Base Texture Resolution .
- * If you intend to import the landscape in RAW16 format, it is better to first place this file in your project (you can do this for RAW8).
- Click the Import Raw button .
- In the window that opens, find and select the landscape that you want to import. If you are importing a file in RAW16 format, then select the “All files” file type .
- In the menu that appears, under Depth, select “bit16”, if you import the landscape in RAW16 format, for the RAW8 format, select “bit8”. Also make sure that the Byte order value is set to “Windows” and the Width / Height values of the height map correspond to the values of the landscape you import.
- Change the Terrain Size to the values from the imported area (X corresponds to the Width value of the height map, Z to Height, and you have to remember the value of Y yourself) so that the recreated terrain matches the one you exported from WM .
 Click the Import button .
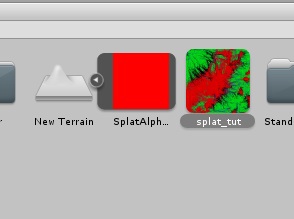
- Assign the textures that you want to use in your area, as usual. Then make sure you save the scene. You should see a red splatmap for the terrain that appears in the asset window.
- Import (just drag and drop into the unity window) splatmap created and exported to WM earlier.
- Go to the inspector for the imported splatmap and change the following parameters:
Texture Type: Advanced
Read / Write Enabled: checked
Format: ARGB 32 bit
Then click Apply . - Download and import the script below into your project and place it in the “YourProject / Assets / Editor folder”: download .
 From the Terrain menu, select “Replace Splatmap”. If you do not see this label, it means that the ReplaceSplatmap.js script was not correctly located in the project folder. Drag the built-in splatmap inside the landscape to the first “Splatmap” field and the imported splatmap to the “New” field. Make sure that Flip Vertical matches the orientation of your area.
- If you are an indie developer, you can take a pie from the shelf: you are done!

PS: That's all for now. Perhaps there will still be a video of the whole process.









