September 28, 2015 at 10:13
We are developing the infrastructure for development in the InfoboxCloud cloud. Part 1: Launch Gitlab
In this series of articles, we will look at the process of deploying infrastructure for development in the InfoboxCloud cloud. For convenient deployment of the application stack, we will use Docker.
In the first article, we ’ll deploy Gitlab , which includes:
and much more.
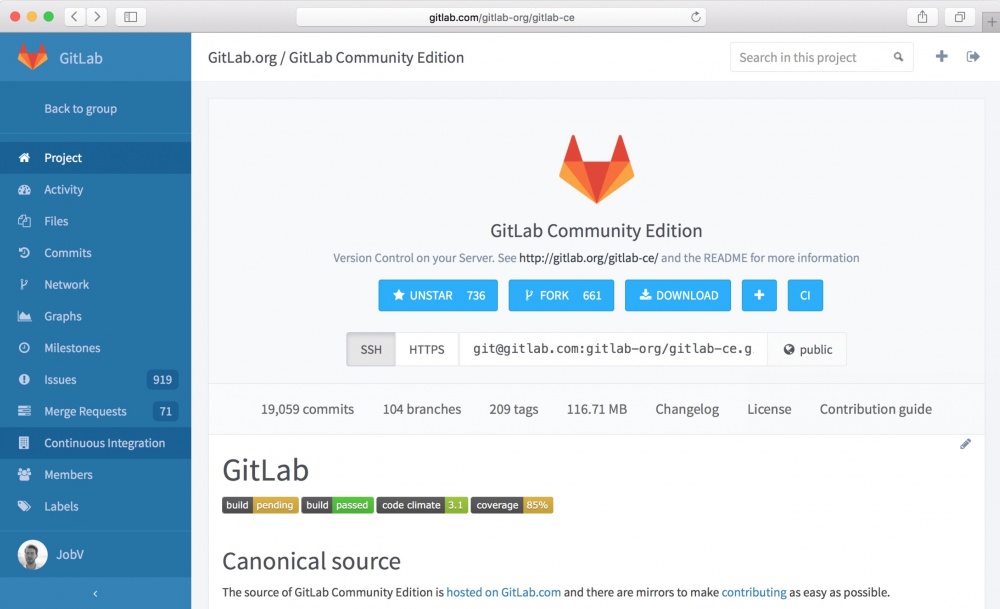
You can create an unlimited number of free repositories, configure access and security policies. If you deploy a VPN before Gitlab , you can not provide a public ip server with Gitlab and work with it by connecting to the cloud’s internal network via VPN from your corporate network.
1. Create a server with CentOS 7 to install Docker in InfoboxCloud . For Docker to work, it is precisely a virtual machine that is needed now, so when creating a server, be sure to check the box “Allow OS kernel control” .
After creating the server with CentOS 7, connect to it via SSH .
We have prepared a script that will allow you to install Docker and useful utilities for working with Docker on such a server. The necessary settings will be made automatically.
Run the command to install Docker and Compose:
Docker and compose will be installed.
You can create an image with docker installed in the control panel by clicking on the server and then “Create Image”. After that, you can create new servers from the image with Docker and not perform this step again.
For comfortable Gitlab operation, 2 CPU cores and 2Gb Ram from 100 to 500 users are recommended.
If you need to save as much as possible during testing, you can give a Gitlab server 1 CPU core 1 GHz, but there should be at least 2 GB of memory.
If you need to work with a large number of users:
CPU
RAM
If you need more users, you can run Gitlab on multiple servers .
We have already prepared the files for the quick deployment of Gitlab latest version. Gitlab will be deployed to the docker container. Before that, we will update the official image with Gitlab: we will receive all updates on the OS including the latest version of Gitlab (the official image is updated with a delay, we will have the latest stable version earlier).
Install git with the command:
Go to the user directory.
Download the necessary files to deploy gitlab.
Now go to the directory with the files for deployment.
The following files and directories are present in the directory:
The Dockerfile contains:
Let's look at the purpose of the commands in more detail:
The docker-compose.yml contains:
The first line indicates the name of the container that will result. build indicates the path where the Dockerfile is located to build the image. In the ports section, specify which host ports to forward to which container ports. In the volumes section, specify which host folders to forward to the container in the appropriate folders. The restart: always policy means that the container will start automatically when the system boots and when processes fall in it.
We have already prepared all this and you just need to collect the image with the team:
Then deploy the container with the command:
If you need to put a balancer in front of Gitlab - an example of creating related containers with a balancer can be seen in this article . It is recommended that you enable traffic encryption on the NGINX balancer side to securely log into Gitlab.
If you do not know how to edit the file, see the section "How to edit a text file" for details in this article . If you are interested in dealing with Docker Compose - details are here .
Now you can login to gitlab at:
Gitlab has been successfully installed.

Login data by default:
At the first login, you will be prompted to set a new password for the login.
After changing the password and logging in to Gitlab, you will see a start page.

Direct the A-record of the domain with which gitlab will be used to the dedicated ip-address of the host in the cloud. The highlighted address can be viewed in the control panel in the "Cloud Infrastructure" section.

The main gitlab settings should be specified on the host in the ~ / gitlab / config / gitlab.rb file .
If the lines with the parameters that we will indicate are commented out (# is set before the parameter) - # should be removed. This should be done only for those parameters that are set.
First, back up the configuration file. It is recommended to do this every time the parameters are changed:
In the parameter, specify the domain directed to the server through which Gitlab will be available.

This parameter specifies the time zone.
This section shows the working parameters in gitlab.rb for a domain bound to Yandex Mail . Settings for Gmail and Mailgun are listed here .
Paste these parameters into the gitlab.rb file , replacing [email protected] with your Yandex address for the domain. Replace your mail password here with your mail password. Instead of plugndo.com, insert the name of your mail domain. Leave the remaining settings unchanged.
After saving the changes, reload the container with gitlab command:
, where instead of CONTAINER_ID, specify the unique number of your container with gitlab. It can be viewed using the command:
To check the correctness of mail settings, create a user in Gitlab, if everything is done correctly, the user will receive an email link to set a password.

After applying the instructions in the article, you received the latest version of Gitlab on your own cloud server. You can begin to configure the system for your projects. Thanks to triple replication in the distributed fault-tolerant storage system in InfoboxCloud you can not worry about the safety of your data.
Send us your email address and full name at [email protected] , in response you will receive data for access to the control panel. You can test the new cloud region for 14 days, then you can go to the full version of the cloud.
If you find a mistake in the article or you have questions / comments, write to us in the PM or by mail . If you cannot leave comments on Habré, write in InfoboxCloud Community .
Productive development!
In the first article, we ’ll deploy Gitlab , which includes:
- web interface for git source control system, which is most similar to github
- convenient viewing of user activities
- file browser
- Wiki
- Code Review Features
- bug tracker
- the ability to create code snippets
- the ability to insert web hooks
- build server
and much more.
You can create an unlimited number of free repositories, configure access and security policies. If you deploy a VPN before Gitlab , you can not provide a public ip server with Gitlab and work with it by connecting to the cloud’s internal network via VPN from your corporate network.
Environment preparation
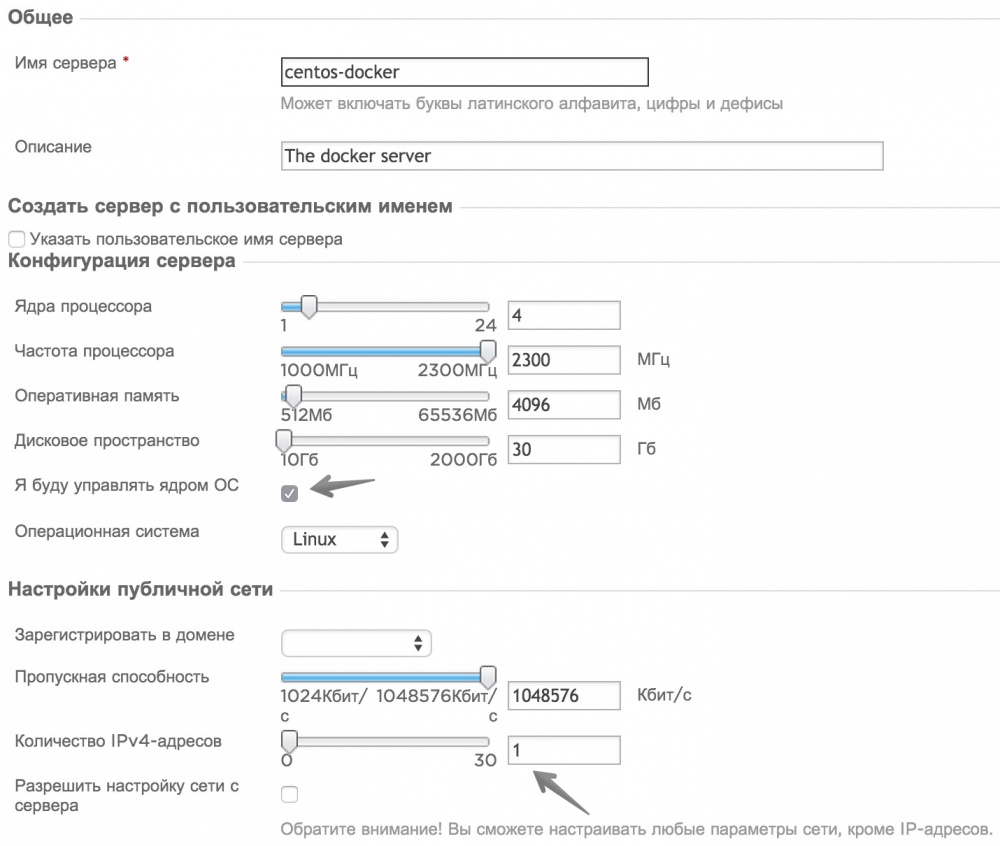
1. Create a server with CentOS 7 to install Docker in InfoboxCloud . For Docker to work, it is precisely a virtual machine that is needed now, so when creating a server, be sure to check the box “Allow OS kernel control” .
How to create a server in InfoboxCloud for Docker
If you do not have access to InfoboxCloud yet - order it .
After registration, you will receive data to access the control panel by email. Enter the control panel at: https://panel.infobox.ru
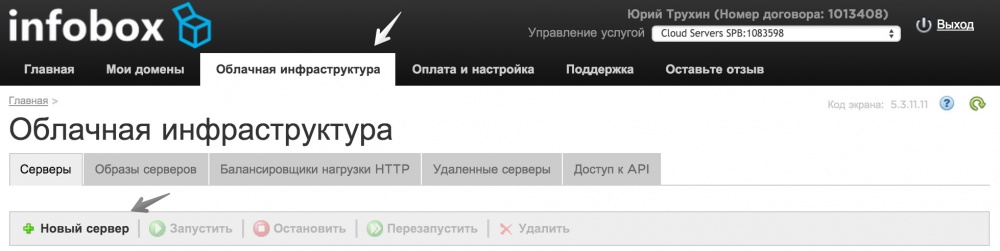
In the "Cloud infrastructure" section of your subscription, click "New Server" (if necessary, the subscription changes in the upper right corner in the drop-down menu).
Set the necessary server parameters. Be sure to give the server 1 public IP address and check the box “Allow OS kernel control” , as shown in the screenshot below.
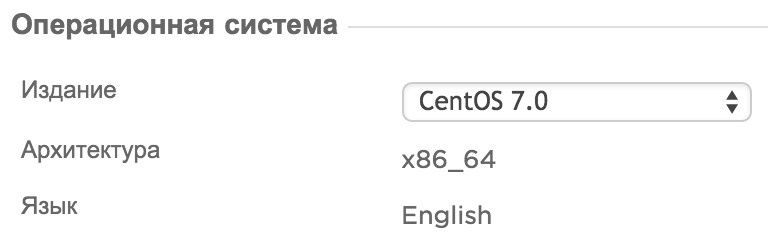
In the list of available operating systems, select CentOS 7 and complete the server creation.
After that, the data for accessing the server will be sent to you by e-mail.
After registration, you will receive data to access the control panel by email. Enter the control panel at: https://panel.infobox.ru
In the "Cloud infrastructure" section of your subscription, click "New Server" (if necessary, the subscription changes in the upper right corner in the drop-down menu).
Set the necessary server parameters. Be sure to give the server 1 public IP address and check the box “Allow OS kernel control” , as shown in the screenshot below.
In the list of available operating systems, select CentOS 7 and complete the server creation.
After that, the data for accessing the server will be sent to you by e-mail.
After creating the server with CentOS 7, connect to it via SSH .
We have prepared a script that will allow you to install Docker and useful utilities for working with Docker on such a server. The necessary settings will be made automatically.
Run the command to install Docker and Compose:
bash <(curl -s http://repository.sandbox.infoboxcloud.ru/scripts/docker/centos7/install.sh)
Docker and compose will be installed.
You can create an image with docker installed in the control panel by clicking on the server and then “Create Image”. After that, you can create new servers from the image with Docker and not perform this step again.
Cloud Server System Requirements
For comfortable Gitlab operation, 2 CPU cores and 2Gb Ram from 100 to 500 users are recommended.
If you need to save as much as possible during testing, you can give a Gitlab server 1 CPU core 1 GHz, but there should be at least 2 GB of memory.
If you need to work with a large number of users:
CPU
- 4 CPU cores - up to 2,000 users
- 8 CPU cores - up to 5,000 users
- 16 CPU cores - up to 10,000 users
- 24 CPU cores - up to 15,000 users
RAM
- 4GB RAM - up to 1,000 users
- 8GB RAM - up to 2,000 users
- 16GB RAM - up to 4,000 users
- 32GB RAM - up to 8,000 users
- 64GB RAM - 16,000 Users
If you need more users, you can run Gitlab on multiple servers .
Install Gitlab
We have already prepared the files for the quick deployment of Gitlab latest version. Gitlab will be deployed to the docker container. Before that, we will update the official image with Gitlab: we will receive all updates on the OS including the latest version of Gitlab (the official image is updated with a delay, we will have the latest stable version earlier).
Install git with the command:
yum install -y git
Go to the user directory.
cd ~
Download the necessary files to deploy gitlab.
git clone https://github.com/trukhinyuri/gitlab-docker.git
Now go to the directory with the files for deployment.
cd ~/gitlab-docker
The following files and directories are present in the directory:
- Dockerfile : describes the actions that will be performed on the official gitlab image;
- docker-compose.yml describes how to deploy the resulting image, which ports to forward, which folders of the container to mount to the host;
- config folder : gitlab will store configuration files in this folder
- data folder : in this folder gitlab will store data files
- logs folder : gitlab will store logs in this folder
The Dockerfile contains:
FROM gitlab/gitlab-ce:latest
MAINTAINER Yuri Trukhin
ENV REFRESHED_AT 2015.09.27.004
ENV GITLAB_SHELL_SSH_PORT 8005
RUN apt-get update
RUN apt-get -y upgrade
EXPOSE 80
EXPOSE 443
EXPOSE 22
Let's look at the purpose of the commands in more detail:
- FROM indicates from which image which version we will build the container. In this case, we use the official Gitlab Community Edition image of the latest version.
- ENV sets environment variables. ENV REFRESHED_AT 2015.09.27.004 - the date the image was built. If it is necessary to update the container, change the date, rebuild the image (as it is done below) and expand it. ENV GITLAB_SHELL_SSH_PORT 8005 tells Gitlab that on the host SSH will be located on port 8005 and you need to work with this port (and take this into account in the web interface).
- RUN runs commands inside the container. We update the OS.
- EXPOSE shows which ports need to be made available for forwarding to the host.
The docker-compose.yml contains:
gitlab:
  build: .
  ports:
  - "8004:443"
  - "8003:80"
  - "8005:22"
  volumes:
  - ./config:/etc/gitlab
  - ./logs:/var/log/gitlab
  - ./data:/var/opt/gitlab
  restart: always
The first line indicates the name of the container that will result. build indicates the path where the Dockerfile is located to build the image. In the ports section, specify which host ports to forward to which container ports. In the volumes section, specify which host folders to forward to the container in the appropriate folders. The restart: always policy means that the container will start automatically when the system boots and when processes fall in it.
We have already prepared all this and you just need to collect the image with the team:
docker-compose build
Then deploy the container with the command:
docker-compose up -d
If you need to put a balancer in front of Gitlab - an example of creating related containers with a balancer can be seen in this article . It is recommended that you enable traffic encryption on the NGINX balancer side to securely log into Gitlab.
If you do not know how to edit the file, see the section "How to edit a text file" for details in this article . If you are interested in dealing with Docker Compose - details are here .
Now you can login to gitlab at:
http://ip–адрес вашего сервера
Gitlab has been successfully installed.
Login data by default:
- login : root
- password : 5iveL! fe
At the first login, you will be prompted to set a new password for the login.
After changing the password and logging in to Gitlab, you will see a start page.
Initial setup
Direct the A-record of the domain with which gitlab will be used to the dedicated ip-address of the host in the cloud. The highlighted address can be viewed in the control panel in the "Cloud Infrastructure" section.
The main gitlab settings should be specified on the host in the ~ / gitlab / config / gitlab.rb file .
If the lines with the parameters that we will indicate are commented out (# is set before the parameter) - # should be removed. This should be done only for those parameters that are set.
First, back up the configuration file. It is recommended to do this every time the parameters are changed:
cp gitlab.rb gitlab.rb.old
Parameter configuration in gitlab.rb
external_url
In the parameter, specify the domain directed to the server through which Gitlab will be available.
time_zone
This parameter specifies the time zone.
gitlab_rails['time_zone'] = 'Europe/Moscow'
Mail settings in gitlab.rb
This section shows the working parameters in gitlab.rb for a domain bound to Yandex Mail . Settings for Gmail and Mailgun are listed here .
Paste these parameters into the gitlab.rb file , replacing [email protected] with your Yandex address for the domain. Replace your mail password here with your mail password. Instead of plugndo.com, insert the name of your mail domain. Leave the remaining settings unchanged.
gitlab_rails['smtp_enable'] = true
gitlab_rails['smtp_address'] = "smtp.yandex.ru"
gitlab_rails['smtp_port'] = 587
gitlab_rails['smtp_user_name'] = "[email protected]"
gitlab_rails['smtp_password'] = "здесь ваш пароль от почты"
gitlab_rails['smtp_domain'] = "plugndo.com"
gitlab_rails['smtp_authentication'] = "login"
gitlab_rails['smtp_enable_starttls_auto'] = true
#gitlab_rails['smtp_openssl_verify_mode'] = 'peer'
gitlab_rails['gitlab_email_from'] = '[email protected]'
gitlab_rails['gitlab_email_reply_to'] = '[email protected]'
After saving the changes, reload the container with gitlab command:
docker restart CONTAINER_ID
, where instead of CONTAINER_ID, specify the unique number of your container with gitlab. It can be viewed using the command:
docker ps
To check the correctness of mail settings, create a user in Gitlab, if everything is done correctly, the user will receive an email link to set a password.
Conclusion
After applying the instructions in the article, you received the latest version of Gitlab on your own cloud server. You can begin to configure the system for your projects. Thanks to triple replication in the distributed fault-tolerant storage system in InfoboxCloud you can not worry about the safety of your data.
How to get a trial version of InfoboxCloud for free?
Send us your email address and full name at [email protected] , in response you will receive data for access to the control panel. You can test the new cloud region for 14 days, then you can go to the full version of the cloud.
If you find a mistake in the article or you have questions / comments, write to us in the PM or by mail . If you cannot leave comments on Habré, write in InfoboxCloud Community .
Productive development!