We create a REST service on PostgreSQL and Rust. Part 1: prototype
- Tutorial
Hello.
Some time ago I saw a post on the notorious blog about how to implement on Go a simple program that works with a database, and then make an entire REST service on its basis . I decided to check how difficult it is to make a similar program in Rust and share the results.
We will start by working with the database and create a regular console application, and then add, so to speak, a REST frontend.
A few introductory remarks.
For the impatient, here is the finished project on GitHub. It includes the implementation of a REST service. I invite everyone else to read further.
In general, I will try to illustrate in detail the development process with all errors regarding Rust, their causes and solutions. I think knowing typical problems and how to solve them greatly helps newcomers to the language. Do not be afraid of the compiler, he is your friend.
You will need installed Rust ( how to install ). Any version after 1.0 should work - both stable and nightly. I tried several in the range 1.1-1.3.
The code itself is of prototype quality - I'm not trying to make a very reliable or readable program right now. Having understood it, you can think about the correctness and style later. However, this version was written very quickly.
Now to the point.
Like any Rust project that does not require special tricks with assembly, our program will use Cargo. Create a new project:
Cargo carefully creates the Git repository in the directory.
And we can immediately build and run our stub program:
Then we commit our changes to the repository and move on to the essence of our program.
Let's start with the simplest prototype that connects to the database, creates one table, adds one record there and reads it back.
First I will give the whole code, and then I will explain each part of it. Below is the contents of src / main.rs.
Let's take it in order.
The first line in our new main is connecting to the database. Here it is worth immediately telling more.
We assume that the PostgreSQL server is running locally on the default port, and the username and password are “postgres”. To do this, of course, we need to install PostgreSQL. You can see, for example, this guide . Indicate your username with access to the database and his password instead of "postgres: postgres".
In addition, do not forget to initialize the database.
The aforementioned Connection itself is a type from the postgres container ( documentation ). Therefore, we request its binding at the top of the file
and enter into the scope of Connection and SslMode
If you try to build the program right now, you will get another error:
This means that the compiler did not find a suitable container. This is because we did not specify it in the dependencies of our project. Let's do it in Cargo.toml ( more ):
Now everything should be collected. But if you did not start the server, you will get the following error:
This is a direct result of our .unwrap () - it causes a panic of the current thread if the Result was not Ok (_) - i.e. A connection error has occurred.
By the way, you can see the backtrace for it if you run the program with RUST_BACKTRACE = 1 set in the environment (it works only in the debug version of the program!).
Fuh, just one line, and so many ways to mess up! I hope you are not very scared and ready to continue.
The positive thing here is that we explicitly say that we want to drop the program in case of a connection error. When we want to make a normal product out of our toy, a simple text search on .unwrap () will show you where to start. Further I will not dwell on this moment.
Create a table:
Strange & [] at the end is an empty slice . This request has no parameters, so we do not pass them.
Why a slice, not an array? A good style in Rust is not to accept ownership if objects are read-only. Otherwise, we would have to clone the value to pass to the function, i.e. she would have swallowed him. Read more about ownership here .
Next, we create a structure that represents our record, which we will add to the table:
Fundamentally, now it makes no sense to add this data to the structure, but it will help us further. By the way, here is her announcement:
Now perform the actual insertion:
Here, our request already has parameters. They are substituted using string interpolation in the numbered fields $ 1, $ 2, etc. And now our parameter slice is not empty - it contains links to the corresponding fields of the structure.
Next, we prepare a query to the database to read what we wrote:
I think nothing interesting. It is just creating a request object. Duplicate queries make sense not to recreate, but to store, to increase performance. We could also immediately execute the request without creating a “prepared object”.
At the end, we execute the request itself. Let's go through each line:
Here we go around the array of query results. As always, the request might fail. The parameter list is again empty - & [].
Now again we collect the structure from the query results.
Here we just take the fields by numbers, but in general the library allows you to use the names of the table fields.
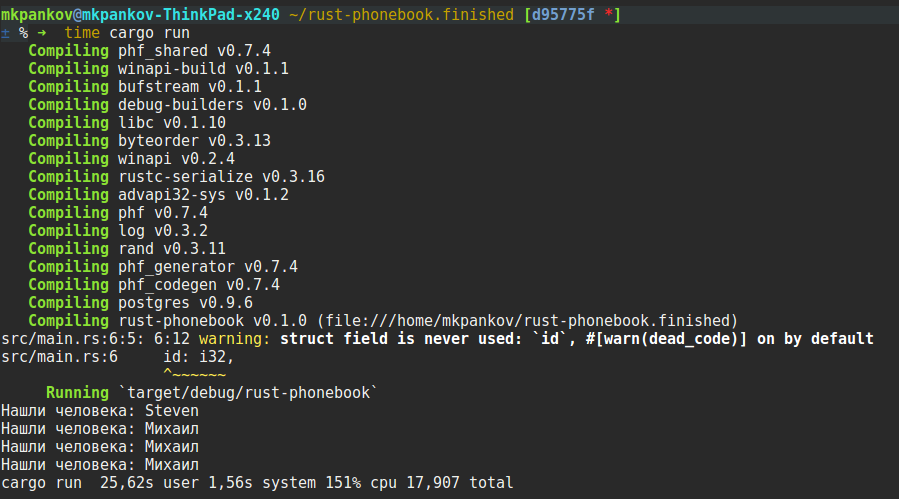
Finally, we print the message with the result:
The post turned out to be long, because we got acquainted with the infrastructure, terminology and set up the environment, but I hope it will be useful as an illustration of the workflow.
In the next part, we will add the server configuration in the .ini file. Stay with us!
Some time ago I saw a post on the notorious blog about how to implement on Go a simple program that works with a database, and then make an entire REST service on its basis . I decided to check how difficult it is to make a similar program in Rust and share the results.
We will start by working with the database and create a regular console application, and then add, so to speak, a REST frontend.
A few introductory remarks.
For the impatient, here is the finished project on GitHub. It includes the implementation of a REST service. I invite everyone else to read further.
In general, I will try to illustrate in detail the development process with all errors regarding Rust, their causes and solutions. I think knowing typical problems and how to solve them greatly helps newcomers to the language. Do not be afraid of the compiler, he is your friend.
You will need installed Rust ( how to install ). Any version after 1.0 should work - both stable and nightly. I tried several in the range 1.1-1.3.
The code itself is of prototype quality - I'm not trying to make a very reliable or readable program right now. Having understood it, you can think about the correctness and style later. However, this version was written very quickly.
Now to the point.
Like any Rust project that does not require special tricks with assembly, our program will use Cargo. Create a new project:
$ cargo new --bin rust-phonebook
$ cd rust-phonebook
Cargo carefully creates the Git repository in the directory.
What does it look like
$ git status On branch master Initial commit Untracked files: (use "git add... "to include in what will be committed) .gitignore Cargo.toml src / nothing added to commit but untracked files present (use "git add" to track)
And we can immediately build and run our stub program:
$ cargo run
   Compiling rust-phonebook v0.1.0 (file: /// home / mkpankov / rust-phonebook)
     Running `target / debug / rust-phonebook`
Hello world!
Then we commit our changes to the repository and move on to the essence of our program.
Let's start with the simplest prototype that connects to the database, creates one table, adds one record there and reads it back.
First I will give the whole code, and then I will explain each part of it. Below is the contents of src / main.rs.
The code
extern crate postgres;
use postgres::{Connection, SslMode};
struct Person {
    id: i32,
    name: String,
    data: Option>
}
fn main() {
    let conn =
        Connection::connect(
            "postgres://postgres:postgres@localhost",
            &SslMode::None)
        .unwrap();
    conn.execute(
        "CREATE TABLE person (
           id              SERIAL PRIMARY KEY,
           name            VARCHAR NOT NULL,
           data            BYTEA
         )",
        &[])
        .unwrap();
    let me = Person {
        id: 0,
        name: "Михаил".to_string(),
        data: None
    };
    conn.execute(
        "INSERT INTO person (name, data) VALUES ($1, $2)",
        &[&me.name, &me.data])
        .unwrap();
    let stmt = conn.prepare("SELECT id, name, data FROM person").unwrap();
    for row in stmt.query(&[]).unwrap() {
        let person = Person {
            id: row.get(0),
            name: row.get(1),
            data: row.get(2)
        };
        println!("Нашли человека: {}", person.name);
    }
}
Let's take it in order.
fn main() {
    let conn =
        Connection::connect(
            "postgres://postgres:postgres@localhost",
            &SslMode::None)
        .unwrap();
The first line in our new main is connecting to the database. Here it is worth immediately telling more.
We assume that the PostgreSQL server is running locally on the default port, and the username and password are “postgres”. To do this, of course, we need to install PostgreSQL. You can see, for example, this guide . Indicate your username with access to the database and his password instead of "postgres: postgres".
In addition, do not forget to initialize the database.
The aforementioned Connection itself is a type from the postgres container ( documentation ). Therefore, we request its binding at the top of the file
extern crate postgres;
and enter into the scope of Connection and SslMode
use postgres::{Connection, SslMode};
If you try to build the program right now, you will get another error:
$ cargo build
   Compiling rust-phonebook v0.1.0 (file: ///home/mkpankov/rust-phonebook.finished)
src / main.rs: 1: 1: 1:23 error: can't find crate for `postgres`
src / main.rs: 1 extern crate postgres;
              ^ ~~~~~~~~~~~~~~~~~~~~~~
error: aborting due to previous error
Could not compile `rust-phonebook`.
To learn more, run the command again with --verbose.
This means that the compiler did not find a suitable container. This is because we did not specify it in the dependencies of our project. Let's do it in Cargo.toml ( more ):
[dependencies]
postgres = "0.9"
Now everything should be collected. But if you did not start the server, you will get the following error:
$ cargo run
     Running `target / debug / rust-phonebook`
thread ''panicked at' called `Result :: unwrap ()` on an `Err` value: IoError (Error {repr: Os {code: 111, message:" Connection refused "}}) ', ../src/libcore/ result.rs:732
This is a direct result of our .unwrap () - it causes a panic of the current thread if the Result was not Ok (_) - i.e. A connection error has occurred.
By the way, you can see the backtrace for it if you run the program with RUST_BACKTRACE = 1 set in the environment (it works only in the debug version of the program!).
Backtrace
$ RUST_BACKTRACE = 1 cargo run
     Running `target / debug / rust-phonebook`
thread ''panicked at' called `Result :: unwrap ()` on an `Err` value: IoError (Error {repr: Os {code: 111, message:" Connection refused "}}) ', ../src/libcore/ result.rs:732
stack backtrace:
   1: 0x56007b30a95e - sys :: backtrace :: write :: haf6e4e635ac76143Ivs
   2: 0x56007b30df06 - panicking :: on_panic :: ha085a58a08f78856lzx
   3: 0x56007b3049ae - rt :: unwind :: begin_unwind_inner :: hc90ee27246f12475C0w
   4: 0x56007b304ee6 - rt :: unwind :: begin_unwind_fmt :: ha4be06289e0df3dbIZw
   5: 0x56007b30d8d6 - rust_begin_unwind
   6: 0x56007b3390c4 - panicking :: panic_fmt :: he7875691f9cbe589SgC
   7: 0x56007b25e58d - result :: Result:: unwrap :: h10659124002062427088
                        at ../src/libcore/macros.rs:28
   8: 0x56007b25dcfd - main :: h2f2e9aa4b99bad67saa
                        at src / main.rs: 13
   9: 0x56007b30d82d - __rust_try
  10: 0x56007b30fbca - rt :: lang_start :: hefba4015e797c325hux
  11: 0x56007b27d1ab - main
  12: 0x7fb3f21076ff - __libc_start_main
  13: 0x56007b25db48 - _start
  14: 0x0 -
Fuh, just one line, and so many ways to mess up! I hope you are not very scared and ready to continue.
The positive thing here is that we explicitly say that we want to drop the program in case of a connection error. When we want to make a normal product out of our toy, a simple text search on .unwrap () will show you where to start. Further I will not dwell on this moment.
Create a table:
    conn.execute(
        "CREATE TABLE person (
           id              SERIAL PRIMARY KEY,
           name            VARCHAR NOT NULL,
           data            BYTEA
         )",
        &[])
        .unwrap();
Strange & [] at the end is an empty slice . This request has no parameters, so we do not pass them.
Why a slice, not an array? A good style in Rust is not to accept ownership if objects are read-only. Otherwise, we would have to clone the value to pass to the function, i.e. she would have swallowed him. Read more about ownership here .
Next, we create a structure that represents our record, which we will add to the table:
    let me = Person {
        id: 0,
        name: "Михаил".to_string(),
        data: None
    };
Fundamentally, now it makes no sense to add this data to the structure, but it will help us further. By the way, here is her announcement:
struct Person {
    id: i32,
    name: String,
    data: Option>
}
Now perform the actual insertion:
    conn.execute(
        "INSERT INTO person (name, data) VALUES ($1, $2)",
        &[&me.name, &me.data])
        .unwrap();
Here, our request already has parameters. They are substituted using string interpolation in the numbered fields $ 1, $ 2, etc. And now our parameter slice is not empty - it contains links to the corresponding fields of the structure.
Next, we prepare a query to the database to read what we wrote:
let stmt = conn.prepare("SELECT id, name, data FROM person").unwrap();
I think nothing interesting. It is just creating a request object. Duplicate queries make sense not to recreate, but to store, to increase performance. We could also immediately execute the request without creating a “prepared object”.
At the end, we execute the request itself. Let's go through each line:
for row in stmt.query(&[]).unwrap() {
Here we go around the array of query results. As always, the request might fail. The parameter list is again empty - & [].
Now again we collect the structure from the query results.
        let person = Person {
            id: row.get(0),
            name: row.get(1),
            data: row.get(2)
        };
Here we just take the fields by numbers, but in general the library allows you to use the names of the table fields.
Finally, we print the message with the result:
        println!("Нашли человека: {}", person.name);
    }
}
The post turned out to be long, because we got acquainted with the infrastructure, terminology and set up the environment, but I hope it will be useful as an illustration of the workflow.
In the next part, we will add the server configuration in the .ini file. Stay with us!