How I was looking for an idea for a first project on Arduino or Wake-on-LAN on Arduino
Background
At one time, after watching a video about how people make various devices like hexopads, I respected those people who made it, with the desire to learn how to do something like that. For myself, for some reason unknown to me, I could feel a big difference in emotions from the programmed controller with the banal blinking of the LED in comparison with the complex algorithm in the software product, and the first one won. Having decided that the only way available for me to reach the state when something similar to the hexopad can get out of my hands is to start programming elementary things. The choice fell on the Arduino due to the availability of the platform itself and the abundance of information on it.
Where to begin?
Probably the most common question when you start a new business is “where to start?” I didn’t want to do something unnecessary, but something very complex could lead to the fact that without understanding the details, it could cool down to the project without mastering it . Then I remembered about one feature of my PC, which gave me enough inconvenience. Due to certain circumstances, I often have to connect to my home computer. Naturally, in order to connect via RDP, the computer must be turned on. Based on this, there were two options: 1) leave the PC turned on (which is at least inconvenient); 2) wake him up before connecting.
Obviously, the second solution is more concise both economically and practically. Any attempts to make wake-on-lan work stably ended up making the computer inaccessible, as it did not get out of sleep. And to be more precise, he could be awakened within a limited time (about 15-30 minutes) after going to sleep. Outside of this time interval, it was not possible to wake up. We tried different boards and different dances with a tambourine around the BIOS. The result was always the same. I admit the idea that all this is possible under the given conditions on this hardware, but the time required to solve the problem was too large. As a result, during the next “business trip”, I had to leave the computer turned on unattended for several days. I think the majority understands that it cannot be said that the remote access task has been solved.
No sooner said than done
The first thing I started with was to determine how everything will work and the minimum necessary set to solve this problem. On the functional side, the solution was as follows. Arduino works as a web server and waits for a signal. Upon receipt of the on / off signal, it checks the status of the PC (whether it is already working / off) and, making sure that the conditions are met for a short time, closes the contacts of the power button. Everything is pretty simple.
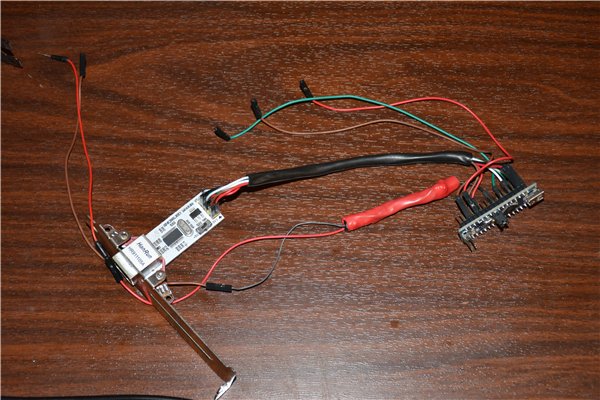
The set is also quite simple: Arduino nano, ethernet MINI ENC28J60, wires for connecting the contacts and 1 transistor (initially I thought I would do without a transistor, just applying the same voltage as the first pin to the second pin, but empirically established that the board does not wait for the equivalent voltage at the second contact, but just a short to ground of the first).
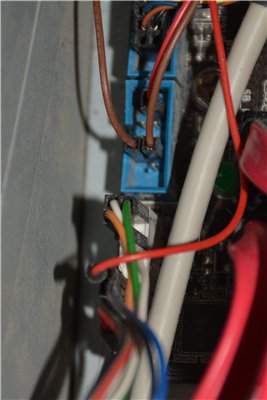
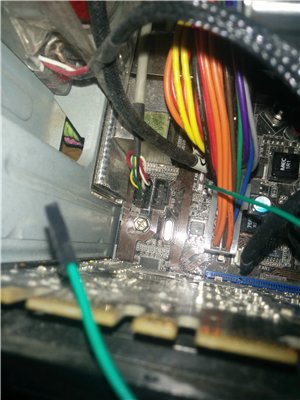
The power is taken from USB, and the inclusion check is removed from the free pin for the cooler on the motherboard.
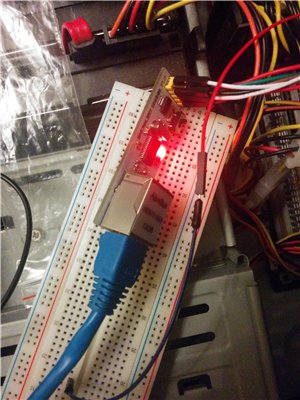
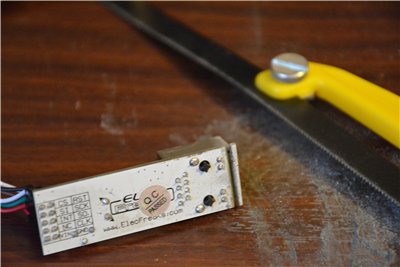
The choice on ethernet MINI ENC28J60 fell due to the small size and the fact that the craftsmen have already written a library for Arduino to work with this board.
It works something like this: the Mac address, IP, subnet mask, port and buffer size are triggered. Further initialization of the ENC28J60 board and ethernet / ip. Then, in the loop, a buffer is checked to see if something came up with a request. The request we are interested in is the page requested by the GET method with the address to which we will respond. If we get a request to the root page ("GET / HTTP ...") we give the answer "It works!" Imitating Apache. In the headers, we also imitate Apache in every possible way (Server: “Apache / 2.4.9 (Win32), all that)” so that Vasya, having read the Hacker magazine, would try to understand why he couldn’t break the server. If the request does not go to the root page, then if the requested page is not the one that we determined to enable / disable, we will issue “404 Not Found”.
It's still not difficult to connect. I don’t see the point of drawing a diagram. Since in fact 3 boards are connected between each other (Arduino nano, ENC28J60, motherboard) and 1 transistor. I decided that for those who are not good at circuitry, it would be more visual to present just a table at the intersection of the columns in which the connection will be.
| Arduino nano | ENC28J60 | motherboard | transistor |
| +5 | + 5USB | ||
| D13 | SCR | ||
| 3v3 | VIN | ||
| GND | GND | ||
| D2 | INT | ||
| D12 | SO | ||
| D11 | ST | ||
| D10 | CS | ||
| D8 | CPU_fan | ||
| D6 | base | ||
| GND | emitter | ||
| Power sw | collector | ||
| GND | GND |
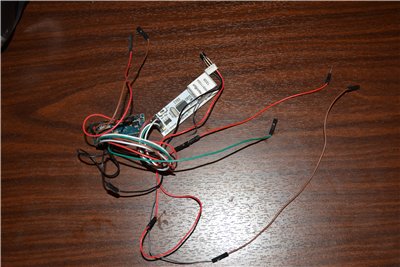
For convenience, all wires were tightened with heat shrink, and the board was sawn ENC28J60, so that it can be fixed on the rear panel. Some ancient network board served as a donor for fasteners, firewood to which is nowhere to be found.
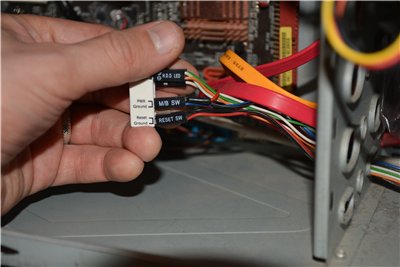


When working after receiving a request to turn on / off, the program looks to see if there is voltage on the "CPU_fan", based on this it decides whether to supply power to the transistor. If necessary, it supplies current to the base of the transistor and, after a while, disconnects it back. The current based on the transistor allows it to open and close the contacts “Power SW” and “GND”.
The goal is achieved. Moreover, I got the opportunity to output the PC after the BSOD, as we can send a signal that will emulate a 4 second press on the power button.
Conclusion
This is far from the most difficult of what has been done. There were our own, more complex projects, and writing code “to help” other people, but, firstly, for the first article I wanted to choose a not difficult “project” (a too loud word for the above), corresponding to the “sandbox”, and secondly , the first project is like a first love. It sinks into the soul. Thus, I would like to try to motivate, show that the first step may be easier than it seems. And if at least one person after reading tries, I will consider that the article was a success. For the “smallest" I advise you to start with a video from Jeremy Blum.
PS: We are waiting with a colleague for a parcel to assemble a quadrocopter and are already thinking of collecting a hexopad. And it was only worth a try ...
Link to the sketchbook and library for working with ENC28J60.