Why SCADA when there is .NET?
I work for a company that automates production processes. Not familiar with programmable logic controllers (PLC), human-machine interface (HMI) and SCADA (supervisory control and data acquisition).
I also like programming. Mostly in C # and Java (Android). When I got acquainted with WPF technology and saw how easy it is to implement a graphical user interface, my delight knew no bounds. “This is the killer of SCADA systems,” I thought. You just need to somehow connect the .NET project with the input-output devices (PLC).
And then an idea came to me that at some point comes to every machine gunner. Make your own SCADA system. And not just a SCADA system, but a SCADA system for .NET developers (primarily for himself). Because sometimes when you switch from Visual Studio to the editor of the "modern" SCADA system, you want to tear out your last hair. But real difficulties begin when it is necessary to implement functionality that goes beyond the basic. Another thing is the world of programmers. The answer to almost any question can be quickly found on stackoverflow.com through its google.com search interface .
Next, I will describe what I managed to do. The source code of the project is available at https://github.com/phmi/phmi .
To use PHmi (as I called it), the following conditions must be satisfied:
Project development can be divided into two phases: server configuration and client project development.
Run PHmiConfigurator.exe. The following window will appear:
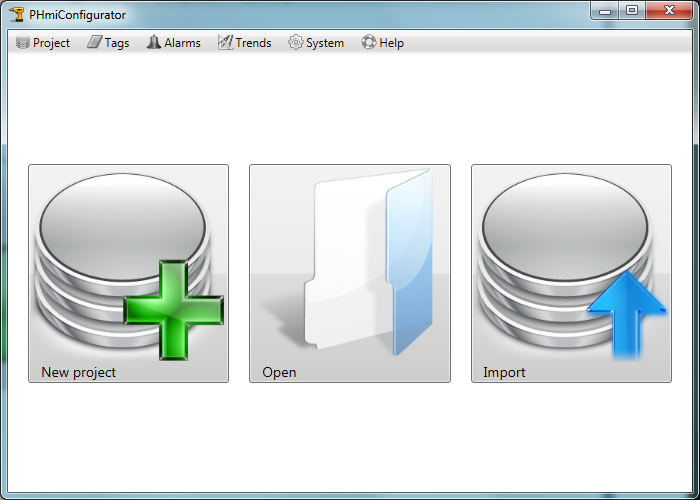
Click on the “New project” button. The “New project” window will appear:
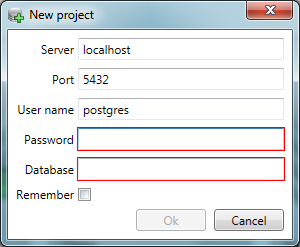
Enter the communication parameters with PostgreSQL and the desired database name:
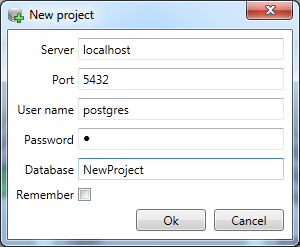
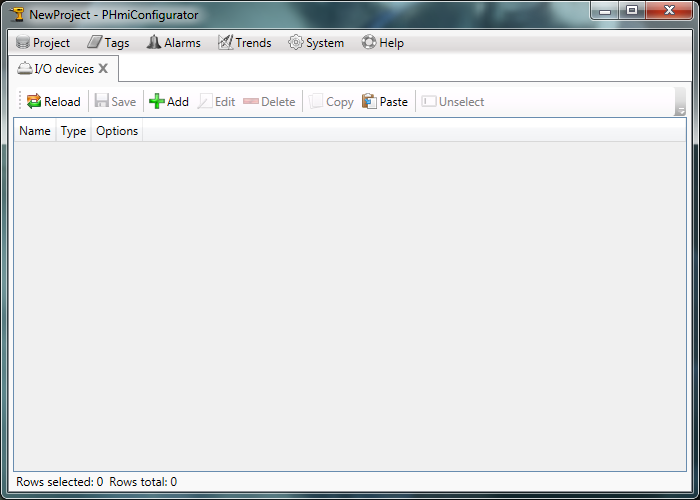
After clicking on the “Ok” button, a new project will be created:

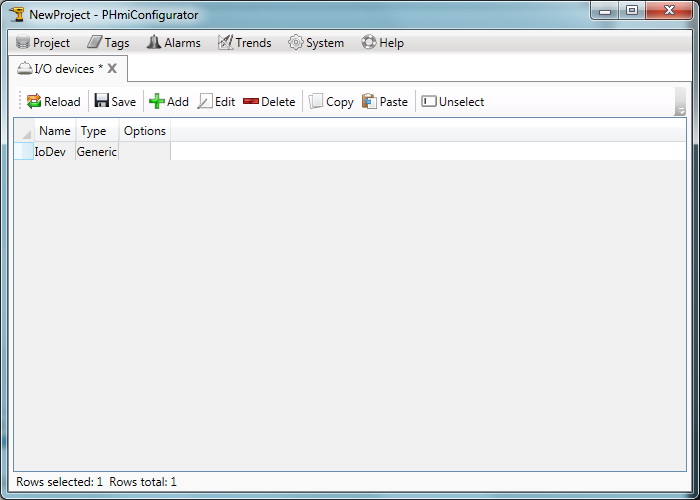
Click on the “I / O devices” button. The “I / O devices” tab opens in the configurator:
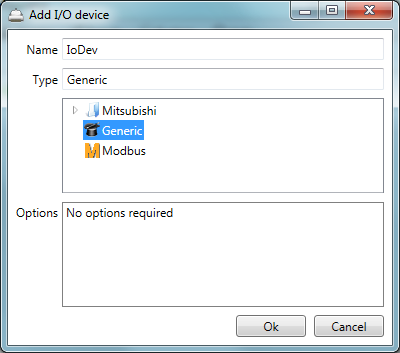
Add a new “IoDev” input / output device of the “Generic” type. Generic is an input / output device for debugging purposes. Or it is used when you do not need to connect to a real device. It supports any tag addresses:
Click on the “Save” button and close the tab.
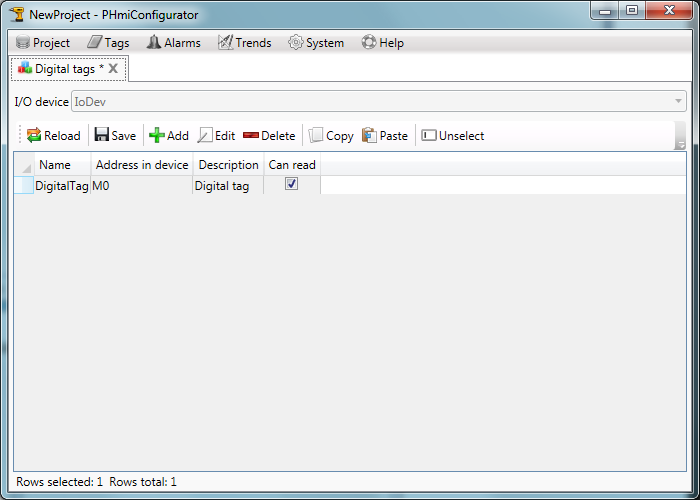
Open the “Digital tags” tab and create a new digital tag.
Open the “Numeric tags” tab and create a new analog tag:
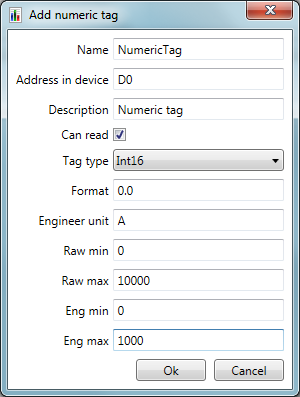
Fields of description, format, units of measurement, calibration boundaries are optional and may be omitted.
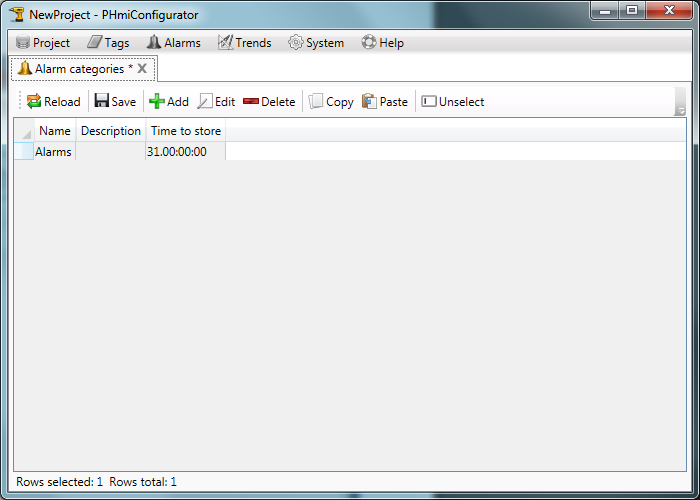
Create a new category of alarms:
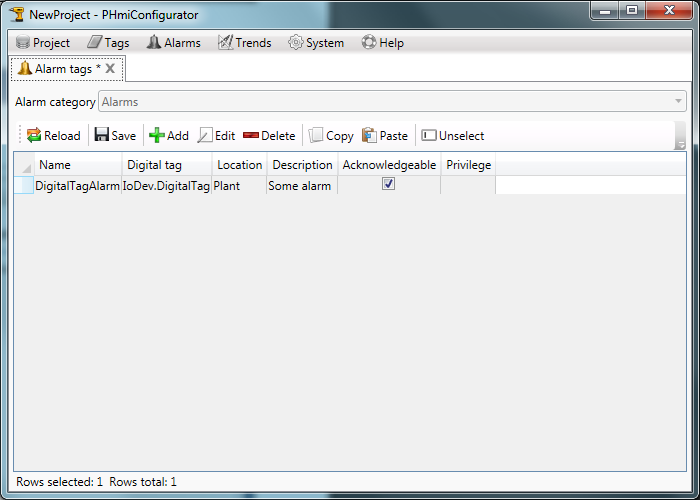
Create a new tag for alarms:
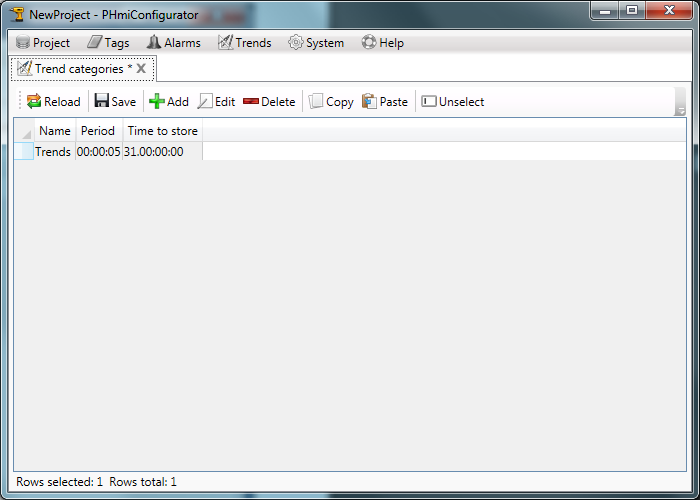
Create a category of trends:
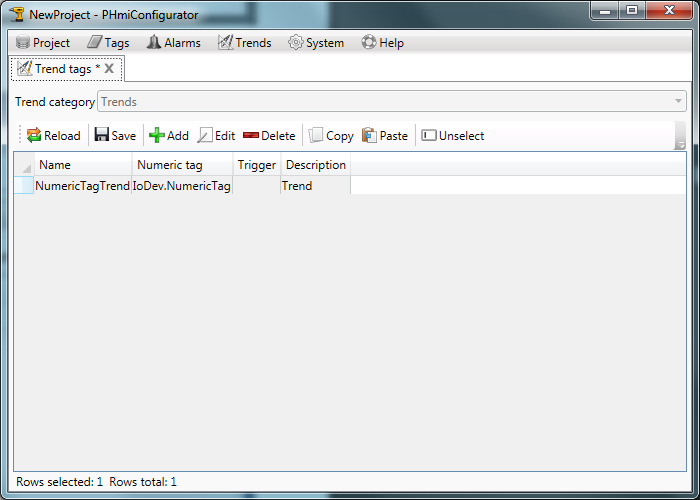
Create a new tag for trends:
In the configurator, click on the “Build client” button:
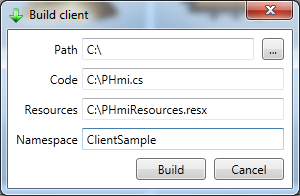
Choose the path to the files to create them.
"Namespace" should match the name of the future Visual Studio project.
Click on the “Build” button.
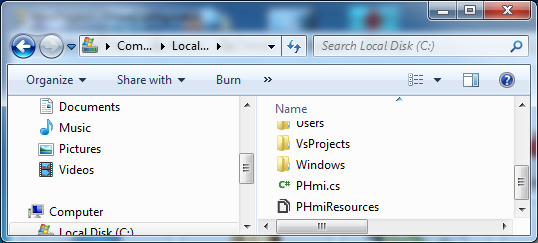
Files should appear on the specified path:
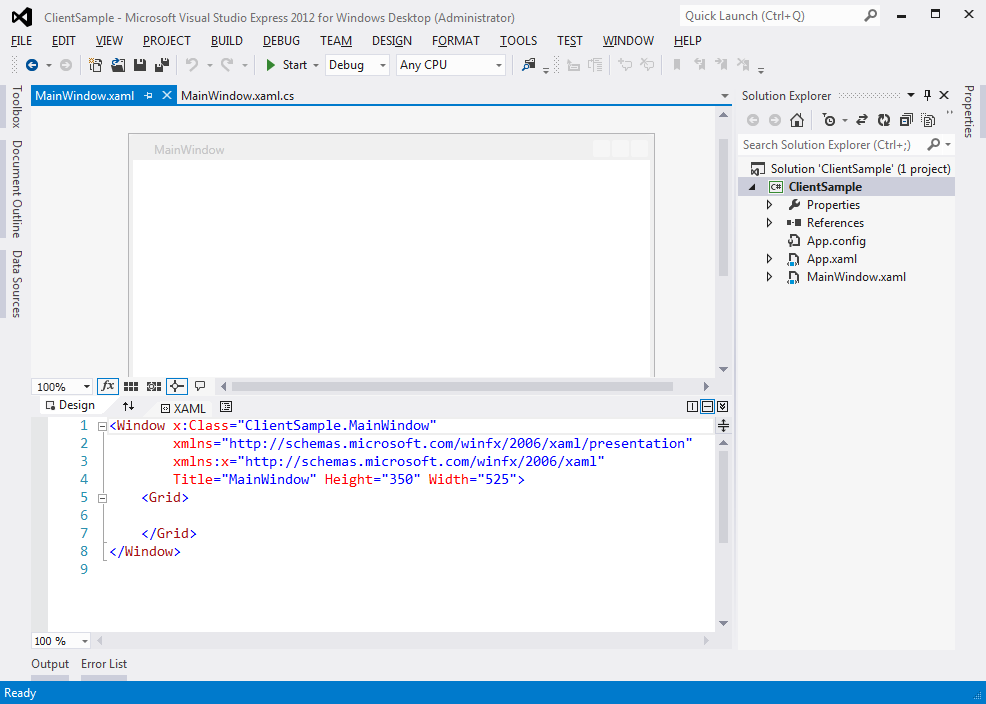
Launch Microsoft Visual Studio and create a new WPF project. The target framework should be “.Net Framework 4.0” or higher:

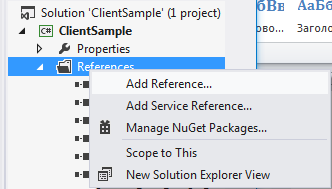
Add a link to PHmiClient.dll:
Add PHmi.cs and PHmiResources.resx files created in advance:
Double-click PHmiResources.resx and change “Access modifier” to Public:

Open MainWindow.xaml. Add Knotrol Root to the root Grid.
Bind PHmi to the DataContext Root. To do this, create a new PHmi object in the window resources.
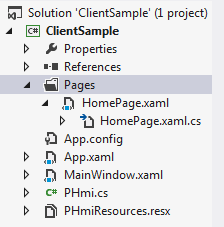
Add the “Pages” folder for the pages. Add a UserControl called "HomePage" there.
Pages must implement the IPage interface. The listing of HomePage.xaml.cs is presented below.
And here is the markup of the Xaml file:
We added a TextBlock to display tag values.
Bind the homepage type to Root:
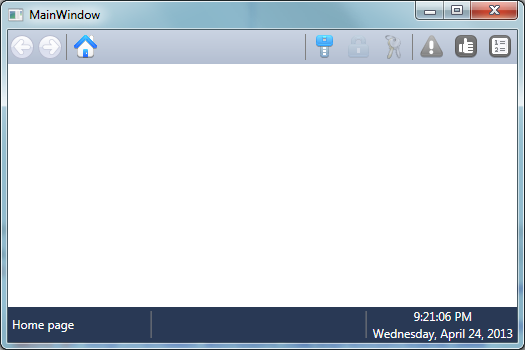
Run the application and see what happened:
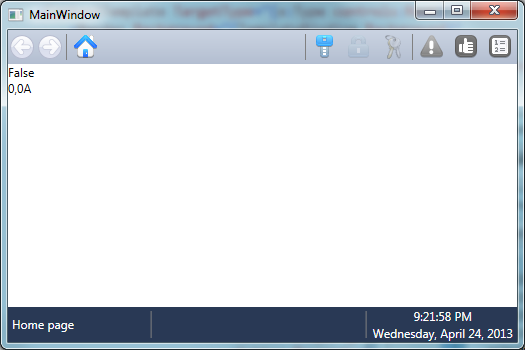
The tag values are not visible. This is because PHmiRunner.exe is not running. Click the “Run” button in the configurator.
Now add the controls to the page.
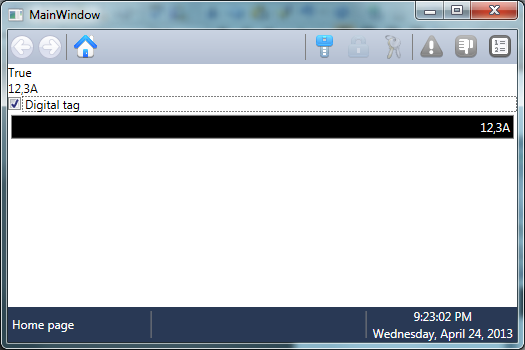
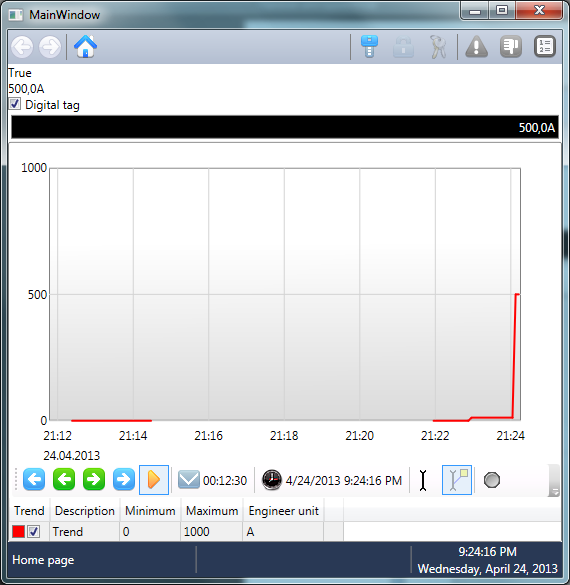
If you enable the “Digital tag", an accident will occur.
Add a trend to the page.
To display strings in accordance with regional settings (date, time, etc.), you must change the XmlLanguage in the window constructor:
Thanks!
I also like programming. Mostly in C # and Java (Android). When I got acquainted with WPF technology and saw how easy it is to implement a graphical user interface, my delight knew no bounds. “This is the killer of SCADA systems,” I thought. You just need to somehow connect the .NET project with the input-output devices (PLC).
And then an idea came to me that at some point comes to every machine gunner. Make your own SCADA system. And not just a SCADA system, but a SCADA system for .NET developers (primarily for himself). Because sometimes when you switch from Visual Studio to the editor of the "modern" SCADA system, you want to tear out your last hair. But real difficulties begin when it is necessary to implement functionality that goes beyond the basic. Another thing is the world of programmers. The answer to almost any question can be quickly found on stackoverflow.com through its google.com search interface .
Next, I will describe what I managed to do. The source code of the project is available at https://github.com/phmi/phmi .
Installation
To use PHmi (as I called it), the following conditions must be satisfied:
- PHmi
- PostgreSQL DBMS v9.2 or higher (it can be downloaded from www.postgresql.com )
- Microsoft Visual Studio 2010 or higher (express version or Community Edition will do)
Project development
Project development can be divided into two phases: server configuration and client project development.
Server configuration
Run PHmiConfigurator.exe. The following window will appear:
Click on the “New project” button. The “New project” window will appear:
Enter the communication parameters with PostgreSQL and the desired database name:
After clicking on the “Ok” button, a new project will be created:
Click on the “I / O devices” button. The “I / O devices” tab opens in the configurator:
Add a new “IoDev” input / output device of the “Generic” type. Generic is an input / output device for debugging purposes. Or it is used when you do not need to connect to a real device. It supports any tag addresses:
Click on the “Save” button and close the tab.
Open the “Digital tags” tab and create a new digital tag.
Open the “Numeric tags” tab and create a new analog tag:
Fields of description, format, units of measurement, calibration boundaries are optional and may be omitted.
Create a new category of alarms:
Create a new tag for alarms:
Create a category of trends:
Create a new tag for trends:
Customer project development
In the configurator, click on the “Build client” button:
Choose the path to the files to create them.
"Namespace" should match the name of the future Visual Studio project.
Click on the “Build” button.
Files should appear on the specified path:
Launch Microsoft Visual Studio and create a new WPF project. The target framework should be “.Net Framework 4.0” or higher:
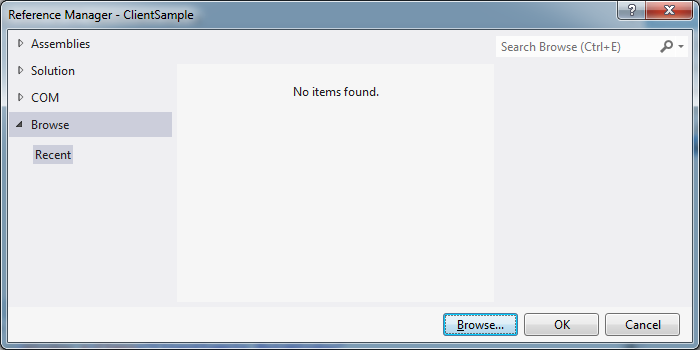
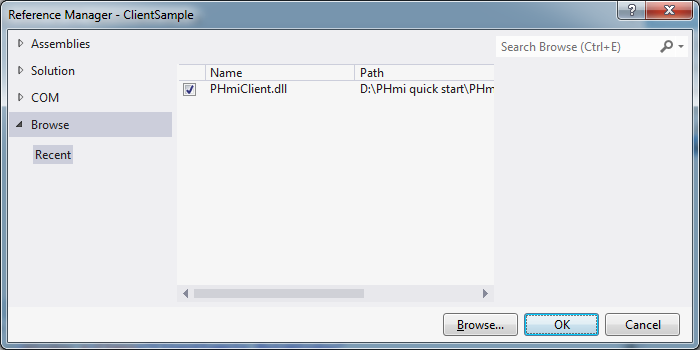
Add a link to PHmiClient.dll:
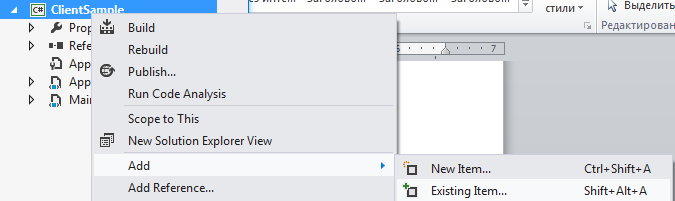
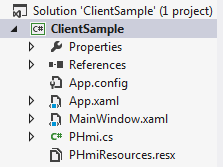
Add PHmi.cs and PHmiResources.resx files created in advance:
Double-click PHmiResources.resx and change “Access modifier” to Public:
Open MainWindow.xaml. Add Knotrol Root to the root Grid.
Bind PHmi to the DataContext Root. To do this, create a new PHmi object in the window resources.
Add the “Pages” folder for the pages. Add a UserControl called "HomePage" there.
Pages must implement the IPage interface. The listing of HomePage.xaml.cs is presented below.
using PHmiClient.Controls.Pages;
using System;
using System.Windows.Controls;
namespace ClientSample.Pages
{
    ///
    /// Interaction logic for HomePage.xaml
    ///
    public partial class HomePage : UserControl, IPage
    {
        public HomePage()
        {
            InitializeComponent();
        }
        public object PageName
        {
            get { return "Home page"; }
        }
        public PHmiClient.Controls.IRoot Root
        {
            get; set;
        }
    }
}
And here is the markup of the Xaml file:
We added a TextBlock to display tag values.
Bind the homepage type to Root:
Run the application and see what happened:
The tag values are not visible. This is because PHmiRunner.exe is not running. Click the “Run” button in the configurator.
Now add the controls to the page.
If you enable the “Digital tag", an accident will occur.
Add a trend to the page.
Setting the window language
To display strings in accordance with regional settings (date, time, etc.), you must change the XmlLanguage in the window constructor:
using System.Threading;
using System.Windows;
using System.Windows.Markup;
namespace ClientSample
{
    ///
    /// Interaction logic for MainWindow.xaml
    ///
    public partial class MainWindow : Window
    {
        public MainWindow()
        {
            Language = XmlLanguage.GetLanguage(
                Thread.CurrentThread.CurrentUICulture.IetfLanguageTag);
            InitializeComponent();
        }
    }
}
Thanks!