Analyze text tonality in Excel with Azure Machine Learning and Power Query
- Transfer
- Tutorial
You may have seen Joseph Sirosh's post last week about the ability to publish Azure Machine Learning models in the Azure Marketplace, and that MS has already published a number of APIs. For Excel there is a special add-on that can be used to access these APIs, but I noticed that at least one API ( Sentiment Analysis API ) can be used directly through Power Query .
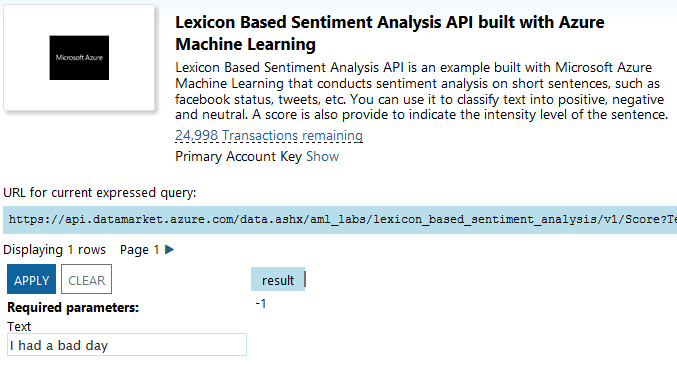
To do this, first you need to go to the Azure Marketplace, log in with your Microsoft account and sign up for the Lexicon Based Sentiment Analysis API. The documentation says that you have 25,000 transactions per month for free. The API as such is very simple: pass the sentence for evaluation, and you will receive a response from -1 to 1, where 1 means positive tonality and -1 negative. For example, the expression “I had a good day” returns 1:

Whereas the expression “I had a bad day” returns -1:
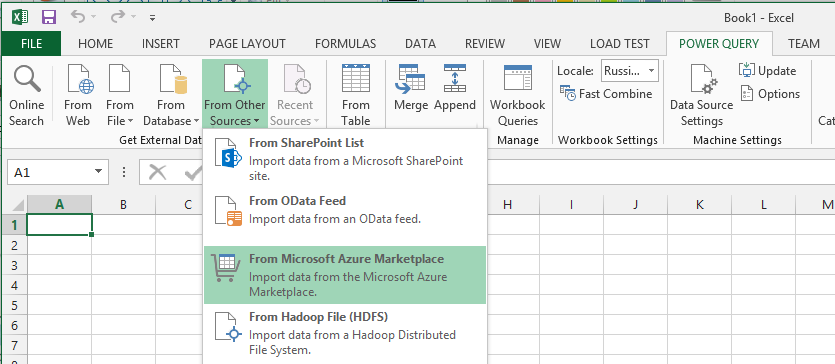
Now you can go to Power Query and click “From Azure Marketplace” (you will need to enter your credentials if this is the first time you use the Azure Marketplace from Power Query):
And then when the “Navigator” panel appears, double-click on “Score”:

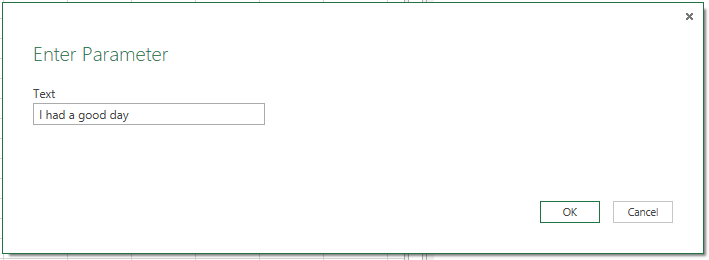
The API is presented as a function in Power Query (I think this is an OData service operation, but I'm not sure), and double-clicking on “Score” will call the function. You can enter an expression in this field, and the Query Editor opens to display the result of the evaluation:
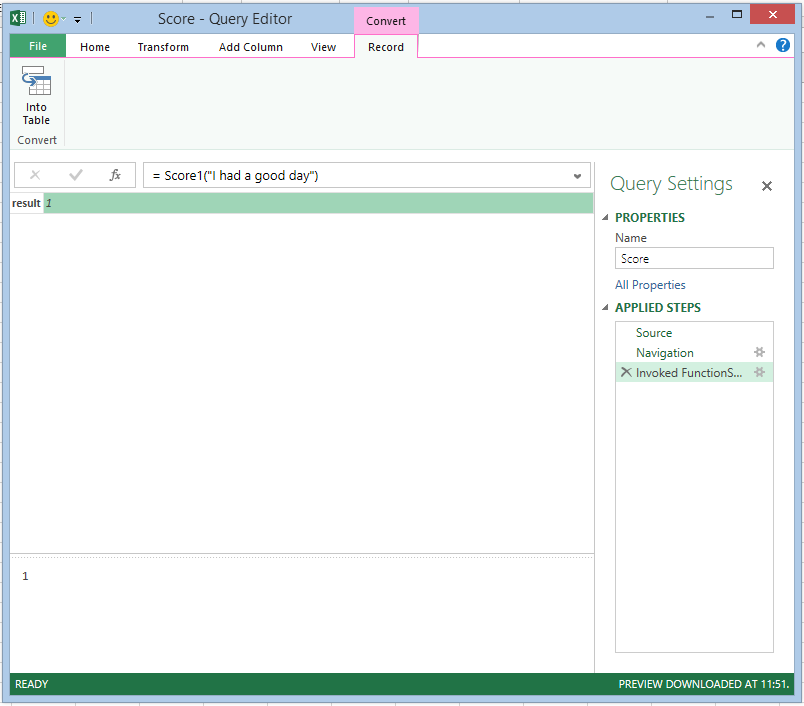
However, in order to do something useful, you need to not just call the function "right now", you need to make a query that returns a function. To do this, edit the request a little. Go to the Advanced Editor, and you will see the M-code for the request - it will look something like this:
You need to remove the last line (# “Invoked FunctionScore1”), which calls the function, leaving the following code:
Now you can click “Close & Load” to close the Query Editor window. Now you have the “Score” function, which you can call from other queries. For example, make the following Excel spreadsheet:

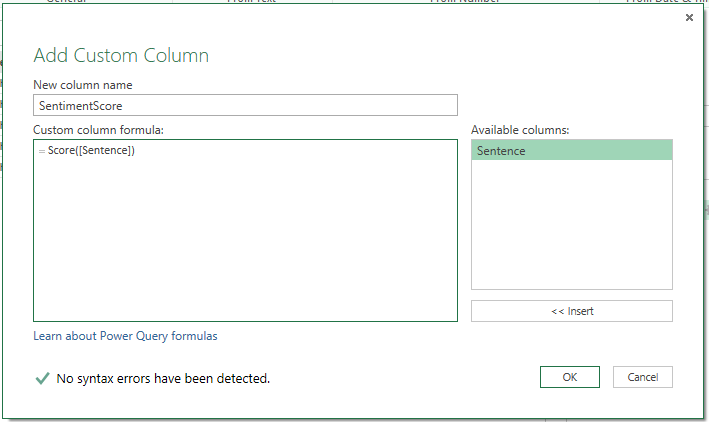
Click the “From Table” button to load this table into Power Query, then click “Add Custom Column” in the Query Editor and add a new column called “Sentiment Score” with the expression Score ( [Sentence])
You will be asked to set the privacy level for the data used, since calling this function involves sending data from your worksheet to the API, where, potentially, someone can see them.

Click “Continue” and set the privacy level for this workbook as “Public” so that the data can be sent to the API:

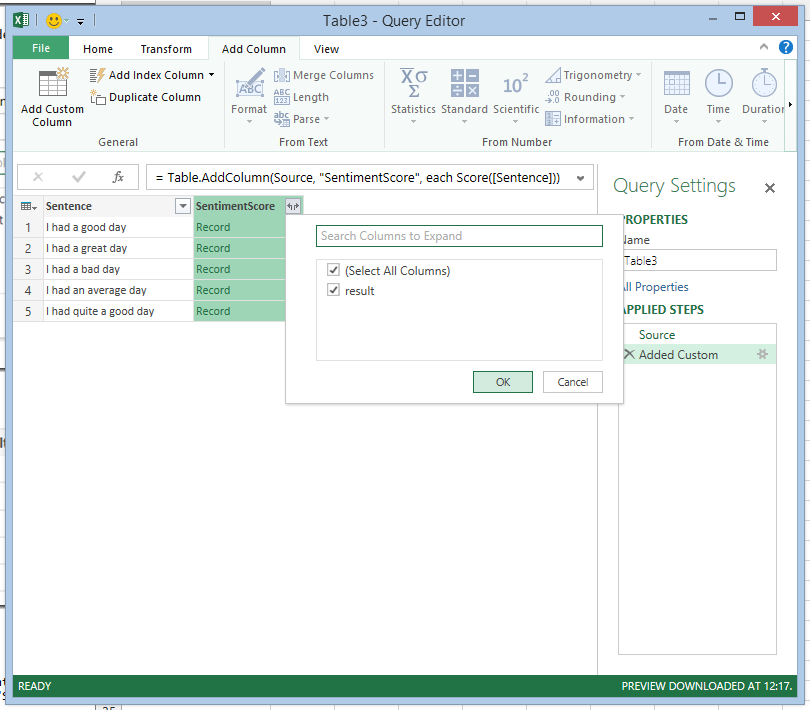
Click “Save” and you will see that a “Sentiment Score” column has been added containing the value “Record”. Click on the “Expand” icon in this column and then “Ok”:
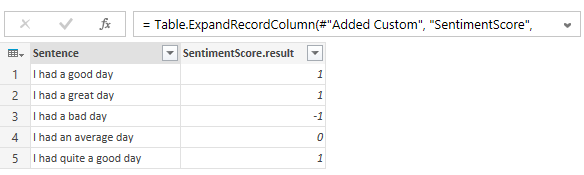
And finally, you will see, in fact, the grade:
Here is the code:
You can download the workbook file here .
Of course, I could not resist and repeated this with my Facebook status updates - which can be accessed very easily from Power Query . Here is the average monthly assessment of the tonality of my statuses from June 2009 to the present:

As you can see, I was in a particularly good mood in August - perhaps due to the fact that I was on vacation almost the entire month.
To do this, first you need to go to the Azure Marketplace, log in with your Microsoft account and sign up for the Lexicon Based Sentiment Analysis API. The documentation says that you have 25,000 transactions per month for free. The API as such is very simple: pass the sentence for evaluation, and you will receive a response from -1 to 1, where 1 means positive tonality and -1 negative. For example, the expression “I had a good day” returns 1:
Whereas the expression “I had a bad day” returns -1:
Now you can go to Power Query and click “From Azure Marketplace” (you will need to enter your credentials if this is the first time you use the Azure Marketplace from Power Query):
And then when the “Navigator” panel appears, double-click on “Score”:
The API is presented as a function in Power Query (I think this is an OData service operation, but I'm not sure), and double-clicking on “Score” will call the function. You can enter an expression in this field, and the Query Editor opens to display the result of the evaluation:
However, in order to do something useful, you need to not just call the function "right now", you need to make a query that returns a function. To do this, edit the request a little. Go to the Advanced Editor, and you will see the M-code for the request - it will look something like this:
let
    Source = Marketplace.Subscriptions(),
    #"https://api.datamarket.azure.com/data.ashx/aml_labs/lexicon_based_sentiment_analysis/v1/" = Source{[ServiceUrl="https://api.datamarket.azure.com/data.ashx/aml_labs/lexicon_based_sentiment_analysis/v1/"]}[Feeds],
    Score1 = #"https://api.datamarket.azure.com/data.ashx/aml_labs/lexicon_based_sentiment_analysis/v1/"{[Name="Score"]}[Data],
    #"Invoked FunctionScore1" = Score1("I had a good day")
in
    #"Invoked FunctionScore1"
You need to remove the last line (# “Invoked FunctionScore1”), which calls the function, leaving the following code:
let
    Source = Marketplace.Subscriptions(),
    #"https://api.datamarket.azure.com/data.ashx/aml_labs/lexicon_based_sentiment_analysis/v1/" = Source{[ServiceUrl="https://api.datamarket.azure.com/data.ashx/aml_labs/lexicon_based_sentiment_analysis/v1/"]}[Feeds],
    Score1 = #"https://api.datamarket.azure.com/data.ashx/aml_labs/lexicon_based_sentiment_analysis/v1/"{[Name="Score"]}[Data],
    #"Invoked FunctionScore1" = Score1("I had a good day")
in
    Score1
Now you can click “Close & Load” to close the Query Editor window. Now you have the “Score” function, which you can call from other queries. For example, make the following Excel spreadsheet:
Click the “From Table” button to load this table into Power Query, then click “Add Custom Column” in the Query Editor and add a new column called “Sentiment Score” with the expression Score ( [Sentence])
You will be asked to set the privacy level for the data used, since calling this function involves sending data from your worksheet to the API, where, potentially, someone can see them.
Click “Continue” and set the privacy level for this workbook as “Public” so that the data can be sent to the API:
Click “Save” and you will see that a “Sentiment Score” column has been added containing the value “Record”. Click on the “Expand” icon in this column and then “Ok”:
And finally, you will see, in fact, the grade:
Here is the code:
let
    Source = Excel.CurrentWorkbook(){[Name="Table3"]}[Content],
    #"Added Custom" = Table.AddColumn(Source, "SentimentScore", each Score([Sentence])),
    #"Expand SentimentScore" = Table.ExpandRecordColumn(#"Added Custom", "SentimentScore", {"result"}, {"SentimentScore.result"})
in
    #"Expand SentimentScore"
You can download the workbook file here .
Of course, I could not resist and repeated this with my Facebook status updates - which can be accessed very easily from Power Query . Here is the average monthly assessment of the tonality of my statuses from June 2009 to the present:
As you can see, I was in a particularly good mood in August - perhaps due to the fact that I was on vacation almost the entire month.