Data backup
- Tutorial
Continuing the testing of the EMC product lines, this time we will deal with the company's software for creating backups and data recovery called EMC NetWorker. Therefore, today I will share with you experience in deploying the classic "backup software"

NetWorker makes life easier for those who “have already started making backups.” NetWorker makes the backup process centralized and automated. But in order for all this to work, and there was no need to touch anything, you need to carefully tinker with all the intricacies of setting up systems and creating backup tasks (Task for creating a backup copy). Therefore, it is of great relevance to acquire NetWorker for use in large and complex infrastructures.
NetWorker was developed in 1988 by Legato, and the first version entered the Enterprise solutions market in 1990. Then the software was also called Legato NetWorker, but in 2003 EMC bought Legato, and now it is EMC NetWorker (despite the word legato still present in the code)
NetWorker works according to the server-client scheme. That is, the NetWorker server is installed on the dedicated host that is backing up, and the NetWorker client is installed on the hosts whose data we want to save.
NetWorker stores backups on the media that you provide to it, whether it is SHD, VTL, any tape library, or a dedicated ball (CIFS, NFS). NetWorker, in principle, is configured to work with all the devices that are in your storage area network SAN, and LAN network. In addition, NetWorker can operate at the application level, whether it be VMware, MS SQL, Oracle, Exchange, etc., you only need to install the appropriate module.
When you purchase NetWorker, you need to understand well what we will use, since NetWorker is very strictly licensed.
The list of what is most often licensed:
· The number of clients (physical, virtual, working via NDMP protocol),
· The number of storage nodes - Storage Node,
· The amount of data stored on disk devices,
· The number of tape libraries - autochangers,
· Various modules (Mod for Microsoft Applications Windows, for Databases and Appliacations, for SAP, etc.)
Or you can simply license out the total amount of data that needs to be protected.
First, let's see what is needed to work with NetWorker:
1. A server or virtual machine (VM) with a preinstalled OS, that is, NetWorker is an application and is installed as a program in the OS. In our case, it will be a VM on the IBM Flex System with Win2008R2 on board. We will install NetWorker Server on it. (a configured DNS is required, or you will have to write a lot of things in hosts)
2. If we want to make a system with distributed load, then we need at least one more server. We will not use it. But if used, then the NetWorker Storage node would then be installed on it.
3. A place to store backups. We will use the available DD160 using the DD Boost protocol.
4. Clients themselves: hosts with applications, databases, virtual machines, computers or laptops of users.
NetWorker runs on all Linux, Unix, and Windows-like operating systems as a service, and the easiest way to install it is on Windows.

If you do not go into the jungle of the installer, the Server NetWorker deployment process takes 22 clicks on the word "next" or OK and, in general, you must agree with all the default policies.
But you really need to get a grasp of it, as there will be a stage where you need to create a NetWorker administrator account.
It looks like just installed NetWorker

Since the main storage location will be DD160, we connect it to our NetWorker, and, depending on which license is purchased - VTL or DD Boost, we connect using this protocol. We have a DD Boost license and this makes life much easier, since if there was only a VTL license, you would have to create drives, tapes, etc. on Data Domain, and connect all this to NetWorker like a regular tape library.
Using a working computer as an example, install the NetWorker client.
Thus, one of the ways to create a client, at the same time and create a group, using the usual installation wizard is described.
But in a good way, all this must be done manually, through New Client Properties. And at each point separately analyze the capabilities of NetWorker, for example, the creation of pre- and post-scripts. Including, and remote installation of several clients at once. And for this there is an Administration Guide of 814 pages ...
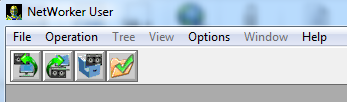
For the average user, it is possible to initiate data recovery on their own, create backup copies of what they want, or archive data. To do this, run the NetWorker User program, which is installed with the NetWorker client.
Backup Reporting is also one of NetWorker's most attractive aspects.
Reports can be configured so that they arrive by e-mail or via SNMP to any monitoring service.
So, setting it all up once, you can no longer worry about data safety.
All successful use of EMC NetWorker!
Why all this?
NetWorker makes life easier for those who “have already started making backups.” NetWorker makes the backup process centralized and automated. But in order for all this to work, and there was no need to touch anything, you need to carefully tinker with all the intricacies of setting up systems and creating backup tasks (Task for creating a backup copy). Therefore, it is of great relevance to acquire NetWorker for use in large and complex infrastructures.
A bit of history
NetWorker was developed in 1988 by Legato, and the first version entered the Enterprise solutions market in 1990. Then the software was also called Legato NetWorker, but in 2003 EMC bought Legato, and now it is EMC NetWorker (despite the word legato still present in the code)
How does it all work
NetWorker works according to the server-client scheme. That is, the NetWorker server is installed on the dedicated host that is backing up, and the NetWorker client is installed on the hosts whose data we want to save.
NetWorker stores backups on the media that you provide to it, whether it is SHD, VTL, any tape library, or a dedicated ball (CIFS, NFS). NetWorker, in principle, is configured to work with all the devices that are in your storage area network SAN, and LAN network. In addition, NetWorker can operate at the application level, whether it be VMware, MS SQL, Oracle, Exchange, etc., you only need to install the appropriate module.
Licensing
When you purchase NetWorker, you need to understand well what we will use, since NetWorker is very strictly licensed.
The list of what is most often licensed:
· The number of clients (physical, virtual, working via NDMP protocol),
· The number of storage nodes - Storage Node,
· The amount of data stored on disk devices,
· The number of tape libraries - autochangers,
· Various modules (Mod for Microsoft Applications Windows, for Databases and Appliacations, for SAP, etc.)
Or you can simply license out the total amount of data that needs to be protected.
Installation process
First, let's see what is needed to work with NetWorker:
1. A server or virtual machine (VM) with a preinstalled OS, that is, NetWorker is an application and is installed as a program in the OS. In our case, it will be a VM on the IBM Flex System with Win2008R2 on board. We will install NetWorker Server on it. (a configured DNS is required, or you will have to write a lot of things in hosts)
2. If we want to make a system with distributed load, then we need at least one more server. We will not use it. But if used, then the NetWorker Storage node would then be installed on it.
3. A place to store backups. We will use the available DD160 using the DD Boost protocol.
4. Clients themselves: hosts with applications, databases, virtual machines, computers or laptops of users.
NetWorker runs on all Linux, Unix, and Windows-like operating systems as a service, and the easiest way to install it is on Windows.
If you do not go into the jungle of the installer, the Server NetWorker deployment process takes 22 clicks on the word "next" or OK and, in general, you must agree with all the default policies.
But you really need to get a grasp of it, as there will be a stage where you need to create a NetWorker administrator account.
22 clicks:
The installer is a link to the .exe file, which is acquired by the integrator during installation. An archive with all the necessary files for deploying NetWorker takes a little more than 200 MB.
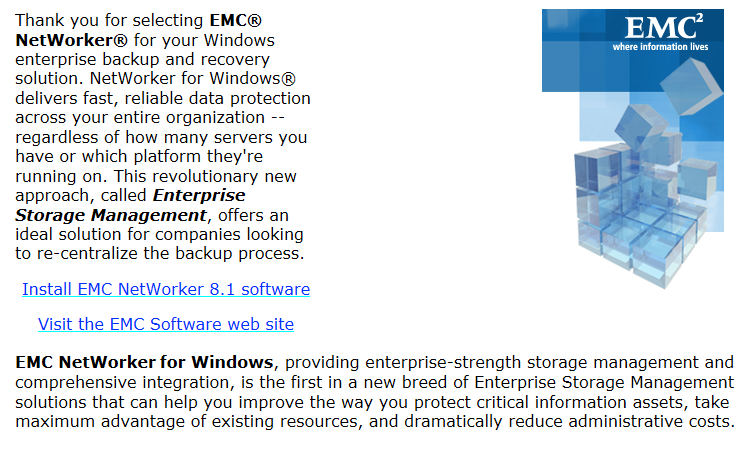
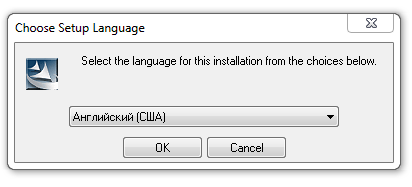
English, OK (1)
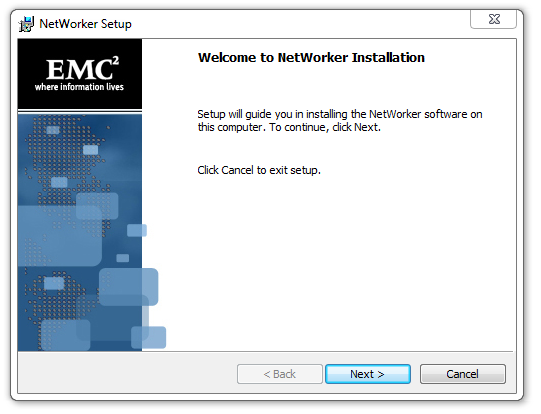
Next (2)
Enter the server credentials. Next (3)
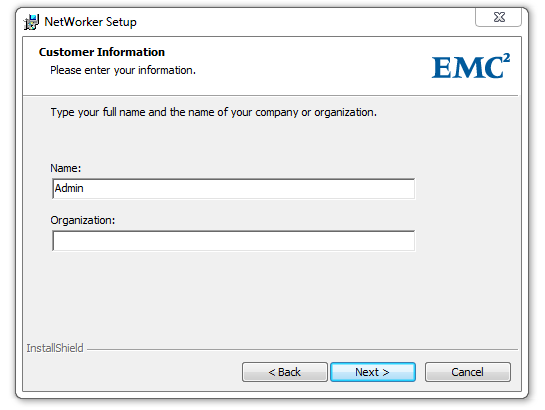
Make or not make changes to the Firewall. Next (4)

We select which component we install, Server and Client, put all the “checkmarks”, and determine the place where we install. Next (5)
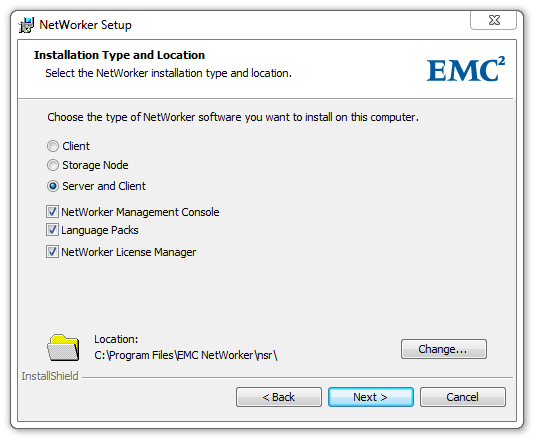
Choose which languages we will use. Further (6) We
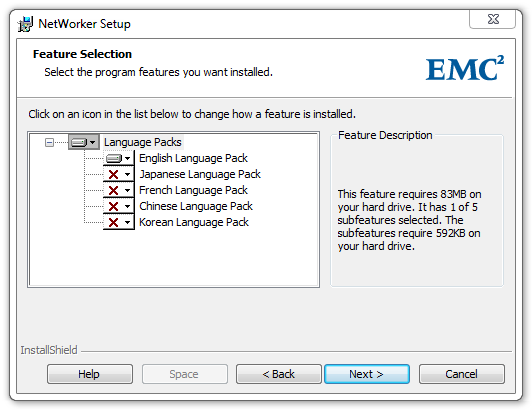
confirm the terms of the License Agreement. Next (7) We
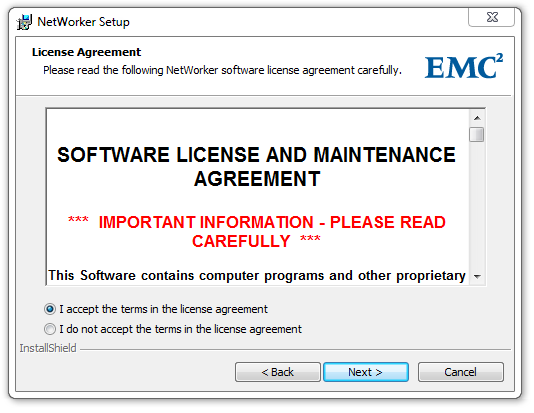
check whether we have chosen everything correctly. Next (8)
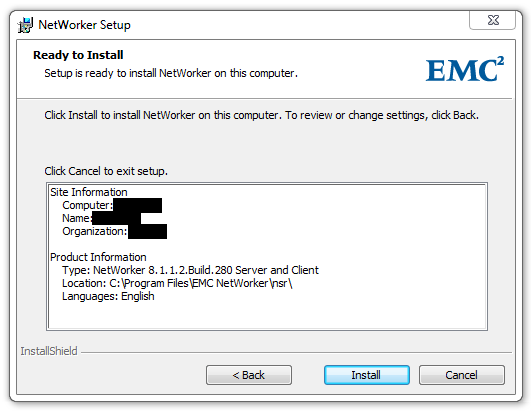

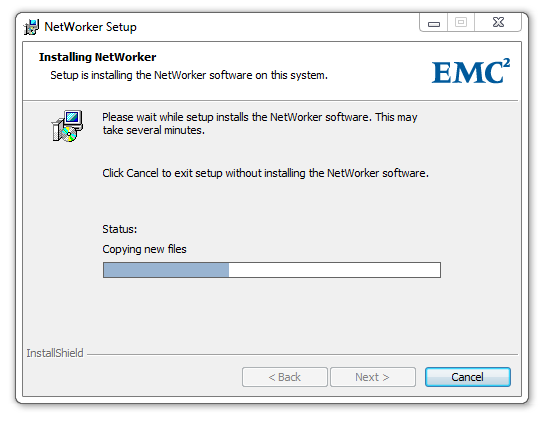
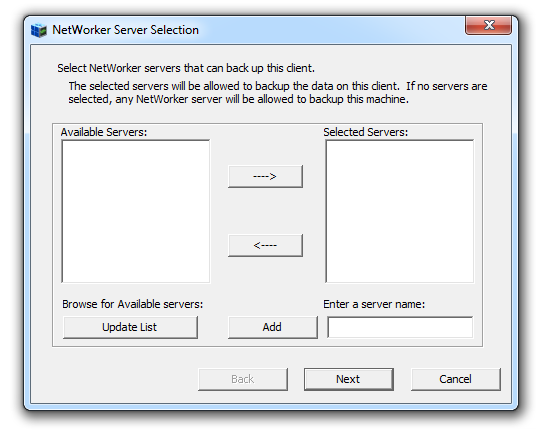
During installation, a window appears with a choice of NetWorker server; this means that the NetWorker client is installed. Since the server itself is not ready yet, just click on (9)
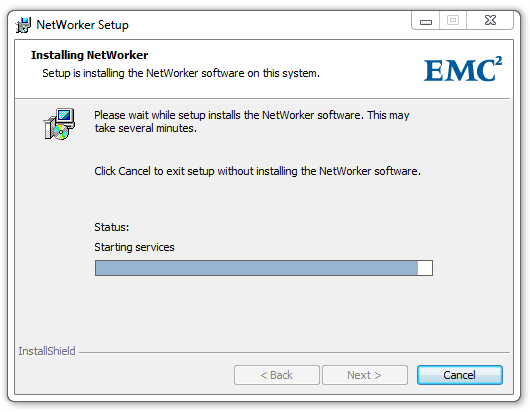
Also, during the installation of the NetWorker server, a window appears with the installation of the management console. Next (10)
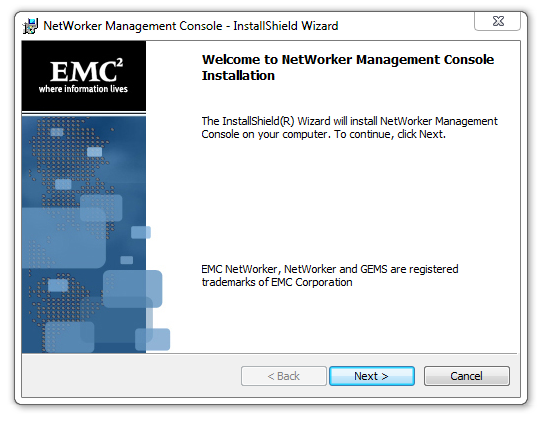
Enter the same server credentials. Next (11)
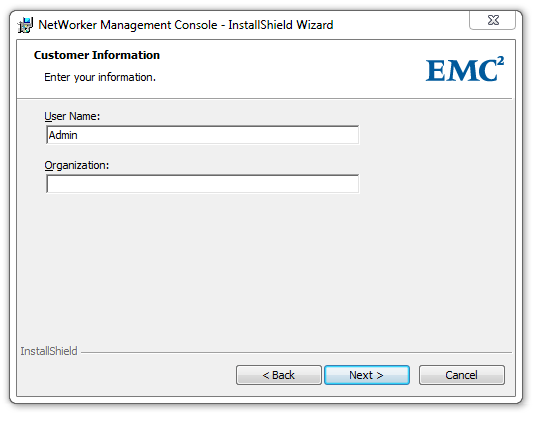
Choose the installation location. Next (12)
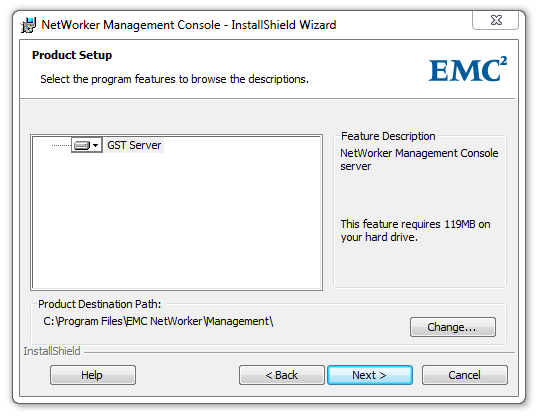
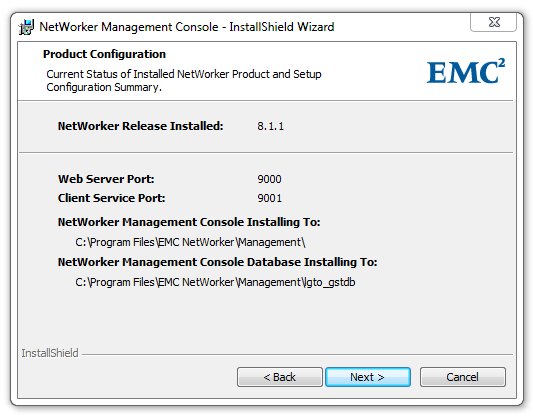
Choose the location of the database of the management console and the port number on which the console will work. Ports 9000 and 9001 are set by default. Next (13) We
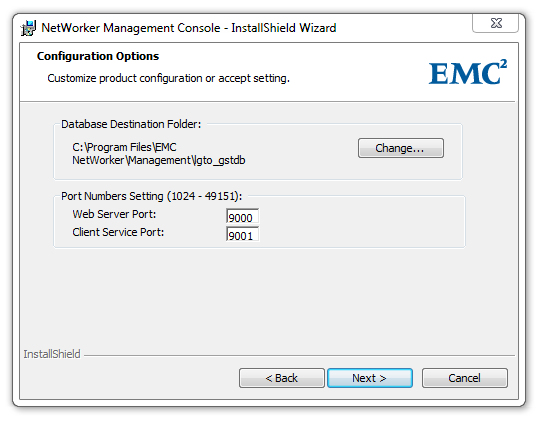
check whether everything is correctly selected. Next (14)
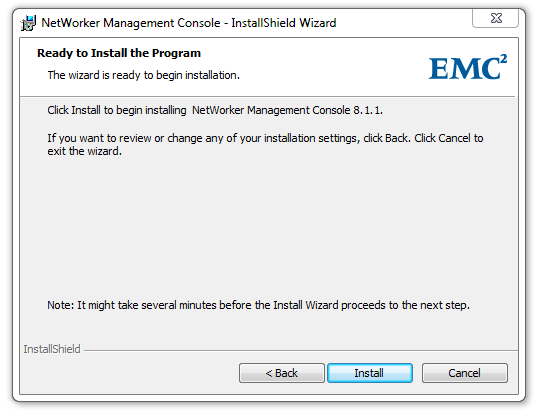
Next (15)
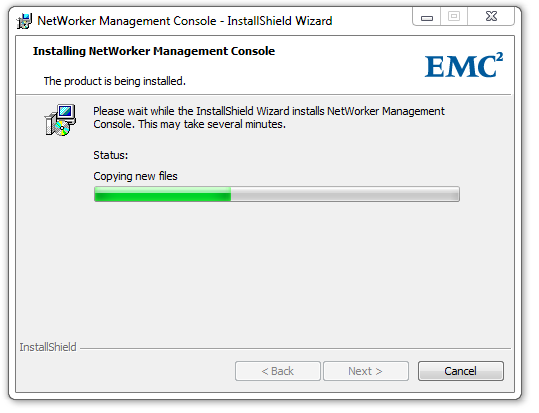
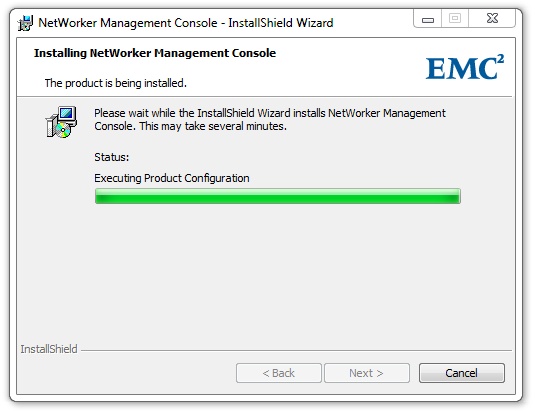
The management console is installed. Finish (16)
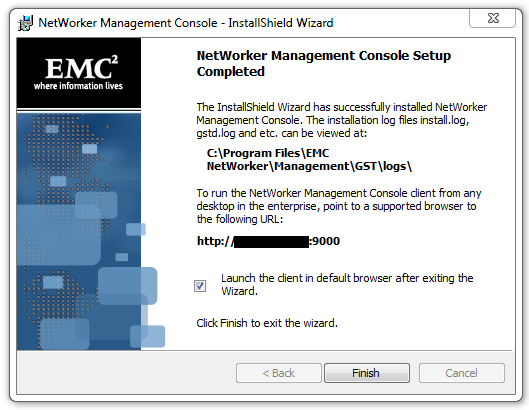
The NetWorker server is installed. Next (17)
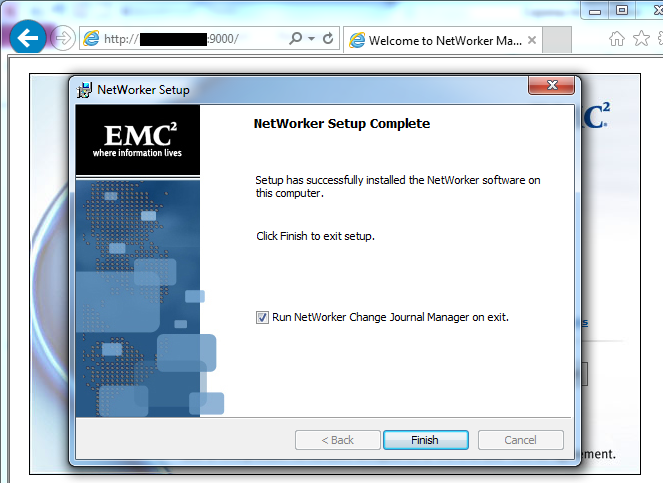
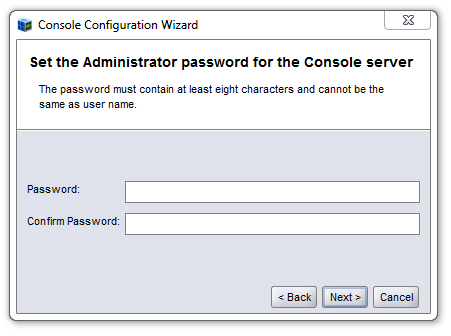
And immediately starts the initial configuration of the management console. Next (18) We

create a password. Next (19)
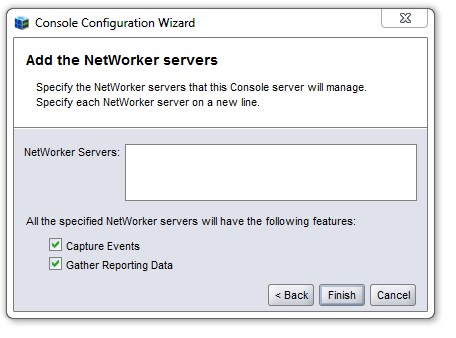
Enter the IP address of the NetWorker server. Next (20)

Or the name of the NetWorker server. Finish (21)
The link ServerName (IP_servera): 9000, or automatically add a shortcut on the desktop opens the management console. Start (22)
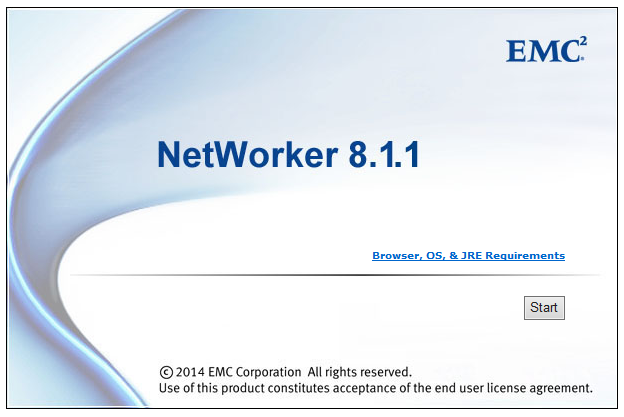
The installer is a link to the .exe file, which is acquired by the integrator during installation. An archive with all the necessary files for deploying NetWorker takes a little more than 200 MB.
English, OK (1)
Next (2)
Enter the server credentials. Next (3)
Make or not make changes to the Firewall. Next (4)
We select which component we install, Server and Client, put all the “checkmarks”, and determine the place where we install. Next (5)
Choose which languages we will use. Further (6) We
confirm the terms of the License Agreement. Next (7) We
check whether we have chosen everything correctly. Next (8)
During installation, a window appears with a choice of NetWorker server; this means that the NetWorker client is installed. Since the server itself is not ready yet, just click on (9)
Also, during the installation of the NetWorker server, a window appears with the installation of the management console. Next (10)
Enter the same server credentials. Next (11)
Choose the installation location. Next (12)
Choose the location of the database of the management console and the port number on which the console will work. Ports 9000 and 9001 are set by default. Next (13) We
check whether everything is correctly selected. Next (14)
Next (15)
The management console is installed. Finish (16)
The NetWorker server is installed. Next (17)
And immediately starts the initial configuration of the management console. Next (18) We
create a password. Next (19)
Enter the IP address of the NetWorker server. Next (20)
Or the name of the NetWorker server. Finish (21)
The link ServerName (IP_servera): 9000, or automatically add a shortcut on the desktop opens the management console. Start (22)
Appearance
It looks like just installed NetWorker
appearance
When Launch NetWorker Administration is clicked, the NetWorker Server Basic Management window opens.

On the first tab “Monitoring” there will be all tasks for creating backups or restoring them.
While the list is empty, since we have not created anything yet.
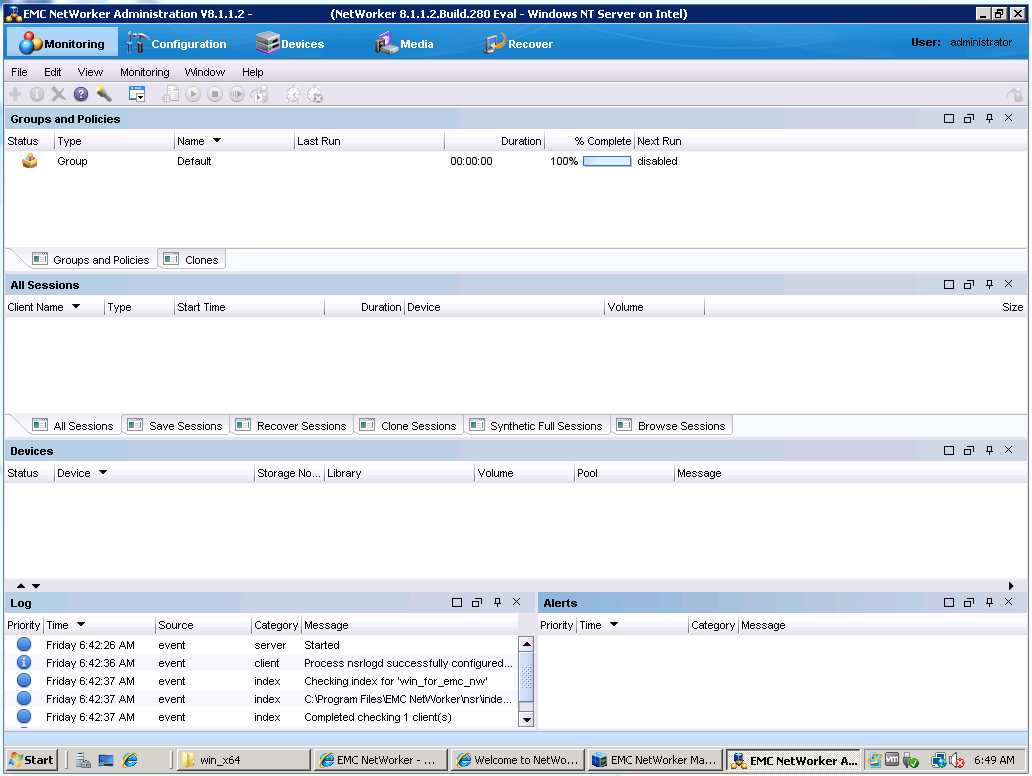
On the second tab “Configuration” the basic settings of the backup process are made.
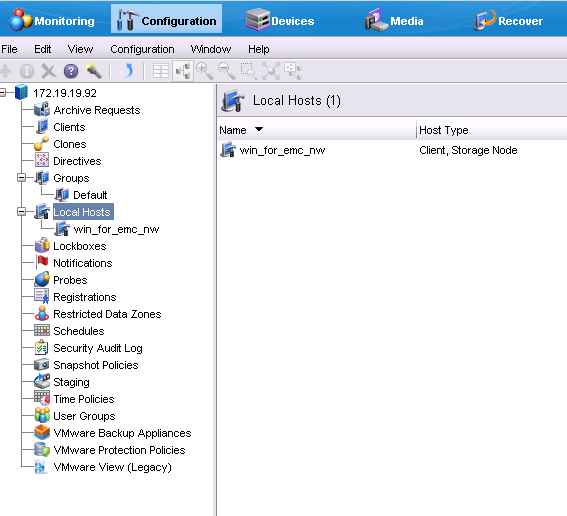
The third tab “Devices” shows all the devices connected to NetWorker that participate in the backup process: libraries (Tape or VTL), drives, NetWorker storage nodes, Data Domain and Avamar.
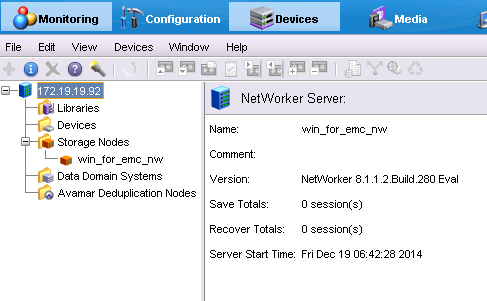
The fourth tab - “Media” devices that are related to data safety, in order: Templates for cassette labeling, media pools - they combine cassette sets, storage, ribbons, information is recorded in the indexes, which backup data is stored (a set of links to blocks or data files), the backup jobs themselves (i.e. the addresses of folders and files whose backups you need to create).
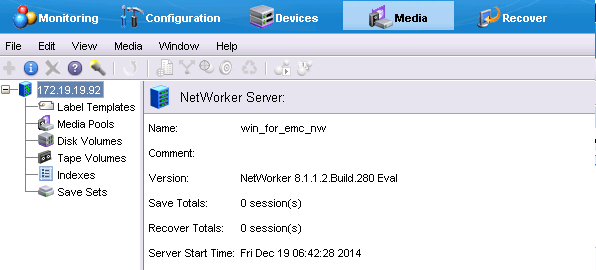
On the last tab, only data recovery jobs will be visible

On the first tab “Monitoring” there will be all tasks for creating backups or restoring them.
While the list is empty, since we have not created anything yet.
On the second tab “Configuration” the basic settings of the backup process are made.
The third tab “Devices” shows all the devices connected to NetWorker that participate in the backup process: libraries (Tape or VTL), drives, NetWorker storage nodes, Data Domain and Avamar.
The fourth tab - “Media” devices that are related to data safety, in order: Templates for cassette labeling, media pools - they combine cassette sets, storage, ribbons, information is recorded in the indexes, which backup data is stored (a set of links to blocks or data files), the backup jobs themselves (i.e. the addresses of folders and files whose backups you need to create).
On the last tab, only data recovery jobs will be visible
Integration with Data Domain
Since the main storage location will be DD160, we connect it to our NetWorker, and, depending on which license is purchased - VTL or DD Boost, we connect using this protocol. We have a DD Boost license and this makes life much easier, since if there was only a VTL license, you would have to create drives, tapes, etc. on Data Domain, and connect all this to NetWorker like a regular tape library.
Integration with Data Domain
As you can see, everything is in order with our DD, and you can continue.
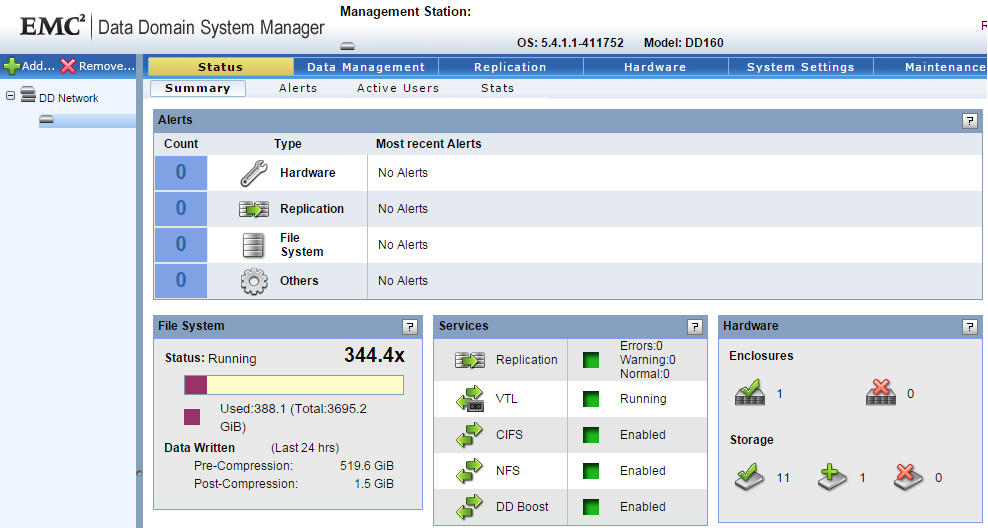
Since we will use DD Boost, we don’t need to do anything with DD first, we just need to remember the password with the account from it.
In order to connect DD, go to the Devices tab> Right-click on Data Domain Systems> New Device Wizard.

Select Data Domain.
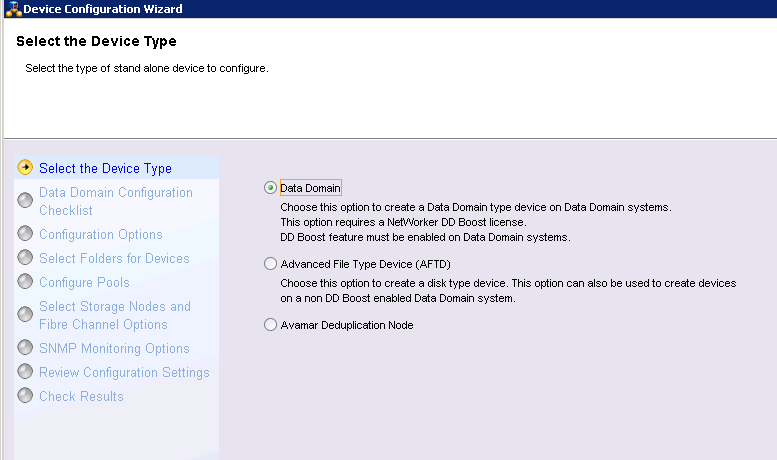
Next we are shown what we will do now.

Next, enter the IP address of our DD and login with a password from DD Boost.

At this stage, create a folder in DD, where backups will be stored, and in DD terminology, create MTree for our NetWorker.

Media Pool is created automatically.
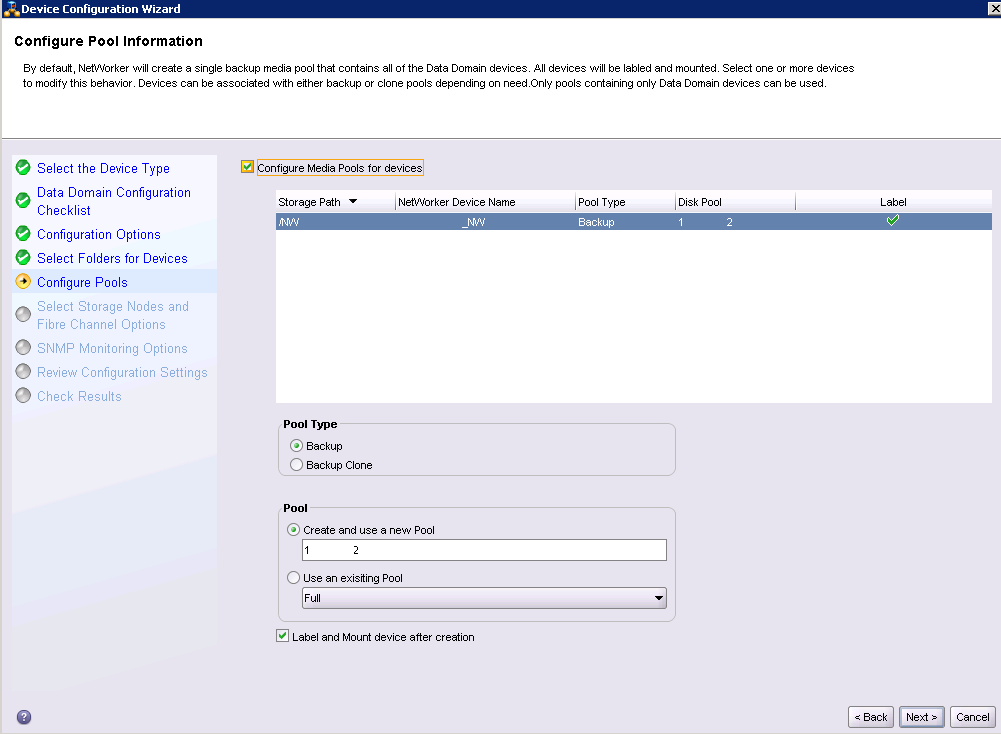
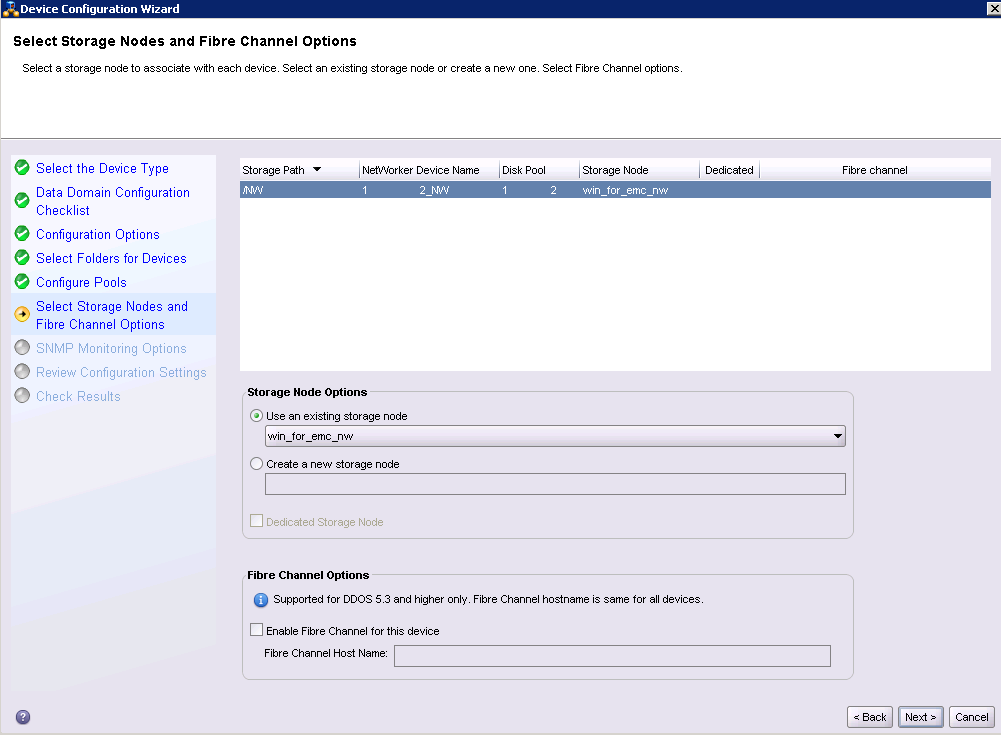
Choose which Storage Node we will use, and whether we will configure FC.
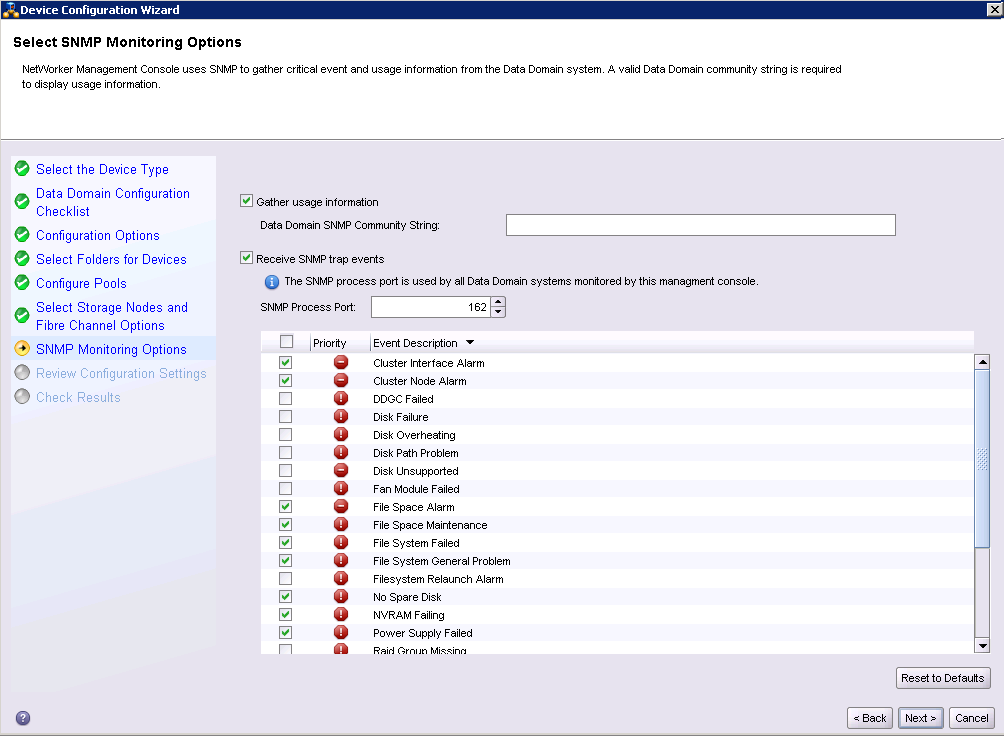
Configure SNMP.
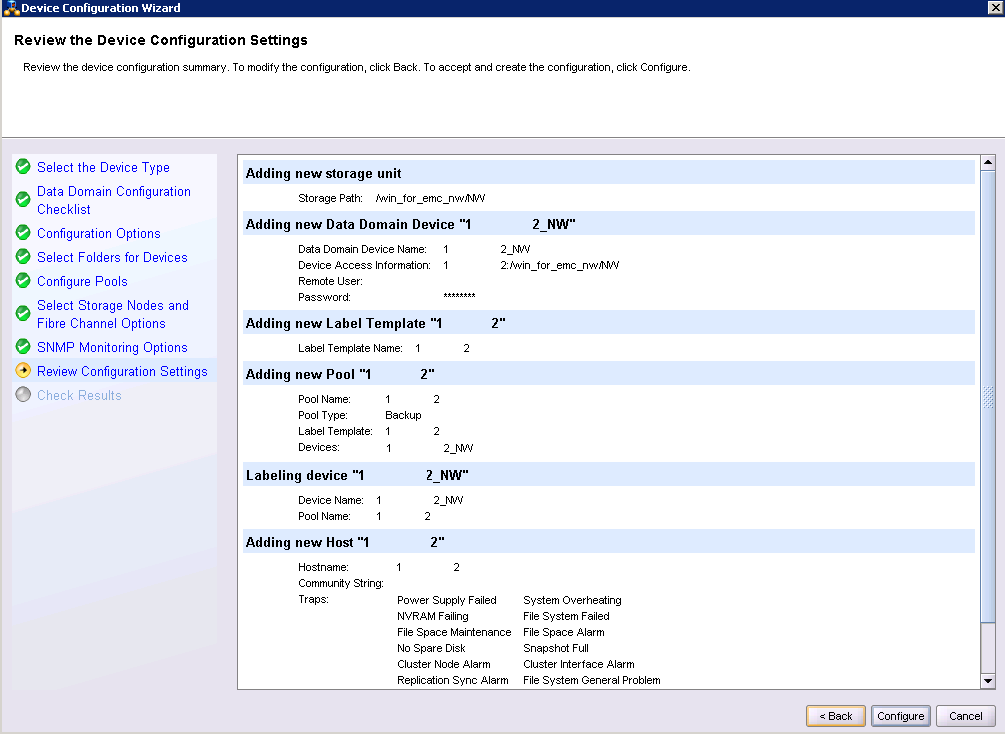
Check if we entered everything correctly.
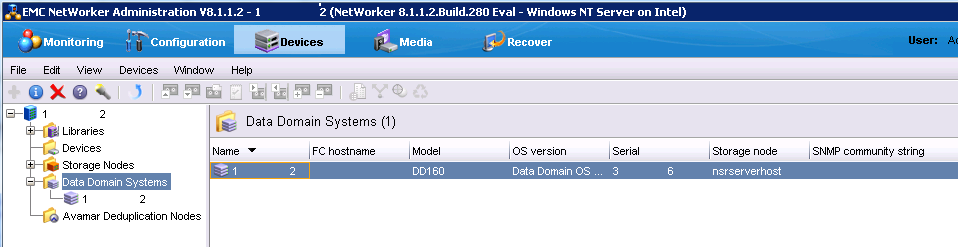
Check if everything is configured correctly. (finish, 10 clicks on the “next”)

Done, DD has seamlessly integrated into our NetWorker
Since we will use DD Boost, we don’t need to do anything with DD first, we just need to remember the password with the account from it.
In order to connect DD, go to the Devices tab> Right-click on Data Domain Systems> New Device Wizard.
Select Data Domain.
Next we are shown what we will do now.
Next, enter the IP address of our DD and login with a password from DD Boost.
At this stage, create a folder in DD, where backups will be stored, and in DD terminology, create MTree for our NetWorker.
Media Pool is created automatically.
Choose which Storage Node we will use, and whether we will configure FC.
Configure SNMP.
Check if we entered everything correctly.
Check if everything is configured correctly. (finish, 10 clicks on the “next”)
Done, DD has seamlessly integrated into our NetWorker
Client Installation
Using a working computer as an example, install the NetWorker client.
Client Installation
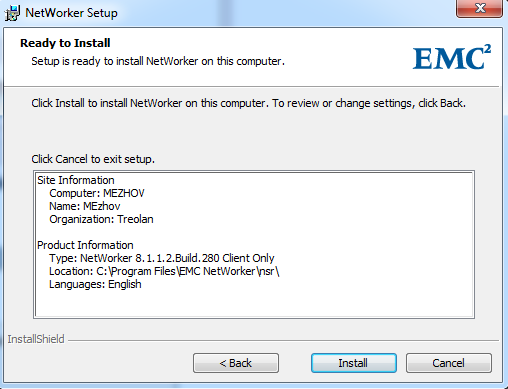
Клиент ставится с того же файла .exe, что и сервер NetWorker, но на этот раз выбирается только клиент

Далее
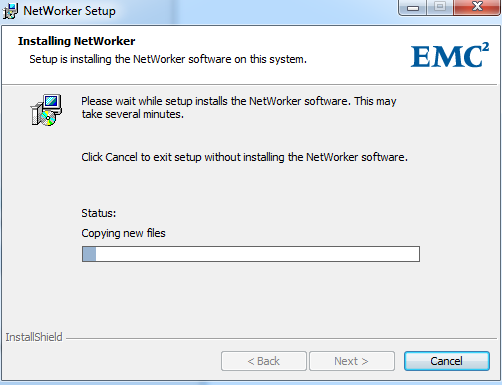
Устанавливается в течение пары минут.
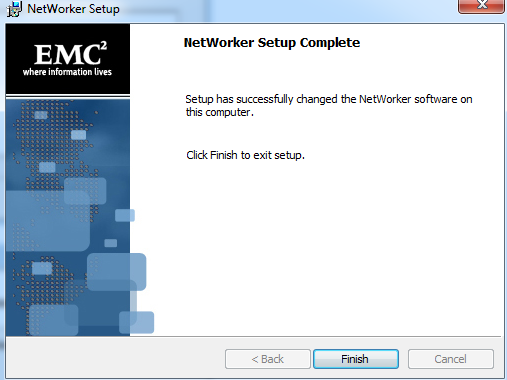
Готово
Сразу после установки открывается NetWorker Server Selection.

Добавим нашего клиента в сервере NetWorker
Открываем вкладку Configuration > правый клик по Clients > New Clients Wizard
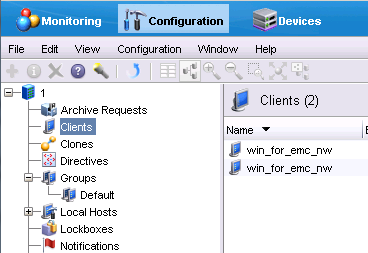
Вводим имя компьютера или IP-адрес

Далее
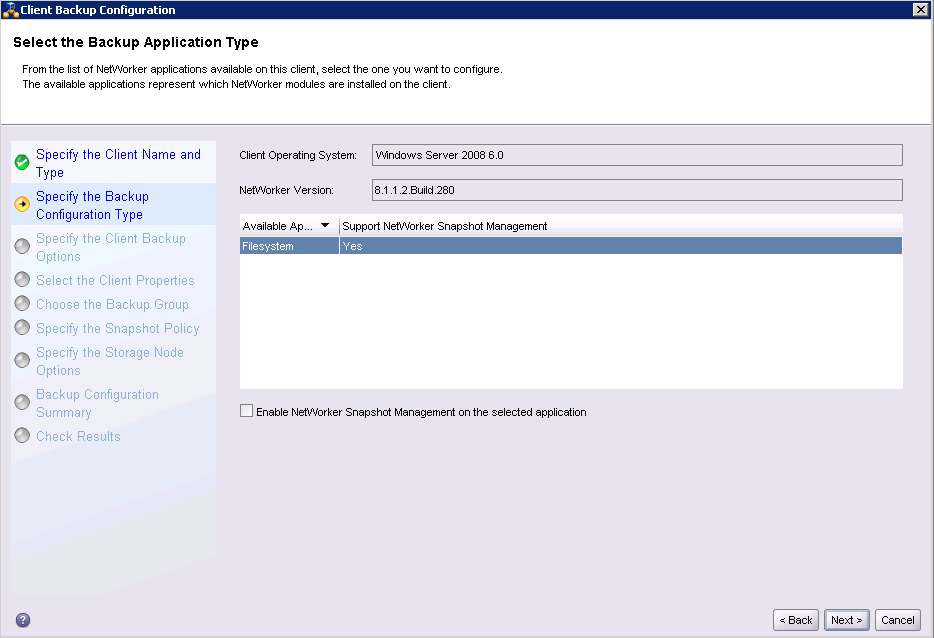
Выбираем, куда будут записываться данные. Тут же выбирается метод дедупликации, если имеется Data Domain или Avamar.
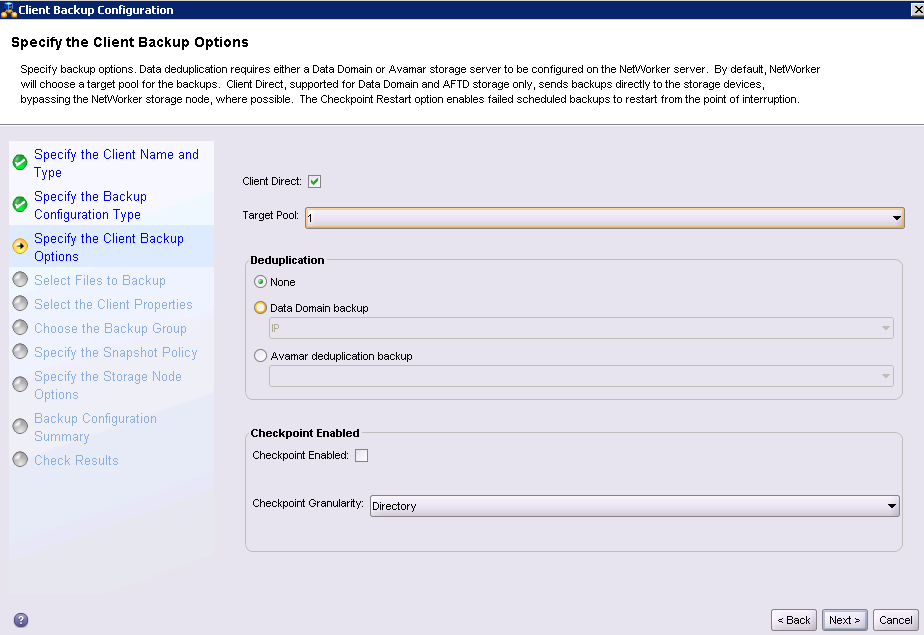
В этом же мастере установки можно уже выбрать, что надо бэкапить с данного клиента
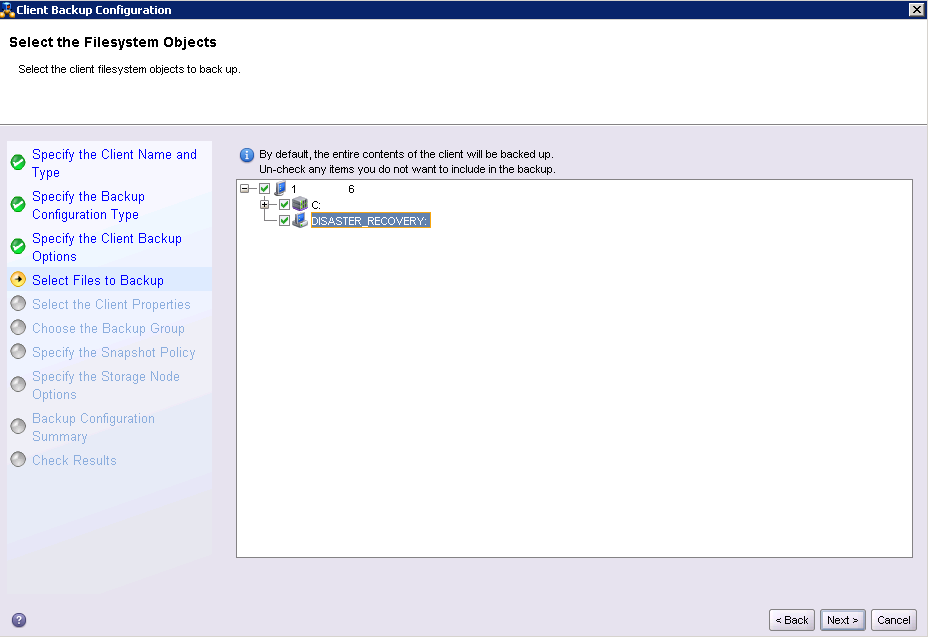
Настраиваем расписание, политики бэкапа и время хранения копий
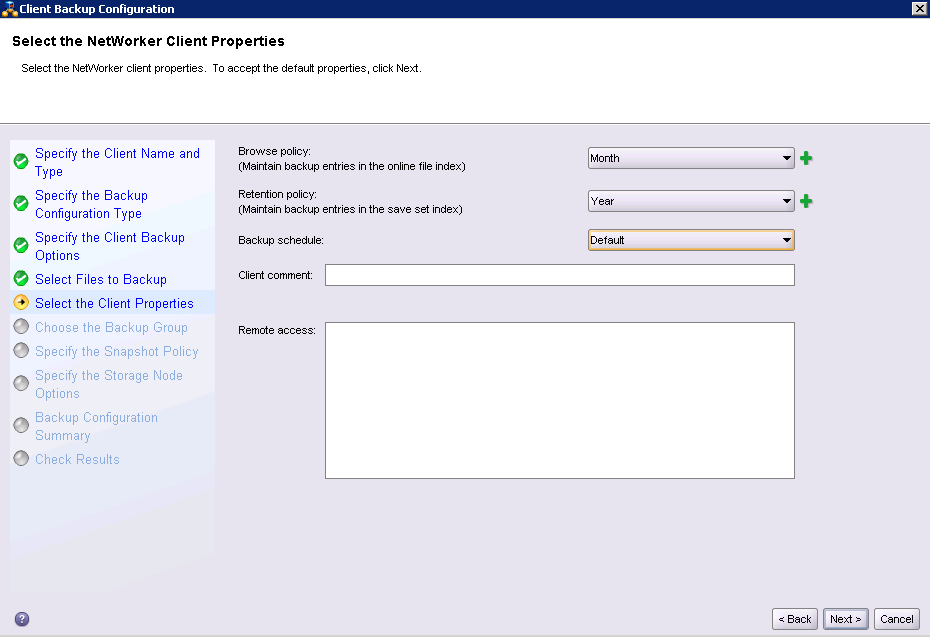
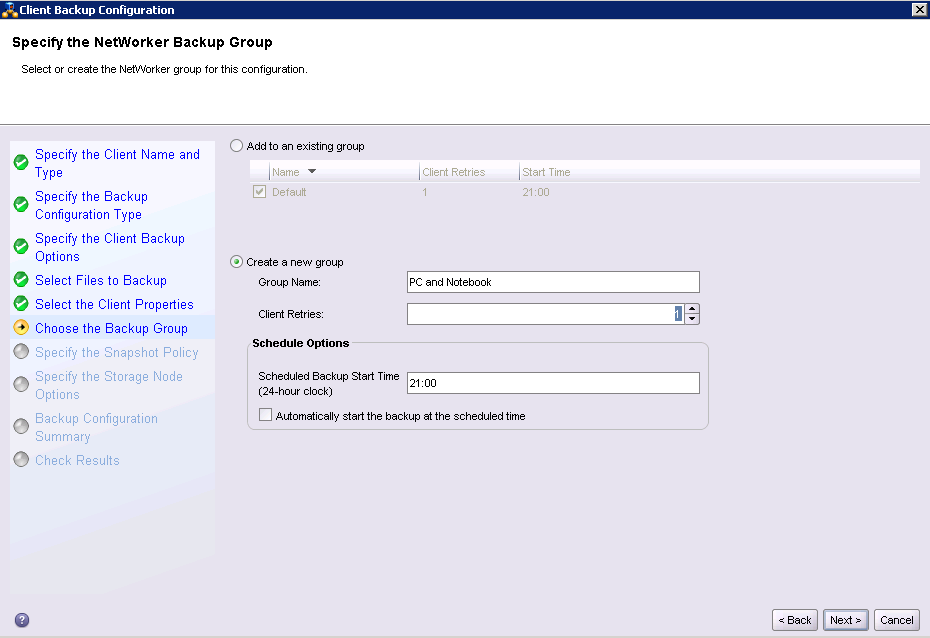
Создаём группу, в которую будут входить и другие клиенты
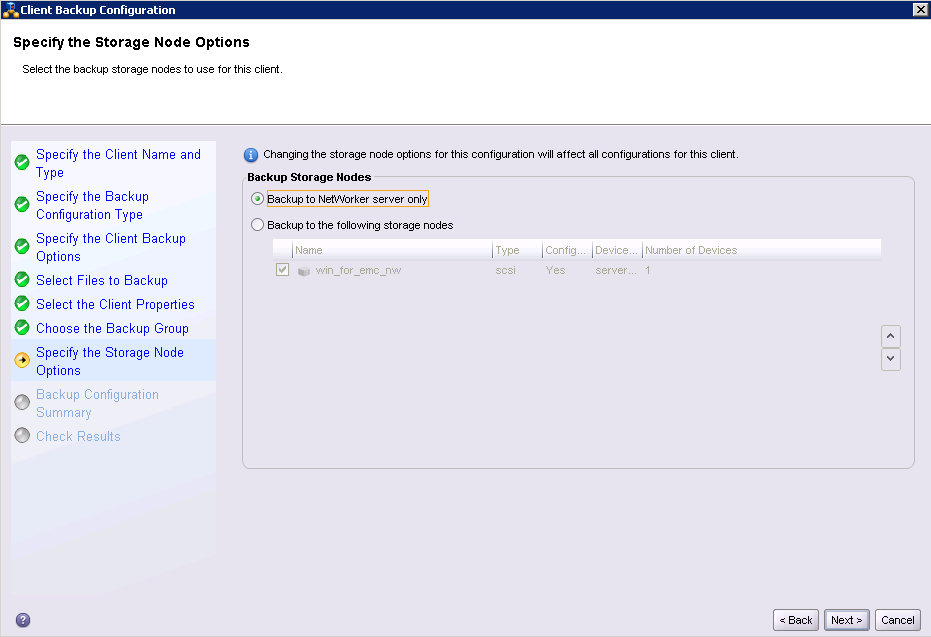
На данном этапе выбирается, с помощью какой Storage Node будет происходить бэкап; так у нас только один узел хранения (сам сервер NetWorker), оставляем его по умолчанию.
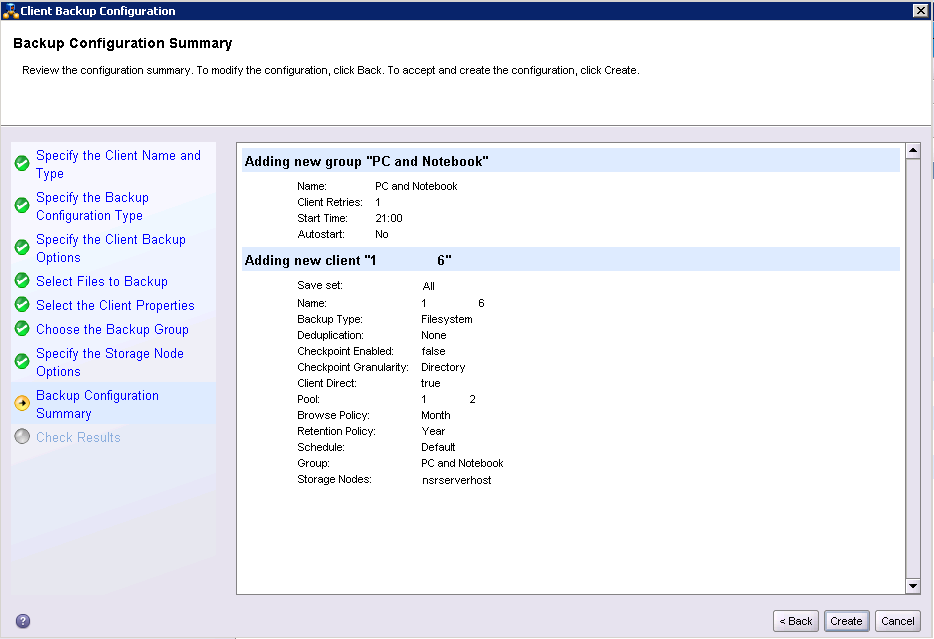
Проверяем, всё ли правильно выбрано.

Готово
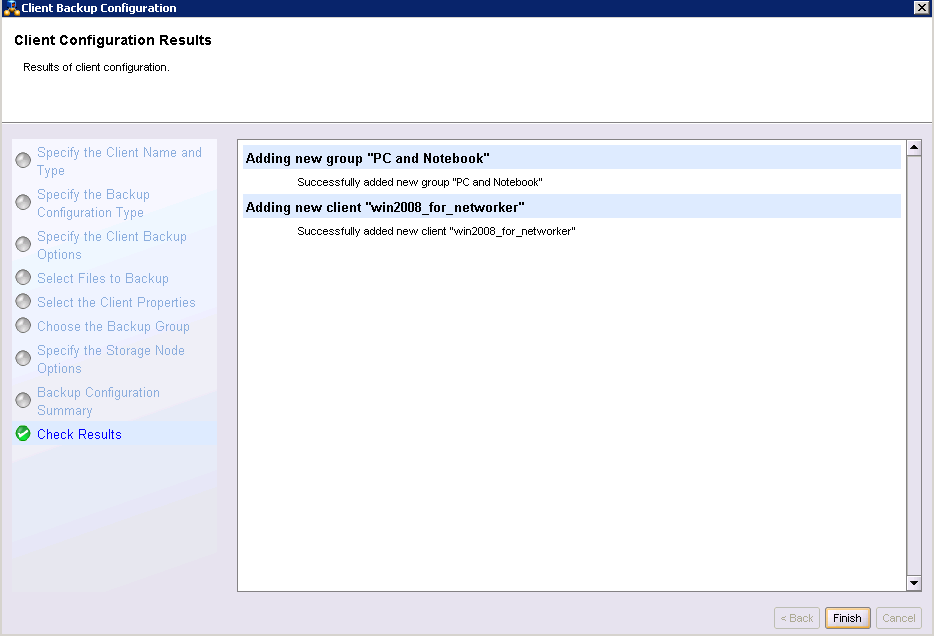
Клиент и группа созданы.
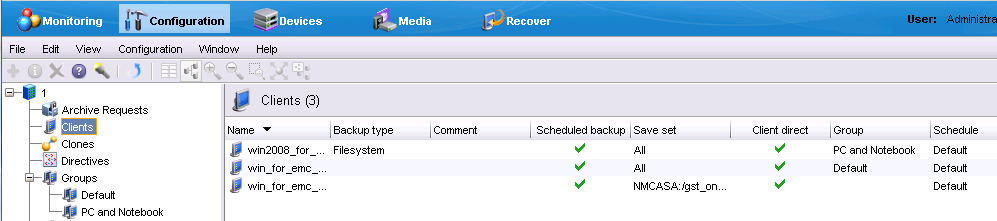
Чтобы задание стартовало в назначенное время, нужно активировать автостарт в группе, так как при создании оно по умолчанию выключено.

Далее
Устанавливается в течение пары минут.
Готово
Сразу после установки открывается NetWorker Server Selection.
Добавим нашего клиента в сервере NetWorker
Открываем вкладку Configuration > правый клик по Clients > New Clients Wizard
Вводим имя компьютера или IP-адрес
Далее
Выбираем, куда будут записываться данные. Тут же выбирается метод дедупликации, если имеется Data Domain или Avamar.
В этом же мастере установки можно уже выбрать, что надо бэкапить с данного клиента
Настраиваем расписание, политики бэкапа и время хранения копий
Создаём группу, в которую будут входить и другие клиенты
На данном этапе выбирается, с помощью какой Storage Node будет происходить бэкап; так у нас только один узел хранения (сам сервер NetWorker), оставляем его по умолчанию.
Проверяем, всё ли правильно выбрано.
Готово
Клиент и группа созданы.
Чтобы задание стартовало в назначенное время, нужно активировать автостарт в группе, так как при создании оно по умолчанию выключено.
Thus, one of the ways to create a client, at the same time and create a group, using the usual installation wizard is described.
But in a good way, all this must be done manually, through New Client Properties. And at each point separately analyze the capabilities of NetWorker, for example, the creation of pre- and post-scripts. Including, and remote installation of several clients at once. And for this there is an Administration Guide of 814 pages ...
For the average user, it is possible to initiate data recovery on their own, create backup copies of what they want, or archive data. To do this, run the NetWorker User program, which is installed with the NetWorker client.
Reports
Backup Reporting is also one of NetWorker's most attractive aspects.
Reports can be configured so that they arrive by e-mail or via SNMP to any monitoring service.
example
Here is an example of a backup task that failed:

The "hostname resolution failed" error is a name matching error, that is, the server "did not reach" the client.
Or, you can immediately see when the task was successful, and when not. That is, you don’t even have to open a report.

Everything will be written quite simply and intuitively.
The "hostname resolution failed" error is a name matching error, that is, the server "did not reach" the client.
Or, you can immediately see when the task was successful, and when not. That is, you don’t even have to open a report.
Everything will be written quite simply and intuitively.
Conclusion
So, setting it all up once, you can no longer worry about data safety.
All successful use of EMC NetWorker!