 November 27, 2014 at 16:37
SSLR: Screen Space Local Reflections in AAA Games
- Tutorial
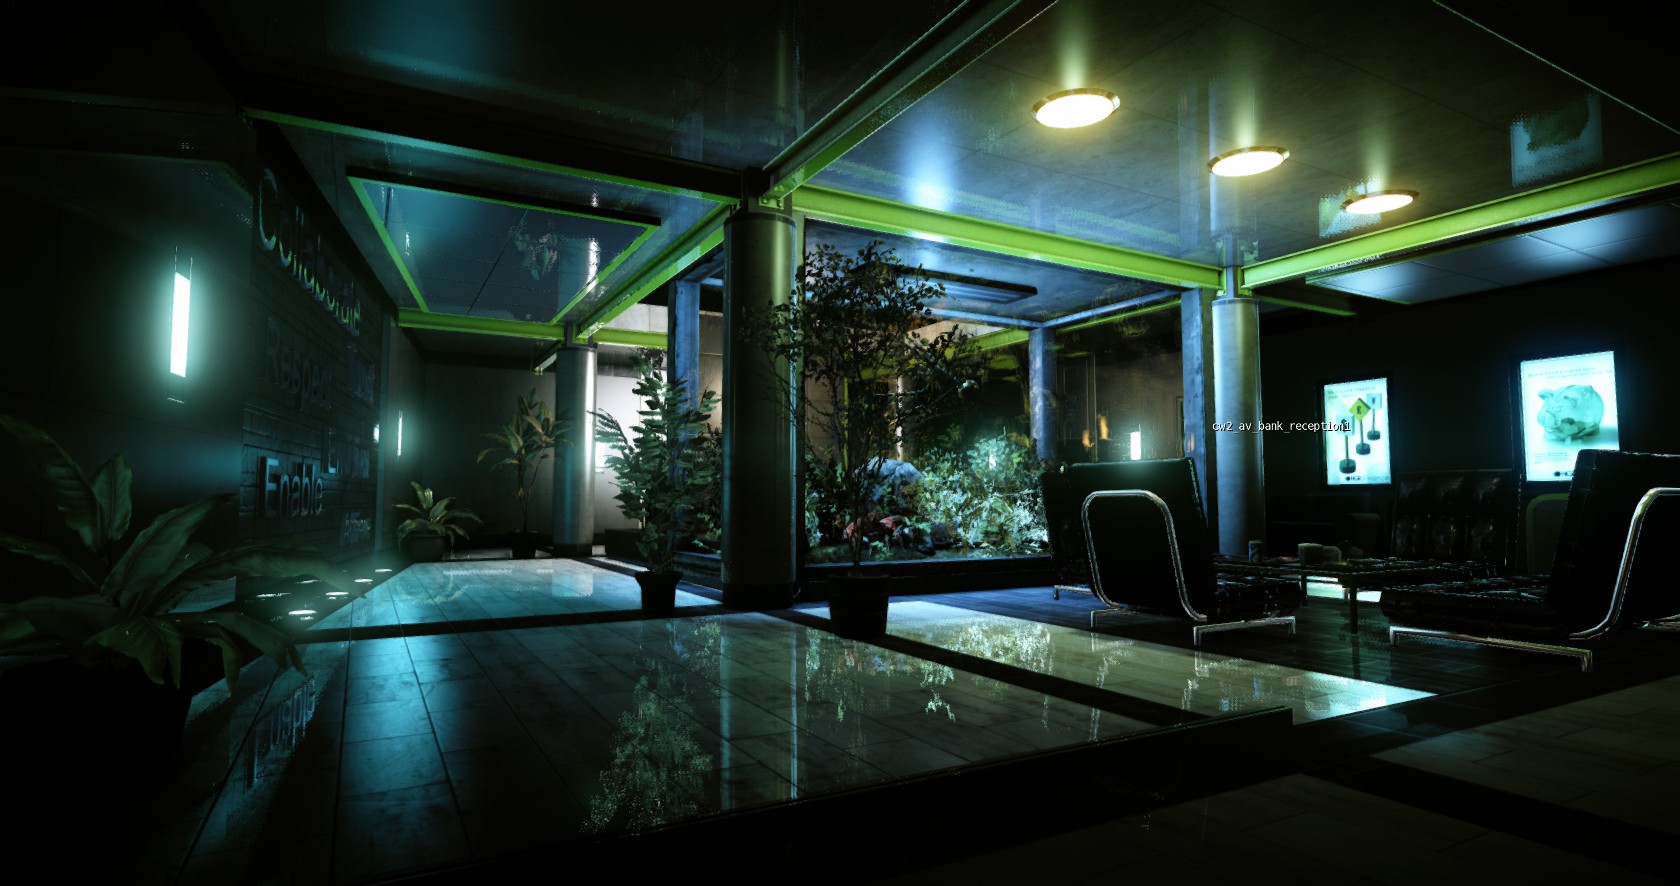
Hello Friend! This time I will again raise the issue of graphics in AAA games. I already examined the HDRR technique (not to be confused with HDRI) here and talked a little about color correction. Today I will tell you what SSLR (also known as SSPR, SSR) is: Screen Space Local Reflections . Who cares - under cat.
Introduction to Deferred Rendering
First, I’ll introduce a concept such as Deferred Rendering (not to be confused with Deferred Shading , since the latter refers to lighting). What is the essence of Deferred Rendering ? The fact is that all effects (such as lighting, global shading, reflections, DOF ) can be separated from the geometry and realize these effects as a special kind of postprocessing. For example, what does it take to apply DOF ( Depth Of Field , long-distance blur) to our scene? Have the scene itself ( Color Map ) and have information about the position of the texel (in other words, how many pixels are far from the camera). Next - everything is simple. Apply Blur to Color Mapwhere the blur radius will depend on the pixel depth (from the Depth Map ). And if you look at the result - the further the object, the more it will be blurred. So what does the Deferred Rendering technique do ? She builds the so-called GBuffer , which usually includes three textures ( RenderTarget ):
- Color map (information about the diffuse component or just the color of the pixel)

- Normal map (pixel normal information)

- Depth map (information about the position of the “pixel”, only the depth is stored here)

In the case of the Color map , Normal map everything seems to be clear, these are ordinary Surface.Color textures: perhaps, except that the normal vector can lie within [-1, 1] (a simple packing of the vector into the format [0, 1] is used )
But the situation with the Depth map is becoming incomprehensible. How does the Depth map store information about the position of a pixel, and even one number? Speaking very simplistically, the transformation of the primitive:
float4 vertexWVP = mul(vertex, World*View*Projection);Gives us the screen coordinates:
float2 UV = vertexWVP.xy;And some information on how far the pixel is from the camera:
float depth = vertexWVP.z / vertexWVP.w;Based on this, we do not need UV , because when drawing a regular quad on a full screen, it is already known. Therefore, it is worth storing in the depth map not the pixel position, but only the depth.
In the future, we can reconstruct the pixel position in a very simple way:
float3 GetPosition(float2 UV, float depth)
{
	float4 position = 1.0f;
	position.x = UV.x * 2.0f - 1.0f;
	position.y = -(UV.y * 2.0f - 1.0f);
	position.z = depth;
	//Transform Position from Homogenous Space to World Space
	position = mul(position, InverseViewProjection);
	position /= position.w;
	return position.xyz;
}
Let me remind you that to build GBuffer you need a technique like MRT ( Multiple Render Targets ), which draws the model into several Render Target at once (and each RT contains different information). One of the rules of MRT is that the dimension of all Render Target must be the same . In the case of Color Map , Normal Map - Surface.Color : 32-bit RT , where for each ARGB channel there are 8 bits, i.e. 256 gradations from 0 to 1.
Thanks to this approach, we can apply complex effects to any geometry, for example, the most popular Screen Space effect: SSAO (Screen Space Ambient Occlusion). This algorithm analyzes the depth and normal buffers, counting the level of shading. I will not describe the entire algorithm, it has already been described on the Habr, I will only say that the task of the algorithm is to trace the depth map: we have a set of random vectors directed from the considered “pixel” and we need to find the number of intersections with the geometry.
Example effect (left without SSAO, right with SSAO):

Just Deferred Shading is the Screen Space effect. Those. for each light source on the screen (without any optimizations) we draw a quad in Additive mode in the so-called RenderTarget : Light Map . And knowing the world position of the “pixel”, its normal, the position of the light source - we can calculate the illumination of this pixel.
Example of Deferred Shading (lighting is delayed, after rendering the geometry):

Advantages and problems of Screen Space effects
The most important plus of Screen Space effects is the independence of the complexity of the effect from the geometry.
The most important minus is the locality of all effects. The fact is that we will constantly encounter Information Lost , in many cases it is highly dependent on the review, since SSE depends on adjacent texel depths that can be generated by any geometry.
Well, it’s worth noting that Screen Space effects are performed completely on the GPU and are post-processing.
Finally SSLR
After all the theory, we came to an effect such as Screen Space Local Reflections : local reflections in the screen space.
To begin with, we will deal with perspective projection:

The horizontal and vertical angle of view is set by FOV (usually 45 degrees, I prefer 60 degrees), in a virtual camera they are different because Aspect Ratio (aspect ratio) is also taken into account .
The projection window (where we operate with UV-space data) is what we see, then we project our scene.
The front and rear clipping planes, respectively, Near Plane, Far Plane , are set in the same projection as the parameters. In the case of Deferred Rendering , the Far Plane value is too large , because Depth Buffer accuracy will drop dramatically: it all depends on the scene.
Now, knowing the projection matrix and the position on the projection window (as well as the depth) for each pixel, we calculate its position as follows:
float3 GetPosition(float2 UV, float depth)
{
	float4 position = 1.0f;
	position.x = UV.x * 2.0f - 1.0f;
	position.y = -(UV.y * 2.0f - 1.0f);
	position.z = depth;
	position = mul(position, InverseViewProjection);
	position /= position.w;
	return position.xyz;
}
After we need to find the look vector for this pixel:
float3 viewDir = normalize(texelPosition - CameraPosition);The CameraPosition is the camera position.
And find the reflection of this vector from the normal in the current pixel:
float3 reflectDir = normalize(reflect(viewDir, texelNormal));Next, the task is reduced to tracing the depth map. Those. we need to find the intersection of the reflected vector with some geometry. It’s clear that any tracing is done through iterations. And we are very limited in them. Because Each Depth Map selection is worth the time. In my version, we take some initial approximation L and dynamically change it based on the distance between our texel and the position that we “restored”:
float3 currentRay = 0;
float3 nuv = 0;
float L = LFactor;
for(int i = 0; i < 10; i++)
{
    currentRay = texelPosition + reflectDir * L;
    nuv = GetUV(currentRay); // проецирование позиции на экран
    float n = GetDepth(nuv.xy); // чтение глубины из DepthMap по UV
    float3 newPosition = GetPosition2(nuv.xy, n);
    L = length(texelPosition - newPosition);
}
Auxiliary functions, transfer of a world point to the screen space:
float3 GetUV(float3 position)
{
	 float4 pVP = mul(float4(position, 1.0f), ViewProjection);
	 pVP.xy = float2(0.5f, 0.5f) + float2(0.5f, -0.5f) * pVP.xy / pVP.w;
	 return float3(pVP.xy, pVP.z / pVP.w);
}
After completing the iterations, we have the position of “intersection with reflected geometry”. And our nuv value will be the projection of this intersection onto the screen, i.e. nuv.xy is the UV coordinates in our screen space, and nuv.z is the restored depth (i.e. abs (GetDepth (nuv.xy) -nuv.z) must be very small) .
At the end of the iterations, L will show the distance of the reflected pixel. The last step is actually adding a reflection to the Color Map :
float3 cnuv = GetColor(nuv.xy).rgb;
return float4(cnuv, 1);
Dilute the theory with illustrations, the original image (the contents of the Color Map from GBuffer):

After compiling the shader (reflection), we get the following picture (Color Map from GBuffer + SSLR shader result):

Not a lot . And here it is worth recalling once again that Space-Screen effects are a solid Information Lost (examples are highlighted in red frames).
The fact is that if the reflection vector goes beyond the Space-Screen , the information on the Color- map becomes inaccessible and we see Clamping of our UV .
To partially correct this problem, an additional coefficient can be introduced that will reflect the “range” of reflection. And further on this coefficient we will obscure the reflection, the problem is partially solved:
L = saturate(L * LDelmiter);
float error *= (1 - L);
Result, reflection multiplied by error (attempt to remove the SSLR artifact - information lost):

Already better, but we notice another problem, what will happen if the vector is reflected in the direction of the camera? Clamping ' UV will not occur, however, despite the relevance of UV (x> 0, y> 0, x <1, y <1) it will be incorrect:

This problem can also be partially solved if you somehow limit the angles of permissible reflections. A chip with angles from the Fresnel effect is ideal for this :
float fresnel = dot(viewDir, texelNormal);We modify the formula a little bit:
float fresnel = 0.0 + 2.8 * pow(1+dot(viewDir, texelNormal), 2);Fresnel values, taking into account Normal mapping (values of the fresnel variable for the SSLR algorithm):

Those areas that are reflected in the “camera” will be black, and we do not take them into account (instead, you can make a fade into a cubic texture).
Reflection multiplied by error and fresnel (attempt to remove most SSLR artifacts):

By the way, the value of Fresnel should be limited by some parameter, because due to the “roughness” of the normals, the value will be an order of magnitude greater than unity (or another limiter number).
And the final stage of today's article is blurring reflections, because perfect reflection only at the mirror. The degree of blur can be considered as 1-error (the further the reflected pixel - the more blurred). This will be a kind of blur weight and can be stored in the alpha channel of RT reflections.
Result (final image with artifacts removed and with blurry reflections):

Conclusion
Also, it is worth adding some information about the reflectivity: how clear the reflection is, how much the surface is generally able to reflect, in those places where SSLR does not work - add a static reflection of the cubic texture.
Of course, Space-Screen effects are not fair, and developers are trying to hide artifacts, but now in real time it’s impossible to do this (with complex geometry). And without such effects, the game begins to look somehow wrong. I described the general SSLR technique : the main points from the shader I cited. Unfortunately, I can’t attach the code, because There are too many dependencies in the project.
Happy development! ;)









