STM32 Nucleo. We connect the TFT LCD based on the ILI9341 chip
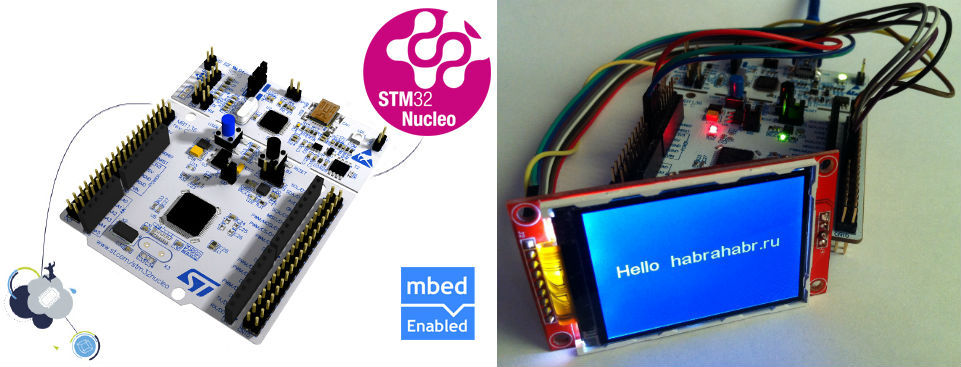
There are already two publications on Habré about the STM32 Nucleo platform and development in the environment of mbed.org . This is a “platform overview” and a “quick start” . I will tell in this publication how to quickly connect an inexpensive TFT LCD module based on the ILI9341 chip. The article will be useful for Arduino lovers who want to switch to more modern and powerful microcontrollers, using the already accumulated knowledge.
You can get acquainted with the display prices, for example, on Ebay .
I will use the NUCLEO-F401RE board , you can use any of this line.
So, you have already read the two previous articles, so immediately get down to business.
Open ouron-line compiler . Create a new program.

Let's call it, for example, ili9341_display_test.

We import the official mbed library into our project .

Find and import.

We check what is imported into our project.

In the same way, we import the graphic library for our display.
In the search for “ili9341” we find the library from Peter Drescher.

We also need fonts, we import the same, on request in the search for "TFT_fonts".

For those who want to use any other font or develop their own, the GLCD font creator program is to help . The program is free, but for the correct import you have to shaman, and this is another topic.
Now create the main file in which our program will be.

Let's call it main.cpp.

Now we have a project with two libraries, a set of fonts and the main program file.
We click on main.cpp and

And here is the code.
#include "mbed.h"                                       //включаем основную библиотеку mbed
#include "SPI_TFT_ILI9341.h"                            //включаем библиотеку нашего дисплея на чипе ili9341
#include "Arial28x28.h"                                 //включаем выбранный шрифт
SPI_TFT_ILI9341 TFT(D11, D12, D13, D8, D9, D10,"TFT");  // (mosi, miso, sck, cs, reset, dc)
int main()
{
    TFT.set_orientation(3);                             // выбираем ориентацию дисплея
    TFT.background(Blue);                               // выбираем цвет фона (можно словами)
    TFT.foreground(0xFFFF);                             // выбираем цвет шрифта (или в формате rgb565)
    TFT.cls();                                          // заливаем экран цветом фона
    TFT.set_font((unsigned char*) Arial28x28);          // выбираем наш шрифт
    TFT.locate(30, 100);                                // координаты начала текста (горизонталь, вертикаль)
    TFT.printf("Hello habrahabr.ru");                   // выводим на экран
}
How to connect the display? Yes, very easy!
We go to the page of our board (I have this ST-Nucleo-F401RE ).
We find a picture of Arduino-compatible Headers.

This is the pinout of our board with the pin names so familiar to all Arduino amateurs.
Find the contacts of the SPI interface.
SCK - D13
MISO - D12
MOSI - D11
We also need the contacts CS, reset, DC, I used D8, D9, D10, respectively.
In our program, this is indicated as a string:
SPI_TFT_ILI9341 TFT(D11, D12, D13, D8, D9, D10,"TFT"); // (mosi, miso, sck, cs, reset, dc)
We connect them to the corresponding contacts on our display.
Also, the display must be connected to power.
I used VCC - + 5v (on the display board there is a 3.3 volt stabilizer, if you close it with the provided jumper, you can use a 3.3 volt power supply).
GND - GND
LED - backlight, designed for 3.3 volts, so we connect to the + 3.3v pin.
The display logic works from 3.3 volts, like our microcontroller, so we do not need to use a logic level converter, as in the case of arduino uno.
Now we can compile our program, for this, click the Compile button in the online compiler and save the resulting file directly to our board (with the board connected, we have removable media “NUCLEO”).
If everything is done correctly, then we will see on the screen the inscription "Hello habrahabr.ru".
useful links
Here you will find examples of code and usage, this is the official page of the library SPI_TFT_ILI9341.
Here are described the functions of working with this library, such as the construction of lines, squares and other things.
Here is a lot of useful information on mbed.
Have fun!