LAN between houses using WiFI bridge
There was a need to make a local network between two nodes remote from each other at a distance of 1.15 km. Since there is experience in helping a friend and connecting his private house to the FTTB network of a neighboring high-rise building through Mikrotik routers, it was decided to implement the connection on them. The choice fell on the RouterBOARD SXT Lite5 (please do not count for advertising, but this is the best choice for this price).
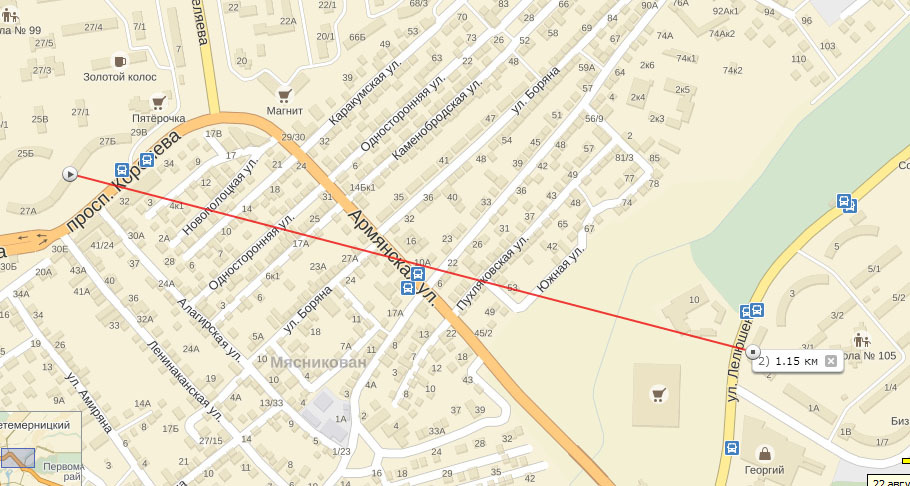
Characteristics and installation process, including The video can be found on the website of Mikrotik or dealers in Russia. So far, a test bench has been assembled. Stand parameters - the distance between points 1.15 km on Yandex maps. One point is installed on the balcony of the 8th floor, the second in the apartment, also located on the 8th floor, mounted on tripods for photo equipment.
Wiring diagram.

Explanation:
10.1.1.0/30- addresses for eoip tunnels
192.168.7.0/30- addresses for managing
192.168.88.0/24- addresses on the side of the Bridge router
192.168.78.0/24- addresses on the side of the Station router
192.168.3.1/32- loopback interface
192.168 .4.1 / 32- loopback interface
Information about the router (I ended up in the old case):
Firmware version:
Information about the distance (Rostov):
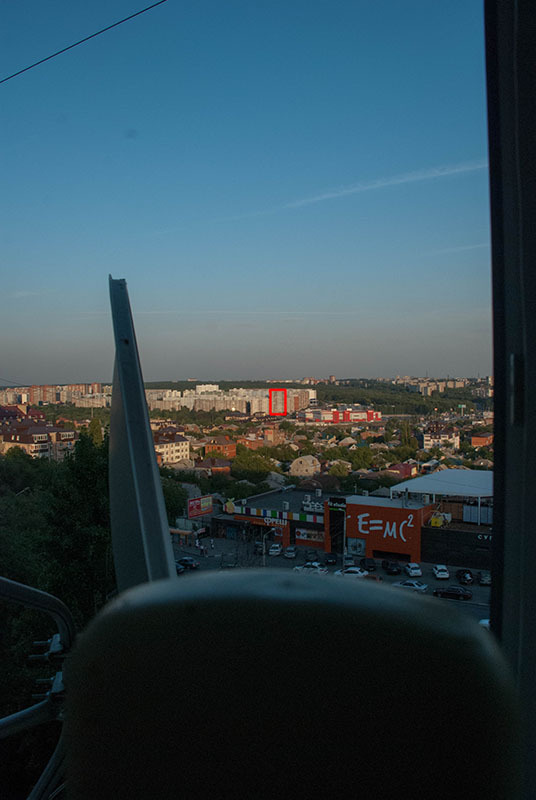
This is how it looks from the camera’s lens:
18 mm
frame : 300 mm frame : A
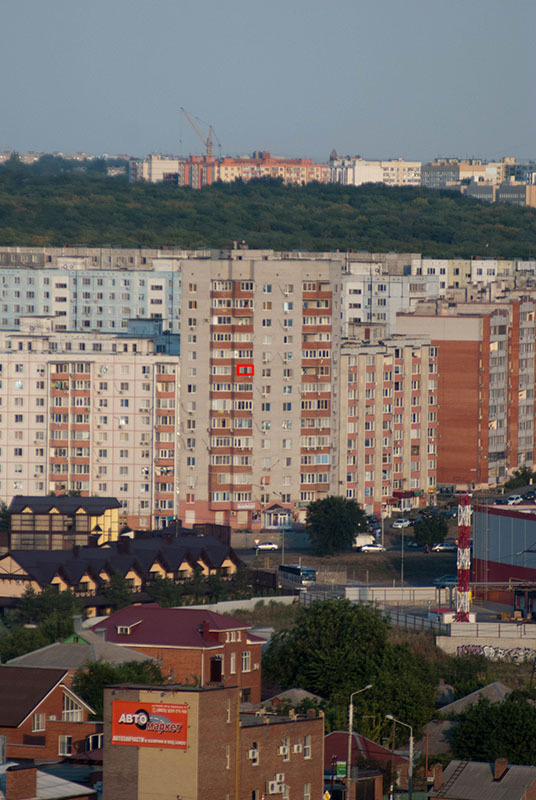
point at the second end is visible on this frame:
Well, close-up design:

Configuring a router that works in access point mode.
1. It is necessary to configure the security of the point itself, there are a lot of manuals on the Internet. On the bench glands, I skipped this step.
2. Creating bridge interfaces (here and hereinafter I try to give names with the same designation, like vlan30, bridge30 and eoip30):
3. Concurrent EoIP tunnels. Mandatory tunnel ID must match on both routers.
4. Creating a VLAN. You must add a VLAN to the WLAN interface.
5. The union of bridge, eoip and vlan.
Bridge1 combine with ether1, eoip1
Bridge30 combine with vlan30
6. Assignment of IP addresses.
7. Add routes. I made routes through the address, but not the interface.
8. Configuring the WLAN interface.
9. Security settings.
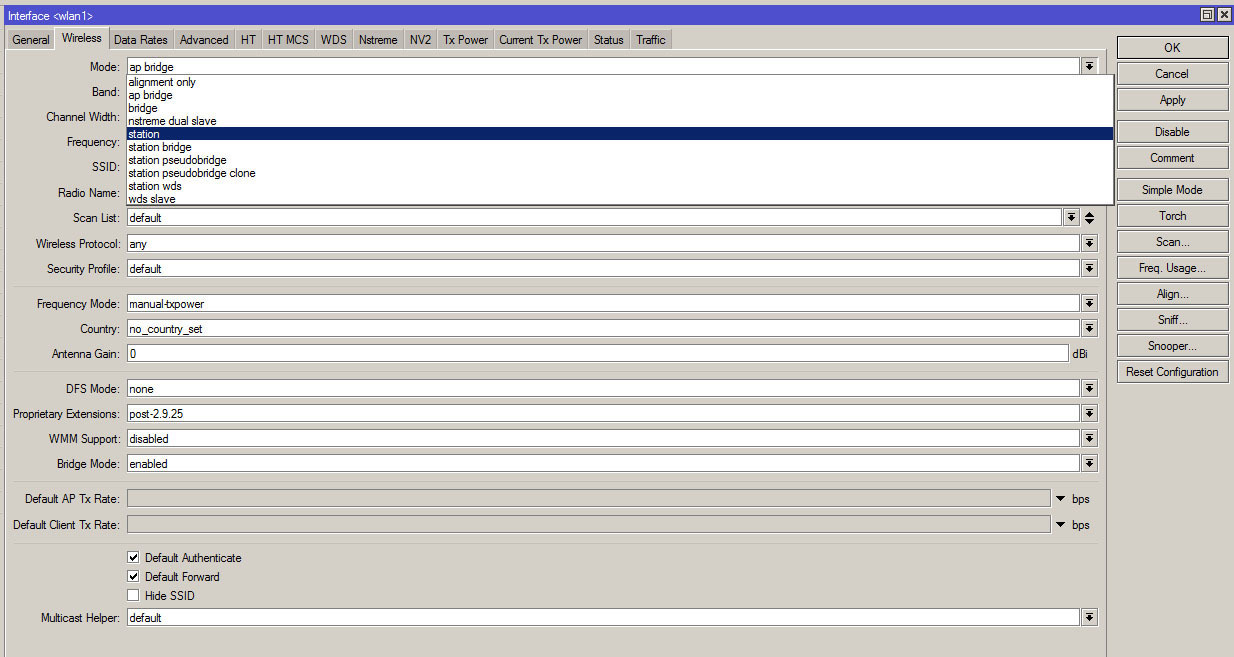
That's all. On the second router, everything is configured in the same way, we change only the addresses and the mode of operation of the point. At step 8, select in Mode - Station:
As a result, the second router appears in the Registration tab of the Wireless menu, it is indicated by Radio Name AP2:

Test file transfer.
Ping went:

To transmit the Centos image:

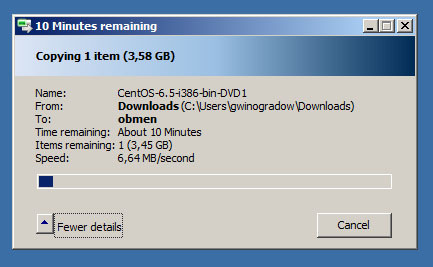
Interface indicators show the transmission speed:
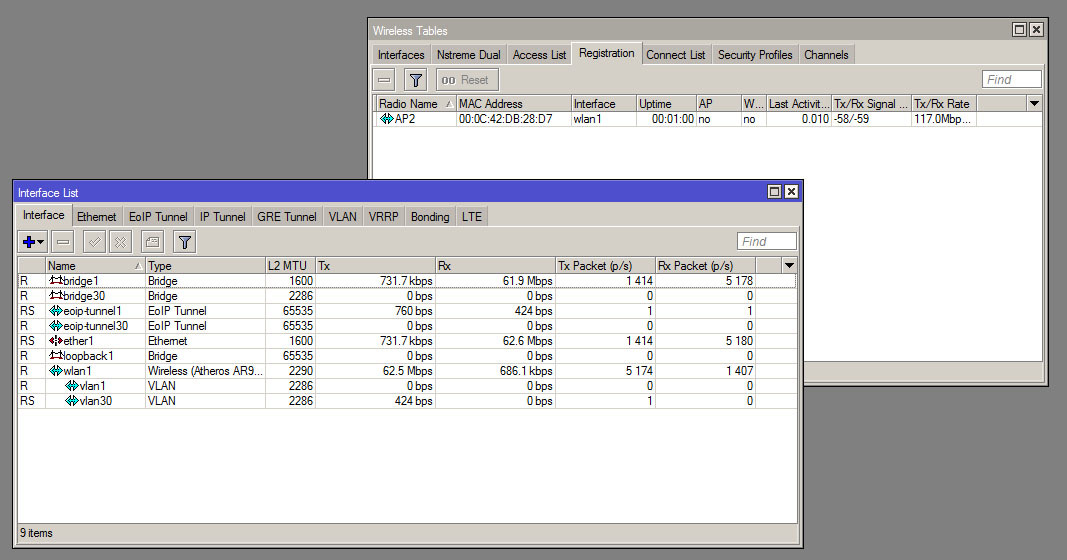
Signal
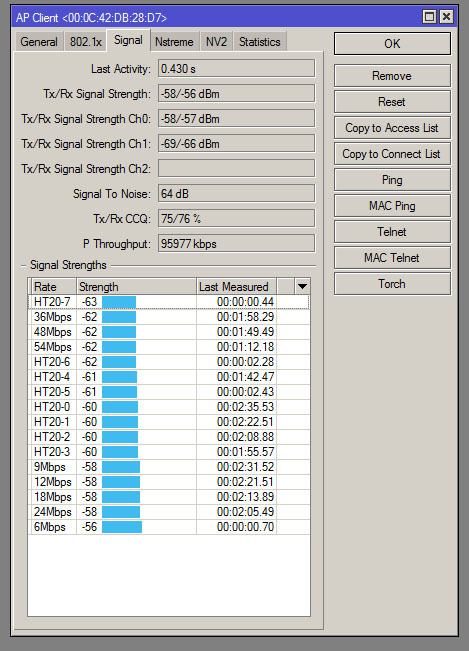
data: Transmission time:

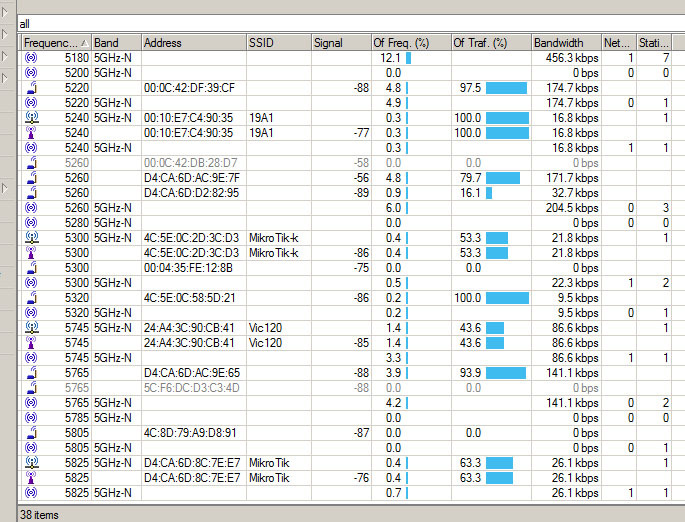
Well and neighbors:
Characteristics and installation process, including The video can be found on the website of Mikrotik or dealers in Russia. So far, a test bench has been assembled. Stand parameters - the distance between points 1.15 km on Yandex maps. One point is installed on the balcony of the 8th floor, the second in the apartment, also located on the 8th floor, mounted on tripods for photo equipment.
Wiring diagram.
Explanation:
10.1.1.0/30- addresses for eoip tunnels
192.168.7.0/30- addresses for managing
192.168.88.0/24- addresses on the side of the Bridge router
192.168.78.0/24- addresses on the side of the Station router
192.168.3.1/32- loopback interface
192.168 .4.1 / 32- loopback interface
Information about the router (I ended up in the old case):
[admin@MikroTik] /system> resource print
	         uptime: 56m36s
	         version: 6.18
	         build-time: Aug/01/2014 10:47:47
	         free-memory: 44.7MiB
	         total-memory: 64.0MiB
	         cpu: MIPS 24Kc V7.4
	         cpu-count: 1
	         cpu-frequency: 400MHz
	         cpu-load: 1%
	         free-hdd-space: 49.0MiB
	         total-hdd-space: 64.0MiB
	         write-sect-since-reboot: 409
	         write-sect-total: 123255
	         bad-blocks: 0%
	         architecture-name: mipsbe
                 board-name: RB711GA-5HnD
                 platform: MikroTik
Firmware version:
[admin@MikroTik] /system> routerboard print
          routerboard: yes
          model: 711GA-5HnD
          serial-number: 38EB02618CAA
          current-firmware: 3.07
          upgrade-firmware: 3.17
Information about the distance (Rostov):
This is how it looks from the camera’s lens:
18 mm
frame : 300 mm frame : A
point at the second end is visible on this frame:
Well, close-up design:
Configuring a router that works in access point mode.
1. It is necessary to configure the security of the point itself, there are a lot of manuals on the Internet. On the bench glands, I skipped this step.
2. Creating bridge interfaces (here and hereinafter I try to give names with the same designation, like vlan30, bridge30 and eoip30):
/interface bridge
add  name=bridge1       #используется для EoIP туннеля
add  name=bridge30     #используется для управления
add name=loopback1    #Loopback interface
Setup for winbox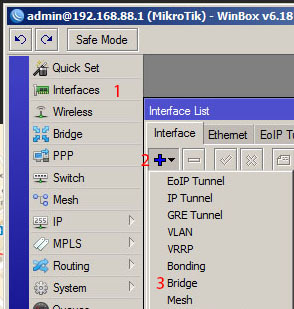
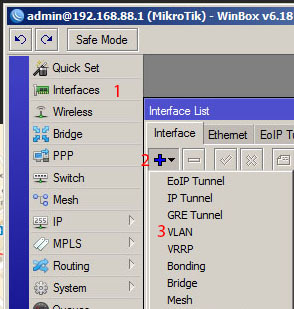
Click the Interface tab (1), then the symbol "+" (2) and Bridge (3).
An example of adding Bridge30 (hereinafter, I try to give numbers in an orderly manner. Bridge30 corresponds to Vlan 30 and EoIP Tunnel 30):

Click the Interface tab (1), then the symbol "+" (2) and Bridge (3).
An example of adding Bridge30 (hereinafter, I try to give numbers in an orderly manner. Bridge30 corresponds to Vlan 30 and EoIP Tunnel 30):
3. Concurrent EoIP tunnels. Mandatory tunnel ID must match on both routers.
/interface eoip
add clamp-tcp-mss=yes local-address=10.1.1.1 mac-address=02:03:58:45:B9:21 mtu=\
    1500 name=eoip-tunnel1 remote-address=10.1.1.2 tunnel-id=1
add clamp-tcp-mss=yes local-address=10.1.1.1 mac-address=02:3B:CD:AA:46:A2 mtu=\
    1500 name=eoip-tunnel30 remote-address=10.1.1.2 tunnel-id=30
Setup for winbox
Creating tunnels is similar to creating bridges:
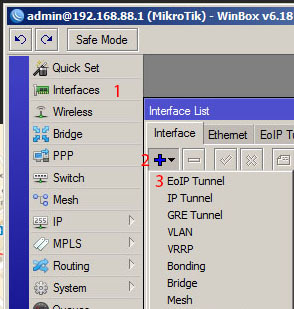
Setting up an eoip tunnel:

Setting up an eoip tunnel:
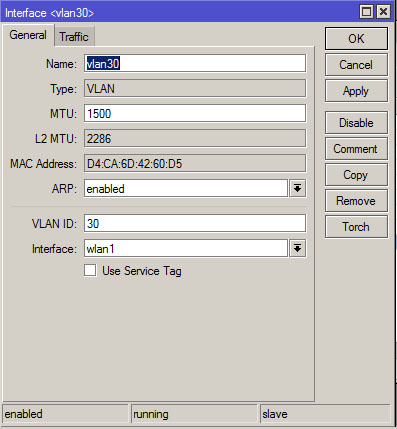
4. Creating a VLAN. You must add a VLAN to the WLAN interface.
/interface vlan
add interface=wlan1  name=vlan1 vlan-id=1
add interface=wlan1  name=vlan30 vlan-id=30
Setup for winbox
It's simple:
Configuring the VLAN itself:
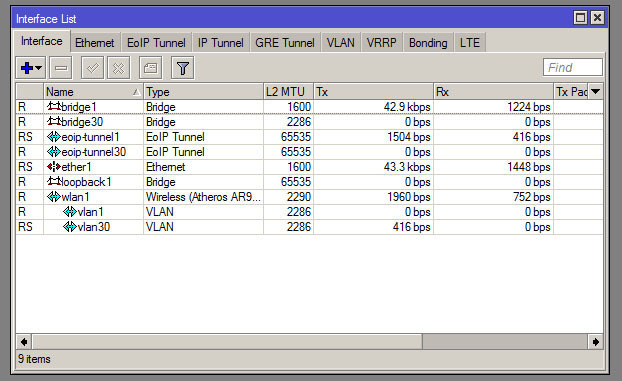
After these operations there will be the following result:
Configuring the VLAN itself:
After these operations there will be the following result:
5. The union of bridge, eoip and vlan.
Bridge1 combine with ether1, eoip1
Bridge30 combine with vlan30
/interface bridge port
add bridge=bridge1 interface=ether1
add bridge=bridge1 interface=eoip-tunnel1
add bridge=bridge30 interface=vlan30
Setup for winbox
We go to the Bridge menu (left) and then to the Ports tab
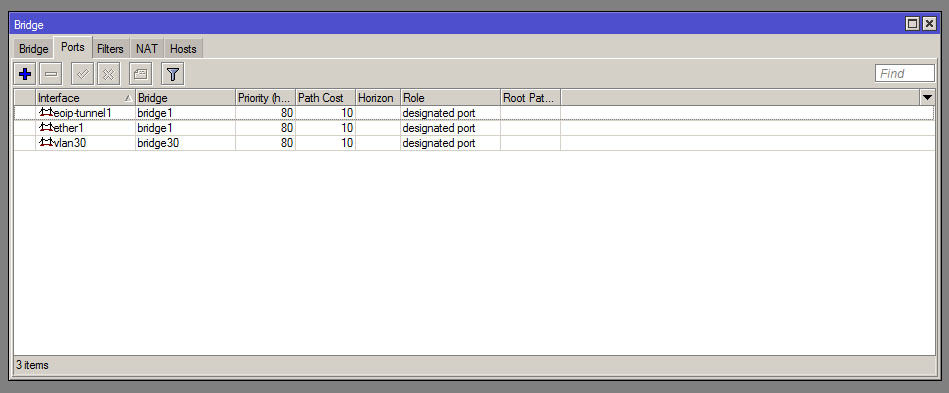
Press "+" and add the ports to the corresponding bridge.

Press "+" and add the ports to the corresponding bridge.
6. Assignment of IP addresses.
/ip address
add address=192.168.88.1/24 comment="default configuration" interface=ether1 \
    network=192.168.88.0
add address=10.1.1.1/30 interface=wlan1 network=10.1.1.0
add address=192.168.3.1/32 interface=loopback1 network=192.168.2.1
add address=192.168.7.1/30 interface=vlan30 network=192.168.7.0
Setup for winbox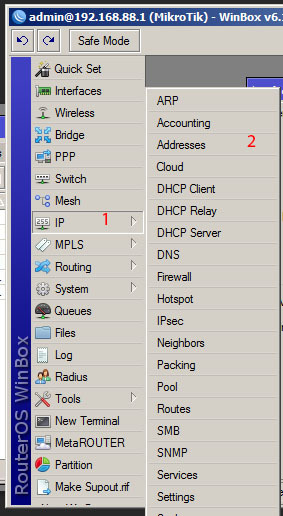
Add addresses according to the plan:
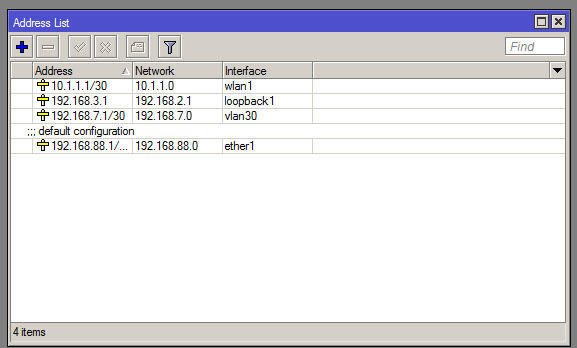
Add addresses according to the plan:
7. Add routes. I made routes through the address, but not the interface.
/ip route
add distance=1 dst-address=192.168.4.0/24 gateway=10.1.1.2
add distance=1 dst-address=192.168.78.0/24 gateway=10.1.1.2
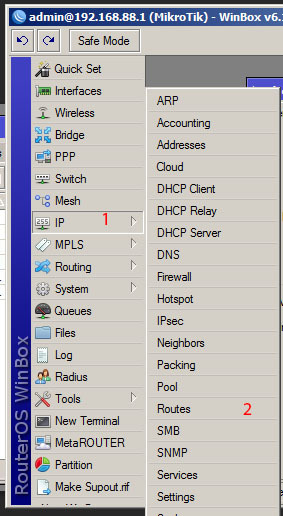
Setup for winbox
Adding is straightforward. Menu selection:
Result:
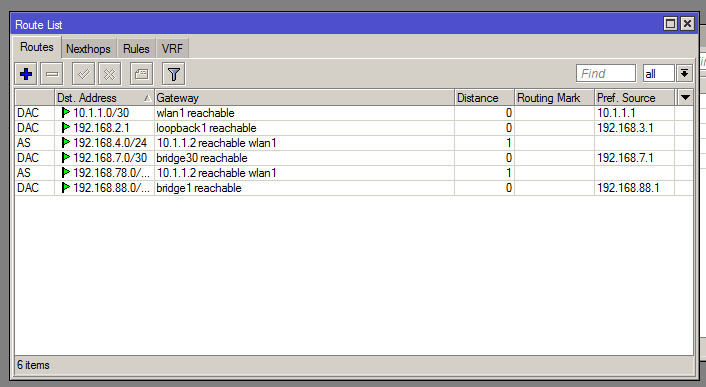
Result:
8. Configuring the WLAN interface.
/interface wireless
set [ find default-name=wlan1 ] band=5ghz-a/n disabled=no frequency=5300 \
    ht-rxchains=0,1 ht-txchains=0,1 l2mtu=2290 mode=ap-bridge radio-name=AP1 \
    ssid=local    #из нюансов- выбор режима работы, в режиме точки доступа ap-bridge, клиент - station
Setup for winbox
You need to select the Wireless menu, it is on the left and then select the wlan1 interface:
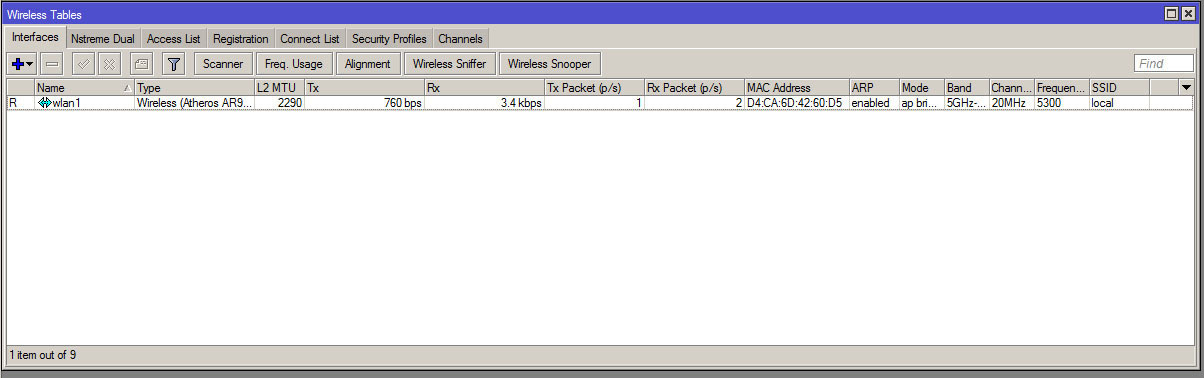
Change Mode to ap-bridge. Press the Advanced Mode button (on the screen changed to Simple Mode) and change Radioname:
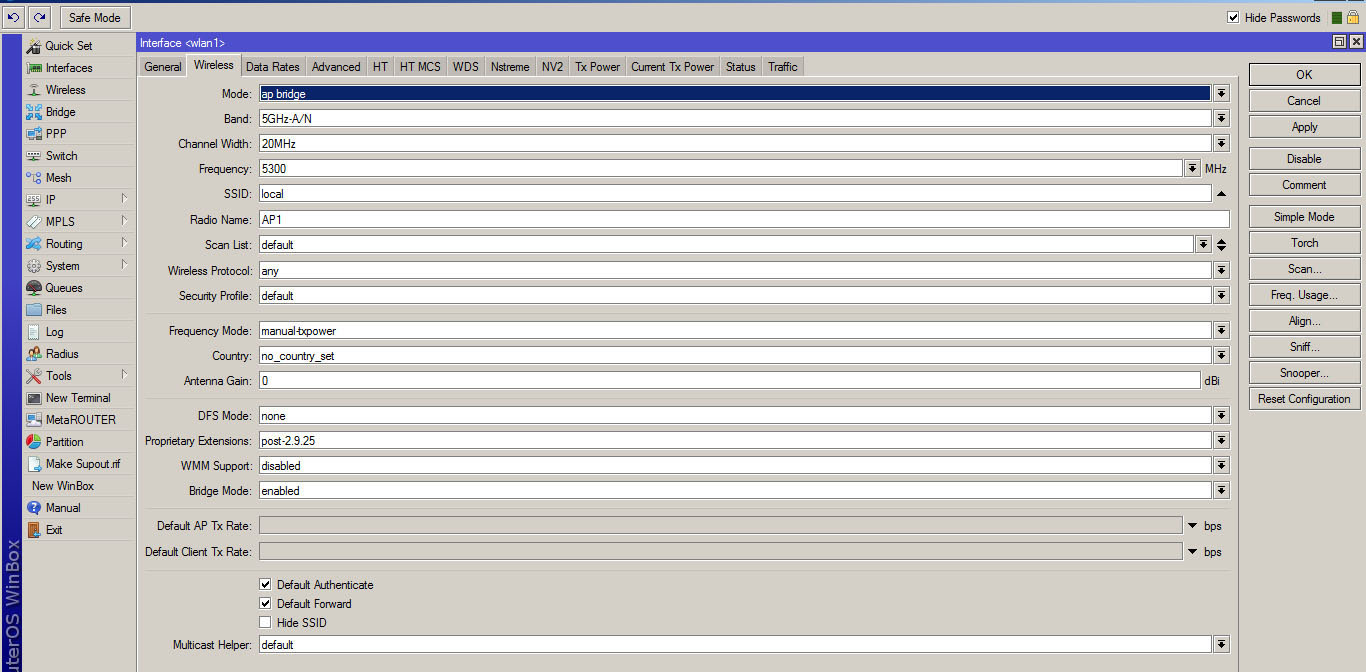
Change Mode to ap-bridge. Press the Advanced Mode button (on the screen changed to Simple Mode) and change Radioname:
9. Security settings.
/interface wireless security-profiles
set [ find default=yes ] authentication-types=wpa2-psk eap-methods="" mode=\
    dynamic-keys  wpa2-pre-shared-key=password
Setup for winbox
You need to return to the Wireless tab and select the Security Profile tab, I edited the default profile.

Profile Settings Menu:
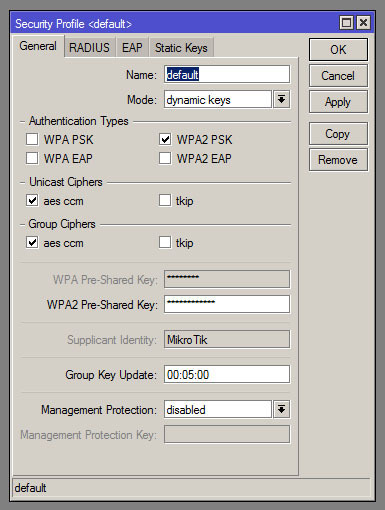
Profile Settings Menu:
That's all. On the second router, everything is configured in the same way, we change only the addresses and the mode of operation of the point. At step 8, select in Mode - Station:
As a result, the second router appears in the Registration tab of the Wireless menu, it is indicated by Radio Name AP2:
Test file transfer.
Ping went:
To transmit the Centos image:
Interface indicators show the transmission speed:
Signal
data: Transmission time:
Well and neighbors: