UHF RFID Reader connect to NodeJS
What for?
UHF Reader allows you to control the tags at a distance of 10 meters, which gives interesting perspectives for various uses. The most obvious one is the control of passing vehicles. But you can come up with more exotic options: control of equipment in the garage / shed. It is unlikely that the thief would think that the RFID tag is stuck to the bike (tool case), and he is able to report his departure beyond the limits of the observed perimeter.
NodeJS + RaspberryPI is a flexible and cheap server for data processing and peripheral management.
Equipment
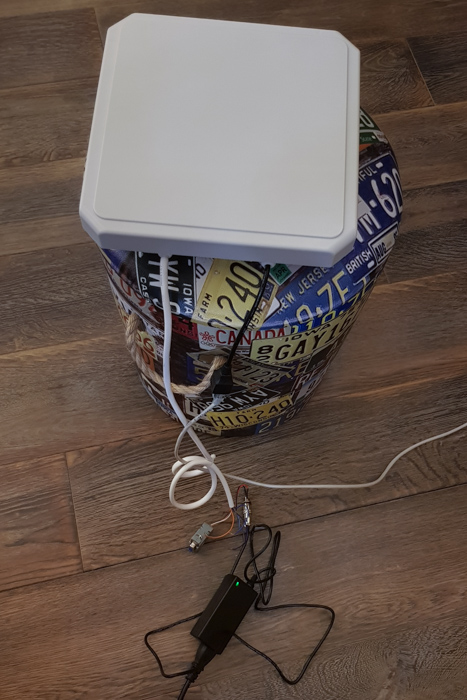
I took tests CF-RU5109 (CHAFON), which supports connection via RS232, RS485, Wiegand, TCP.(I need TCP only for convenience of testing equipment)
Model Page - CF-RU5109
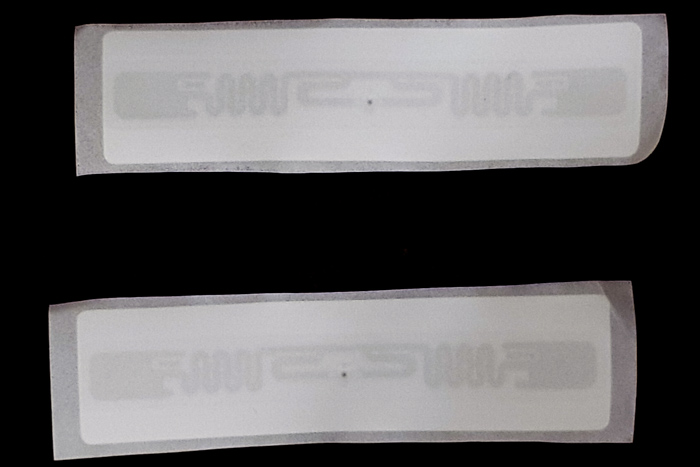
Tags - rfid gen2 uhf paper tag with Alien H3 chip
Read range. Experiments have shown that the reading depends on the activity of the label (its movement in space). The passively lying label is read confidently at a distance of 3 meters, moving slowly - 5–5.5 meters, at a distance of 8 meters it was necessary to actively swing a hand. My reader has a built-in 9dbi antenna.
Soft
SDK, a detailed description of commands, several test programs under Windows are attached to the Reader. I use this software only to try to work with the Reader - we do not need anything from working with NodeJS.
Connect to Node
tcpclient.prototype.Start = function () {
  client = new net.Socket();
  client.setEncoding('ascii');
  client.connect(6000, '192.168.0.190', function() {
  });
    client.on('connect', function(data) {
      console.log('UHF reader connected');
      var bytes = Buffer.from([0x04, 0xff, 0x21, 0x19, 0x95], "ascii");
      client.write(bytes);
    client.on('data', function(data) {
        console.log('UHF reader respond:');
        var buffer = Buffer.from(data, "ascii");
        console.log(buffer);
      });
    });
    client.on('close', function() {
      console.log('UHF reader - connection closed');
    });
    client.on('error', function(err) {
      console.log(err)
    });
};
tcpclient.prototype.Write = function (req) {
  var bytes = new Buffer(req, "ascii");
  console.log(bytes);
  client.write(bytes);
};
From the manual. The command block is structured as follows:
Len, Adr, Cmd, Data [], LSB-CRC16, MSB-CRC16
The last two bytes are the checksum CRC16, with the polynomial 0x8408, the starting number 0xFFFF. Bytes are displayed in the reverse order. The manufacturer has kindly provided the C code for the calculation, and I rewrote it in JS (see below).
Accordingly, [0x04, 0xff, 0x21, 0x19, 0x95] is a command that requests the status of the reader at the default address FF. 04-length, 21-team, 19 and 95 - CRC16 checksum.
var PRESET_VALUE = 0xFFFF;
var POLYNOMIAL = 0x8408;
var CRC16 = function (pucY) {
  var uiCrcValue = PRESET_VALUE;
  for(var i = 0; i < pucY.length; i++){
    uiCrcValue = uiCrcValue ^ (pucY[i]);
    for(var j = 0; j < 8; j++){
      if(uiCrcValue & 0x0001){
        uiCrcValue = (uiCrcValue >> 1) ^ POLYNOMIAL;
      } else {
        uiCrcValue = (uiCrcValue >> 1);
      }
    }
  }
  var buf = Buffer.from(uiCrcValue.toString(16), 'hex');
  buf = Buffer.from([buf[1], buf[0]], 'hex');
  return buf;
};
//CRC16([0x04, 0xff, 0x21]);  //returns <Buffer 19 95>
Command examples
Inventory - a request to read the card once. Operates in Answer-mode
req =[0x04, 0x00, 0x01, 0xdb, 0x4b];
tcpClient.Write(req);
If the label is visible, then we will get the answer
UHF reader respond:62 00 51 79 17 19 00 04 05 60 5b 28 is a tag tag.
<Buffer 13 00 01 01 01 0c 62 00 51 79 17 19 00 04 05 60 5b 28 2f 24>
Switching reader operation modes
Answer-mode : [0x0a, 0x00, 0x35, 0x00, 0x02, 0x01, 0x00, 0x01, 0x00, 0x2a, 0x9f]
Scan / Active mode : [0x0a, 0x00, 0x35, 0x01, 0x02, 0x01, 0x00, 0x01, 0x00 , 0x01, 0x9b]. In this mode, the reader constantly polls tags and gives them tags.
What's next?
And further, if a simple solution is required, then either we write code that sends the 0x01 (Inventory) command at intervals. Tags in the visible area give their tags, we compare them with the database and initiate the appropriate actions. Or we write code that, in the constant scanning mode, waits for the mark to hit the zone of visibility and responds with an event.