 March 28, 2014 at 10:26
Modeling pixel cartoon Simpsons Coach Gag in Excel
Gentlemen, Khabrovsk citizens!
For many years of imprisonment, Dufrane punched a tunnel in the chamber wall with a climbing hammer. Covering the hole with posters depicting famous American beauties, while escaping from the Shawshank Prison, he climbed into the basement, broke through a sewer pipe and crawled through it behind the prison fence.
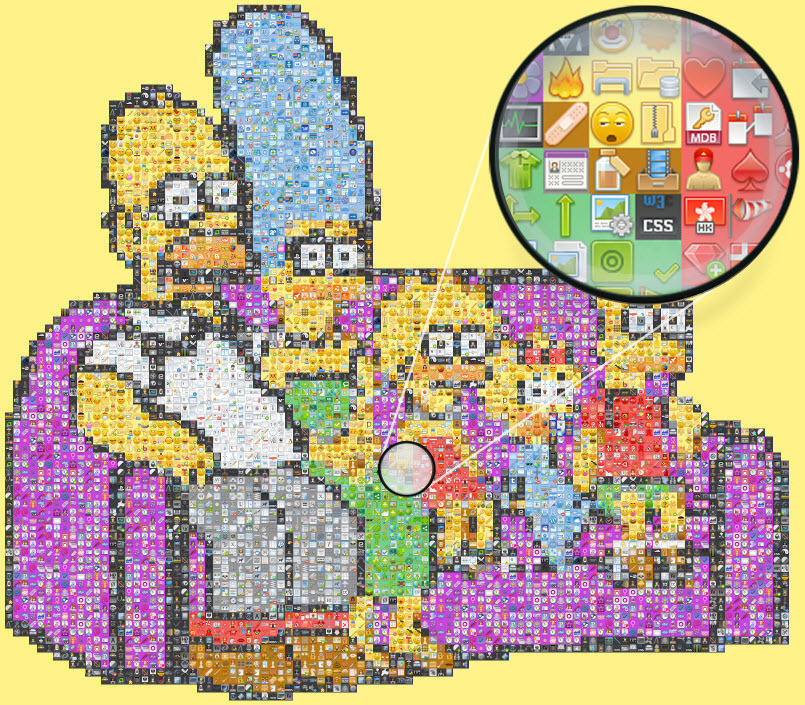
Pixel - Gasuns-Dufrein's hammer. Five years of hard labor is behind. This is the latest release of FatCow icons , 3926 pcs ... We are shooting a poster with Monroe Marge in a white dress over a manhole. What do we see? 1428 lego cubes , a springfield gigapixel panorama of 22848 pixels . In front of you is the simulated bare sofa of the Simsons on 89 slides, without sound. A week later, we are ready to talk aboutthe making of , but for now follow the white rabbit ...
Sources of the video:
Folder with slides from 32x32 icons .
Folder with slides from 16x16 icons .
First, I needed a victim for experiments. After watching 300 potential candidates, the choice fell on an entertaining animated tattoo artist on the sacrum of Simpson's mother Marge. A classic of the genre, another remake about the sofa of the Simpsons family . Here is our work of art, but about how it was, read below. Just to describe and realize what exactly we did and for what, it took us 3 months of work.

Now it’s fashionable to collect Minecraft pictures from cubes. That is, the idea of lego cubes outside the lego world is neither new nor forgotten. However, no one has previously implemented animation from icons of a similar scale - neither manually, nor semi-automatically, nor by any other programmatic way (by setting layers in Photoshop or in any other way). Requirements - maximum visual similarity with the above specified animation (source image).
That is, recognition is required, ideally, complete similarity.
After drinking a lot of coffee, which was pretty drunk, and having gathered courage, we began to come up with animation from the icons. They thought for three days and three nights, and finally came up with. But at first not a damn thing happened. Then, too, until it was born.
It was necessary to find a victim for perversion, having watched hundreds of short videos, they found an interesting GIF animation based on the epic cartoon Simpsons . I had to think further in enhanced mode. The deeper into the forest, the more firewood - the number of problems grew exponentially.
The first step was to get the highest quality picture with fairly fine detail. The resolution of the original image in our case was a negligible 500x281 px. Accordingly, we have 140 500 pixels. Thus, if you make a picture of the icons 1 to 1, then the picture would have to consist of 140,500 icons. Simply the computational volume inaccessible to us (even for 16 RAM DDR3 with i7) and software limitations. Which of the two, software or hardware, would fall first, hitherto unknown. Therefore, by selecting (we tried 3-4 times with a decrease in the number of icons by 20,000 - 30,000), the optimal “working” resolution was chosen. It was reduced by 11 times compared to the original one, respectively, and consisted of only 12 876 (instead of the original 140 500 ) icons.
Instead of 1 pixel, we substituted a 32x32 px icon from the FatCow Farm Fresh set . In total, we got a picture resolution of 148 cells wide and 87 high. Multiplying each value by 32 px, we got an extension of the picture to an impressive 4736x2784 px.
Embroidery program Stitch Art Easy , - download here the primary conversion of the picture into a pixel image takes place. The program, too, was not immediately found; I had to reject a dozen other tools. The resulting image is saved in Excel, where 1 cell = 1 px.
The program creates this kind of [Figure 1], where the lettering inside the picture is a comparison of the color scheme with the tab of the legend of colors, the letter in the picture = the letter in the tab of the legend of colors (column “@") [figure 2]. For example, a yellow cell with the letter C is the 30th line on the legend of colors.The
figure obtained during processing by the program looks like this
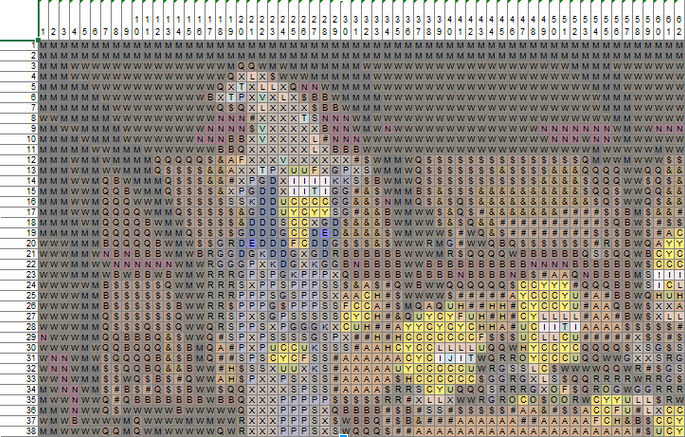
Fig. 1: View of the image in an excel laid out using Stitch Art Easy

Fig. 2: Stitch Art Easy color legend
We decided to use 10 colors for our task. Since the icons were formed into 10 color groups.
A month earlier, we still could not arrange the icons according to color. The following macro was born, which worked in conjunction with the (“ carpeted iconset-preview-generator program ”). The macro was able to process images by attaching the icon to a specific location. The location of the icon was set using the color of the cell. Being able to determine the location of the icon using the color, it was decided to improve the macro the following scheme: specific color = icon corresponding to the color.
During the operation of the macro, the conversion of the shades of the past filter programs for embroidery was required. To do this, the entire line of colors (125) Paterna Wool was manually prescribed matching 1 out of 10 primary colors. The macro can be found here
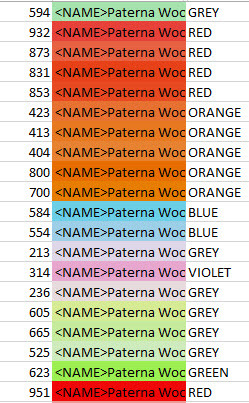
. 3: A color legend with matching colors
Macro replaces the shades in the picture with the basic 10 colors, which makes the image an order of magnitude worse than it was with shades. We look [figure 4]. We did not consider the option of increasing the basic colors due to shades, since the icons cannot be divided into shades manually, and there is no software method either. Therefore, it was decided to look for another way to create a picture.

Figure 4: Figure 1 reduced to basic colors.
The grass has exhausted itself, we turn to hard labor manual finishing.
After a long break, an interesting solution was found. For the workers and peasants, it was decided to create a colorless picture, only with circled contours. Thus, color played a secondary role, as it was already manually added to Excel. The option of creating a simple object contour drawing was not simple, I had to try and select various Photoshop filters, so as not to redraw the whole picture.
The first attempt to obtain a contour was as follows. After applying the menu item “Filter-> Stylization-> Select Edges”, we get such a picture 5
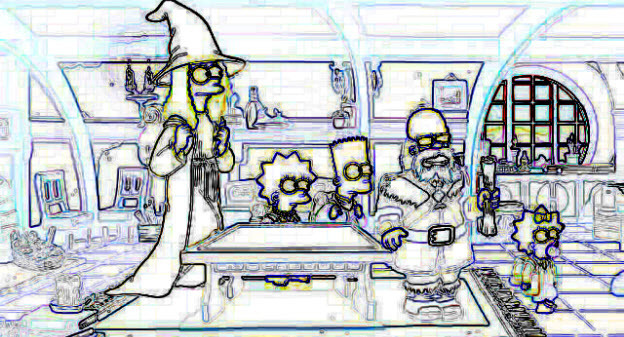
Fig. 5: Using the filter Stylization-> Select Edges
After conversion through the embroidery program, in Excel we see just such a dirty picture, [Figure 6.]
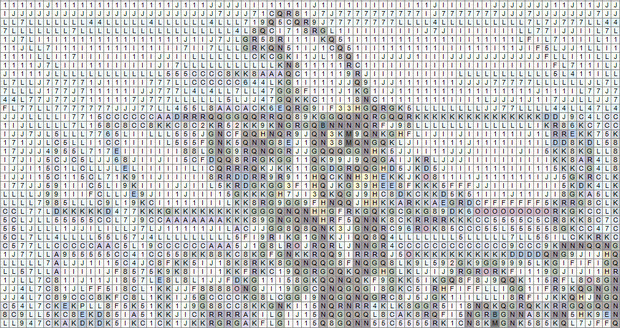
Fig. 6: View of the image after processing the filter Stylization-> Select edges in the embroidery program.
After that, we just tried to convert the color without making any manual changes.
Converting shades to base colors leads to a complete failure, [Figure 7].
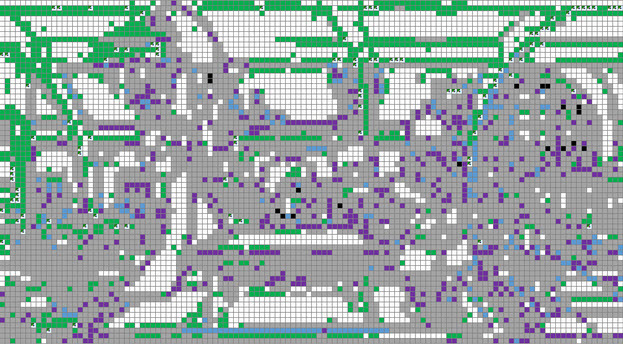
Fig. 7: View of the picture after reduction to the base colors.
After such a fiasco, we pushed this strategy aside and set about revising the remaining options. There was a thought about scaling! Everyone wondered if this thought was what we needed ?! It was decided to check.
To test this hypothesis, we re-transformed the drawing, but this time we did not reduce the size, as we did before. At the same time, we forgot that the terrible quality of the converted and converted outlines was due to the reduction of the image by 11 times. We continue to try, without changing anything, to process this drawing. On the other hand, it was decided to test the available resources of the computer on which it all began. After receiving the image in MS Excel, we received 3 sheets - 3 parts of the image. After processing, these parts had to form a huge panoramic picture, and for processing only the first such fragment, about 10-15 operations would be needed. Then it is necessary to glue 3 fragments again into 1 drawing.
It was planned to take a large picture and turn it into an icon carpet. It seemed that the icons would be so small against the general background that they would create a single color.
We inform you in advance that a picture with a higher resolution (meaning a picture that has already been created on the basis of icons) did not live up to its expectations. And it is practically unreadable due to the fact that the computer simply can not process such a volume of the picture.
For a more illustrative example, we give [Figure 8] - the figure is not compressed by scaling.
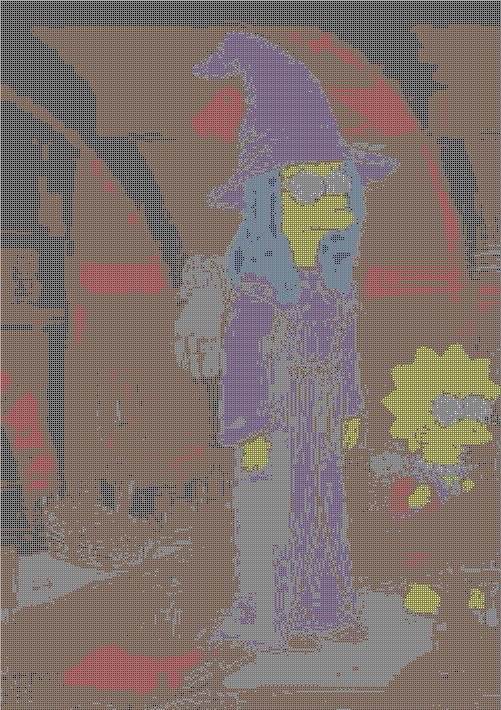
Fig. 8: Picture in real size.
As can be seen from [Figure 8], which is formed using the embroidery program and reduced to the base colors in Excel, to process large resolutions we need to either increase the number of colors and add shades to the existing 10 colors, or create a less cluttered picture, bring contours and bring the colors inside the contours to a single color.
But using such pictures to create animations is unrealistic, since they weigh a lot. Such a panorama alone weighs more than 100 MB. An example of such a panoramic picture
is Panorama .
After incorrect thoughts about resolution, we again return to thoughts about contours and creating colorless pictures. After a day of wandering and trial processing, it was decided to use a gif animashka. We
divide the animation into frames by any online service .;
The resulting frames are reduced to a contour view;
We take the initial frame, [figure 9].
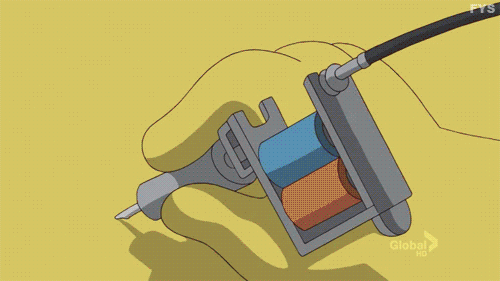
Fig. 9: Original frame.
Next, you need to clear each frame of garbage pixels. Since we got a picture from gif, we also got all the garbage that we can see in [Figure 10].
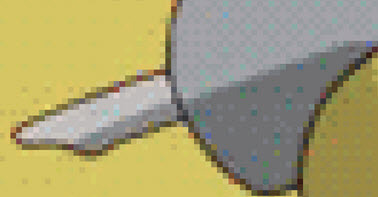
Fig. 10: Part of the original frame in an approximate form.
Based on several processing positions, it was customary to use a gray fill filter to obtain contours. In Photoshop, this menu is Image -> Correction -> Desaturate (Shift + Ctrl + U) [Figure 11].
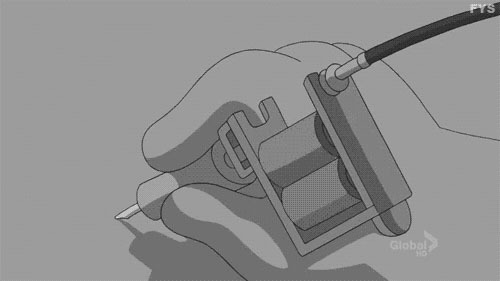
Fig. 11: Application of the filter Image -> Correction -> Bleach.
Next, the edges are selected, the menu Filter - Stylization - Select edges [Figure 12].
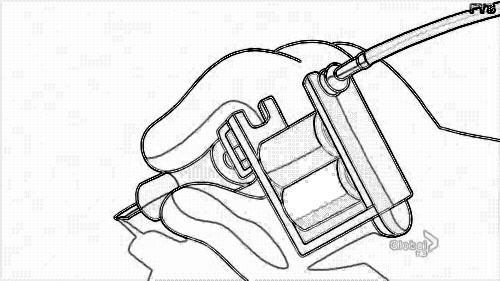
Fig. 12: Using the Stylization filter - Selecting edges
After selecting the edges, all areas are cleaned with a magic wand [Figure 13].
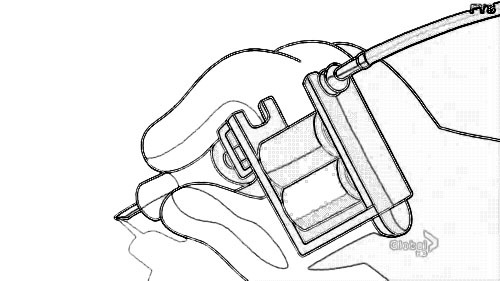
Fig. 13: Application of the filter Image -> Correction -> Desaturate.
Then painted over with uniform colors without shades [Figure 14]

. Fig. 14: Manual image processing.
Although later they refused to paint with color, and left only the outline. Why? Because, when passing through the embroidery program, a filter is applied and you have to make additional efforts to return the picture to its original form.
One of the processing steps was the selection of colors with manual adjustment;
The work of the color replacement macro is described at the beginning of the article
. [Figure 15] shows a fragment of a large picture. Even one contour alone shows that due to the refraction of colors, the reproduction of shades occurs. What carries additional processing.
As you can see in [Figure 15], there are quite a few colors. However, in such a figure, we can clearly identify all the elements, remove insignificant ones and adjust the color as needed. But processing them is not so simple, because then you have to bring to the basic colors, which means everything will change, you need to think further.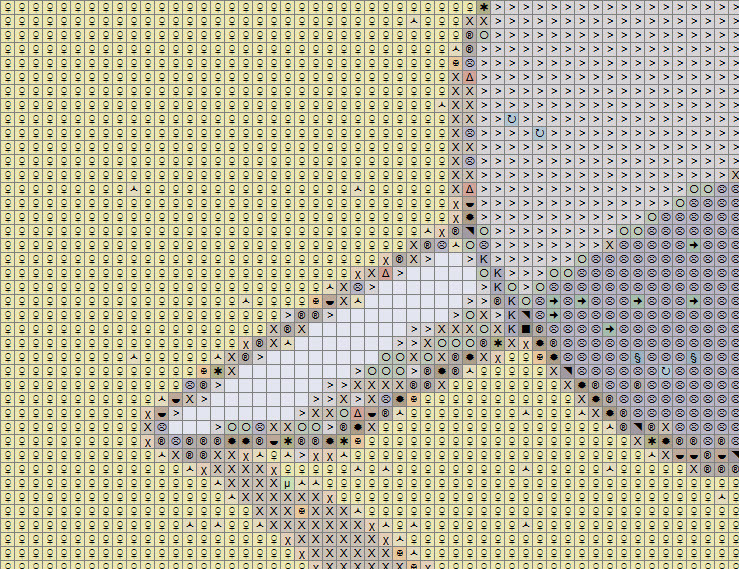
Fig. 15: Getting the picture as is.
In [Figure 16], the same frame is processed in gray, the image is slightly smoothed, but also not very suitable.
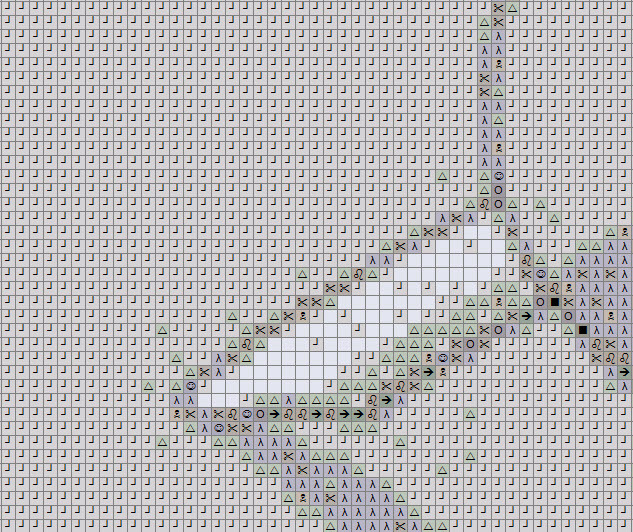
Fig. 16: Getting the picture in gray.
[Figure 17] after selecting the outline. On small parts, the filter is useless, the outlines merge.
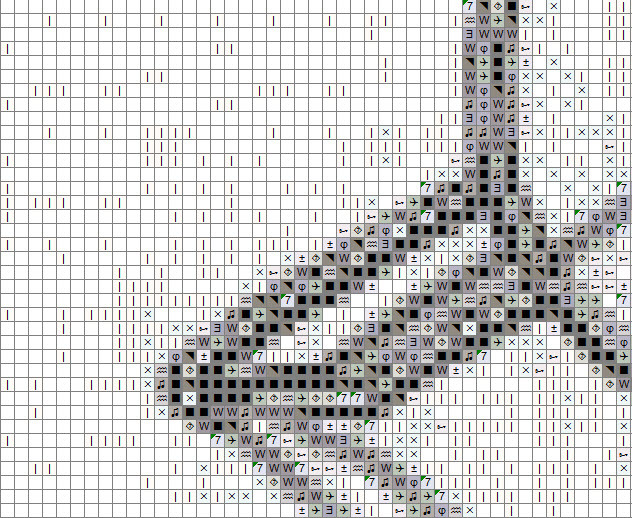
Fig. 17: View of the pattern after the outline is selected.
[Figure 18] remove excess background component. As you can see, there are only borders and small garbage.
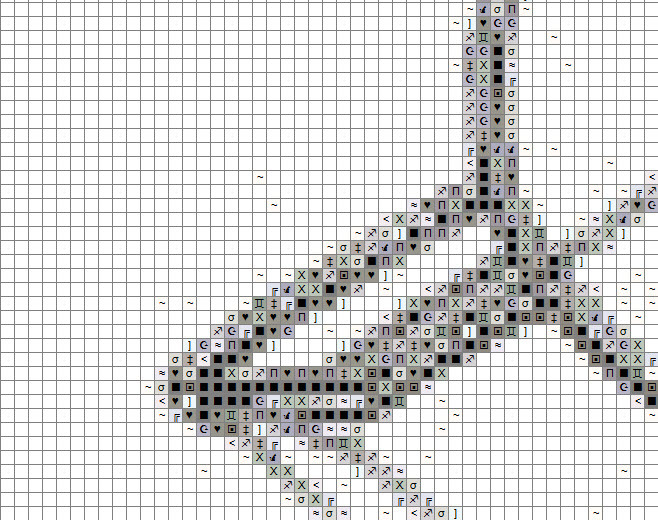
Fig. 18: View of the image after removing the excess background component.
[Figure 19] manual processing and color filling.
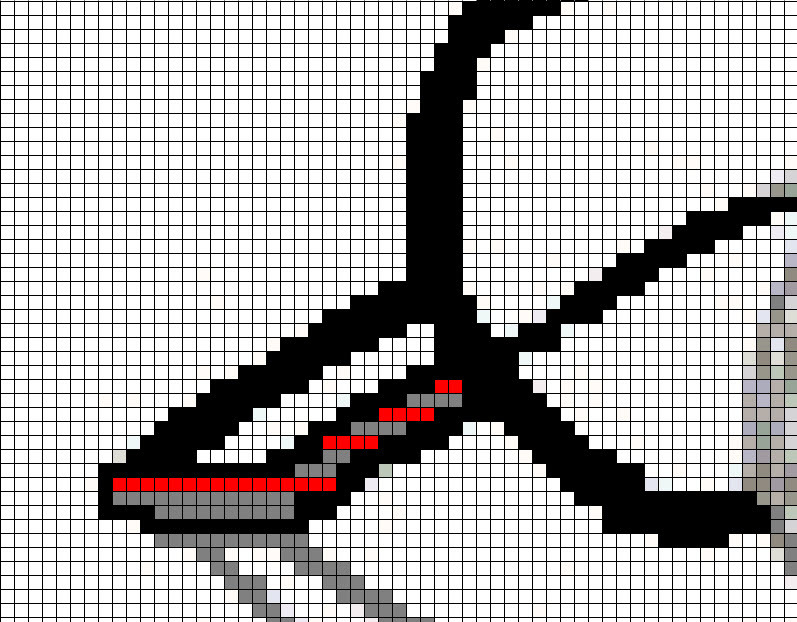
Fig. 19: Manual processing.
Replacing colors with icons;
Substitution of icons instead of colored cells. At first, 2 sizes of icons 16x16 and 32x32 were used, but since even with a large increase it didn’t look beautiful, and most importantly, it turned out not to be clear [Figure 20].
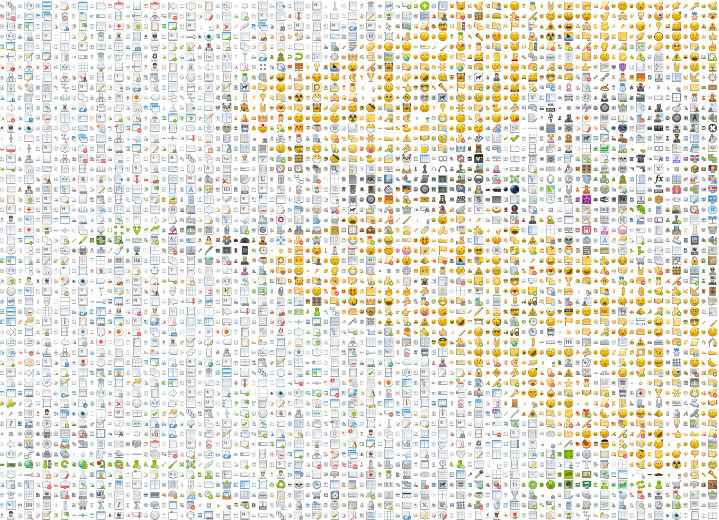
Fig. 20: Figure after replacing cells with icons.
What we did not impress us, and continuing to process further, we left only 32x32 icons with an inter-window distance of 3 px, and after some consideration of the picture from a different angle, we tried it completely without it. The result was terrible [Figure 21].
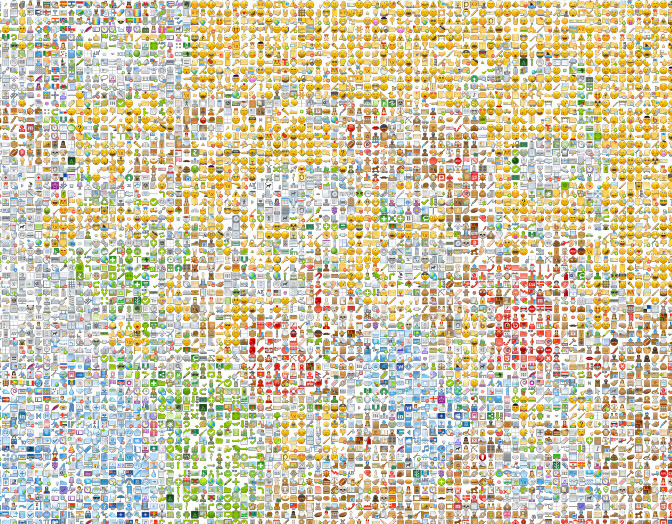 Fig. 21: Attempt No. 1 to influence visual perception.
Having not achieved the desired result (the icons were very “stuck together”), we experimented further. It was decided to insert a single-pixel space between the cells / icons. It became much better [Figure 22].

Fig. 22: Attempt No. 2 to influence visual perception.
However, in In this view, everything merged and was ugly. We decided to enhance the visual perception of removing the icons that were part of the background image of the interior. As well as adding a background under the icons. This gave the desired effect. The final result is in [Figure 23].

Fig. 23: Final result:
Animation is created using the imagemagick program.To create an animation, just enter the command in the folder with frames
I hope the above was pretty detailed and still quite fun. Perhaps somewhere mistakes were made in the formation of some arguments, please forgive.
We hope you have received a boost of vigor and do not want to repeat this yourself and understand that this should not be done.

Thank you all for your attention!
Prior to this, the best formula was the Talmud Formulas on Google SpreadSheet , but now it's different. Now we have a new hit.
For many years of imprisonment, Dufrane punched a tunnel in the chamber wall with a climbing hammer. Covering the hole with posters depicting famous American beauties, while escaping from the Shawshank Prison, he climbed into the basement, broke through a sewer pipe and crawled through it behind the prison fence.
Pixel - Gasuns-Dufrein's hammer. Five years of hard labor is behind. This is the latest release of FatCow icons , 3926 pcs ... We are shooting a poster with Monroe Marge in a white dress over a manhole. What do we see? 1428 lego cubes , a springfield gigapixel panorama of 22848 pixels . In front of you is the simulated bare sofa of the Simsons on 89 slides, without sound. A week later, we are ready to talk aboutthe making of , but for now follow the white rabbit ...
Sources of the video:
Folder with slides from 32x32 icons .
Folder with slides from 16x16 icons .
First, I needed a victim for experiments. After watching 300 potential candidates, the choice fell on an entertaining animated tattoo artist on the sacrum of Simpson's mother Marge. A classic of the genre, another remake about the sofa of the Simpsons family . Here is our work of art, but about how it was, read below. Just to describe and realize what exactly we did and for what, it took us 3 months of work.
The idea of pixel animation using icons, is it real or fiction ?!
Now it’s fashionable to collect Minecraft pictures from cubes. That is, the idea of lego cubes outside the lego world is neither new nor forgotten. However, no one has previously implemented animation from icons of a similar scale - neither manually, nor semi-automatically, nor by any other programmatic way (by setting layers in Photoshop or in any other way). Requirements - maximum visual similarity with the above specified animation (source image).
That is, recognition is required, ideally, complete similarity.
Trial of trial and error
After drinking a lot of coffee, which was pretty drunk, and having gathered courage, we began to come up with animation from the icons. They thought for three days and three nights, and finally came up with. But at first not a damn thing happened. Then, too, until it was born.
It was necessary to find a victim for perversion, having watched hundreds of short videos, they found an interesting GIF animation based on the epic cartoon Simpsons . I had to think further in enhanced mode. The deeper into the forest, the more firewood - the number of problems grew exponentially.
The first step was to get the highest quality picture with fairly fine detail. The resolution of the original image in our case was a negligible 500x281 px. Accordingly, we have 140 500 pixels. Thus, if you make a picture of the icons 1 to 1, then the picture would have to consist of 140,500 icons. Simply the computational volume inaccessible to us (even for 16 RAM DDR3 with i7) and software limitations. Which of the two, software or hardware, would fall first, hitherto unknown. Therefore, by selecting (we tried 3-4 times with a decrease in the number of icons by 20,000 - 30,000), the optimal “working” resolution was chosen. It was reduced by 11 times compared to the original one, respectively, and consisted of only 12 876 (instead of the original 140 500 ) icons.
Instead of 1 pixel, we substituted a 32x32 px icon from the FatCow Farm Fresh set . In total, we got a picture resolution of 148 cells wide and 87 high. Multiplying each value by 32 px, we got an extension of the picture to an impressive 4736x2784 px.
The disease progressed ...
Embroidery program Stitch Art Easy , - download here the primary conversion of the picture into a pixel image takes place. The program, too, was not immediately found; I had to reject a dozen other tools. The resulting image is saved in Excel, where 1 cell = 1 px.
The program creates this kind of [Figure 1], where the lettering inside the picture is a comparison of the color scheme with the tab of the legend of colors, the letter in the picture = the letter in the tab of the legend of colors (column “@") [figure 2]. For example, a yellow cell with the letter C is the 30th line on the legend of colors.The
figure obtained during processing by the program looks like this
Fig. 1: View of the image in an excel laid out using Stitch Art Easy
- No - serial number;
- @ - letter to determine the color in the picture;
- Color - color or tint from the composition of the thread palette;
- Code - a digital color code in the color palette of a specific thread model;
- Count - the number of pixels covering the given color;
- Palette is a company that produces mouline thread.
Fig. 2: Stitch Art Easy color legend
- 10 color sets of threads of different firms of manufacturers of floss (Palette), they are also lists of palettes;
- the ability to create your own palette;
- the number of colors in each palette is fixed (for example, the Paterna Wool palette has 417 thread colors). But the program allows you to encode a maximum of 125 alphanumeric characters.
We decided to use 10 colors for our task. Since the icons were formed into 10 color groups.
A month earlier, we still could not arrange the icons according to color. The following macro was born, which worked in conjunction with the (“ carpeted iconset-preview-generator program ”). The macro was able to process images by attaching the icon to a specific location. The location of the icon was set using the color of the cell. Being able to determine the location of the icon using the color, it was decided to improve the macro the following scheme: specific color = icon corresponding to the color.
During the operation of the macro, the conversion of the shades of the past filter programs for embroidery was required. To do this, the entire line of colors (125) Paterna Wool was manually prescribed matching 1 out of 10 primary colors. The macro can be found here
. 3: A color legend with matching colors
Macro replaces the shades in the picture with the basic 10 colors, which makes the image an order of magnitude worse than it was with shades. We look [figure 4]. We did not consider the option of increasing the basic colors due to shades, since the icons cannot be divided into shades manually, and there is no software method either. Therefore, it was decided to look for another way to create a picture.
Figure 4: Figure 1 reduced to basic colors.
The grass has exhausted itself, we turn to hard labor manual finishing.
After a long break, an interesting solution was found. For the workers and peasants, it was decided to create a colorless picture, only with circled contours. Thus, color played a secondary role, as it was already manually added to Excel. The option of creating a simple object contour drawing was not simple, I had to try and select various Photoshop filters, so as not to redraw the whole picture.
The first attempt to obtain a contour was as follows. After applying the menu item “Filter-> Stylization-> Select Edges”, we get such a picture 5
Fig. 5: Using the filter Stylization-> Select Edges
After conversion through the embroidery program, in Excel we see just such a dirty picture, [Figure 6.]
Fig. 6: View of the image after processing the filter Stylization-> Select edges in the embroidery program.
After that, we just tried to convert the color without making any manual changes.
Converting shades to base colors leads to a complete failure, [Figure 7].
Fig. 7: View of the picture after reduction to the base colors.
After such a fiasco, we pushed this strategy aside and set about revising the remaining options. There was a thought about scaling! Everyone wondered if this thought was what we needed ?! It was decided to check.
To test this hypothesis, we re-transformed the drawing, but this time we did not reduce the size, as we did before. At the same time, we forgot that the terrible quality of the converted and converted outlines was due to the reduction of the image by 11 times. We continue to try, without changing anything, to process this drawing. On the other hand, it was decided to test the available resources of the computer on which it all began. After receiving the image in MS Excel, we received 3 sheets - 3 parts of the image. After processing, these parts had to form a huge panoramic picture, and for processing only the first such fragment, about 10-15 operations would be needed. Then it is necessary to glue 3 fragments again into 1 drawing.
It was planned to take a large picture and turn it into an icon carpet. It seemed that the icons would be so small against the general background that they would create a single color.
We inform you in advance that a picture with a higher resolution (meaning a picture that has already been created on the basis of icons) did not live up to its expectations. And it is practically unreadable due to the fact that the computer simply can not process such a volume of the picture.
For a more illustrative example, we give [Figure 8] - the figure is not compressed by scaling.
Fig. 8: Picture in real size.
As can be seen from [Figure 8], which is formed using the embroidery program and reduced to the base colors in Excel, to process large resolutions we need to either increase the number of colors and add shades to the existing 10 colors, or create a less cluttered picture, bring contours and bring the colors inside the contours to a single color.
But using such pictures to create animations is unrealistic, since they weigh a lot. Such a panorama alone weighs more than 100 MB. An example of such a panoramic picture
is Panorama .
Return to square one ...
After incorrect thoughts about resolution, we again return to thoughts about contours and creating colorless pictures. After a day of wandering and trial processing, it was decided to use a gif animashka. We
divide the animation into frames by any online service .;
The resulting frames are reduced to a contour view;
We take the initial frame, [figure 9].
Fig. 9: Original frame.
Next, you need to clear each frame of garbage pixels. Since we got a picture from gif, we also got all the garbage that we can see in [Figure 10].
Fig. 10: Part of the original frame in an approximate form.
Based on several processing positions, it was customary to use a gray fill filter to obtain contours. In Photoshop, this menu is Image -> Correction -> Desaturate (Shift + Ctrl + U) [Figure 11].
Fig. 11: Application of the filter Image -> Correction -> Bleach.
Next, the edges are selected, the menu Filter - Stylization - Select edges [Figure 12].
Fig. 12: Using the Stylization filter - Selecting edges
After selecting the edges, all areas are cleaned with a magic wand [Figure 13].
Fig. 13: Application of the filter Image -> Correction -> Desaturate.
Then painted over with uniform colors without shades [Figure 14]
. Fig. 14: Manual image processing.
Although later they refused to paint with color, and left only the outline. Why? Because, when passing through the embroidery program, a filter is applied and you have to make additional efforts to return the picture to its original form.
One of the processing steps was the selection of colors with manual adjustment;
The work of the color replacement macro is described at the beginning of the article
. [Figure 15] shows a fragment of a large picture. Even one contour alone shows that due to the refraction of colors, the reproduction of shades occurs. What carries additional processing.
As you can see in [Figure 15], there are quite a few colors. However, in such a figure, we can clearly identify all the elements, remove insignificant ones and adjust the color as needed. But processing them is not so simple, because then you have to bring to the basic colors, which means everything will change, you need to think further.
Fig. 15: Getting the picture as is.
In [Figure 16], the same frame is processed in gray, the image is slightly smoothed, but also not very suitable.
Fig. 16: Getting the picture in gray.
[Figure 17] after selecting the outline. On small parts, the filter is useless, the outlines merge.
Fig. 17: View of the pattern after the outline is selected.
[Figure 18] remove excess background component. As you can see, there are only borders and small garbage.
Fig. 18: View of the image after removing the excess background component.
[Figure 19] manual processing and color filling.
Fig. 19: Manual processing.
Replacing colors with icons;
Substitution of icons instead of colored cells. At first, 2 sizes of icons 16x16 and 32x32 were used, but since even with a large increase it didn’t look beautiful, and most importantly, it turned out not to be clear [Figure 20].
Fig. 20: Figure after replacing cells with icons.
What we did not impress us, and continuing to process further, we left only 32x32 icons with an inter-window distance of 3 px, and after some consideration of the picture from a different angle, we tried it completely without it. The result was terrible [Figure 21].
Fig. 21: Attempt No. 1 to influence visual perception.Having not achieved the desired result (the icons were very “stuck together”), we experimented further. It was decided to insert a single-pixel space between the cells / icons. It became much better [Figure 22].
Fig. 22: Attempt No. 2 to influence visual perception.
However, in In this view, everything merged and was ugly. We decided to enhance the visual perception of removing the icons that were part of the background image of the interior. As well as adding a background under the icons. This gave the desired effect. The final result is in [Figure 23].
Fig. 23: Final result:
Animation is created using the imagemagick program.To create an animation, just enter the command in the folder with frames
c:\Gif_ani>convert -delay 40 -loop 0 00*.png Full_animation.gifTo summarize the work:
I hope the above was pretty detailed and still quite fun. Perhaps somewhere mistakes were made in the formation of some arguments, please forgive.
We hope you have received a boost of vigor and do not want to repeat this yourself and understand that this should not be done.
- The result of the work - No. 1, the Simpsons animation, option 1, 32x32 icons
- The result of the work - No. 2, the Simpsons animation, the latest version , 16x16 icons, duration 0:59
- How it was - No. 3, step-by-step processing of drawings (manual processing)
- As it was 2 - № 4, step-by-step processing of drawings (one of the types of automation)
Thank you all for your attention!
Prior to this, the best formula was the Talmud Formulas on Google SpreadSheet , but now it's different. Now we have a new hit.
Only registered users can participate in the survey. Please come in.
Tell the story of the making of?
- 65.3% Yes, of course! 64
- 37.7% No, not worth it! 37









