September 3, 2013 at 09:12
Install OSSEC (HIDS) and Prewikka (WebUI)
This article will tell you how to install the OSSEC intrusion detection system and bring OSSEC alerts to a relatively convenient and informative Web interface. OSSEC can output alerts to syslog, DBMS or send them another IDS - Prelude . This IDS has practically not developed in recent years, but it has a good Web interface - Prewikka. This system also allows you to connect other IDS besides OSSEC - Snort, for example. First we install Prelude IDS, then Prewikk. Then connect OSSEC to Prelude. In the process, you will need to create two bases. Prewikka will use one to store user settings, etc. In the second, the prelude-manager will save information on events, and Prewikka will read it from there.
For installation, I will use a virtual machine with CentOS 6.4 installed. First you need to install Prelude-IDS. The developers provided installation instructions from packages and source codes for almost all popular platforms. Here you can download source, RPM and SRPM.
We connect a repository for CentOS / RHEL:
Next, install Prelude Manager and the packages necessary for working with a common database:
We start MySQL:
Now create the database and user:
Edit the Prelude Manager config:
Add the following lines there (or remove the comments):
Now you need to create a profile for Prelude Manager:
After the key generation is completed, you can start Prelude Manager:
Make sure that the server started normally:
Install the necessary packages:
We create one more base for Prewikka:
Now edit the Prewikka configuration file and specify the correct databases:
In our case, it is necessary to add (or edit) the following lines:
Now put Apache:
Create a virtual host:
It would seem that everything is ready, but here several pitfalls await us. Firstly, you must disable or configure SELinux, secondly, open port 80 on the local firewall, thirdly, set permissions on the folder with the configuration file:
However, if you try to log into Prewikk now, an error will occur.
Check the logs:
Install the missing module:
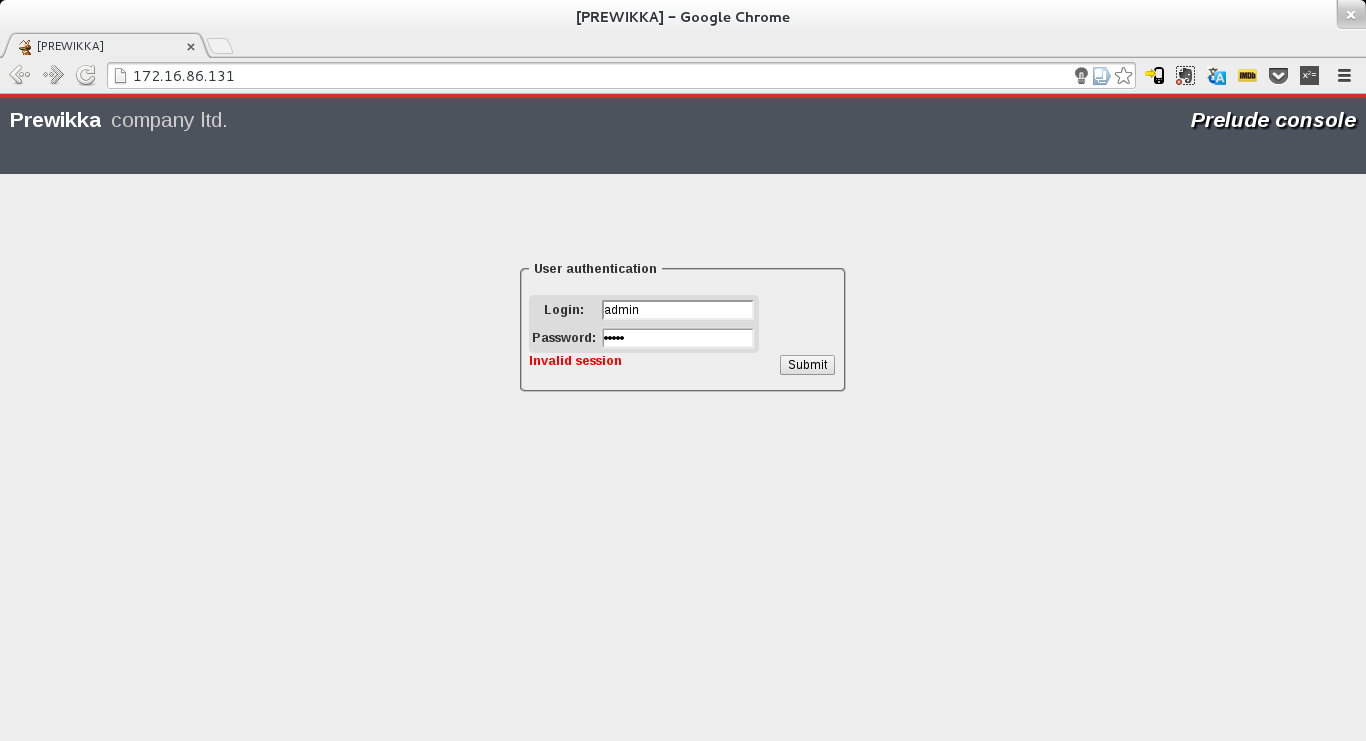
Now you can go to the server and log in with a pair of username / password admin / admin.
Download archives with the latest version of OSSEC here . On the same page it is written that RPM for RHEL / CentOS can be taken from the AtomiCorp repository . This option will not work for us, since OSSEC in that repository was built without libprelud support, however, when installing agents on the destination servers, it can be used.
So, download and unpack the latest version of OSSEC.
Now in order to compile OSSEC we set libprelude-devel, the compiler and make
Set the compilation options:
We start installation
The installation script will ask several questions - what language to use, type of installation, etc. The most important thing is to specify the correct type of installation. In our case, server. Also, I do not recommend including the active response function without first reading the manual on it and customizing it for yourself.
After the final press of the "enter" key, OSSEC will start compiling and copying it to the installation directory (by default it is / var / ossec /).
We indicate in the configuration file that events must be sent to prelude-manager.
Add a line to the sectionyes .
It should look something like this:
Now connect OSSEC to the prelude. We start the registration server in one console:
In another - register OSSEC command:
Like last time, we can speed up key generation with the command:
As soon as key generation is completed, the second console will prompt you to enter a one-time password. In this case, it is “p9gnqy98”.
Now restart both daemons.
If you go to Prewikk now, you can see notifications and alarms coming from OSSEC.
If you go to the Agents tab, the list of agents should include prelude-manager and OSSEC.
So, we installed Prelude IDS on our server. We configured the output of its alerts in the MySQL DBMS installed on the same server. We also created another database for the Prewikka Web interface, which is part of the Prelude IDS. After all this, we compiled OSSEC HIDS with special options that allow you to send OSSEC events not only to syslog or DBMS, but directly to Prelude.
Now, when there are suspicious events in the logs, OSSEC will generate an alert, write it to the /var/ossec/logs/ossec.log file, send it to Prelude IDS. Prelude, in turn, writes it to the database, and Prewiika, upon entering it, will ensure that all these events are displayed in a readable form.
In this article, I have not described quite a few things that, if there are interested readers, more than one article can be devoted.
For example, how to install OSSEC on a server without a compiler, how to configure and maintain a database for Prelude, how to install and configure OSSEC agents on other servers, how to configure your own rules for generating events for OSSEC.
For installation, I will use a virtual machine with CentOS 6.4 installed. First you need to install Prelude-IDS. The developers provided installation instructions from packages and source codes for almost all popular platforms. Here you can download source, RPM and SRPM.
Install Prelude Manager
We connect a repository for CentOS / RHEL:
[root@ossec ~]# yum install https://www.prelude-ids.org/attachments/download/297/prelude-ids-rhel-2-1.noarch.rpm
Next, install Prelude Manager and the packages necessary for working with a common database:
[root@ossec ~]# yum install prelude-manager prelude-manager-db-plugin libpreludedb-mysql
We start MySQL:
[root@ossec ~]# /etc/init.d/mysqld start
[root@ossec ~]# chkconfig mysqld on
Now create the database and user:
[root@ossec ~]# mysql -u root -p
mysql> CREATE database prelude;
Query OK, 1 row affected (0.00 sec)
mysql> GRANT ALL PRIVILEGES ON prelude.* TO prelude@'localhost' IDENTIFIED BY 'preludepasswd';
Query OK, 0 rows affected (0.00 sec)
[root@ossec ~]# mysql -u root prelude -p < /usr/share/libpreludedb/classic/mysql.sql
Edit the Prelude Manager config:
[root@ossec ~]# vim /etc/prelude-manager/prelude-manager.conf
Add the following lines there (or remove the comments):
[db]
type = mysql
host = localhost
port = 3306
name = prelude
user = prelude
pass = preludepasswd
Now you need to create a profile for Prelude Manager:
[root@ossec ~]# prelude-admin add "prelude-manager" --uid 0 --gid 0
Generating 2048 bits RSA private key... This might take a very long time.
[Increasing system activity will speed-up the process].
Generation in progress...
There is one point. As the program warns, key generation can take a very long time.
There is an opportunity to speed up this process:[root@ossec ~]# yum install rng-tools [root@ossec ~]# rngd -r /dev/urandom
After the key generation is completed, you can start Prelude Manager:
[root@ossec ~]# /etc/init.d/prelude-manager restart
Make sure that the server started normally:
Aug 19 05:36:33 ossec prelude-manager: INFO: server started (listening on 127.0.0.1 port 4690).
Aug 19 05:36:33 ossec prelude-manager: INFO: Subscribing db[default] to active reporting plugins.
Aug 19 05:36:33 ossec prelude-manager: INFO: Generating 1024 bits Diffie-Hellman key for TLS...
Prewikka Installation
Install the necessary packages:
[root@ossec ~]# yum install prewikka libpreludedb-python
We create one more base for Prewikka:
[root@ossec ~]# mysql -u root -p
Enter password:
mysql> CREATE database prewikka;
Query OK, 1 row affected (0.00 sec)
mysql> GRANT ALL PRIVILEGES ON prewikka.* TO prewikka@'localhost' IDENTIFIED BY 'prewikkapasswd';
Query OK, 0 rows affected (0.01 sec)
[root@ossec ~]# mysql -u root prewikka -p < /usr/share/prewikka/database/mysql.sql
Now edit the Prewikka configuration file and specify the correct databases:
[root@ossec ~]# vim /etc/prewikka/prewikka.conf
In our case, it is necessary to add (or edit) the following lines:
[idmef_database]
type: mysql
host: localhost
user: prelude
pass: preludepasswd
name: prelude
[database]
type: mysql
host: localhost
user: prewikka
pass: prewikkapasswd
name: prewikka
Now put Apache:
[root@ossec ~]# yum install httpd
Create a virtual host:
[root@ossec ~]# vim /etc/httpd/conf.d/prewikka.conf
 ServerName my.server.org
 Setenv PREWIKKA_CONFIG "/etc/prewikka/prewikka.conf"

        AllowOverride None
        Options ExecCGI

                AddHandler cgi-script .cgi

        Order allow,deny
        Allow from all

Alias /prewikka/ /usr/share/prewikka/htdocs/
ScriptAlias / /usr/share/prewikka/cgi-bin/prewikka.cgi
It would seem that everything is ready, but here several pitfalls await us. Firstly, you must disable or configure SELinux, secondly, open port 80 on the local firewall, thirdly, set permissions on the folder with the configuration file:
[root@ossec ~]# chmod o+x /etc/prewikka/
However, if you try to log into Prewikk now, an error will occur.
Check the logs:
[root@ossec ~]# tail  -f  /var/log/httpd/error_log
[Mon Aug 19 06:26:53 2013] [error] [client 172.16.86.1] from prewikka import utils, siteconfig, cairoplot
[Mon Aug 19 06:26:53 2013] [error] [client 172.16.86.1]   File "/usr/lib/python2.6/site-packages/prewikka/cairoplot.py", line 34, in
[Mon Aug 19 06:26:53 2013] [error] [client 172.16.86.1]
[Mon Aug 19 06:26:53 2013] [error] [client 172.16.86.1] import cairo
[Mon Aug 19 06:26:53 2013] [error] [client 172.16.86.1] ImportError
[Mon Aug 19 06:26:53 2013] [error] [client 172.16.86.1] :
[Mon Aug 19 06:26:53 2013] [error] [client 172.16.86.1] No module named cairo
Install the missing module:
[root@ossec ~]# yum install cairo
Now you can go to the server and log in with a pair of username / password admin / admin.
Install OSSEC
Download archives with the latest version of OSSEC here . On the same page it is written that RPM for RHEL / CentOS can be taken from the AtomiCorp repository . This option will not work for us, since OSSEC in that repository was built without libprelud support, however, when installing agents on the destination servers, it can be used.
So, download and unpack the latest version of OSSEC.
[root@ossec ~]# wget http://www.ossec.net/files/ossec-hids-2.7.tar.gz
[root@ossec ~]# tar xvzf ossec-hids-2.7.tar.gz
Now in order to compile OSSEC we set libprelude-devel, the compiler and make
[root@ossec ~]# yum install libprelude-devel gcc make
Set the compilation options:
[root@ossec ~]# cd ossec-hids-2.7/src/
[root@ossec src]# make setprelude
We start installation
[root@ossec src]# ../install.sh
The installation script will ask several questions - what language to use, type of installation, etc. The most important thing is to specify the correct type of installation. In our case, server. Also, I do not recommend including the active response function without first reading the manual on it and customizing it for yourself.
OSSEC HIDS v2.7 Installation Script - http://www.ossec.net
 You are about to start the installation process of the OSSEC HIDS.
 You must have a C compiler pre-installed in your system.
 If you have any questions or comments, please send an e-mail
 to [email protected] (or [email protected]).
  - System: Linux ossec 2.6.32-358.el6.x86_64
  - User: root
  - Host: ossec
  -- Press ENTER to continue or Ctrl-C to abort. --
1- What kind of installation do you want (server, agent, local, hybrid or help)? server
  - Server installation chosen.
2- Setting up the installation environment.
 - Choose where to install the OSSEC HIDS [/var/ossec]:
    - Installation will be made at  /var/ossec .
3- Configuring the OSSEC HIDS.
  3.1- Do you want e-mail notification? (y/n) [y]: n
   --- Email notification disabled.
  3.2- Do you want to run the integrity check daemon? (y/n) [y]:
   - Running syscheck (integrity check daemon).
  3.3- Do you want to run the rootkit detection engine? (y/n) [y]:
   - Running rootcheck (rootkit detection).
  3.4- Active response allows you to execute a specific
       command based on the events received. For example,
       you can block an IP address or disable access for
       a specific user.
       More information at:
       http://www.ossec.net/en/manual.html#active-response
   - Do you want to enable active response? (y/n) [y]: n
     - Active response disabled.
  3.5- Do you want to enable remote syslog (port 514 udp)? (y/n) [y]:
   - Remote syslog enabled.
  3.6- Setting the configuration to analyze the following logs:
    -- /var/log/messages
    -- /var/log/secure
    -- /var/log/maillog
    -- /var/log/httpd/error_log (apache log)
    -- /var/log/httpd/access_log (apache log)
 - If you want to monitor any other file, just change
   the ossec.conf and add a new localfile entry.
   Any questions about the configuration can be answered
   by visiting us online at http://www.ossec.net .
   --- Press ENTER to continue ---
After the final press of the "enter" key, OSSEC will start compiling and copying it to the installation directory (by default it is / var / ossec /).
We indicate in the configuration file that events must be sent to prelude-manager.
[root@ossec src]# vim /var/ossec/etc/ossec.conf
Add a line to the section
It should look something like this:
no yes rules_config.xml pam_rules.xml sshd_rules.xml
...
Now connect OSSEC to the prelude. We start the registration server in one console:
[root@ossec ~]# prelude-admin registration-server prelude-manager
The "p9gnqy98" password will be requested by "prelude-admin register"
in order to connect. Please remove the quotes before using it.
Generating 1024 bits Diffie-Hellman key for anonymous authentication...
Waiting for peers install request on 0.0.0.0:5553...
Waiting for peers install request on :::5553...
In another - register OSSEC command:
[root@ossec ~]# prelude-admin register OSSEC "idmef:w" 127.0.0.1 --uid ossec --gid ossec
Generating 2048 bits RSA private key... This might take a very long time.
[Increasing system activity will speed-up the process].
Generation in progress... X
Like last time, we can speed up key generation with the command:
[root@ossec ~]# rngd -r /dev/urandom
As soon as key generation is completed, the second console will prompt you to enter a one-time password. In this case, it is “p9gnqy98”.
Now restart both daemons.
[root@ossec ~]# /etc/init.d/prelude-manager start
[root@ossec ~]# /etc/init.d/ossec start
If you go to Prewikk now, you can see notifications and alarms coming from OSSEC.
If you go to the Agents tab, the list of agents should include prelude-manager and OSSEC.
Summary
So, we installed Prelude IDS on our server. We configured the output of its alerts in the MySQL DBMS installed on the same server. We also created another database for the Prewikka Web interface, which is part of the Prelude IDS. After all this, we compiled OSSEC HIDS with special options that allow you to send OSSEC events not only to syslog or DBMS, but directly to Prelude.
Now, when there are suspicious events in the logs, OSSEC will generate an alert, write it to the /var/ossec/logs/ossec.log file, send it to Prelude IDS. Prelude, in turn, writes it to the database, and Prewiika, upon entering it, will ensure that all these events are displayed in a readable form.
In this article, I have not described quite a few things that, if there are interested readers, more than one article can be devoted.
For example, how to install OSSEC on a server without a compiler, how to configure and maintain a database for Prelude, how to install and configure OSSEC agents on other servers, how to configure your own rules for generating events for OSSEC.