Universal iRig for iPhone and Android do it yourself or save 30 euros
The lucky owners of iPhones have most likely heard about such a thing as iRig, which, together with the software from IK Multimedia (the same authors of AmpliTube - a software guitar combo with pedals for PC), allows you to use their apple technique as a guitar processor. However, the prices for the official iRig are somewhat overstated, to say the least. Plus, for me, a huge disadvantage of this thing was the lack of support for Android devices (see the reasons for incompatibility below).
And so, if you want to make your iRig so that it also supports android, plus spend a minimum of money, then welcome to cat.
I work as a simple programmer in one office dealing with MG MN communications and Sip telephony. When developing clients for our Sip telephony, it was necessary to test the quality of communication, how different codecs work, etc. There are not many systems that are tailored precisely for this, but their cost is unrealistically overpriced, apparently this is due to weak competition. Therefore, a colleague approached me with the idea of connecting the phone to a computer, not just like that, but so that the computer is defined as a headset. Armed with Google, I climbed to read the documentation on the iPhone, and at the same time I went to irig (I don’t have an iPhone and I heard about the iPhone for the first time). The docks said that the iPhone, like other phones, uses Jack 3,5mm with 4 segments to connect a headset. The first two are used for headphones, 3 and 4 power and ground. But here the fun began.
The fact is that for iphone (and other apple products) the order of land and nutrition is different from those used on androids.
On an iPhone, it looks like this:

On an Android, 3 and 4 segments (counting from top to bottom) are rearranged. Therefore, it is necessary to make an iRig analogue, but only universal, not just for an apple.
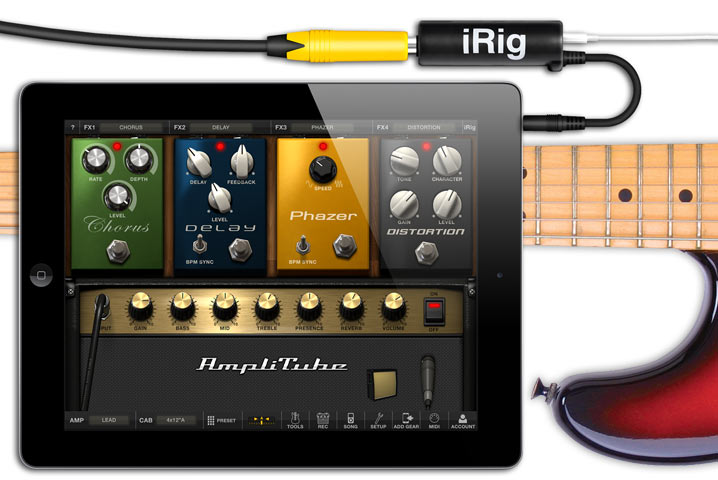
iRig is a plastic cylinder with a wire for connecting to iphone / ipod / ipad, a headphone jack (and in general for audio output), an input for a guitar. With its simplicity, it allows you to make a guitar processor out of an apple device, and of quite good quality! Video as proof:
Unfortunately amplitube is only for apple devices, while android is still in development, the problem is related to delay. On an apple, it is about 10ms, which is enough for a comfortable guitar playing, and under android delay of 100-500ms, it is impossible to play. This was written by IK Multimedia themselves. And this is sad, because I want to drive it on the android, and the number of pedals my eyes flare up, that's just part of them:

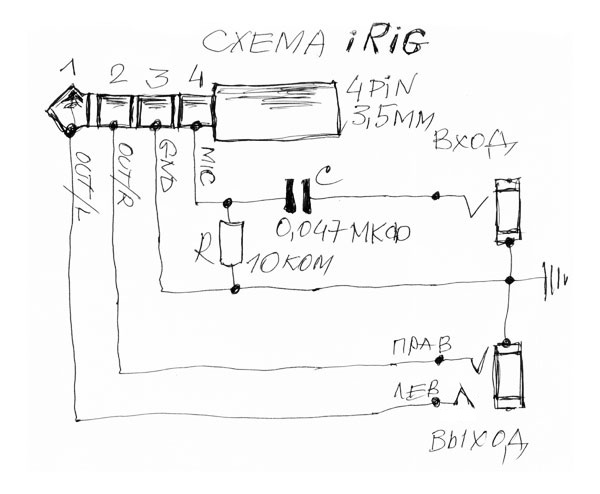
For an iPhone, the circuit diagram looked something like this:
But it had to be done:
1) Universal (the ability to use it on an android)
2) Practical (some kind of box, box)
It’s clear that I, as a person in radio electronics, are at the amateur level if they could lie I could repeat such a corpus:
However, creativity and a desire to help a colleague did their job.
I spread a small scarf (you can download it at the end of the article), it looks like this (please note that everything is connected through the wires, and not to the board itself, so I made soldering places specifically for wires and not elements):

Here the numbers are marked:
1) 4 holes where a 4-core wire with a 4-segment Jack 3.5mm is soldered (male)
2) 3 wires are connected here that go to the headphone output (Jack 3.5mm mother)
3) 3 wires are soldered here that go to the input (microphone), given that the input on the phone is mono - left and right channel are combined into one
4) A simple 100 Ohm resistor, volume control of the incoming signal (in case the signal is too strong, i.e. too loud, just for convenience)
5) There is a jumper between the two holes
6.1-6.2) 6 wires are soldered here are connected to a 6-foot shift switch, although I'm actually in the second version used only the 4 tabs on the tab 2 soldered wires directly crosswise. But the original connection in the picture below:
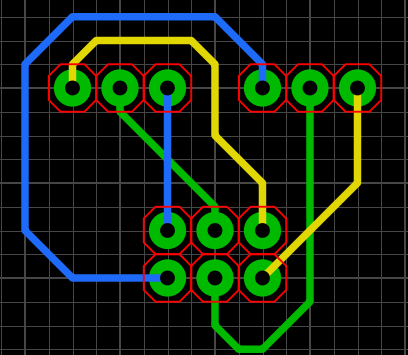
Green lines - the main entrance
Blue lines - Android mode.
Yellow lines - iPhone mode.
List of used:
1) The fee is 40 rubles (actually less, because I used only 1/4 of it)
2) Ingredients for weeding the board after LUT (I used peroxide with citric acid)
3) Resistor 10 kOhm smd - 1 rub
4) A capacitor - 1 RUB
5) A shift switch - was available
6) A variable resistor - was available (as well 10 rubles)
7) A case - a jar - was available, but I think it costs 10 rubles.
Those. in total, apart from peroxide and citric acid, I got 52 rubles (the maximum will be 100 rubles) and 1 hour, instead of 30 euros. The sound quality is almost the same (I didn’t notice much by ear).
In the first version of my improvised airig, I used a creative jar. This is a jar for collecting tests, the choice was due to the fact that only she was at hand, well, the form is similar to the original airig.
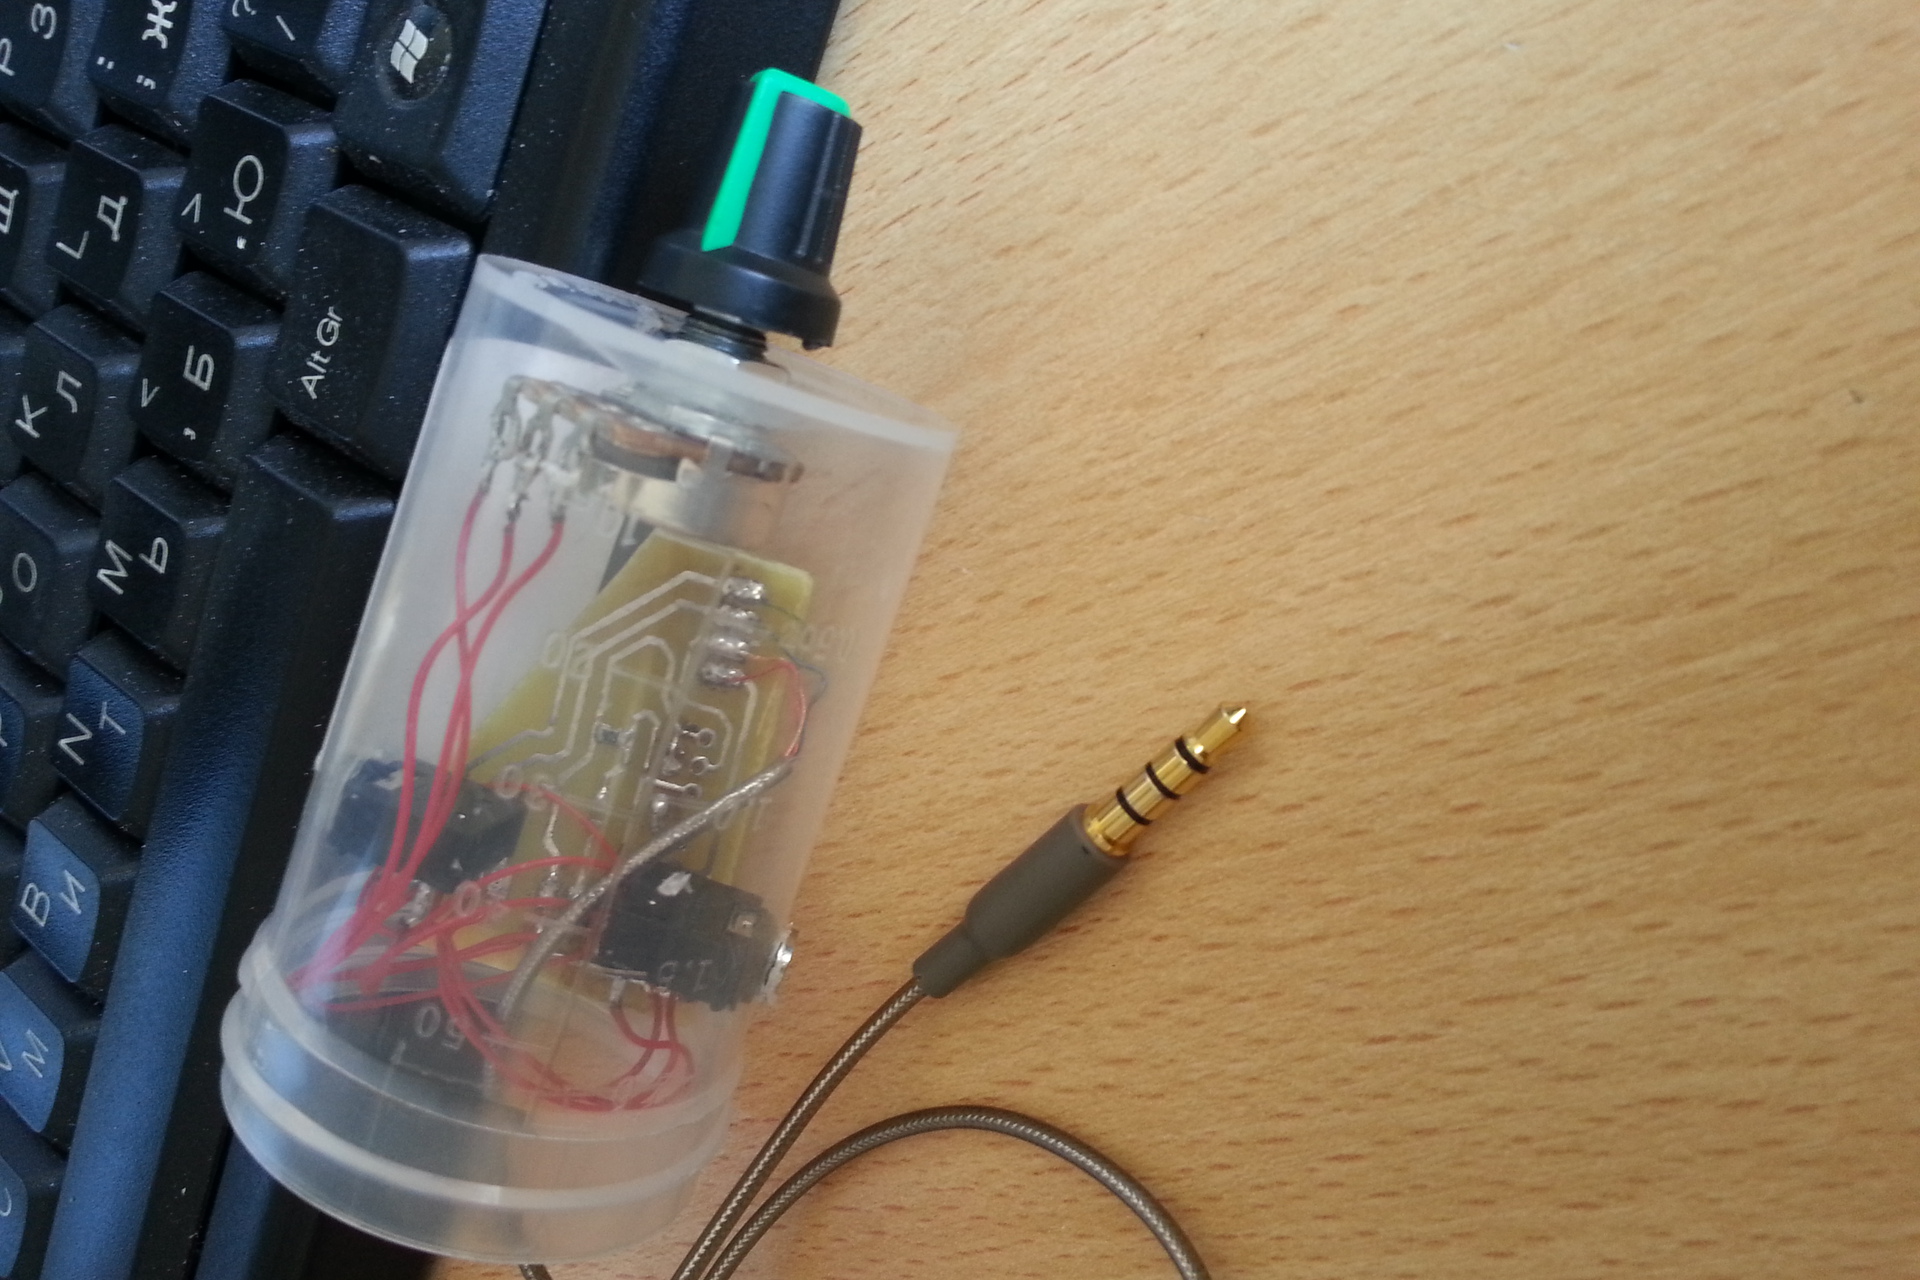
The shift switch is not visible in the photo, it is on the back side relative to the position of the camera.
Also in the photo there is no red cap, it did not fall into the frame (the wire passed through it).
Unfortunately, and perhaps fortunately, this work at work gained popularity, having made several versions they now walk on the hands of employees for non-working purposes and now they can’t find it to photograph the revised version. :) I
recommend: rub the jar with a fine skin, then it will become dull, the class looks generally :)
Well, actually the link:
Scheme for SprintLayout
And so, if you want to make your iRig so that it also supports android, plus spend a minimum of money, then welcome to cat.
Intro (birth of an idea)
I work as a simple programmer in one office dealing with MG MN communications and Sip telephony. When developing clients for our Sip telephony, it was necessary to test the quality of communication, how different codecs work, etc. There are not many systems that are tailored precisely for this, but their cost is unrealistically overpriced, apparently this is due to weak competition. Therefore, a colleague approached me with the idea of connecting the phone to a computer, not just like that, but so that the computer is defined as a headset. Armed with Google, I climbed to read the documentation on the iPhone, and at the same time I went to irig (I don’t have an iPhone and I heard about the iPhone for the first time). The docks said that the iPhone, like other phones, uses Jack 3,5mm with 4 segments to connect a headset. The first two are used for headphones, 3 and 4 power and ground. But here the fun began.
The fact is that for iphone (and other apple products) the order of land and nutrition is different from those used on androids.
On an iPhone, it looks like this:
On an Android, 3 and 4 segments (counting from top to bottom) are rearranged. Therefore, it is necessary to make an iRig analogue, but only universal, not just for an apple.
A bit about iRig
iRig is a plastic cylinder with a wire for connecting to iphone / ipod / ipad, a headphone jack (and in general for audio output), an input for a guitar. With its simplicity, it allows you to make a guitar processor out of an apple device, and of quite good quality! Video as proof:
Unfortunately amplitube is only for apple devices, while android is still in development, the problem is related to delay. On an apple, it is about 10ms, which is enough for a comfortable guitar playing, and under android delay of 100-500ms, it is impossible to play. This was written by IK Multimedia themselves. And this is sad, because I want to drive it on the android, and the number of pedals my eyes flare up, that's just part of them:
Schemes such schemes
For an iPhone, the circuit diagram looked something like this:
But it had to be done:
1) Universal (the ability to use it on an android)
2) Practical (some kind of box, box)
It’s clear that I, as a person in radio electronics, are at the amateur level if they could lie I could repeat such a corpus:
However, creativity and a desire to help a colleague did their job.
I spread a small scarf (you can download it at the end of the article), it looks like this (please note that everything is connected through the wires, and not to the board itself, so I made soldering places specifically for wires and not elements):
Here the numbers are marked:
1) 4 holes where a 4-core wire with a 4-segment Jack 3.5mm is soldered (male)
2) 3 wires are connected here that go to the headphone output (Jack 3.5mm mother)
3) 3 wires are soldered here that go to the input (microphone), given that the input on the phone is mono - left and right channel are combined into one
4) A simple 100 Ohm resistor, volume control of the incoming signal (in case the signal is too strong, i.e. too loud, just for convenience)
5) There is a jumper between the two holes
6.1-6.2) 6 wires are soldered here are connected to a 6-foot shift switch, although I'm actually in the second version used only the 4 tabs on the tab 2 soldered wires directly crosswise. But the original connection in the picture below:
Green lines - the main entrance
Blue lines - Android mode.
Yellow lines - iPhone mode.
Total
List of used:
1) The fee is 40 rubles (actually less, because I used only 1/4 of it)
2) Ingredients for weeding the board after LUT (I used peroxide with citric acid)
3) Resistor 10 kOhm smd - 1 rub
4) A capacitor - 1 RUB
5) A shift switch - was available
6) A variable resistor - was available (as well 10 rubles)
7) A case - a jar - was available, but I think it costs 10 rubles.
Those. in total, apart from peroxide and citric acid, I got 52 rubles (the maximum will be 100 rubles) and 1 hour, instead of 30 euros. The sound quality is almost the same (I didn’t notice much by ear).
In the first version of my improvised airig, I used a creative jar. This is a jar for collecting tests, the choice was due to the fact that only she was at hand, well, the form is similar to the original airig.
The shift switch is not visible in the photo, it is on the back side relative to the position of the camera.
Also in the photo there is no red cap, it did not fall into the frame (the wire passed through it).
Unfortunately, and perhaps fortunately, this work at work gained popularity, having made several versions they now walk on the hands of employees for non-working purposes and now they can’t find it to photograph the revised version. :) I
recommend: rub the jar with a fine skin, then it will become dull, the class looks generally :)
Well, actually the link:
Scheme for SprintLayout