July 8, 2013 at 15:21
Announcement of a series of articles on configuring the Communigate Pro server. Server installation
Hello!
A bit about our developments. Install the free version.

It all started with a mail server, but now it is a full-fledged Unified Communication server and is used in TELE2, Beeline, AT&T, T-mobile networks ... Immediately dispel the myth that we are imprisoned for operators, all over the world Communigate use schools, universities, corporations, restaurants , car dealers, etc.
The emphasis on standard protocols and open programming interfaces makes it possible to use CommuniGate Pro as a platform for developing advanced solutions in the field of unified communications. We invite potential developers for this platform to download and install a product that works in community mode without limiting functionality when creating up to five accounts.
What is Communigate Pro?
Communigate Pro is a high-quality solution with a whole set of basic functions for sending
messages, files, voice and video.
Key features of our platform:
- One reliable platform for all types of communications - no need to install separate solutions for mail, voice, and instant messaging
- Scalability and reliability (when combining several servers into a dynamic cluster, service availability reaches 99.999% of the time)
- Extensive list of supported protocols and standards
- Flexibility - the ability to deeply modify graphical interfaces and the processing of signals and messages
- One client protocol for all tasks - we provide a simple and understandable XML protocol for working with all server functionality
Installation
To demonstrate the installation as an operating system, we chose Windows, for the reason that it is best to familiarize yourself with the product simply by installing it on a workstation or laptop. Installation takes only 5-10 minutes and 100 MB on the hard drive.
The product has a “community” mode - you can use all the features for free, while the total number of accounts is no more than 5.
Distribution choice
The latest stable versions of the product for various platforms (more than 15 operating systems are supported) can be found here.
Windows installation
The distribution is a simple zip archive. Run Installer.exe:
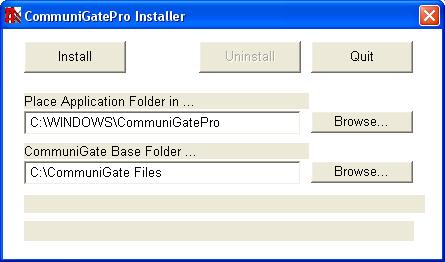
- Application Folder - a folder with the program and default settings and interface files.
- Base Folder - a folder with user data and all settings other than standard.
When upgrading the server version, only the Application Folder is replaced.
After installation, make sure that the desired process is running:

Main interfaces
In any browser, open this URL:
localhost:8010/(or http://[ip адрес сервера]:8010/) and get into WebAdmin.
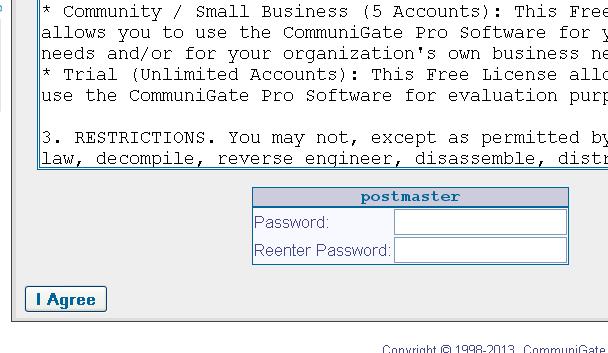
By default, the administrator is the postmaster user, when you first visit the admin panel, select the password for it:
After the login, we get to the main interface settings page:
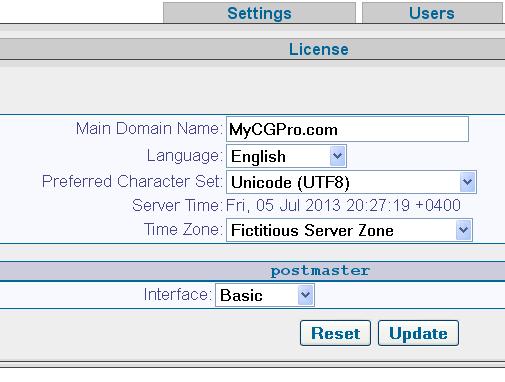
Here you can choose a convenient interface language, time zone and name of the main domain. We also recommend switching from Basic mode to Expert (it affects what settings are displayed, Basic mode is good for self-study, but in this series of articles we will use Expert mode, since only the most interesting settings are visible in it).
WebAdmin is a hierarchical system of tabs. To indicate any setting, we will use the following format:
Tab1-> Tab2-> Tab3 -> "Setting Name"
For example, you can create a user using the button
In addition to WebAdmin, there are 3 more web interfaces for users:
- WebUser - HTML interface with mail, calendars and contacts, by default is available through port 8100:
localhost:8100/ - Pronto! - a more functional Flash interface, in addition to mail, calendars and contacts, supports calls, IM and some additional functions, is available at a URL of the form
localhost:8100/Pronto/ - Pronto! Lite - the newest and minimalistic interface on HTML 5, URL for access -
localhost:8100/?Skin=hPronto-#pronto-login
Actually, the installation is completed on this, users can already correspond and call each other. You just need to remember that if there are no DNS records, then in the client settings you need to use the IP address of the computer instead of the server name, and for calls you need to use the full account name, since we have not assigned short numbers yet. Read more about all these settings in the following articles.
What's next?
Sample topics on the following posts:
- Key objects and concepts in Communigate Pro. Nuances of mail settings.
- Calendars, contacts, tasks, folder access control
- Basic IP telephony settings, features of embedded applications
- Develop your own PBX applications
- Web - interfaces and their modification
- Interaction with external programs. Filters and automation of administrative tasks
Leave comments on the content of future articles in the comments.
PS An example of one of the latest in-house client interfaces: