Making a simple game with buttons, drawers and doors on Unity
- From the sandbox
- Tutorial
Unity is unmatched for rapid prototyping of games. If you had the idea of some new game mechanics, with Unity it can be implemented and tested as soon as possible. Under the cut, I will tell you how to make a simple puzzle using only standard components and without getting into graphic editors. In the course of the article, I will demonstrate a couple of game design tricks, and in the end I will talk a little about aesthetics, dynamics and mechanics.
For the most impatient, the links below are the finished prototype.
Online version
Compiled version for Windows [ Mirror ] ~ 7.5 MB
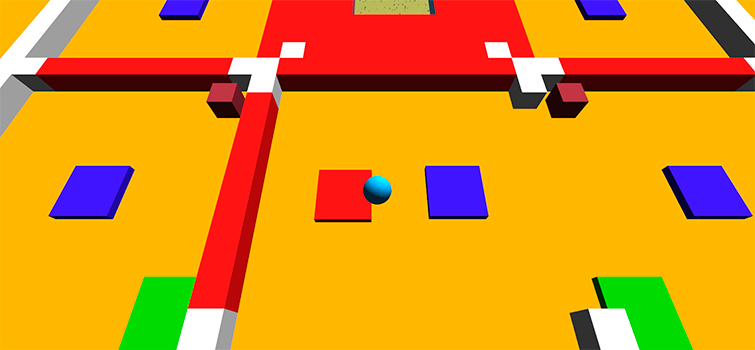
What are we going to do? A two-dimensional puzzle with a bun in the role of the main character, who can move boxes, which can press buttons, which can open doors, which hide the exit from the level that I built. Or you, here we have a tutorial after all.
It is understood that you have already managed to download Unity and played a little in the editor. Not? Now is the time, I will wait.
Rough sketch

I lied, I won’t wait. We create an empty project without unnecessary packages and select the window layout for your taste, I will use Tall. Add a sphere to the hierarchy, drag the main camera onto it. Now the camera will follow our sphere if it suddenly wants to take a walk. Rename the sphere to “Player”, drag it to Project, now we have a prefab , which we can use in any new scenes, if any. Do not forget to check the coordinates of the prefabs during creation and use, if we want to make a toy in two dimensions, then the third axis should be set to zero for all interacting objects.
Now add a light source, go to the menu GameObject -> Create Other -> Directional light. Its coordinates do not matter, it will illuminate our objects equally from anywhere. However, it makes sense to raise it slightly above the stage so that it does not interfere with the selection of objects, so we will put it the coordinates (0; 0; -10). Speaking of the scene, the X axis will grow from left to right, Y - from bottom to top, and Z - from the viewer deep into the screen. Click on the arrows around the cube in the upper right corner of the scene and rotate it as needed.
Add a cube to the scene, call it “Wall” and drag it into Assets. The lonely cubic wall next to the spherical bun is not very impressive, right? Three Scale fields in the inspector will allow us to stretch the wall, and the keyboard shortcut Ctrl + D will create a copy of it. Unity has many other useful keyboard shortcuts., for example, holding Ctrl restricts the movement of objects to unit intervals, and the V key will allow you to drag the object to the vertices, and they will stick to the vertices of other objects. Great, isn't it? And are you still writing your engine? Oh well.

Think of something like a room, save the scene, press Play and admire your creation for a couple of minutes. Good game designers call this testing. Something is missing, right? Hmm Perhaps if I admire some more, then ...
Scripts and Physics
We need more movement and color! Although, if your harsh childhood was filled with concrete toys, then you can leave everything as it is. For everyone else, the time has come for scripts. I will give examples in C #, but you can write in JS or Boo. Actually, it makes no sense to choose the last two, they were added to Unity more like an appendage, they are less supported, expand worse, and it’s harder for them to find examples. Especially terrible is Boo, which is essentially unpythonic Python. Abomination. Viva, pythonists!
We create C # Script, call it “PlayerController”, drag it onto the Player prefab and open your favorite editor using
using UnityEngine;
public class PlayerController: MonoBehaviour
{
    void Update()
    {
    }
}
The Update function is called in each frame, which is very convenient for implementing the movement, and we will place the code inside it. Player button presses can be obtained using the Input class . Wonderful input settings come with Unity, just write Input.GetAxis ("Horizontal") and we already know whether the player on the keyboard pressed the right or left arrow. If a player has a gamepad connected, then he can control from it, we don’t even need to write extra code.
var direction = new Vector3(Input.GetAxis("Horizontal"), Input.GetAxis("Vertical"), 0);
With such a simple line, we get information about user actions and create a motion vector. In order for the vector to be applied somewhere, we need a Rigidbody . Select the prefab Player and through the menu Component -> Physics -> Rigidbody add the desired component. Now we can refer to it in our script.
rigidbody.AddForce(direction);
The AddForce function has several interesting options for applying force , but for a start we will have enough default values.
Done! Save, click Play, test.

Eeeem, you know, it reminded me of that moment from the Inception movie, where a man turned his eyes furiously and rolled head over heels on the wall or on the ceiling. Perhaps this is how he felt.
We need to prohibit rotation and movement along the Z axis. Select the prefab, look at the Rigidbody component and see the Constraints section. We leave unchecked only the first two ticks X and Y, the other four are included. Uncheck the Use Gravity checkbox and prescribe a Drag equal to four (in the section on aesthetics I will explain why this was done). Testing again.
It moves and does not spin! Hurrah! But does it too slowly. Add one variable to our script and use it in the formula of our movement. All the code will end up looking like this:
using UnityEngine;
public class PlayerController : MonoBehaviour
{
    public int acceleration;
    void Update()
    {
        var direction = new Vector3(Input.GetAxis("Horizontal"), Input.GetAxis("Vertical"), 0);
        rigidbody.AddForce(direction * acceleration);
    }
}
Notice how in the inspector a new Acceleration field appeared in our script? Effectively, yes? We drive thirty into the box or something to your taste and check in action.
Materials and Colliders
It's time to make some kind of button so that there is something to click on. Duplicate Wall prefab and rename it to “Button”. In the inspector at the collider, check the Is Trigger box. This will disrupt our button and cause other objects to pass through it. Create a script “Button” and hang on the button.
Trigger colliders have OnTriggerEnter and OnTriggerExit events that are fired whenever something crosses the trigger area. In fact, this is not entirely true, because there are many different objects and the physical engine does not handle all collisions, read more here .
First, let's just check how triggers work. Let's write something in the Unity console. Function Debug.Log very useful, in addition to text, it also knows how to print different game objects.
using UnityEngine;
public class Button : MonoBehaviour {
    void OnTriggerEnter(Collider other)
    {
        Debug.Log("Hello");
    }
    void OnTriggerExit(Collider other)
    {
        Debug.Log("Habr!");
    }
}
Threw a button on the stage. Have you tested? Move on. It would be clearer if our button changed color when pressed. For color, we need to attach material to the button . Create -> Material, let's call it “Button Mat” and drop it on the button. In the material properties, select green for Main Color. Now in the script we can access the color of the material using renderer.material.color and change it as we like. Make the button blush from entering our bun. Somehow it went.
using UnityEngine;
public class Button : MonoBehaviour {
    void OnTriggerEnter(Collider other)
    {
        renderer.material.color = new Color(1, 0, 0);
    }
    void OnTriggerExit(Collider other)
    {
        renderer.material.color = new Color(0, 1, 0);
    }
}
The Color class can accept alpha in addition to the triple RGB, but we have an ordinary diffuse shader, so it is not important for us. Testing!

If you have not done this yet, then it is time to clean up our project, otherwise we will get lost in a mishmash of prefabs and scripts. For example, create a folder called “Levels” for storing scenes, “Prefabs” for storing blanks, “Materials” for materials and “Scripts” for scripts, and then sort the accumulated wealth into daddies.
You know, our button is still not like a button! Let's flatten it and make it squeeze under the bun. Select the button in the hierarchy, make it 0.3 units thick and lay it on the floor, i.e. set the Z coordinate to 0.35. See in the inspector at the top three convenient buttons "Select", "Revert" and "Apply"? Using them, you can interact with the prefab right on the spot. Click Apply and all the buttons will now be flat and still.
To implement programmatic animation, we will use the Transform class . It has a localPosition property that will allow us to move the button:
transform.localPosition += new Vector3(0, 0, 0.3f);
This code will push the button. In general, it looks like this:
using UnityEngine;
public class Button : MonoBehaviour {
    void OnTriggerEnter(Collider other)
    {
        transform.localPosition += new Vector3(0, 0, 0.3f);
        renderer.material.color = new Color(1, 0, 0);
    }
    void OnTriggerExit(Collider other)
    {
        transform.localPosition -= new Vector3(0, 0, 0.3f);
        renderer.material.color = new Color(0, 1, 0);
    }
}
Tested. Hitting the button forces it to be sausage-free due to the spherical collider of the kolobok, which will not always touch the recessed button. How to solve this? We recall that the games are half composed of lies, which means that the size of the collider does not have to coincide with the model. We look at the collider properties in the inspector, quadruple its size along the Z axis and shift it by -1.5 in the same direction. Testing! So much better.
Doors, Drawers and Magnets
Now that we have a fully functional button, we can get it to do something. We will clone the wall prefab, call it “Door”, create the red material “Door Mat”, hang it where necessary and throw the freshly baked door onto the stage. In order to somehow influence the door, we need to have a link to its object, so we will create a new variable for the button.
public GameObject door;
GameObject is a class in which all-all-all objects on the stage are wrapped , which means they all have the SetActive function , which is represented in the inspector by a checkmark in the upper left corner. If you still use Unity of the third version, then you will have to use alternatives . Using the activity property, you can hide objects without deleting them. They seem to disappear from the scene and their colliders cease to participate in the calculations. Right for the door. We bring the code to the following form:
using UnityEngine;
public class Button : MonoBehaviour
{
    public GameObject door;
    void OnTriggerEnter(Collider other)
    {
        door.SetActive(false);
        transform.localPosition += new Vector3(0, 0, 0.3f);
        renderer.material.color = new Color(1, 0, 0);
    }
    void OnTriggerExit(Collider other)
    {
        door.SetActive(true);
        transform.localPosition -= new Vector3(0, 0, 0.3f);
        renderer.material.color = new Color(0, 1, 0);
    }
}
We select the button on the stage, drag the door from the hierarchy to the field that appears in the button script properties. Check the code in action.

Hitting a button with a kolobok automatically dissolves the door and returns it to its place after moving out. But what is the use of the button that constantly turns off and locks the door for us? The hour of boxes has come! We copy the wall prefab, call it “Box”, add the Rigidbody to it, do not forget to do the same operations as with the Player, and then throw it on the stage.

As you probably noticed, pushing a box is not very convenient. In addition, if he gets stuck in the corner of the room, then it will be impossible to get it. As an option, we can make teleport zones in the corners of the room that will move all the boxes that got into them, but this is a little tricky. Add a magnet to PlayerController that will attract all nearby boxes. The Input.GetButton function , unlike Input.GetButtonDown, will return true as long as the requested button is pressed. What we need.
if (Input.GetButton("Jump"))
How will we find the boxes? There are many options, for example, we can attach another collider to the Player and register OnTriggerEnter or OnTriggerStay , but then it will be necessary to solve the problem of early reaction of the button trigger. Remember that matrix link with different colliders? Exactly. In addition, the magnet should work only at the touch of a button, the rest of the time it is not needed. Therefore, we will manually check for collisions using Physics.OverlapSphere . Transform.position will give us the coordinates of the center of the kolobok. Let's look for objects nearby:
var big = Physics.OverlapSphere(transform.position, 2.1f);
Let's look for objects that are almost touching the bun.
var small = Physics.OverlapSphere(transform.position, 0.6f);
Two resulting spheres will capture all objects, including walls and buttons. To filter out the excess, we’ll use tags , they will come in handy more than once. Go to Edit -> Project Settings -> Tags and create labels for all occasions: “Box”, “Wall”, “Button”, “Door”. "Player" is already there. We select prefabs and mark them using the drop-down list at the top of the inspector. Now we can weed out the boxes we need:
foreach (var body in big)
     if (System.Array.IndexOf(small, body) == -1 && body.tag == "Box")
          body.rigidbody.AddForce((transform.position - body.transform.position) * 20);
We found the object in a large sphere, checked its presence in a small sphere, checked the mark, moved to it. A bit of math with vectors, nothing complicated for those who didn't skip school.

Anyway, the box pushes us a little, we won’t bother with this now, it doesn’t interfere with the movement anyway.
Attentive readers have long noticed one button bug. Attentive and zealous have already fixed it. What kind of bug is this?

If two objects get into the collider’s field, and then one object goes about its business, then an extra button turns off. What to do? We need to count the number of koloboks and boxes in the collider area and turn off the button when no one is nearby, and turn it on for any number of those and others. Unfortunately, Unity does not have a list of current collisions. Very sorry. Perhaps the developers have not yet reached this point. In any case, this is solved by a couple of lines of code. We can make our list and put in it all the incoming objects, take out all the outgoing ones, and change the state of the button in Update.
Bad option
using UnityEngine;
using System.Collections.Generic;
public class Button : MonoBehaviour
{
    public GameObject door;
    public bool pressed = false;
    private List colliders = new List();
    void Update()
    {
        if (colliders.Count > 0 && !pressed)
        {
            door.SetActive(false);
            transform.localPosition += new Vector3(0, 0, 0.3f);
            renderer.material.color = new Color(1, 0, 0);
            pressed = true;
        }
        else if (colliders.Count == 0 && pressed)
        {
            door.SetActive(true);
            transform.localPosition -= new Vector3(0, 0, 0.3f);
            renderer.material.color = new Color(0, 1, 0);
            pressed = false;
        }
    }
    void OnTriggerEnter(Collider other)
    {
        colliders.Add(other);
    }
    void OnTriggerExit(Collider other)
    {
        colliders.Remove(other);
    }
}
Lertmind suggested using a counter instead of a list. This method is definitely more elegant, but I leave the old code above for an example of how not to do it.
using UnityEngine;
public class Button : MonoBehaviour
{
    public GameObject door;
    private int colliderCount = 0;
    void OnTriggerEnter(Collider other)
    {
        if (colliderCount == 0)
        {
            door.SetActive(false);
            transform.localPosition += new Vector3(0, 0, 0.3f);
            renderer.material.color = new Color(1, 0, 0);
        }
        colliderCount++;
    }
    void OnTriggerExit(Collider other)
    {
        colliderCount--;
        if (colliderCount == 0)
        {
            door.SetActive(true);
            transform.localPosition -= new Vector3(0, 0, 0.3f);
            renderer.material.color = new Color(0, 1, 0);
        }
    }
}
Scenes, Particles, and Shaders
We have a game character, walls, a button and a door, but nothing is hidden behind it. It’s time to already move between the levels.
Duplicate the wall prefab, rename it to “Finish”, change the label to the same name, turn the collider into a trigger. Create a Finish Mat material with a beckoning blue color and hang it at the finish.

Whole family to gather. But somehow not very alluring and too similar to the wall. And at the door. And per cube. Shaders come to the rescue ! Now we use the usual matte diffuse shader for all materials . In the material properties, select Transparent / Specular for the finish .. This shader will take into account the alpha color and highlight the second color that we specify. Set half-blue alpha, and make the reflection white. We are testing.
While the finish does not look very transparent, you need to somehow hint that it is ethereal. To do this, add to the finish a particle systemthat will float inside and attract the player. Component -> Effects -> Particle System. If you select the finish on the stage, you can look at the simulation so that it is easier to create the desired effect. First of all, check Prewarm, then in the game the particles will appear in advance and will continue their simple life, but will not arise in front of the player. Start Lifetime per unit. Let's make Start Speed smaller, for example 0.1. Start Size 0.1. Set the color to blue. On the Emission tab, change the Rate to two hundred. On the Shape tab, set Shape to Box, this will cause particles to appear throughout the finish. Then check the Random Direction checkbox so that the particles fly in different directions. We activate the Size over Lifetime tab, select some ascending line there. On the Randerer tab, change the standard Renderer Mode to Mesh. Change the mesh to the sphere. Done! Many, many small bubbles appear and disappear, and the finish now looks much more fun.

It remains to force the finish to move the player to the next level. There are several useful functions and variables for managing scenes in Unity. Application.loadedLevel will show us the current level, Application.levelCount will show their number, and Application.LoadLevel will load the desired one. In addition, we need to specify in Build Settings all the scenes that we want to get into. Create a new “Finish” script, hang it on the prefab and write the following inside:
using UnityEngine;
public class Finish : MonoBehaviour
{
    void OnTriggerEnter(Collider other)
    {
        if (other.tag == "Player")
            if (Application.loadedLevel + 1 != Application.levelCount)
                Application.LoadLevel(Application.loadedLevel + 1);
            else
                Application.LoadLevel(0);
    }
}
We check that the player got to the finish line, and then we move to the next or first level. Tasting our new full-featured finish.
Aesthetics, dynamics and mechanics
Here is our prototype and ready. We can now press buttons, open doors and move from level to level. If we only want to test the new mechanics, then this is enough. But if we want to make a prototype of the game, then we need to think more about aesthetics and dynamics. Perhaps you have not often heard these terms when applied to games. In short, the mechanics are some kind of user interaction with the game world. The button that the user can press to open the door is one mechanic. Boxes that can also press buttons are different. Mechanics interact with each other and create the dynamics of the game. The player found the box, dragged it to the button, opened the door, moved to another level. Aesthetics is the feeling of a game. Did you feel in any shooter that you were really pulling the trigger? Nice return, animation, sound - all this affects the aesthetics of shooting. The aesthetics of the game as a whole is influenced by many factors, from download speed to plot. The painstaking work on aesthetics distinguishes one-day games from games that they remember.
Let's look at our creation. The most commonly used mechanics are movement. Let's take a close look at whether everything is okay with her. Open the code.
var direction = new Vector3(Input.GetAxis("Horizontal"), Input.GetAxis("Vertical"), 0);
If you take a closer look, it is clear that our vector is longer along the diagonals, and therefore the applied force is larger. You can fix this by normalizing the vector:
var direction = new Vector3(Input.GetAxis("Horizontal"), Input.GetAxis("Vertical"), 0).normalized;
And you can not fix it. Features of the game engine can also be part of aesthetics. Quake 3 without jumping out would be completely different. It is knowledge of the intricacies of mechanics that distinguishes beginners from
We peer harder and notice that ... See? Not? Compile the project and set the settings to a minimum. Great bun flies, right? Yes, so fast that colliders fly right through. This is all due to the Update function in the control script, which is executed in each frame. If the game is accelerated twice, then all the forces are applied twice as often. To solve this problem, you can simply change Update to FixedUpdate , which does not depend on the frame rate, but is updated by the timer. If Transform were not used for movement, but it would be easier to untie the movement from FPS using Time.deltaTime .
The camera gives the player the opportunity to look into the game world, so it also depends a lot on its angle and behavior. Now our camera just dangles a balloon over the main character, but if you tilt it a little, it will be easier for us to perceive the level, a sense of perspective will appear. Or we can vice versa change the camera to orthogonal, then everything will be completely flat.

The appearance of the game is also of great importance. By appearance, I do not mean the number of polygons in the frame. Remember, games are art. What things are important in related art forms? Stylistics, color, light, shadow. Try to find an interesting combination of colors here or collect your set here . See for example on Proun. This game is made in the spirit of Suprematism, so close to Habr. You can try to copy some color schemes, but without textures and witchcraft with shaders it will turn out not so beautiful. Impatient people have already looked at the result of my attempt at the links above, and attentive readers can see them again at the end of the article.
The essence of this section is as follows: even if you only make a prototype of the game, you should immediately think about what you want to tell the future player what feelings to evoke in him. This is true for all types of arts. It is not at all difficult to make a minimal sketch of the style, and it will pay off first of all for you, it will be easier for you to choose a further direction.
Conclusion
With the help of primitive cubes and a couple of drops of color, you can make a very tolerable prototype, which (in my humble opinion) will be nice to play. Using Unity, this is not at all difficult to do, but we must not forget why you need all this.
References
Prototype from the article
Online version
Compiled version for Windows [ Mirror ] ~ 7.5 MB
Sources [ Mirror ] [ GitHub ] ~ 165 KB
Advanced prototype
Online version
Compiled version for Windows [ Mirror ] ~ 7.5 MB
Sources [ Mirror ] [ GitHub ] ~ 325 KB