Build a Windows Azure Virtual Machine for hosting web applications

Good afternoon!
In my previous article, I talked about how you can easily and easily publish a web application written in ASP.NET MVC 4 in the new Windows Azure Web Sites service.
In today's article, I will try to tell how you can expand the boundaries of Azure using the example of creating a virtual machine in it and hosting a web application on it.
Step 0. Access.
For those who were too lazy to follow the link at the beginning of the article, I will remind you how you can get free access to new features of Windows Azure.
To get started, you need to register for a 90-day trial , and then add new preview functions to your subscription (just the very ones in question). This is done on the Component Preview page , where you can choose what you want to try. In this case, select Virtual Machine .
Step 1. Creating a virtual machine
After we got access to the components of Windows Azure, it's time to start using them. To do this, select Virtual Machines in the management portal and at the bottom of the page click the big plus button (do not miss):

We will have two options available: Quick Create and From Gallery. In fact, the difference between them is small, so consider a more complete path. Select From Gallery :

In this dialog box, we have several options to choose from. To begin with, in addition to ready-made OS images (seen in the screenshot), we are also given the opportunity to load our own image or VHD-disk, from which a virtual machine will be created subsequently. It will be convenient for large projects where you need to create a farm of the same machines, without bothering with configuring each of them. But now we are not interested in this, so let us turn our eyes to affordable ready-made images.
We have several options to choose from. There is Windows Server 2008 R2 (two versions), Linux machines, a specialized server for SQL Server (by the way, recently wrote about this image on the Habr) and the hero of our experiment today is Windows Server 2012. Why is it he? This is my personal choice. Since I use Windows Azure for the most part for informational purposes, I decided that it would be nice to try the “new of the season” - the new server 2012.
So, select the OS we need and click on the arrow below. We get to the next screen of the Create Virtual Machine Wizard:
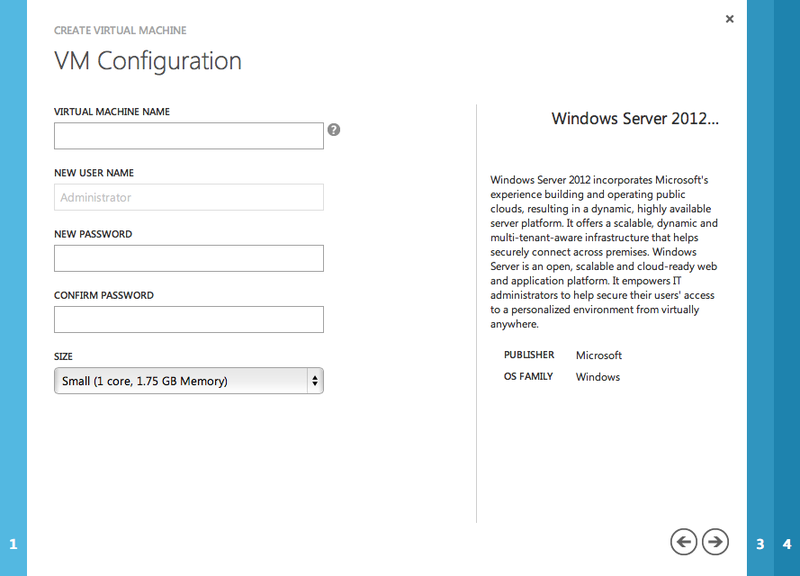
Everything is pretty clear here. You must specify the VM name, administrator password and select one of the proposed configurations of the future hardware. The choice is pretty good and can cover most of the performance requirements for different types of projects. I chose Small, which suits me perfectly. Move on.
In the third step of the wizard, everything is also quite clear:

First you need to decide on the purpose of the future car. If we want to use it as an independent resource (and at the moment we just want this), then select Standalone . Connect To mode , as written in the tip, will allow us to connect this VM to some existing network to share the load. This does not interest us yet.
Then you need to come up with the host name on which the machine will be available. Here you must not confuse the machine name in the previous step and the given host name. The machine name is the name of the computer in Windows. The host name is a subdomain in the cloudapp.net domain, through which the server will be accessed and managed. This name must be unique, therefore, immediately in the wizard we are given a hint about the availability or employment of a particular name.
The remaining fields are quite understandable and you should not particularly focus on them. There you need to select the storage account (either existing or create a new one), the location of the VM and the subscription under which this machine will be charged.
In the fourth step, you don’t need to do anything at all, leave everything as it is:

Click on the daw below and the virtual machine will start to be created.
Step 2. Virtual Machine Management
Once you have created a virtual machine, it will be available in the appropriate list:
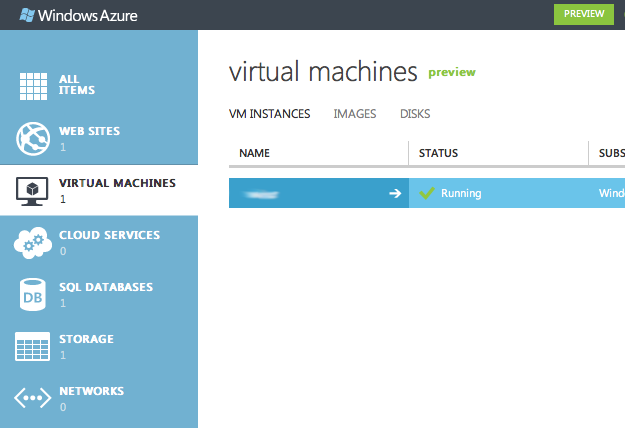
Be sure to wait until the status of the machine changes from Provisioning to Running . This will mean that the machine is ready for use. If you click on its name, the virtual machine control panel opens:
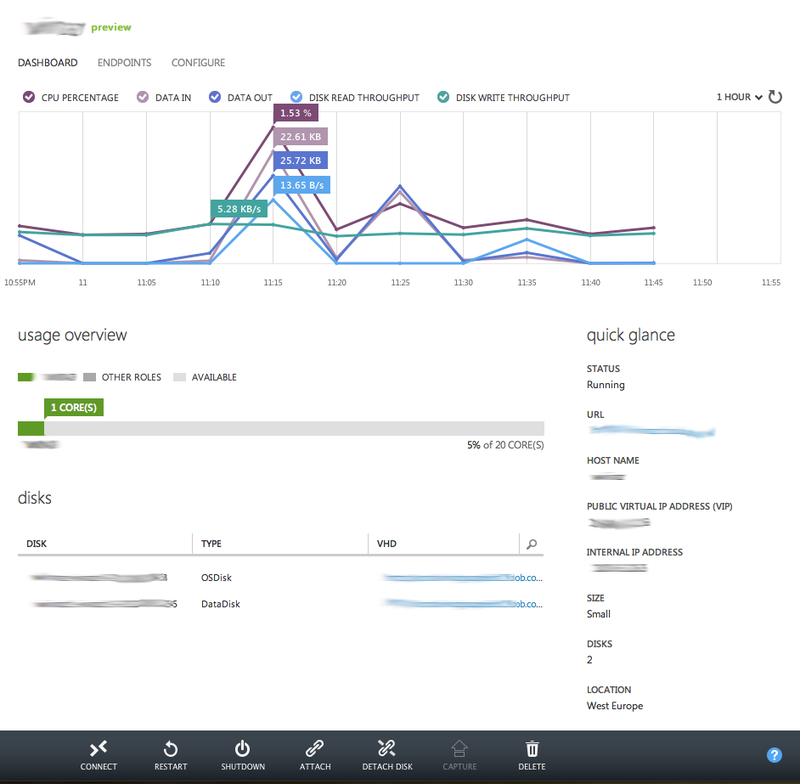
At the bottom of the page there is a Connect button . It will help you get the correct rdp file to connect to this machine using remote desktop. It is time to go to a fresh server and manage it.
Step 3. Server Management
In fact, in this article I will not talk in detail about administering Windows Server 2012. Since web applications are mentioned in the title of this article, this is what we will do - we will install IIS.
When you first login to the new server, the Server Manager window will open:
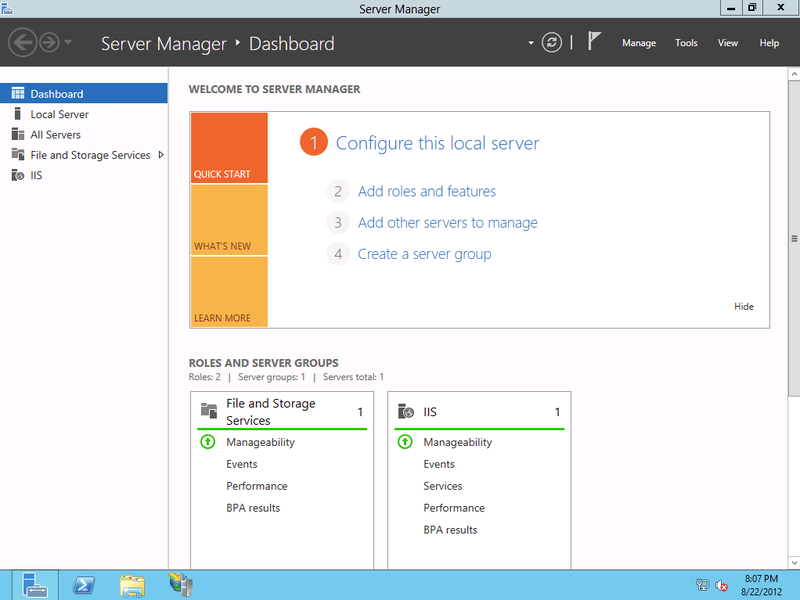
By default, IIS is not enabled in Windows Server 2012, so you need to add them. Select the Add roles and features item , after which the Add Roles Wizard opens. Click Next three times (especially curious people read what they write there, but now we are not interested in it), and in the opened tree select Web Server (IIS). Next, we need to select the necessary IIS components that will allow you to run ASP.NET MVC applications on it. I will not write the exact settings, everyone will decide what he needs. Be sure to include ASP.NET, the rest is to your taste.
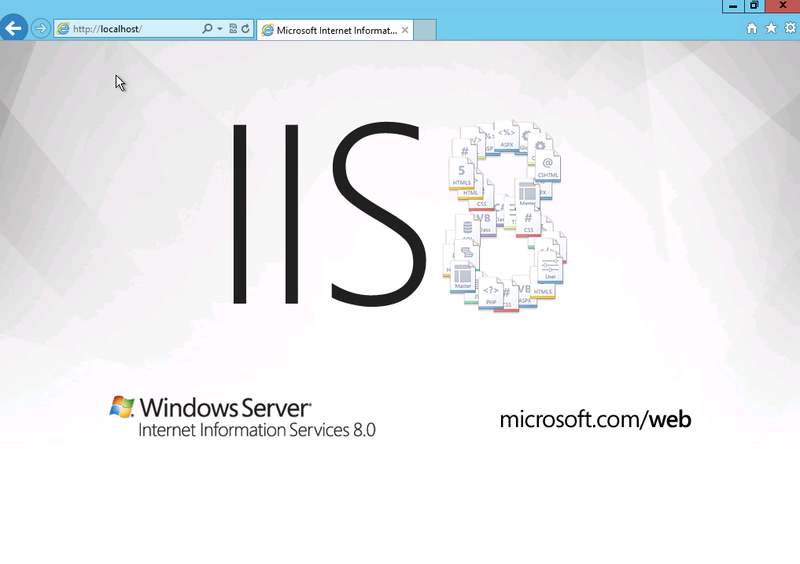
Click Next several times, configure the future role as we need, and after the installation process is complete, our server is happy to accept guests. You can verify this by going to localhost . Something like this should appear:
Step 4. Opening access
Everything is great, so we finally set up a web server, placed some application on it and it opens on localhost. How now to open it from the outside? In fact, everything is quite simple. Surely you were still at the stage of creating the virtual machine trying to click on the link in the control panel, which has the form <your_virut_machine> .cloudapp.net. And for sure you did not display anything. This is because access to the virtual machine is closed from the outside, and not at the firewall level of the operating system itself, but at the level of the Windows Azure infrastructure.
If you look up in the virtual machine control panel, you will see three menu items there: Dashboard , Endpoints and Configure. We figured out the former at the very beginning, everything is clear with the latter - the hardware settings are set up there, but let's understand what Endpoints is.
In the Endpoints tab, we can specify which protocols and which ports will be open for this virtual machine and which physical ports they will be redirected to:
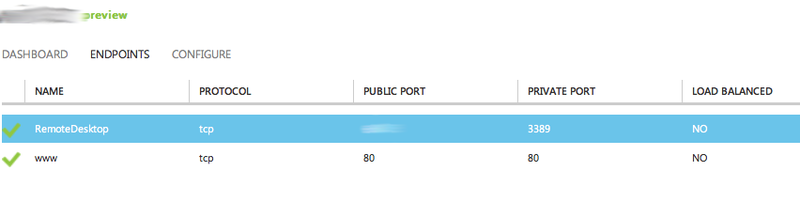
By default, there will be only one port in this list - the one through which you connect via Remote Desktop. Moreover, the public port can be anything, which, apparently, has been done for greater security. In order to open web applications on this virtual machine, you must open the 80th port. The screenshot above shows this. After this action, under the link <your_virut_machine> .cloudapp.net you should see your own application. A small victory is achieved.
Step 5. Assign your own domain
In the previous step, we did everything to make the application work in the cloud and be accessible from the outside. However, you must admit that it would not be cool at all if we could only access it by subdomain and in no way be able to assign our own one or several domains.
Of course, this is possible and quite simple. For this, the official documentation advises two different ways, and both of them are related to editing the DNS zone. The first implies that you create a CNAME record in which you indicate that, for example, www.mydomain.comwill be redirected to mywinazure.cloudapp.net. This method is simple, but too straightforward. If you have several web applications hosted on the server, or if there can be several subdomains on the main domain, this method will not work. Fortunately, there is a second, better way.
As a solution, which, by the way, I also used, I propose editing A record in the DNS zone. In the virtual machine control panel, in the area on the right, you may notice two IP addresses. One is called private and is the IP of the machine itself, and the second is public, virtual (Virtual IP, VIP). That's it and it is necessary to specify it in zone A for the edited domain. In this case, all traffic will be sent to your virtual machine, where IIS will determine the domain and issue the corresponding application (provided that Web Sites are configured correctly in IIS itself). Everything is simple and obvious to indecent, but that’s how it works.
Step 6. Bonus
As a bonus, I’ll talk about an example of integrating one Windows Azure service with another. If you read my previous article, then you know that in it I described a fact-finding service about programming. In that article, I described the process of publishing an ASP.NET MVC 4 application to the cloud using Windows Azure Web Sites and Windows Azure SQL Database. Now, while studying Virtual Machines, I decided to transfer the same service from Web Sites to a virtual machine in order to be able to bind my own domain, and indeed to have everything in one place (now several sites are hosted in the VM).
I transferred the files of the application itself painlessly. But when I remembered the base, at first I was a little sad. I immediately realized that I would have to download the distribution kit first, then take some place for its installation. Start the database service on an already not the fastest machine. Have a database and a web application on the same server. Transfer data from one server to another. Well and some more similar troubles. Not to say that it was straight so difficult, but, frankly, lazy.
And then I thought - what if I set the application hosted in the virtual machine on the database that was created as part of the website hosting on Web Sites? Indeed, from the point of view of the application, this database is exactly the same as if it were installed on the local server. No sooner said than done. I changed web.config as needed, specifying as the database server the same server that I had in Windows Azure. And what would you think? It is working. Now I have a separate application server and a separate database, which can be independently replaced, expanded and mirrored if necessary. Thanks to Azure for such amenities.
Conclusion
On this pleasant note, I would like to finish the story. I hope the material will be useful to beginning Azure researchers and help you decide on the choice of hosting for your web projects. Just in case, I want to insist that I am in no way connected with Microsoft and reflect only my personal point of view, without any advertising.
If anyone is interested to see what kind of application works in the cloud, here are the links: prog-facts.ru and ss10.ru (the second one cited simply as an example that two domains are perfectly directed to one hosting).
Thanks for attention!