Simple automation: photo album
Why and why
This article prompted me to write an angry review by one habruzovatel who stated that, translated into Russian, it sounds something like this: "write comments well, write something useful."
Sending it to hell and thinking a little, I decided that he was right, all the more so since I had been writing all kinds of code for several years and there probably was something to tell about - what if someone came in handy. Looking back, I remembered that somehow there was a task to automate the creation of a photo album. So why not write about it?
Why and why - 2
I myself am a fan of photographing, and naturally, I would have to show my creations to people. For this, the Internet is the most suitable place. The first thing that came to mind at the time was Picasa . But there were moments that I did not like much. it
- limited amount of space;
- the photographs are not with me, and you never know what can happen to them, but I feel sorry for the work.
What I liked was that the Picasophian softinka allowed you to upload photos and create an album en masse, and this is important when there are a lot of photos.
Everything would be fine, but a miracle happened - I got my own web server. Accordingly, I wanted to keep all the pictures at home. Fortunately, Picassa was able to do local photo albums too - just configure the necessary templates - and press the right button at the right time. So far everything suited me, but it began to strain that the big beautiful picas and the Linux server did not look together. But for some time this approach worked, well, figs would be with him, but ...
Then I completely moved to Linux; accordingly, it became stressful to launch the Windows picas. This was a powerful argument for finding a new solution. Such a solution was a script that allowed you to generate a photo album under Linux, was launched from the console and did not require a graphical interface.
Requirements
So what I wanted to get:
- a script launched from the console, without any poking with the mouse, like “launched and forgot”;
- reduction of photos to the desired size for viewing;
- reduction to a small size in order to show in the catalog;
- rotation of pictures if necessary;
- decorating pictures and inserting copyright;
- generating html pages to show all this stuff;
- lack of binding to the database.
Go
Since we need to run from the console, the choice fell on Perl right away - it's simple, fast, and there is experience in writing scripts on it.
I assigned all image operations to ImageMagick . Then I came across something that is not clear, the picture is vertical or horizontal, on which axis to compress. There are probably several solutions here, recently a recipe skipped on a hub. I decided this way: with the “identify” command, we get the picture parameters and see which is larger - the first size or the second. And depending on this, click on the picture with the desired parameter.
Detectim Sizer
Here I had to take into account one point, that the file name may contain spaces and that in the output from the "identify" command, spaces are also used as delimiters. A little dancing with a tambourine - and everything works.
sub getSize
{
    my $fname = shift;
    my $cmd = escapeShell ("identify '$fname'");
    my $info = `$cmd`;
    my $fname_len = length($fname);
    $info =~ s/^.{$fname_len}(.*)$/$1/;
    my $type;
    my $size;
    ($type, $size, undef) = split (' ', $info);
    my ($width, $height) = split ('x', $size);
    return ($width, $height);
}
Here I had to take into account one point, that the file name may contain spaces and that in the output from the "identify" command, spaces are also used as delimiters. A little dancing with a tambourine - and everything works.
Resize by size
sub resize
{
    my $size = shift;
    my $fname_in = shift;
    my $fname_out = shift;
    my ($w, $h) = getSize ($fname_in);
    print "W: $w, H: $h\n";
    my $cmd;
    if ($w > $h) {
        $cmd = "convert '$fname_in' -resize $size -auto-orient '$fname_out'";
    } else {
        $cmd = "convert '$fname_in' -resize x$size -auto-orient '$fname_out'";
    }
    print "CMD: $cmd\n";
    $cmd = escapeShell($cmd);
    `$cmd`;
}
Further, I remembered that Picassa attached shadows to the thumbnail of pictures. An internet rush, it turned out that this is absolutely not a problem and can be solved with the help of the already mentioned ImageMagick. The recipe took from here .
Make a shadow
sub shadow
{
    my $fname_in = escapeShell(shift);
    my $fname_out = escapeShell(shift);
    my $cmd = "convert -page +3+3 '$fname_in' -matte "
        . "\\( +clone -background black -shadow 70x2+2+2 \\) "
        . " +swap -background '#9AB6D7' -mosaic '$fname_out'";
    `$cmd`;
}
While dealing with shadows, it turned out that you can attach watermark to photos as well. Why not? We draw our picture with a signature and put it on the picture using the same ImageMagick. The recipe .
Insert a picture with copyright
sub signImg
{
    my $sign = shift;
    my $fname_in = shift;
    my $fname_out = shift;
    my $cmd = "convert $sign -fill grey50 -colorize 40  miff:- | "
    . " composite -dissolve 30 -gravity south - '$fname_in' "
        . " '$fname_out'";
        $cmd = escapeShell($cmd);
        `$cmd`;
}
In general, you can create anything you like with pictures, there are many examples , everyone will find what they like.
There was a problem with the html binding. Typically, on large sites, the information is in the database and in the URL the image ID is transmitted and everything is fine and beautiful. But I didn’t have a base on my server - it just didn’t fit there, because the server was a doped ASUS router.

I didn’t want to transfer the file name for security reasons. There was a way out - generate a separate html for each file. It is also not beautiful.
An idea borrowed from Linux came to mind - the same team can have several symlinks, and depending on the name of the symlink, it takes the appropriate action. So, the solution: we write one template for showing the picture, create an array that contains all the file names - this is quite secular, and create a bunch of symlinks where the symlink name matches the index of the picture array. That's it - here it is, a base assembled on a knee. And by the file name we climb into the array and pull out the image file name.
We generate PHP-shki for the site
sub genPhpFiles
{
    # Check if index exists already
    my $new_index = undef;
    if (-f "$dir_in/photo_index.inc") {
        `cp $dir_in/photo_index.inc $dir_out_html/photo_index.inc`;
    } else {
        $new_index = 1;
        open F, ">$dir_out_html/photo_index.inc";
        print F ''$_', 'desc' => '$_: '),\n";
        }
        `ln -s template.php $dir_out_html/$idx.php`;
        $idx++;
    }
    closedir $dh;
    if ($new_index) {
        print F "\n); ?>";
        close F;
    }
}
And so, inside PHP, we determine the name of the image file by the name of the symlink
Well, that’s all, all the requirements are met.
Hmm, it turned out even more than I originally wanted ...
I have been using this script for several months now, practically without changing anything, and I am completely satisfied - he does everything that was needed - with the launch of the command, he generates both pictures and html , it remains only to put on the server.
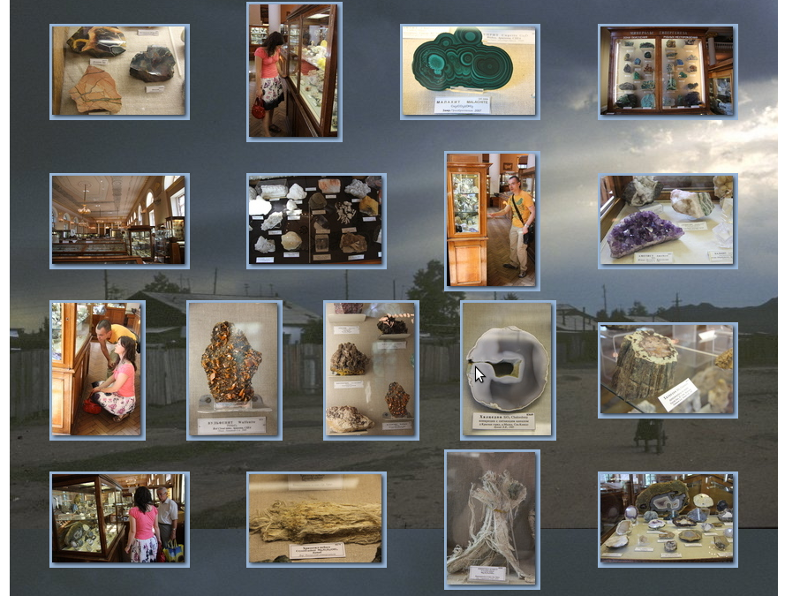
This is what the generated result looks like in the browser:
Photo Index

Single photo

How to use
If anyone needs it, then everything lies in the archives in an ugly fashion .
To use elementary:
- unzip the archiver
- fix styles and templates for your design (photo.css, photo.inc, photo_list.inc, template.php, index.php)
- in the directory “in” to add the source pictures
- run "make_photo_album" and get in the "out" directory pictures of the right size and the generated html-ki.
Kanets. Point.
