May 27, 2012 at 21:07
QScintilla: highlight syntax in application
- Tutorial
- Recovery mode
Hi $ username!
UPD : The second and third part of the QScintilla series.
Today I want to tell you about a great project - QScintilla, which highlights the syntax of code in Qt applications. Often there is a need to highlight something. For example: C ++, Bash, PHP, Diff ... This list goes on and on. But here is the solution: Scintilla port on Qt: QScintilla.
In this post, I’ll show you how to install and use QScintilla in my applications using Ubuntu Linux as an example.
Let's start with the most important thing - with the installation. I suggest building QScintilla and installing it on the system. To do this, download the qscintilla tarball . Unpack it into the folder we need. Now the console. We execute a couple of simple commands:
Great. If you did everything correctly, libqscintilla2.so will appear on your system
Hurrah! You can start coding. We open the criterion - we create the project. Now add the line to the profile:
It is easy to guess that this line connects QScintilla. Now we proceed directly to the coding of the project. Constructor mainwindow.cpp:
Do not forget to add to MainWindow:
You can safely compile - we see an editor that highlights C ++ code with a bang. So far it doesn't look very cool, but it is just for now. And now the fun begins. I propose to expand our editor and decorate it. Add to the constructor:
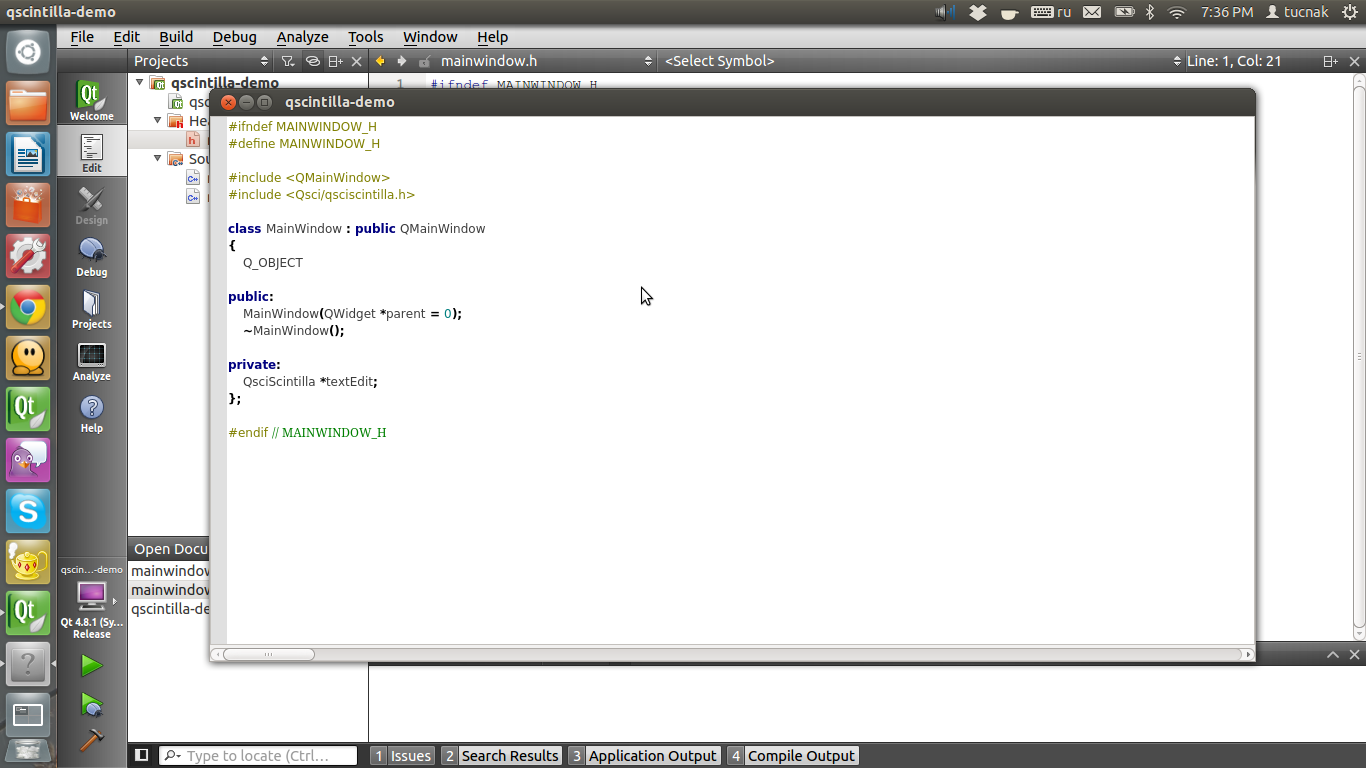
Now we get a relatively working editor that even knows how to do something. Of course, he has many shortcomings, but all of them are also fixable. That’s probably all. I would also like to talk about writing my lexer, search management and string control, but this is too much for one article. But if you do not want to wait for the next article, read the documentation and most importantly - experiment!

Thank you for your attention, and good coding for you!
UPD : The second and third part of the QScintilla series.
Today I want to tell you about a great project - QScintilla, which highlights the syntax of code in Qt applications. Often there is a need to highlight something. For example: C ++, Bash, PHP, Diff ... This list goes on and on. But here is the solution: Scintilla port on Qt: QScintilla.
In this post, I’ll show you how to install and use QScintilla in my applications using Ubuntu Linux as an example.
Installation
Let's start with the most important thing - with the installation. I suggest building QScintilla and installing it on the system. To do this, download the qscintilla tarball . Unpack it into the folder we need. Now the console. We execute a couple of simple commands:
cd Qt4
qmake
make
sudo make install
Great. If you did everything correctly, libqscintilla2.so will appear on your system
Open Qt Creator
Hurrah! You can start coding. We open the criterion - we create the project. Now add the line to the profile:
LIBS += -lqscintilla2It is easy to guess that this line connects QScintilla. Now we proceed directly to the coding of the project. Constructor mainwindow.cpp:
#include
#include
#include
#include "mainwindow.h"
MainWindow::MainWindow()
{
    textEdit = new QsciScintilla; // инитилизируем редактор
    textEdit->setUtf8(true); // мы же хотим читать кириллицу
    setCentralWidget(textEdit); // задаем редактор в ui
    QsciLexerCPP * lexCpp = new QsciLexerCPP(this); // создаем лексер (схему подсветки)
    textEdit->setLexer(lexCpp); // задаем С++ лексер нашему редактору
}
Do not forget to add to MainWindow:
private:
    QSciScintilla *textEdit;
You can safely compile - we see an editor that highlights C ++ code with a bang. So far it doesn't look very cool, but it is just for now. And now the fun begins. I propose to expand our editor and decorate it. Add to the constructor:
    //! Текущая строка кода и ее подсветка
    textEdit->setCaretLineVisible(true);
    textEdit->setCaretLineBackgroundColor(QColor("gainsboro"));
    //! Выравнивание
    textEdit->setAutoIndent(true);
    textEdit->setIndentationGuides(false);
    textEdit->setIndentationsUseTabs(true);
    textEdit->setIndentationWidth(4);
    //! margin это полоска слева, на которой обычно распологаются breakpoints
    textEdit->setMarginsBackgroundColor(QColor("gainsboro"));
    textEdit->setMarginLineNumbers(1, true);
    textEdit->setMarginWidth(1, 50);
    //! Авто-дополнение кода в зависимости от источника
    textEdit->setAutoCompletionSource(QsciScintilla::AcsAll);
    textEdit->setAutoCompletionCaseSensitivity(true);
    textEdit->setAutoCompletionReplaceWord(true);
    textEdit->setAutoCompletionUseSingle(QsciScintilla::AcusAlways);
    textEdit->setAutoCompletionThreshold(0);
    //! Подсветка соответствий скобок
    textEdit->setBraceMatching(QsciScintilla::SloppyBraceMatch);
    textEdit->setMatchedBraceBackgroundColor(Qt::yellow);
    textEdit->setUnmatchedBraceForegroundColor(Qt::blue);
Now we get a relatively working editor that even knows how to do something. Of course, he has many shortcomings, but all of them are also fixable. That’s probably all. I would also like to talk about writing my lexer, search management and string control, but this is too much for one article. But if you do not want to wait for the next article, read the documentation and most importantly - experiment!
Materials
- The source code for the application we wrote: qscintilla-demo
- Qscintilla official documentation
Thank you for your attention, and good coding for you!