April 8, 2012 at 23:20
EnerGenie EG-PMS-LAN Surge Protector with LAN
Progress does not stand still - modern devices in the house are increasingly acquiring Internet support. Fridge with internet? You are welcome! Now, most modern TVs have LAN support. More and more devices with an IP address appear in the house. Company EnerGenie wanted to excel and has released an interesting device - Programmable surge protector with LAN-interface. Also in the assortment there are models with WiFi and USB , but it looks like they are not for sale with us.
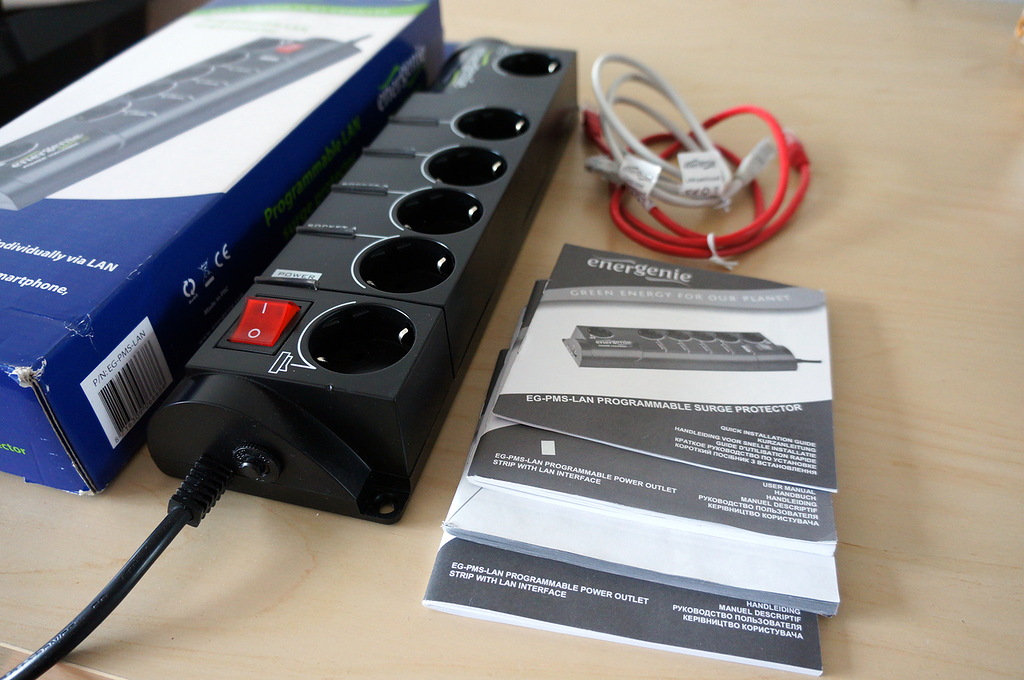
The device comes in a small box in which the device itself is located, 2 patch cords (direct and cross), documentation and a disk. It is strange that the “User Guide” is written on the cover of the manual, but there is no Russian language inside. On the siteThere was a complete guide in Russian.
The external device looks larger than a conventional surge protector. It looks like inside there is a power supply for the network controller and the outlet control board. The power cord has a length of 1.8 m.

On the front side of the device is a power toggle switch that turns off all sockets. In total there are 6 outlets, 4 outlets can be controlled. Near each controlled outlet there is an orange indicator and an outlet number.


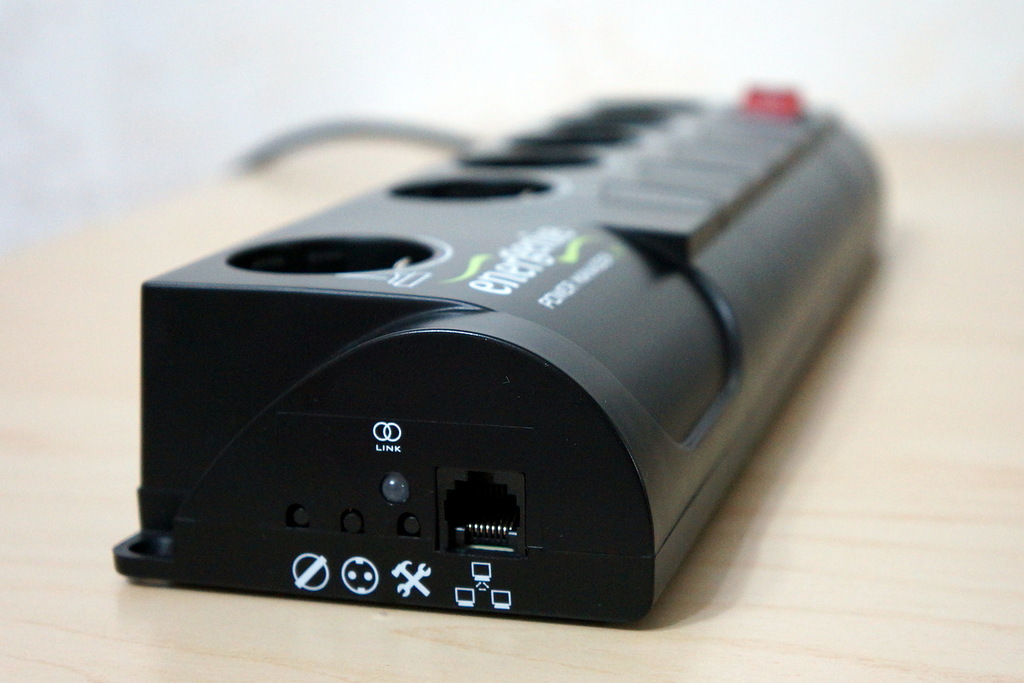
On the side of the device is an RJ-45 connector for connecting a network. Next to it there are 3 buttons to reset, turn off the power and network settings. The network indicator lights up in bright green when transmitting data.

On the back of the device information and MAC address. Not every day you will see the MAC address of the network filter. If desired, the device can be hung on the wall: there are hidden fastenings and holes along the edges of the surge protector. The manufacturer tried to protect itself from parsing and use Y-shaped screws.

After installing the software, a wizard launches that prompts you to find the outlet on the network. In the case of a successful search, click Open and get into the web interface of the outlet!

On the main page, you can manually click the toggle switches of all 4 outlets and register the device on the EnerGenie website for remote control of the device.

For each outlet, you can view tasks and create new ones.


For convenience, each outlet can be identified by a name.

Network filter settings are very simple, although what can I configure?


Also, for convenient configuration, there is a Power Manager program (for Windows only).
In it, you can add several network filters and configure them. When you double-click on the added device, a panel opens, which shows which sockets are on. If you double-click on the outlet, it will turn on or off.

Consider the settings of a separate outlet. Here we can display the tray icon in the tray, set the keys to turn it on and off, allow it to turn on or off when the system starts or shuts down.

Let's take a closer look at the 3 buttons Hardware schedule, Software schedule and Application Events.
In the Hardware schedule, a schedule is set that is saved in the device itself and will be executed regardless of whether the Power Manager program is running. We set the time, set the switch to ON and select a repetition for each day if necessary. Something like this can create schedules. The software schedule does the same, but the schedule only works when the Power Manager program is running.
There are recommended rules for creating the correct schedule:

Using Application Events, you can configure the inclusion and disconnection of outlets depending on the programs being launched or if files have been deleted or created in the folder.
For example, when you start Word Viewer, the outlet with the printer turns on, when you exit the program, the printer turns off. You can also configure the scanner when you run the scan program.

This task allows you to monitor the folder with print jobs and turn on the printer for printing. After 2 minutes, the printer turns off.

The settings are simple, it’s easy to figure it out. As you can understand, the device was made to save energy, but we all know how to use it. For example, reboot a hung access point or server. As a result, everyone decides for himself how to use such an unusual device. The product turned out to be niche and is unlikely to become widespread.
Price 1600 r.
Thanks for attention.
The device comes in a small box in which the device itself is located, 2 patch cords (direct and cross), documentation and a disk. It is strange that the “User Guide” is written on the cover of the manual, but there is no Russian language inside. On the siteThere was a complete guide in Russian.
The external device looks larger than a conventional surge protector. It looks like inside there is a power supply for the network controller and the outlet control board. The power cord has a length of 1.8 m.
On the front side of the device is a power toggle switch that turns off all sockets. In total there are 6 outlets, 4 outlets can be controlled. Near each controlled outlet there is an orange indicator and an outlet number.
On the side of the device is an RJ-45 connector for connecting a network. Next to it there are 3 buttons to reset, turn off the power and network settings. The network indicator lights up in bright green when transmitting data.
On the back of the device information and MAC address. Not every day you will see the MAC address of the network filter. If desired, the device can be hung on the wall: there are hidden fastenings and holes along the edges of the surge protector. The manufacturer tried to protect itself from parsing and use Y-shaped screws.
After installing the software, a wizard launches that prompts you to find the outlet on the network. In the case of a successful search, click Open and get into the web interface of the outlet!
On the main page, you can manually click the toggle switches of all 4 outlets and register the device on the EnerGenie website for remote control of the device.
For each outlet, you can view tasks and create new ones.
For convenience, each outlet can be identified by a name.
Network filter settings are very simple, although what can I configure?
Also, for convenient configuration, there is a Power Manager program (for Windows only).
In it, you can add several network filters and configure them. When you double-click on the added device, a panel opens, which shows which sockets are on. If you double-click on the outlet, it will turn on or off.
Consider the settings of a separate outlet. Here we can display the tray icon in the tray, set the keys to turn it on and off, allow it to turn on or off when the system starts or shuts down.
Let's take a closer look at the 3 buttons Hardware schedule, Software schedule and Application Events.
In the Hardware schedule, a schedule is set that is saved in the device itself and will be executed regardless of whether the Power Manager program is running. We set the time, set the switch to ON and select a repetition for each day if necessary. Something like this can create schedules. The software schedule does the same, but the schedule only works when the Power Manager program is running.
There are recommended rules for creating the correct schedule:
- Events in the list should be in the future.
- Duplicate entries are not allowed.
- The number of events for the outlet should not exceed 16.
- The maximum number of events depends on the total length of the schedule.
- The interval between the present moment and the last entry in the schedule cannot exceed 180 days.
- Without using repetition, the total execution period of an event cannot exceed 215 days.
- The event retry interval cannot exceed 180 days.
Using Application Events, you can configure the inclusion and disconnection of outlets depending on the programs being launched or if files have been deleted or created in the folder.
For example, when you start Word Viewer, the outlet with the printer turns on, when you exit the program, the printer turns off. You can also configure the scanner when you run the scan program.
This task allows you to monitor the folder with print jobs and turn on the printer for printing. After 2 minutes, the printer turns off.
The settings are simple, it’s easy to figure it out. As you can understand, the device was made to save energy, but we all know how to use it. For example, reboot a hung access point or server. As a result, everyone decides for himself how to use such an unusual device. The product turned out to be niche and is unlikely to become widespread.
Price 1600 r.
Thanks for attention.