All about the border property
- Transfer
Everyone is familiar with the css border parameter, but are there any things we don’t know about it?
Everyone is familiar with this use:
This is a single pixel solid frame. We change the syntax a bit:
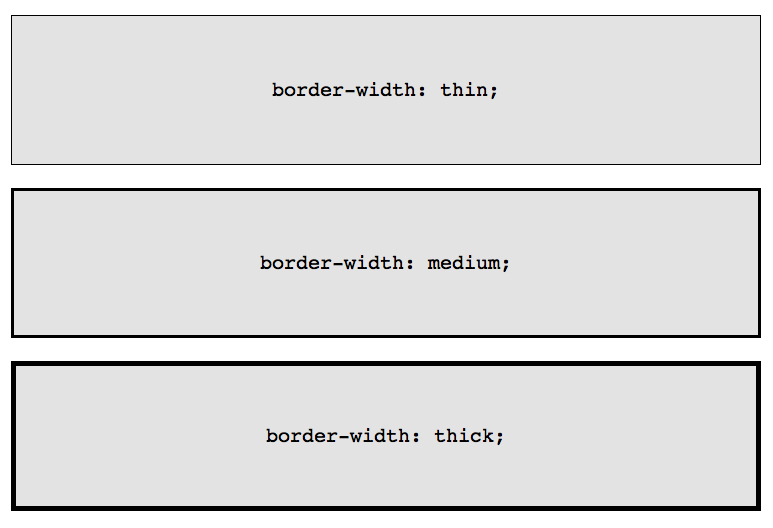
For example, the border-width parameter has three parameters: thin, medium, thick:
If you need to change the border color when hovering over an object:
But this is easier and more correct to implement:
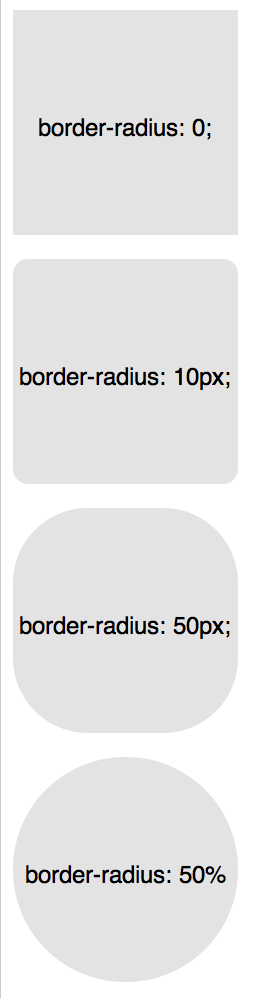
border-radius is a new CSS3 parameter for displaying rounded corners, which works correctly in all modern browsers, except for Internet Explorer 8 (and older versions).
For each corner, you can assign a rounding:
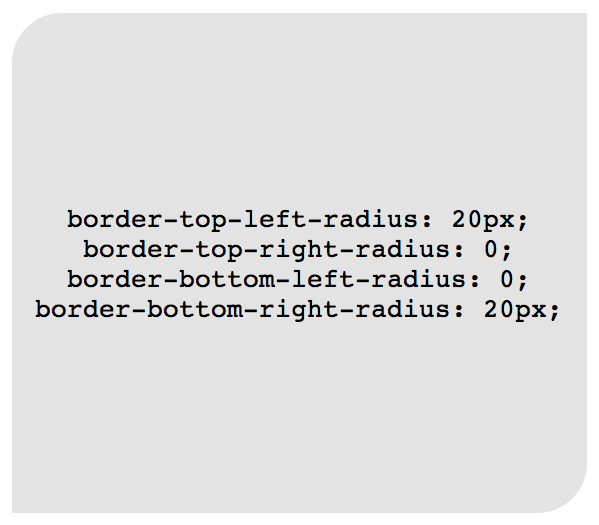
In the above example, it is not necessary to set “0” border-top-right-radius and border-bottom-left-radius if they do not inherit the values that need to be changed.
The whole structure can be compressed into one line:
Here's how to draw a lemon using CSS:
The simplest and most popular examples of applying the border parameter are described here. Let's move on to more complex ones.
solid, dashed, and dotted are the most common border-style values, but let's look at others, for example, groove and ridge.
Or in more detail:
The most popular way to create a double border is with the outline parameter:

This method works great, but is limited to creating a double border. If you need to display several borders of an element, then you need to use a different technique.
You can use this design:

This may not be the most elegant solution, however it works
Another way using shadows:
Two values can be applied to the border-radius parameter using "/", for example:
This is the same as:
This technique is useful if you want to simulate curvature rather than rounding. For example, you can get the effect of curled paper:
The following examples assume this markup:
And such a basic css:
The most common example of using CSS shapes is to display arrows. To understand how this works, you need to understand using a separate border-color for each side and setting it to “0” for width and height:
Or the same thing:
Or so:
And now we leave only the blue triangle:
Our basic markup:
And styles:
Now you need to place the arrow-triangle in the right place. Here is our color box:
We leave only a quarter of the square:
Now move below and paint over:
Application examples:
minus the use of line-height with vertical centering to limit the text to one line. To solve this problem, you can apply display: table to our Speech Bubble and display: table-cell to the text:
Another example of custom border usage:
Using the border parameter is not limited to just “1px solid black”, using borders you can create various shapes, and it’s enough to write a CSS class once and apply it to many elements on the page.
The basics
Everyone is familiar with this use:
border: 1px solid black;This is a single pixel solid frame. We change the syntax a bit:
border-width: thick;
border-style: solid;
border-color: black;
For example, the border-width parameter has three parameters: thin, medium, thick:
If you need to change the border color when hovering over an object:
.box {
    border: 1px solid red;
}
.box:hover {
    border: 1px solid green;
}
But this is easier and more correct to implement:
.box {
    border: 1px solid red;
}
.box:hover {
    border-color: green;
}
Border-radius
border-radius is a new CSS3 parameter for displaying rounded corners, which works correctly in all modern browsers, except for Internet Explorer 8 (and older versions).
For each corner, you can assign a rounding:
border-top-left-radius: 20px;
border-top-right-radius: 0;
border-bottom-right-radius: 30px;
border-bottom-left-radius: 0;
In the above example, it is not necessary to set “0” border-top-right-radius and border-bottom-left-radius if they do not inherit the values that need to be changed.
The whole structure can be compressed into one line:
/* top left, top right, bottom right, bottom left */
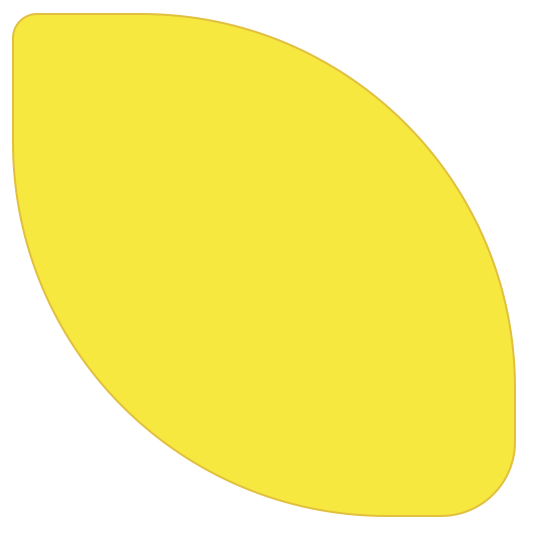
border-radius: 20px 0 30px 0;Here's how to draw a lemon using CSS:
.lemon {
   width: 200px; height: 200px;
   background: #F5F240;
   border: 1px solid #F0D900;
   border-radius: 10px 150px 30px 150px;
}
The simplest and most popular examples of applying the border parameter are described here. Let's move on to more complex ones.
Several borders
Border-style
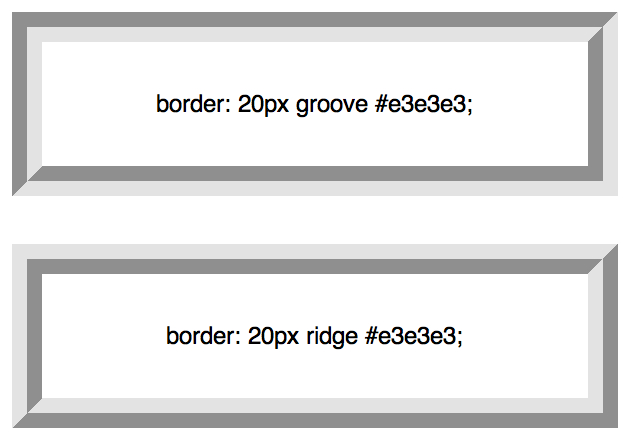
solid, dashed, and dotted are the most common border-style values, but let's look at others, for example, groove and ridge.
border: 20px groove #e3e3e3;Or in more detail:
border-color: #e3e3e3;
border-width: 20px;
border-style: groove;
Outline
The most popular way to create a double border is with the outline parameter:
.box {
   border: 5px solid #292929;
   outline: 5px solid #e3e3e3;
}
This method works great, but is limited to creating a double border. If you need to display several borders of an element, then you need to use a different technique.
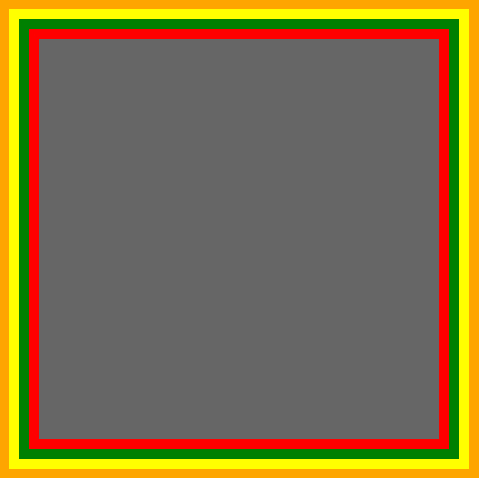
Pseudo-elements
You can use this design:
.box {
  width: 200px; height: 200px;
  background: #e3e3e3;
  position: relative;
  border: 10px solid green;
}
/* Create two boxes with the same width of the container */
.box:after, .box:before {
  content: '';
  position: absolute;
  top: 0; left: 0; bottom: 0; right: 0;
}
.box:after {
  border: 5px solid red;
  outline: 5px solid yellow;
}
.box:before {
  border: 10px solid blue;
}
This may not be the most elegant solution, however it works
Box shadow
Another way using shadows:
.box {
    border: 5px solid red;
     box-shadow:
       0 0 0 5px green,
       0 0 0 10px yellow,
       0 0 0 15px orange;
}
Change angles
Two values can be applied to the border-radius parameter using "/", for example:
border-radius: 50px / 100px; /* horizontal radius, vertical radius */This is the same as:
border-top-left-radius: 50px 100px;
border-top-right-radius: 50px 100px;
border-bottom-right-radius: 50px 100px;
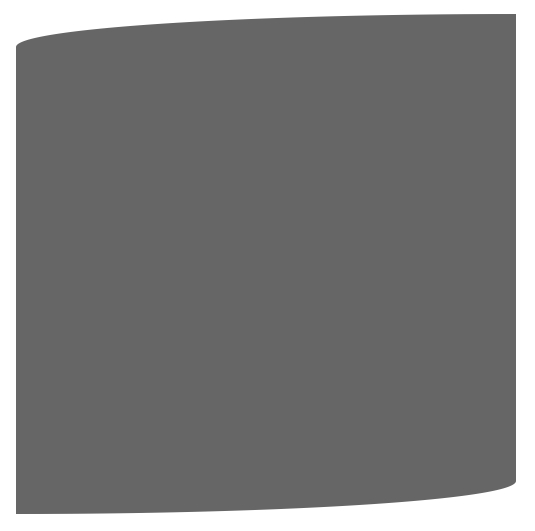
border-bottom-left-radius: 50px 100px;This technique is useful if you want to simulate curvature rather than rounding. For example, you can get the effect of curled paper:
.box {
    width: 200px; height: 200px;
    background: #666;
    border-top-left-radius: 15em 1em;
    border-bottom-right-radius: 15em 1em;
}
CSS shapes
The following examples assume this markup:
And such a basic css:
.box {
width: 200px;
height: 200px;
background: black;
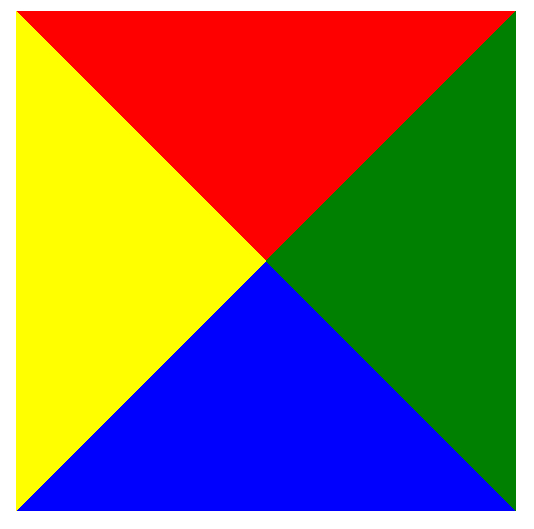
}The most common example of using CSS shapes is to display arrows. To understand how this works, you need to understand using a separate border-color for each side and setting it to “0” for width and height:
.arrow {
  width: 0; height: 0;
  border-top: 100px solid red;
  border-right: 100px solid green;
  border-bottom: 100px solid blue;
  border-left: 100px solid yellow;
}
Or the same thing:
.arrow {
  width: 0; height: 0;
  border: 100px solid;
  border-top-color: red;
  border-right-color: green;
  border-bottom-color: blue;
  border-left-color: yellow;
}
Or so:
.arrow {
width: 0; height: 0;
border: 100px solid;
border-color: red green blue yellow;
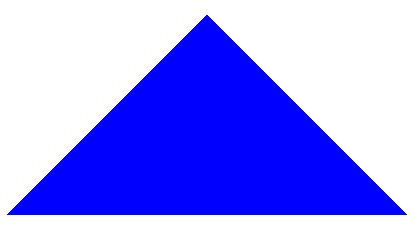
}And now we leave only the blue triangle:
.arrow {
  width: 0; height: 0;
  border: 100px solid;
  border-bottom-color: blue;
}
Creating Speech Bubble
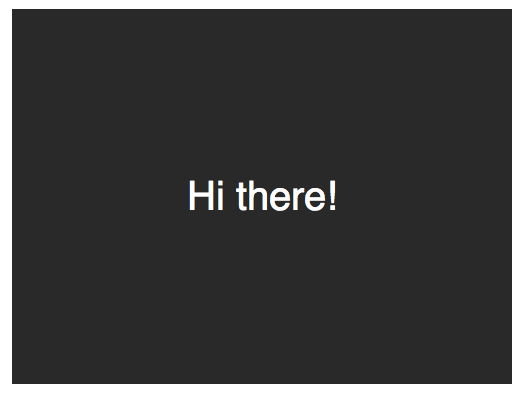
Our basic markup:
Hi there!And styles:
.speech-bubble {
position: relative;
background-color: #292929;
width: 200px;
height: 150px;
line-height: 150px; /* vertically center */
color: white;
text-align: center;
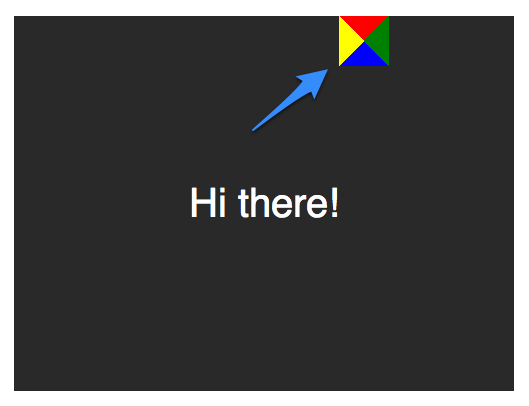
}Now you need to place the arrow-triangle in the right place. Here is our color box:
.speech-bubble:after {
content: '';
position: absolute;
width: 0;
height: 0;
border: 10px solid;
border-color: red green blue yellow;
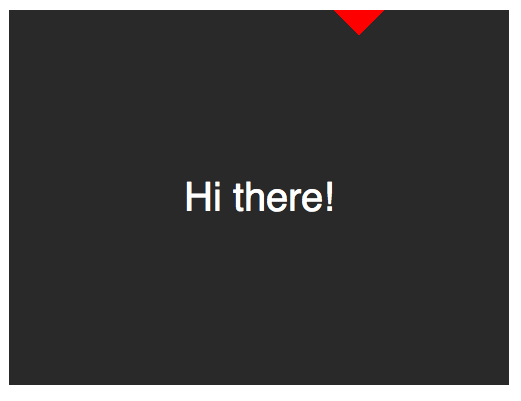
}We leave only a quarter of the square:
.speech-bubble:after {
content: '';
position: absolute;
width: 0;
height: 0;
border: 10px solid;
border-top-color: red;
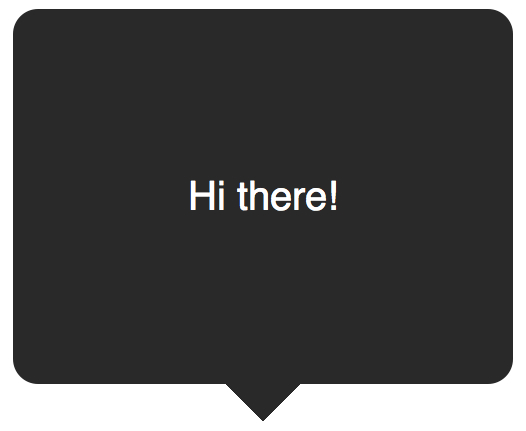
}Now move below and paint over:
.speech-bubble {
/* … other styles */
border-radius: 10px;
}
.speech-bubble:after {
content: '';
position: absolute;
width: 0;
height: 0;
border: 15px solid;
border-top-color: #292929;
top: 100%;
left: 50%;
margin-left: -15px; /* adjust for border width */
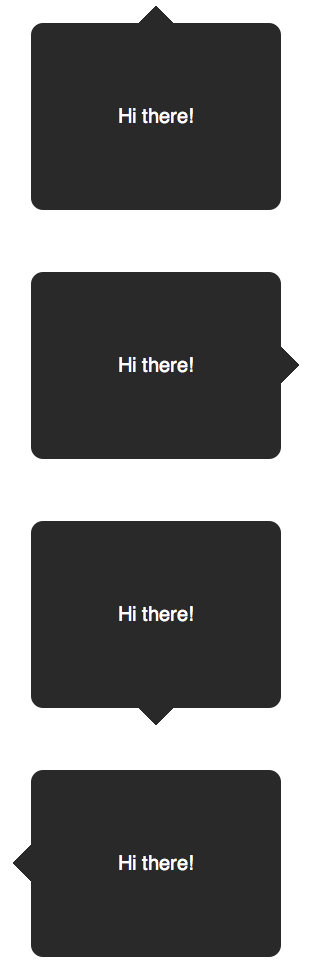
}Application examples:
/*
Speech Bubbles
Usage: Apply a class of .speech-bubble and .speech-bubble-DIRECTION
Hi there
*/
.speech-bubble {
position: relative;
background-color: #292929;
width: 200px;
height: 150px;
line-height: 150px; /* vertically center */
color: white;
text-align: center;
border-radius: 10px;
font-family: sans-serif;
}
.speech-bubble:after {
content: '';
position: absolute;
width: 0;
height: 0;
border: 15px solid;
}
/* Position the Arrow */
.speech-bubble-top:after {
border-bottom-color: #292929;
left: 50%;
bottom: 100%;
margin-left: -15px;
}
.speech-bubble-right:after {
border-left-color: #292929;
left: 100%;
top: 50%;
margin-top: -15px;
}
.speech-bubble-bottom:after {
border-top-color: #292929;
top: 100%;
left: 50%;
margin-left: -15px;
}
.speech-bubble-left:after {
border-right-color: #292929;
top: 50%;
right: 100%;
margin-top: -15px;
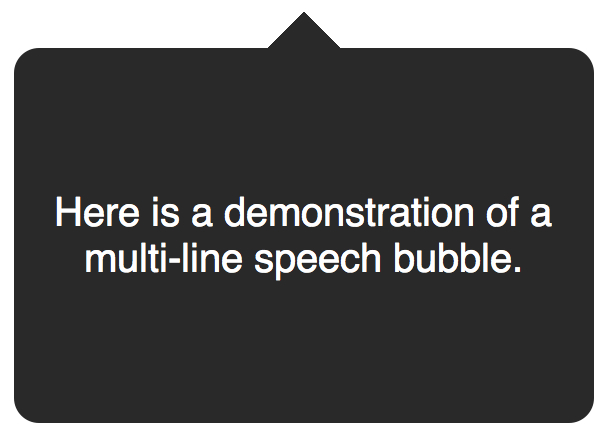
}Center text vertically
minus the use of line-height with vertical centering to limit the text to one line. To solve this problem, you can apply display: table to our Speech Bubble and display: table-cell to the text:
.speech-bubble {
/* other styles */
display: table;
}
.speech-bubble p {
display: table-cell;
vertical-align: middle;
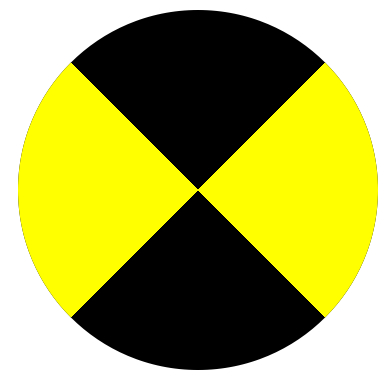
}Another example of custom border usage:
.biohazard {
  width: 0; height: 0;
  border: 60px solid;
  border-radius: 50%;
  border-top-color: black;
  border-bottom-color: black;
  border-left-color: yellow;
  border-right-color: yellow;
}
Total
Using the border parameter is not limited to just “1px solid black”, using borders you can create various shapes, and it’s enough to write a CSS class once and apply it to many elements on the page.