Hackintosh installation using Packard Bell TM85 as an example
 Hello, Habr. I want to share my experience regarding installing Mac on a regular PC. Perhaps this topic will be interesting or useful to someone.
 In this article, I will look at another way to install Hackintosh on a specific configuration, without using different builds.
We will install the original Mac OS X 10.7.3 (at the time of writing) with a bootable installation flash drive.
By the way, this method is applicable to any other IBM PC-compatible computer.
As a result, you get a fully working Hackintosh.
Specifications Packard Bell EasyNote TM85
Processor 2.53 GHz Intel Core i5 460M
Memory 4 GB 1333 MHz Kingstone DDR3
Graphics Nvidia GeForce GT 420M 1GB
HDD SATA Hitachi HTS545050B9A300 500 GB
Training
1. BIOS setup: On the Main tab, select SATA Mode -> AHCI Mode
2. Download the original image of Mac OS X 10.7.3
3. Necessary kexts (drivers), bootloader and other files that we need to take here .
4. Prepare an 8 GB flash drive
The next step is to create a bootable installation flash drive
Attention! To create a bootable USB flash drive, a ready-made Mac OS is required.
If you cannot use Mac OS, download the boot disk image from rutracker.
1. Download the existing Mac OS X.
2. Connect the Flash drive (hereinafter USB), and start Disk Utility, then mark up the USB as follows:
- Select USB from the list of drives and go to the Partition tab
- Partition Layout: 1 Partition
- Name: Install Mac OS X Lion
- Format: Mac OS X Extended (Jounaled)
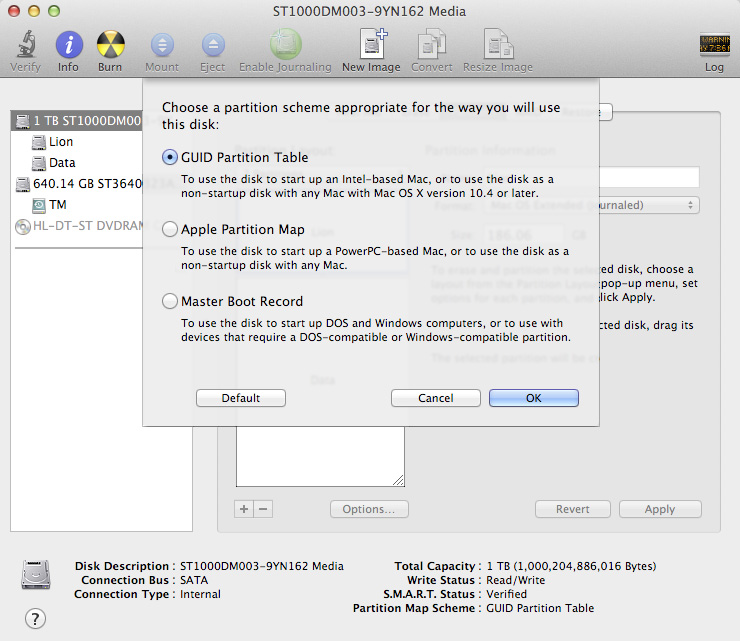
- Click Options and select GUID Partition Table
- OK, Apply. This marks the markup.
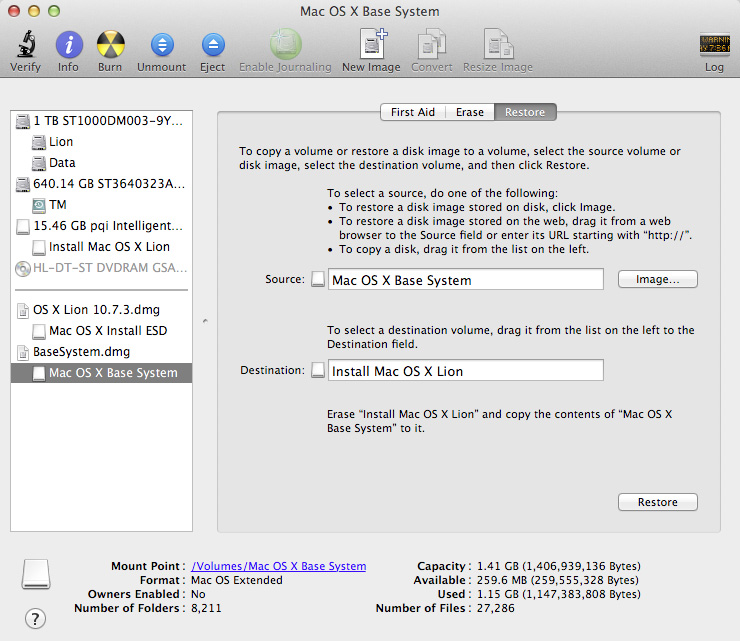
3. Double click on OS X Lion 10.7.3.dmg - Mac OS X Install ESD is mounted.
4. Run in Terminal
open /Volumes/Mac\ OS\ X\ Install\ ESD/BaseSystem.dmg- Mac OS X Base System is mounted .
5. Restore the mounted Mac OS X Base System image to USB. See screenshot.
6. Delete the shortcut / USB / System / Installation / Packages, then create a folder with the same name in its place.
7. Run in Terminal
open /Volumes/Mac\ OS\ X\ Install\ ESD/Packages8. Copy the contents of Packages (7) to / USB / System / Installation / Packages
9. The following is optional:
- If you put a Mac on this model of laptop:
Copy the contents of / files / post-install to / USB / System / Installation / Packages
- If you need to install Mac OS on a disk with MBR partitioning:
- From the folder / files / os x on mbr copy OSInstall.mpkg and replace /USB/System/Installation/Packages/OSInstall.mpkg
- From the / files / os x on mbr folder, copy OSInstall and replace /USB/System/Library/PrivateFrameworks/Install.framework/Frameworks/OSInstall.framework/Versions/A/OSInstall
10. From Mac OS X Install ESD (3), copy mach_kernel to the USB root.
11. Install the Chameleon bootloader from / files / usb on a USB
12. Copy the / files / usb / Extra folder to the USB root
13. Rename USB to Install Mac OS X Lion, then execute in Terminal:
$ sudo su
$ chown -R 0:0 /Volumes/Install\ Mac\ OS\ X\ Lion/Extra
$ chmod -R 755 /Volumes/Install\ Mac\ OS\ X\ Lion/Extra
$ fdisk -e /dev/diskX
$ f 1
$ write
$ exit
X is the identifier of the flash drive, to find out, follow the
diskutil listNote! Please observe the section names, after installation you can change them.
The created bootable USB flash drive is designed to install Mac OS X on PC computers, and with its help you can load already installed Mac OS.
Installation
So, boot from the previously created installation flash drive and enter the following:,
cpus=2 busratio=19 arch=x86_64 -vpress Enter. 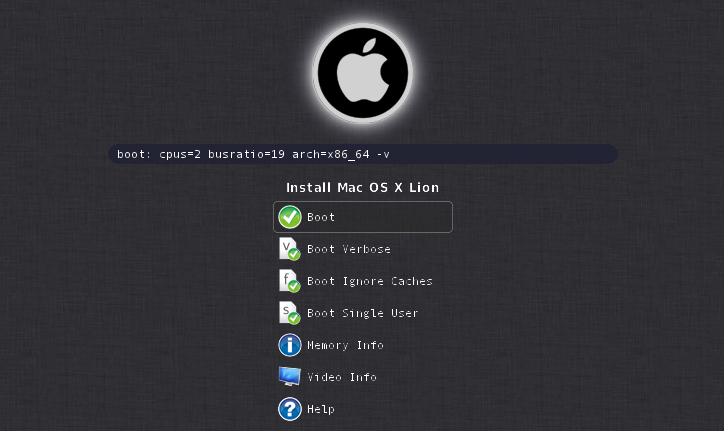
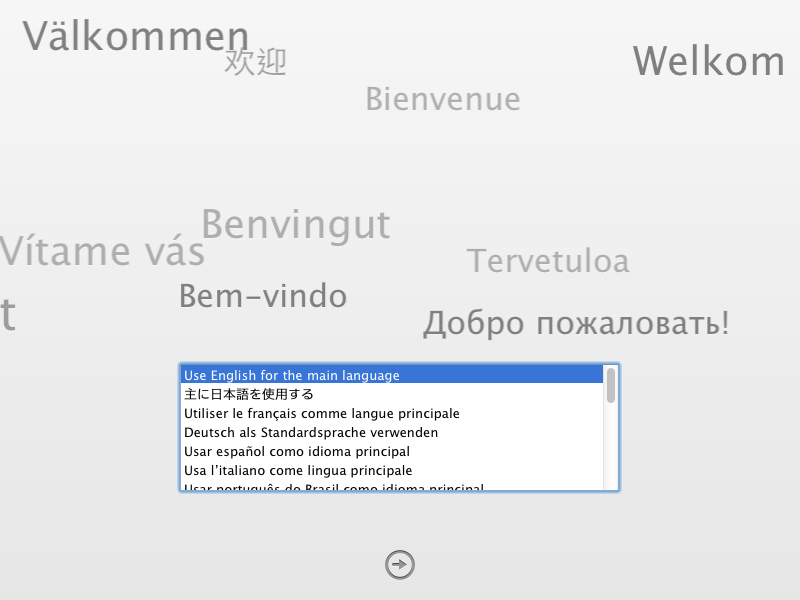
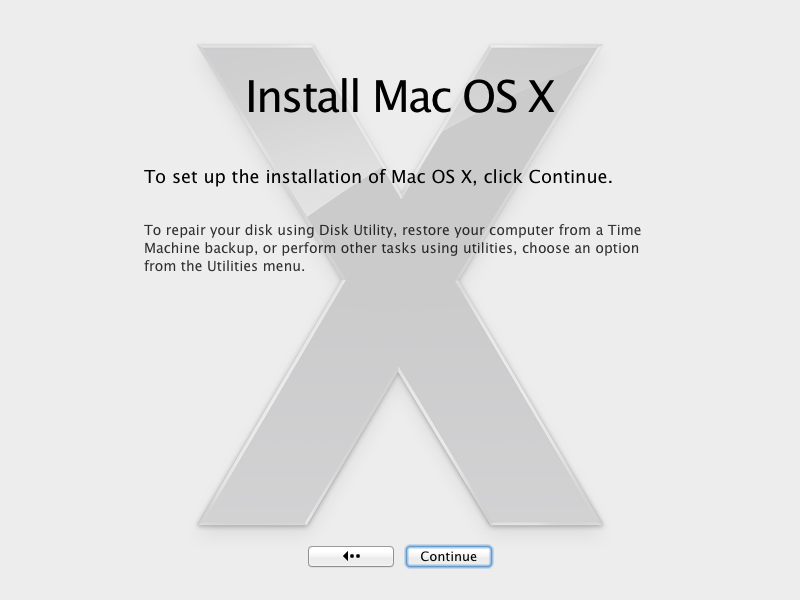
We are waiting for the welcome screen to load and select the desired language.
Click Continue and agree to the license agreement.
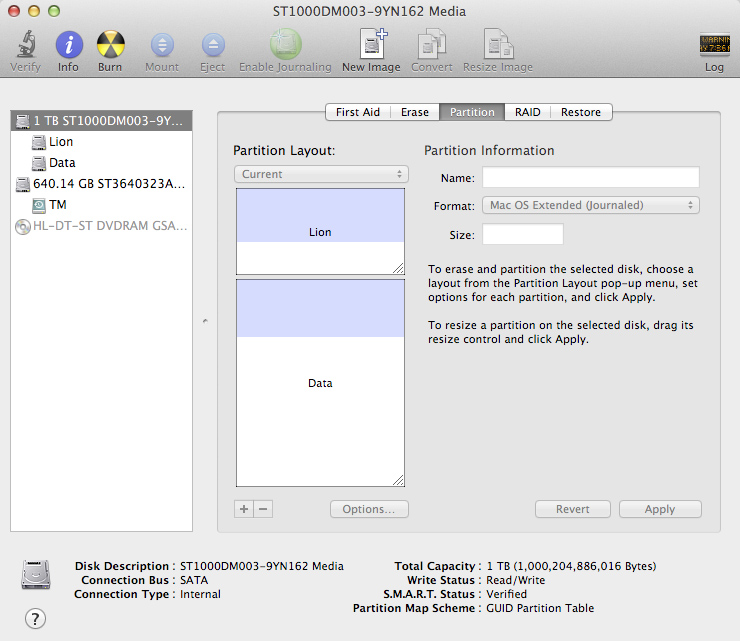
Run Utilities -> Disk Utility and partition the screw.
Close Disk Utility, select the partition for installing Lion, click Customize, put a bird in front of Packard Bell EasyNote TM85 then click OK. Click Install and wait for the installation process to complete.
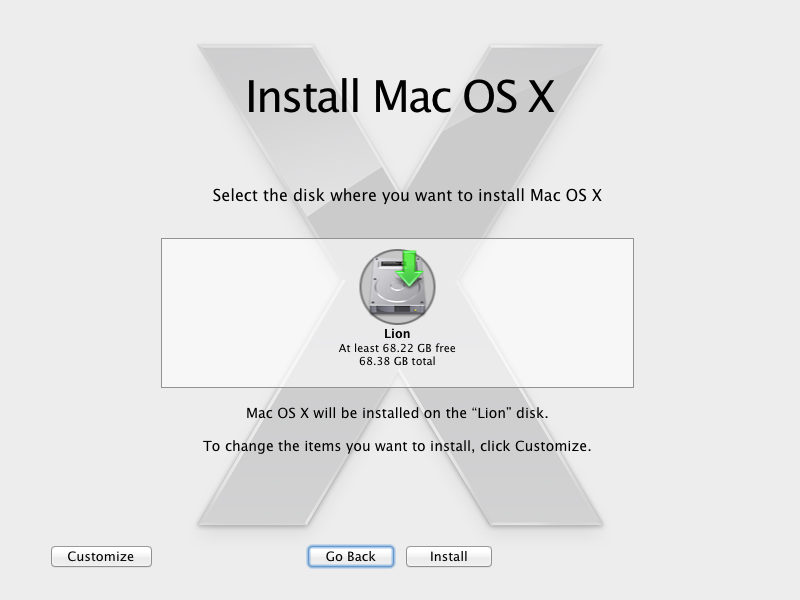
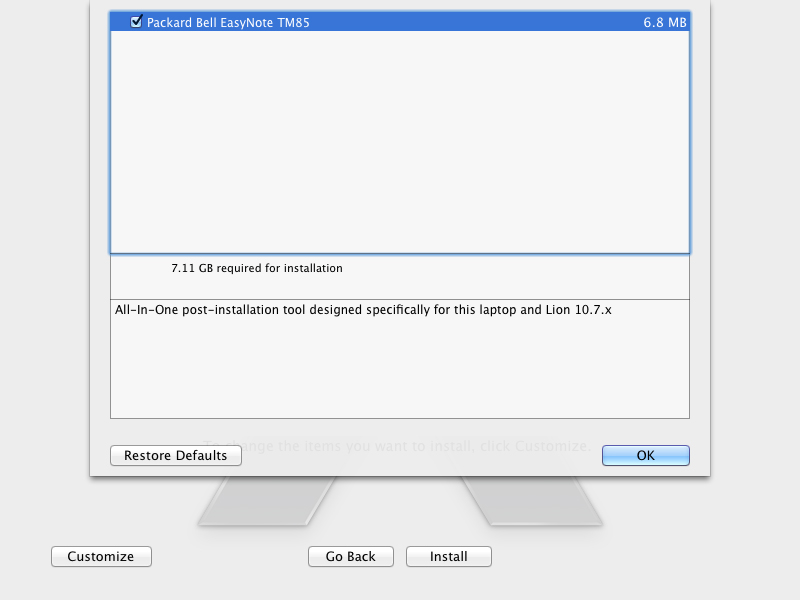
I will explain briefly. The bird opposite Packard Bell EasyNote TM85 is a post installation package that installs the bootloader, necessary kexts, solves the problem with PS / 2 devices, restores the rights to the kexts and the partition with the installed axis.
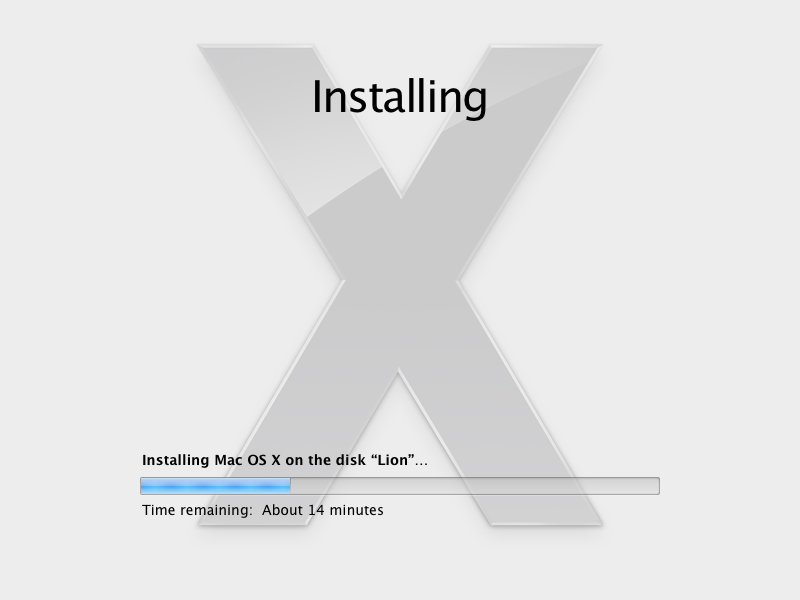

After the reboot, we will regim the account and this completes the installation!
You probably noticed that to install "Mac" on a specific configuration of iron, we did not have to manually install the kexts, bootloader, etc. For this, the installation package /files/post-install/PackardBell-TM85.pkg was compiled, then information about it was added to OSInstall.mpkg / Distribution: How to edit OSInstall.mpkg and create installation packages - you can find out here and here . In case you want to change something, there are sources in the / files / sources folder.
<line choice="PB-TM85"/><choice id="PB-TM85" title="Packard Bell EasyNote TM85" description="All-In-One post-installation tool designed specifically for this laptop and Lion 10.7.x" start_selected="false"><pkg-ref id="com.submedia.pb"/></choice><pkg-ref id="com.submedia.pb" auth="root">file:./post-install/PackardBell-TM85.pkg</pkg-ref><pkg-ref id="com.submedia.pb" installKBytes="6318" version="1.0"/>
Possible problem and its solution.
Error loading:
boot0: GPT
boot0: test
boot0: error
Solution:
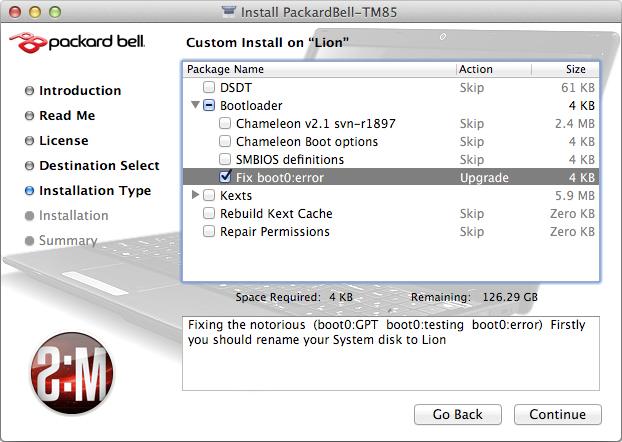
Download Mac OS X Lion using the bootloader on a USB flash drive. Now run /files/PackardBell-TM85.pkg and in the “Installation Type” step select “Bootloader -> Fix boot0: error”, then reboot.
You can also fix the error manually, for this you need to:
Boot from the USB flash drive and open the Terminal:
- Put the file / files / boot1h in the root of the bootable flash drive or other flash drive or non-Lion partition, then go there:
$ cp /path_to_boot1h /new_path_for_boot1h
$ cd /boot1h_location
$ diskutil umount /Volumes/Lion
$ dd if=boot1h of=/dev/rdiskXsY
$ reboot
X - disk identifier, Y - partition identifier with Mac OS
After rebooting, the Mac will boot :)
results
Fully working Hackintosh on a laptop.
Article written in collaboration with SubMedia

Useful resources
PS Installing Mac OS X on other platforms is similar. The problem is getting all the components of the PC to work. If you are lucky and you find the necessary keksts - this is wonderful, otherwise you will have to figure out how to patch / edit DSDT , but this is not the topic of this article. There is also experience installing Mac OS X Lion on the ASUS P6TD Deluxe. The necessary keksts are here .