June 2, 2012 at 16:21
Ollie - autonomous robo airship
- Transfer
“I understood one simple truth. It’s about doing miracles with your own hands. ”
© A. Green“ Scarlet Sails ”

Ollie is an open source autonomous rode airship living in a human environment. Ollie - observers, researchers around the world. When Ollie hears voices, they begin to flap their wings excitedly to express their extreme friendliness. Ollie wants to know about people and craves their attention.
Ollie is available to DIY artists, artists, designers, and students under the Creative Commons Attribution-ShareAlike 3.0 Unported License .
Ollie has brains on the Arduino, wings for flying and a microphone for listening. In this tutorial, I will teach you how to build your Ollie. Please send your questions, suggestions, tweets and all that jazz tohttp://www.meandollie.com/ . Thanks!
The main components:
Additional items:
Bend the wire so that you get 2 identical skeletons of the wing. Do not make them too large to minimize weight, yet Ollie has to fly. To fix the ends use epoxy glue.
Attach the servo mounts to the ends of the wings, and then insulate with epoxy glue. If additional insulation is needed, use duct tape.
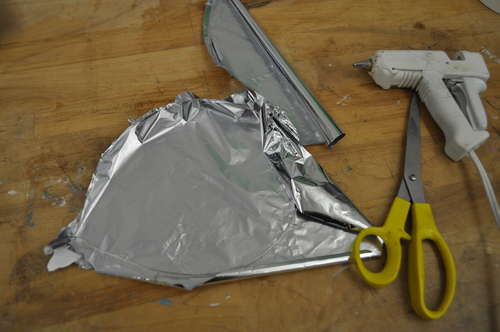
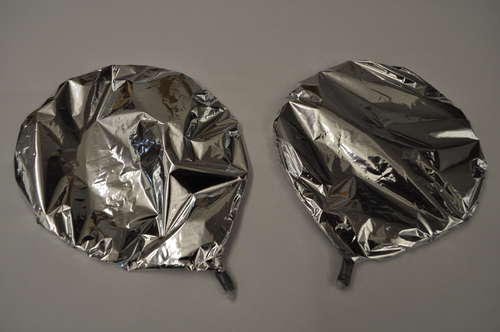
Cut identical shapes out of mylar or foil to “fit” the surface of the skeleton. Use a glue gun for fastening. Do not “tighten” the wing skeleton too tightly so that the wing has a hemispherical shape during flight.
Attach the wings to the servo. Then attach the wires to the drive.
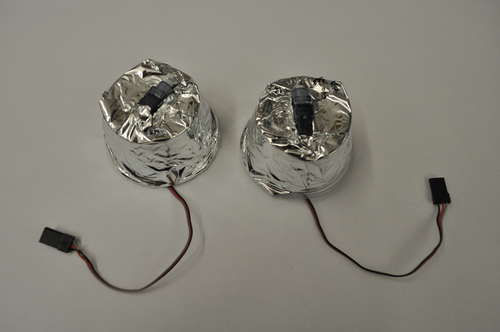

Connect the servo control wires to digital pins 2 and 4 to 5V power and ground on the breadboard and / or to the Arduino Uno (for testing).
Download the basic program to verify that the wiring is working and the wings are moving at the same speed.
If the wings do not move, check the continuity of the circuit, isolate the connections and restart the drives again. If the circuit works correctly, prepare it for connection to the Arduino Mini Pro.
Insert the servos through the small plastic cups (they will be useful for attaching the wings to the ball and masking the motors). Make sure nothing obstructs the movement of the wings.
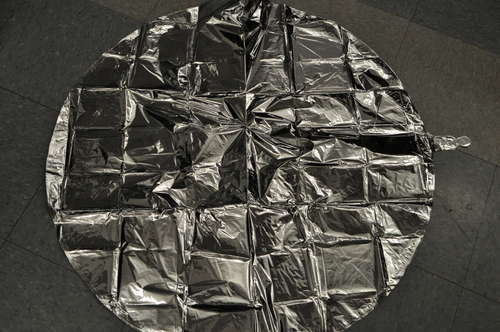
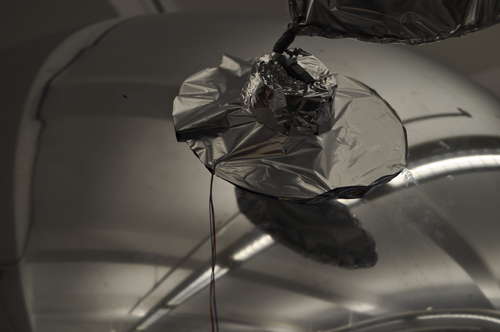
Mark a meter-long mylar ball in the places where the wings will be attached. Marks should be directly on opposite sides of the ball to balance the airship in flight.
Cover the cups with mylar film using a glue gun.
Then fill the ball with helium.
Now fasten the servo cups to the ball using electrical tape. Let the wires hang loose.
After covering the insulating tape with mylar film.
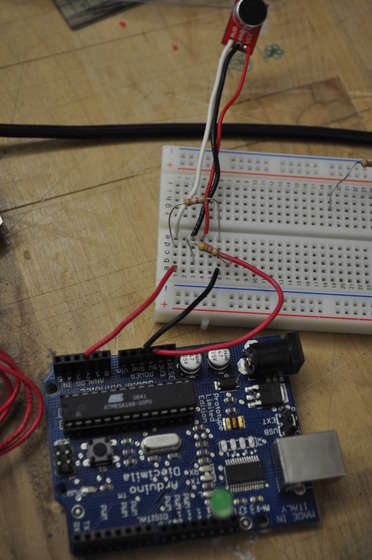
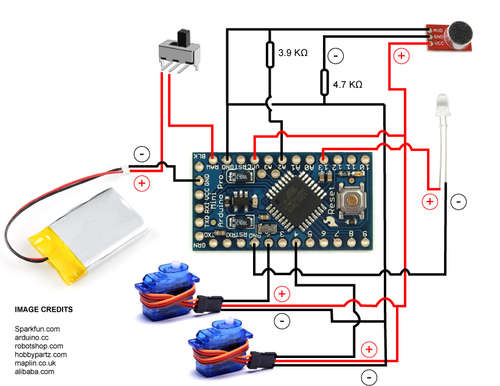
Connect the microphone to the Arduino Uno as shown in the picture with two resistors: 3.9K and 4.7K. The control wire must be connected to analog pin 2 on the Arduino. Resistors are used to amplify the microphone signal, so be sure to connect them correctly.
Connect the LED to the 13th digital pin on the Arduino.
Check insulation.
Run this (http://pastebin.com/xVXSEQYs) program on Arduino to make sure the connection works correctly. The LED should light up when the audio signal exceeds a certain threshold. The threshold should correspond to normal or loud sound. If the LED does not light up, check that everything is connected correctly and “play around” with the constants in the program.
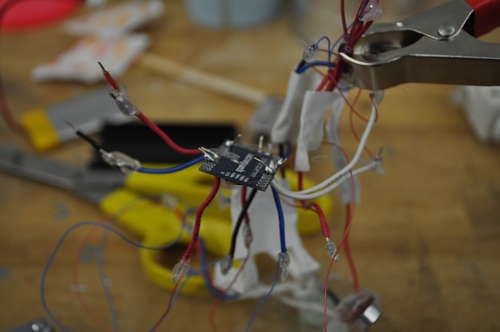

Connect everything according to the scheme. Attach the switch and battery to the circuit board. Solder the wires and insulate with hot glue.
Download the program (http://pastebin.com/crtvLn1w) to the Arduino Pro Mini via FTDI cable or adapter card.
Solder the Arduino Pro Mini connections very carefully and in accordance with the wiring diagram.
Secure the board to the bottom of the ball using a small amount of foil or electrical tape.
At the moment, the board should be light enough so that the ball can lift it, or at least just keep the ball in balance. If the board is too light, add weight with clay.
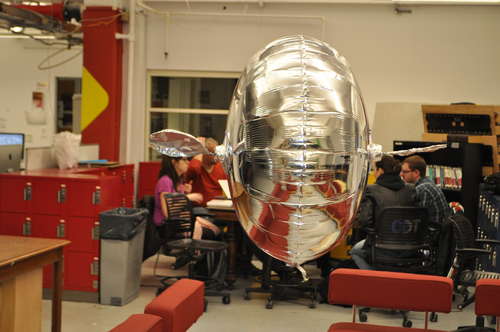
Ollie is ready to fly. Turn on the switch to power the Arduino Pro Mini on battery. Ollie will flap her wings if she hears voices or just a loud noise. Now, Ollie will bring joy and happiness to those around him on her wings.
Send your own experiments, tweets, suggestions, wishes and comments to www.meandollie.com . Ollie loves making new friends.
Everything adds weight, so pay attention to what materials you use. If the weight is not enough, you can use, for example, clay.
If you do not have a polymer lithium-ion battery 850-900mAh, then replacing it should be no more than ~ 18.5g.
Helium leaves the mylar ball rather slowly, so that Ollie will be able to fly 1.5-2 days without refueling.
Check the circuit on the breadboard or Arduino Uno before connecting, and even soldering it on the Arduino Pro Mini.
Be careful when soldering the Arduino Pro Mini, the chip can be very easily burned.
Check the servos and make sure that the wings are oriented correctly and that they are moving in the mirror direction.
Modify the code if required by the room in which Ollie will fly.
© A. Green“ Scarlet Sails ”
Ollie is an open source autonomous rode airship living in a human environment. Ollie - observers, researchers around the world. When Ollie hears voices, they begin to flap their wings excitedly to express their extreme friendliness. Ollie wants to know about people and craves their attention.
Ollie is available to DIY artists, artists, designers, and students under the Creative Commons Attribution-ShareAlike 3.0 Unported License .
Ollie has brains on the Arduino, wings for flying and a microphone for listening. In this tutorial, I will teach you how to build your Ollie. Please send your questions, suggestions, tweets and all that jazz tohttp://www.meandollie.com/ . Thanks!
Step 1. We collect components
The main components:
- 1 Arduino Pro Mini 328 - 5V / 16MHz
- 1 FTDI cable or power board for Arduino Pro Mini
- 1 electronic microphone
- 1 polymer 850-900mAh lithium-ion battery
- 2 Micro Servo at 3.6g (Blue Arrow was used in this project)
- Meter mylar (foil) ball
- Wire d = 0.255mm / 2-3 color wire for wire mounting
- 1 LED
- 1 sheet of mylar or foil for wings
- 1 wire spool for wing frame
- 1 cylinder with helium or access to it
- 1 switch
- 1 resistor at 3.9KΩ
- 1 4.7K resistor
Additional items:
- Arduino Uno or another (for testing)
- Bread board
- Wire diameter 0.644mm or 0.511mm
- Insulating tape
- Small scale
- Soldering iron and solder
- Epoxy adhesive
- Glue thermal gun
- Clay or clay
- Small cups
- Cutter
Step 2. Payment
Step 3. Making wings
Bend the wire so that you get 2 identical skeletons of the wing. Do not make them too large to minimize weight, yet Ollie has to fly. To fix the ends use epoxy glue.
Attach the servo mounts to the ends of the wings, and then insulate with epoxy glue. If additional insulation is needed, use duct tape.
Cut identical shapes out of mylar or foil to “fit” the surface of the skeleton. Use a glue gun for fastening. Do not “tighten” the wing skeleton too tightly so that the wing has a hemispherical shape during flight.
Attach the wings to the servo. Then attach the wires to the drive.
Step 4. Work with engines
Connect the servo control wires to digital pins 2 and 4 to 5V power and ground on the breadboard and / or to the Arduino Uno (for testing).
Download the basic program to verify that the wiring is working and the wings are moving at the same speed.
If the wings do not move, check the continuity of the circuit, isolate the connections and restart the drives again. If the circuit works correctly, prepare it for connection to the Arduino Mini Pro.
Insert the servos through the small plastic cups (they will be useful for attaching the wings to the ball and masking the motors). Make sure nothing obstructs the movement of the wings.
Step 5. Attaching the Wings to the Airship
Mark a meter-long mylar ball in the places where the wings will be attached. Marks should be directly on opposite sides of the ball to balance the airship in flight.
Cover the cups with mylar film using a glue gun.
Then fill the ball with helium.
Now fasten the servo cups to the ball using electrical tape. Let the wires hang loose.
After covering the insulating tape with mylar film.
Step 6. Connect the microphone
Connect the microphone to the Arduino Uno as shown in the picture with two resistors: 3.9K and 4.7K. The control wire must be connected to analog pin 2 on the Arduino. Resistors are used to amplify the microphone signal, so be sure to connect them correctly.
Connect the LED to the 13th digital pin on the Arduino.
Check insulation.
Run this (http://pastebin.com/xVXSEQYs) program on Arduino to make sure the connection works correctly. The LED should light up when the audio signal exceeds a certain threshold. The threshold should correspond to normal or loud sound. If the LED does not light up, check that everything is connected correctly and “play around” with the constants in the program.
Step 7. Assembly
Connect everything according to the scheme. Attach the switch and battery to the circuit board. Solder the wires and insulate with hot glue.
Download the program (http://pastebin.com/crtvLn1w) to the Arduino Pro Mini via FTDI cable or adapter card.
Solder the Arduino Pro Mini connections very carefully and in accordance with the wiring diagram.
Secure the board to the bottom of the ball using a small amount of foil or electrical tape.
At the moment, the board should be light enough so that the ball can lift it, or at least just keep the ball in balance. If the board is too light, add weight with clay.
Step 8. Ollie flies!
Ollie is ready to fly. Turn on the switch to power the Arduino Pro Mini on battery. Ollie will flap her wings if she hears voices or just a loud noise. Now, Ollie will bring joy and happiness to those around him on her wings.
Send your own experiments, tweets, suggestions, wishes and comments to www.meandollie.com . Ollie loves making new friends.
Step 9. Useful Tips
Everything adds weight, so pay attention to what materials you use. If the weight is not enough, you can use, for example, clay.
If you do not have a polymer lithium-ion battery 850-900mAh, then replacing it should be no more than ~ 18.5g.
Helium leaves the mylar ball rather slowly, so that Ollie will be able to fly 1.5-2 days without refueling.
Check the circuit on the breadboard or Arduino Uno before connecting, and even soldering it on the Arduino Pro Mini.
Be careful when soldering the Arduino Pro Mini, the chip can be very easily burned.
Check the servos and make sure that the wings are oriented correctly and that they are moving in the mirror direction.
Modify the code if required by the room in which Ollie will fly.