Work with PySide
This post participates in the contest “Smart Phones for Smart Posts”.

There is some information on the PySide project on the web , but not so much in Russian.
This article is an attempt to fill this gap. Next, the assembly of the project, the launch of applications on the emulator, an example of creating your own binding will be described. Some key features of PySide will be shown with examples.
PySide is a project for creating Qt bindings to the Python programming language . It aims to implement support for all Qt features , including QtQuick and QtMobility . The following versions of components and platforms are currently supported.
There is no possibility to use PySide on Symbian yet (or I don’t know this possibility), but according to the developers, work in this direction is underway. You can use PyS60 as an alternative, though it has nothing to do with Qt , so we won’t talk about it later.
The PySide project also contains a set of tools that allow you to create bindings of any libraries written in C / C ++. We’ll talk more about these tools later.
PySide is licensed under the LGPL, i.e. It can be used in both open and closed commercial projects. PySide source codes are open and available at github.com/PySide. Also, if you find any problems related to PySide , you can report them to the project’s official bug tracker .
On the download page , instructions for installing PySide on various OSs are available. But it may turn out that for your Linux distribution, such a package is not available. Let's assemble it ourselves, which is not at all difficult, because even here, Qt developers took care of their users and prepared a set of scripts that automate PySide assembly actions as much as possible .
So, let's clone a Git repository with build scripts to start. We don’t need anything else yet, because by dependency, all necessary projects will be cloned.
You can have several versions of Qt installed on your system . To specify which version to use, edit the enviroment.sh file, in which write the path to the Qt home directory and the path where PySide will be installed . The enviroment.sh file is provided with detailed comments, so you should not have any difficulties. I immediately warn you that with the version of Qt installed on the system by default, PySide may not be collected. I recommend using the latest version of QtSdk to build.
After everything is configured, collect PySide command
To facilitate the work, the enviroment.sh file is easily converted into a script with which applications using PySide are launched . All you need to do is make it executable and add python $ @ at the end .
To test the functionality of the resulting package, we clone the repository with Qt examples in Python , adapted for PySide
and run any of the examples you like, for example, Hyper UI.


Now we are ready to build PySide for the host system. But during development, it may be convenient to run applications in the simulator that is included with QtSdk. Let's build PySide for her too. To do this, edit the QT_SDK_HOME variable in the enviroment.sh file, specifying the path to QtSimulator ($ {YOUPATH} / QtSDK / Simulator / Qt / gcc) as the Qt home directory . You also need to edit the build_and_install file: add the -DQ_WS_SIMULATOR = yes option to the cmake start command. This option helps cmake determine the platform under which the compilation will take place.
If you start the assembly now, then at the moment it unfortunately will fail, because QtWebKit module will not be able to assemble. I created a report on this error, to which I attached a small patch that fixes this problem. But the moment of writing the article, this bug has not yet been fixed. Therefore, use this patch to fully build PySide under QtSimulator (see the attachment to the bug report using the link above).

Nothing prevents us from building a QtMobility binding for QtSimulator. Its assembly is no different from the assembly of PySide itself . QtMobilityassemble and even run in the simulator, but not one of the modules at the same time, unfortunately, can not be called working. In full, not a single example supplied with QtMobility itself , nor from the pyside-examples package, worked . I’ll also deal with the reasons for this and, perhaps, someday I will write about it.

This section is not an introduction to the Python programming language . It will only show how to use some of the key features of Qt in Python .
Signal is a class through which the connection of a signal and a slot is controlled, as well as the sending of the signal itself. The types of parameters transmitted with the signal are indicated when it is created. It can be any type of C and Python . If we want to send parameters of different types (as in the example above), tuple or list should be specified as the type. As before, the signal must be declared within the class inherited from QObject.
If you need to create several signals, you can use the following recording form
This code will add three signals with the signatures signals (int), signals (QString) and signals (double, QObject *). All of them are contained in the signals variable, which can conditionally be considered a dictionary (not iterable). The signal parameters are used as a key.
Any method of a class that is not necessarily inherited from QObject, a global function, or even a lambda function can serve as a slot. But such objects are not true slots, there is no information about them in QMetaObject, so use this approach with caution. For example, if you use a global function as a slot, then you cannot get information about the calling object in it.
In order to create a true slot, you need to use the Slot decorator from the QtCore module. In code, it looks like this:
Overload rules do not apply to slots and we cannot create a slot that accepts any type of parameters. A separate decorator must be added for each type of parameter. The above is an example of a slot that can accept parameters of type int and QString.
Both the QtCore.Signal class and the QtCore.Slot decorator as additional parameters can take the name under which the generated signals and slots will be stored in the metobject information. By default, if no name is specified, the signal is assigned the name of the class member to which it is assigned, and the name of the method to decorate is assigned to the slot. The slot can also be set to return type. You can use this functionality to communicate Python and QML .
More on Python Interoperabilityand QML can be read on developer.qt.nokia.com in the Python section. You can also see pyside-qml-examples .
Working with Qt properties is not much different from working with classic Python properties . Just a small example.
You can read more about working with Qt properties in Python here .
PySide Tools package includes standard Qt tools for working with application resources, developing a "classic" graphical interface and localizing applications. These are pyside-ui, pyside-rcc and pyside-lupdate. Working with them is no different from the same packages for Qt / C ++. Therefore, you still have the opportunity to create a graphical application framework in QtDesigner. The resulting form is compiled using pyside-ui, which needs to specify the form file and the output file as input parameters through the -o option. Pyside-ui also has an additional interesting option -x which adds application launch code to the resulting Python file . Below is a small example of launching an application using the form created in the designer, resources and localization
Also in PySide are available many Qt goodies of recent years, including QtQuick. Those. we are not deprived of the opportunity to create hybrid applications using Python and QML (QtQuick.Particles, Qt Desktop Components, etc.).
Knowing all of the above, we can create custom Python applications using Qt , including those using QtQuick. But what if we need to use a library written in C / C ++ with our project or use our previous developments made in the same C / C ++? Do not rewrite everything again in Python ?
For example, we have a certain project using Qt Components . All the main functionality is written in QML . But to run it, you need the QmlDesktopViewer class already written in C ++. It’s easy for us to rewrite it in Python.but that would not be interesting right now. Let's make our own binding of this class to Python .
To do this, use the tools from the PySide project to create bindings. These are API Extractor, Shiboken and Generator Runner. We already have all these tools.
To create a binding, you first need to create an xml file that describes what data we want to export, hide, rename, etc. In general, what we will access in the resulting Python module .
I specifically described in detail what files we get at the output of the generator, because they are to be compiled to get the Python module . Understanding this will make it easier to write a project file for your build system. For a more detailed look at the rules for compiling this file, see the API Extractor documentation .
The next step is to create a C ++ language header file that will be used to extract information about the data for which the binding is being done.
The pyside_global.h file we received during the PySide build . You can copy it to the project or add a path to its location.
As a build system, I use CMake. I will not describe the assembly here. The full example code can be taken here . You can use it as an example to create your own binding.
We compile the project, and we get a library with a wrapper over our class, which we can use in our application in Python . We will use the resulting module to run one of the Qt Desktop Components examples.
I also want to note that there are already several third-party library bindings for PySide . One of them is the Qwt binding .
PySide v1.0.8 documentation
PySide Mobility v0.2.2 documentation
New-style signal / slot
PySide on Developer Network
Running PySide applications on Qt Simulator
PySide Binding Generator
PySide Binding Generation Tutorial
There is some information on the PySide project on the web , but not so much in Russian.
This article is an attempt to fill this gap. Next, the assembly of the project, the launch of applications on the emulator, an example of creating your own binding will be described. Some key features of PySide will be shown with examples.
Introduction What is PySide?
PySide is a project for creating Qt bindings to the Python programming language . It aims to implement support for all Qt features , including QtQuick and QtMobility . The following versions of components and platforms are currently supported.
| Qt | 4.6, 4.7, 4.8 betta |
| QtMobility | 1.2.0 |
| Python | 2.5, 2.6, 2.7, 3.2 (experemental) |
| OS | Linux / X11, Maemo 5, MeeGo, Windows, Mac OS X |
There is no possibility to use PySide on Symbian yet (or I don’t know this possibility), but according to the developers, work in this direction is underway. You can use PyS60 as an alternative, though it has nothing to do with Qt , so we won’t talk about it later.
The PySide project also contains a set of tools that allow you to create bindings of any libraries written in C / C ++. We’ll talk more about these tools later.
PySide is licensed under the LGPL, i.e. It can be used in both open and closed commercial projects. PySide source codes are open and available at github.com/PySide. Also, if you find any problems related to PySide , you can report them to the project’s official bug tracker .
PySide Build, Health Check
On the download page , instructions for installing PySide on various OSs are available. But it may turn out that for your Linux distribution, such a package is not available. Let's assemble it ourselves, which is not at all difficult, because even here, Qt developers took care of their users and prepared a set of scripts that automate PySide assembly actions as much as possible .
So, let's clone a Git repository with build scripts to start. We don’t need anything else yet, because by dependency, all necessary projects will be cloned.
$ git clone git://github.com/PySide/BuildScripts.git buildscripts
$ cd buildscripts
$ git submodule init
$ git submodule update
You can have several versions of Qt installed on your system . To specify which version to use, edit the enviroment.sh file, in which write the path to the Qt home directory and the path where PySide will be installed . The enviroment.sh file is provided with detailed comments, so you should not have any difficulties. I immediately warn you that with the version of Qt installed on the system by default, PySide may not be collected. I recommend using the latest version of QtSdk to build.
After everything is configured, collect PySide command
$ ./build_and_install
To facilitate the work, the enviroment.sh file is easily converted into a script with which applications using PySide are launched . All you need to do is make it executable and add python $ @ at the end .
To test the functionality of the resulting package, we clone the repository with Qt examples in Python , adapted for PySide
$ git clone git://github.com/PySide/Examples.git pyside-examples
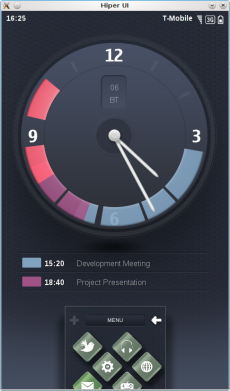
and run any of the examples you like, for example, Hyper UI.
Now we are ready to build PySide for the host system. But during development, it may be convenient to run applications in the simulator that is included with QtSdk. Let's build PySide for her too. To do this, edit the QT_SDK_HOME variable in the enviroment.sh file, specifying the path to QtSimulator ($ {YOUPATH} / QtSDK / Simulator / Qt / gcc) as the Qt home directory . You also need to edit the build_and_install file: add the -DQ_WS_SIMULATOR = yes option to the cmake start command. This option helps cmake determine the platform under which the compilation will take place.
If you start the assembly now, then at the moment it unfortunately will fail, because QtWebKit module will not be able to assemble. I created a report on this error, to which I attached a small patch that fixes this problem. But the moment of writing the article, this bug has not yet been fixed. Therefore, use this patch to fully build PySide under QtSimulator (see the attachment to the bug report using the link above).
Nothing prevents us from building a QtMobility binding for QtSimulator. Its assembly is no different from the assembly of PySide itself . QtMobilityassemble and even run in the simulator, but not one of the modules at the same time, unfortunately, can not be called working. In full, not a single example supplied with QtMobility itself , nor from the pyside-examples package, worked . I’ll also deal with the reasons for this and, perhaps, someday I will write about it.
Introduction to PySide Programming. Signals and slots, property system
This section is not an introduction to the Python programming language . It will only show how to use some of the key features of Qt in Python .
Signal-slot interaction
from  PySide import QtCore
def say_hello(name):
    print "Hello,", name
class Foo(QtCore.QObject):
    @QtCore.Slot(str)
    def say_bye(self, name):
        print "Bye,", name
class Bar(QtCore.QObject):
    signal = QtCore.Signal(tuple)
f = Foo()
b = Bar()
b.signal.connect(say_hello)
b.signal.connect(f.say_bye)
b.signal.emit("User.")
b.signal.emit(1.25)
Signal is a class through which the connection of a signal and a slot is controlled, as well as the sending of the signal itself. The types of parameters transmitted with the signal are indicated when it is created. It can be any type of C and Python . If we want to send parameters of different types (as in the example above), tuple or list should be specified as the type. As before, the signal must be declared within the class inherited from QObject.
If you need to create several signals, you can use the following recording form
class Test(QtCore.QObject):
    signals = QtCore.Signal((int,), (str,), (float, QtCore.QObject))
This code will add three signals with the signatures signals (int), signals (QString) and signals (double, QObject *). All of them are contained in the signals variable, which can conditionally be considered a dictionary (not iterable). The signal parameters are used as a key.
someone.signals.emit(10) #по умолчанию используется тип объявленный первым, т.е. int
someone.signals[str].emit("Hello everybody!")
someone.signals[float, QtCore.QObject].emit(1.23, obj)
Any method of a class that is not necessarily inherited from QObject, a global function, or even a lambda function can serve as a slot. But such objects are not true slots, there is no information about them in QMetaObject, so use this approach with caution. For example, if you use a global function as a slot, then you cannot get information about the calling object in it.
In order to create a true slot, you need to use the Slot decorator from the QtCore module. In code, it looks like this:
@QtCore.Slot(int)
@QtCore.Slot(str)
def mySlot(value):
    print value
Overload rules do not apply to slots and we cannot create a slot that accepts any type of parameters. A separate decorator must be added for each type of parameter. The above is an example of a slot that can accept parameters of type int and QString.
Both the QtCore.Signal class and the QtCore.Slot decorator as additional parameters can take the name under which the generated signals and slots will be stored in the metobject information. By default, if no name is specified, the signal is assigned the name of the class member to which it is assigned, and the name of the method to decorate is assigned to the slot. The slot can also be set to return type. You can use this functionality to communicate Python and QML .
More on Python Interoperabilityand QML can be read on developer.qt.nokia.com in the Python section. You can also see pyside-qml-examples .
Property system
Working with Qt properties is not much different from working with classic Python properties . Just a small example.
from PySide import QtCore
class MyObject(QtCore.QObject):
    def __init__(self):
        QtCore.QObject.__init__(self)
        self._x = None
    def getx(self):
        print "get"
        return self._x
    def setx(self, val):
        print "set"
        self._x = val
    prop = QtCore.Property(int, getx, setx)
obj = MyObject()
obj.prop = 12345
print obj.prop
You can read more about working with Qt properties in Python here .
Creating a GUI Using PySide
PySide Tools package includes standard Qt tools for working with application resources, developing a "classic" graphical interface and localizing applications. These are pyside-ui, pyside-rcc and pyside-lupdate. Working with them is no different from the same packages for Qt / C ++. Therefore, you still have the opportunity to create a graphical application framework in QtDesigner. The resulting form is compiled using pyside-ui, which needs to specify the form file and the output file as input parameters through the -o option. Pyside-ui also has an additional interesting option -x which adds application launch code to the resulting Python file . Below is a small example of launching an application using the form created in the designer, resources and localization
from PySide import QtCore, QtGui
from form_ui import * #подключаем графический интерфейс
import resources_rc #подключаем ресурсы приложения
if __name__ == "__main__":
    import sys
    translator = QtCore.QTranslator()
    translator.load(':/i18n/translations/ru_RU') #подключаем файл локализации из ресурсов
    app = QtGui.QApplication(sys.argv)
    app.installTranslator(translator)
    Form = QtGui.QWidget()
    ui = Ui_Form()
    ui.setupUi(Form)
    Form.show()
    sys.exit(app.exec_())
Also in PySide are available many Qt goodies of recent years, including QtQuick. Those. we are not deprived of the opportunity to create hybrid applications using Python and QML (QtQuick.Particles, Qt Desktop Components, etc.).
Example of creating your own binding
Knowing all of the above, we can create custom Python applications using Qt , including those using QtQuick. But what if we need to use a library written in C / C ++ with our project or use our previous developments made in the same C / C ++? Do not rewrite everything again in Python ?
For example, we have a certain project using Qt Components . All the main functionality is written in QML . But to run it, you need the QmlDesktopViewer class already written in C ++. It’s easy for us to rewrite it in Python.but that would not be interesting right now. Let's make our own binding of this class to Python .
To do this, use the tools from the PySide project to create bindings. These are API Extractor, Shiboken and Generator Runner. We already have all these tools.
To create a binding, you first need to create an xml file that describes what data we want to export, hide, rename, etc. In general, what we will access in the resulting Python module .
I specifically described in detail what files we get at the output of the generator, because they are to be compiled to get the Python module . Understanding this will make it easier to write a project file for your build system. For a more detailed look at the rules for compiling this file, see the API Extractor documentation .
The next step is to create a C ++ language header file that will be used to extract information about the data for which the binding is being done.
#undef QT_NO_STL
#undef QT_NO_STL_WCHAR
#ifndef NULL
#define NULL    0
#endif
#include "pyside_global.h"
#include
#include
The pyside_global.h file we received during the PySide build . You can copy it to the project or add a path to its location.
As a build system, I use CMake. I will not describe the assembly here. The full example code can be taken here . You can use it as an example to create your own binding.
We compile the project, and we get a library with a wrapper over our class, which we can use in our application in Python . We will use the resulting module to run one of the Qt Desktop Components examples.
#!/usr/bin/env python
from PySide.QtCore import *
from PySide.QtGui import *
from PySide.QmlDesktopViewer import *
if __name__ == "__main__":
    import sys
    if len(sys.argv) < 2:
        print "Usage: qmldesktopviewer "
        sys.exit()
    app = QApplication(sys.argv)
    viewer = QmlDesktopViewer()
    viewer.open(sys.argv[1])
    sys.exit(app.exec_())
I also want to note that there are already several third-party library bindings for PySide . One of them is the Qwt binding .
Materials used
PySide v1.0.8 documentation
PySide Mobility v0.2.2 documentation
New-style signal / slot
PySide on Developer Network
Running PySide applications on Qt Simulator
PySide Binding Generator
PySide Binding Generation Tutorial