Creating an RDS Terminal Farm Using NLB Technology and Publishing RD Web Access on ISA Server 2006
So, we want to achieve load balancing on our terminal servers, their fault tolerance, or we want to add a second one to the existing terminal server to increase service performance. In my example, I will implement the following scheme:
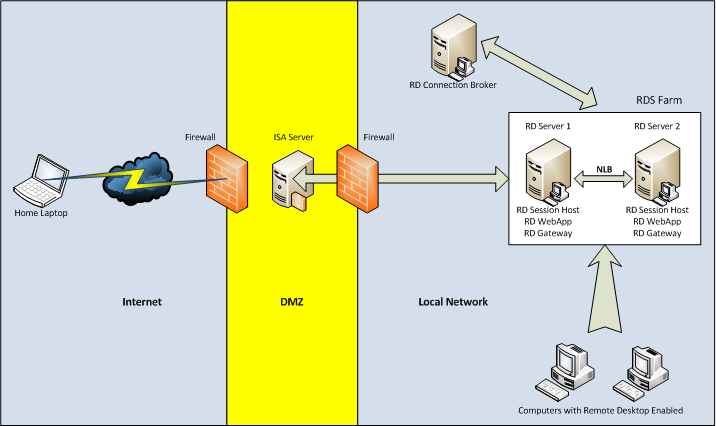
As we can see, to implement such a scheme we will need three servers. Moreover, the role of a broker can be installed on our existing server, for example, on a file or print server. For clarity, we call our servers as follows:

As we can see, our domain name is domain.local. For access to terminal services outside the domain.ru domain name will be used. Thus, in our DNS domain.local domain we will need to create an additional zone named domain.ru, where we will then create an RDS.domain.ru record that will refer to the IP address of the terminal farm.
- Remote Desktop Session Host (Remote Desktop Session Host)
- Remote Desktop Gateway
(Remote Desktop Web Access)
- Network Desktop Remote Access (NPS) - Network Policy Server (NPS)
When installing services, check “Require” NLA ”, we will configure other settings later. We reboot the server at the first request.
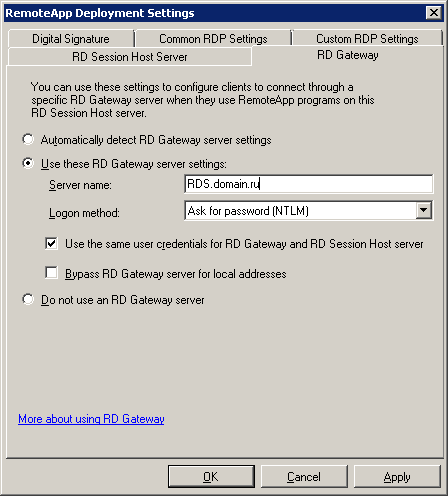
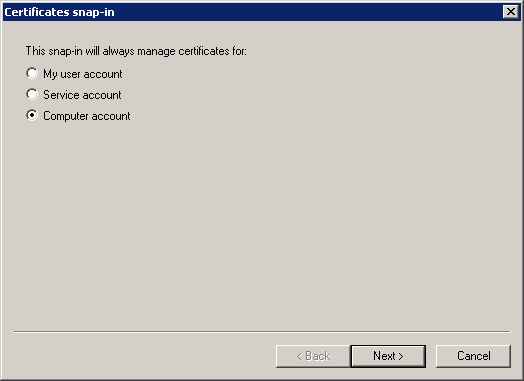
On the Digital Signature tab, specify the certificate that you must first request. To complete this step, your domain must have a certification authority (CA). On the RDS1 server, run mmc and add the Certificates (computer account) snap-in:

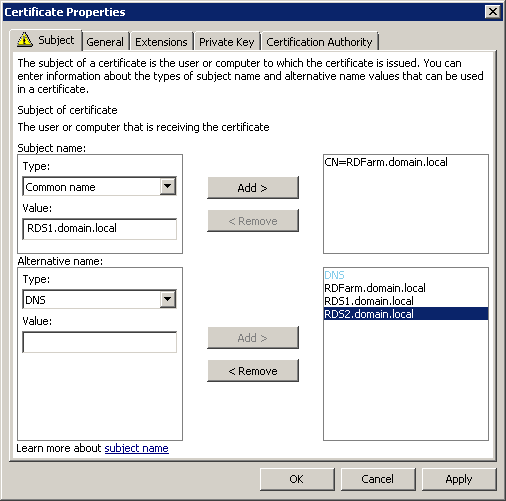
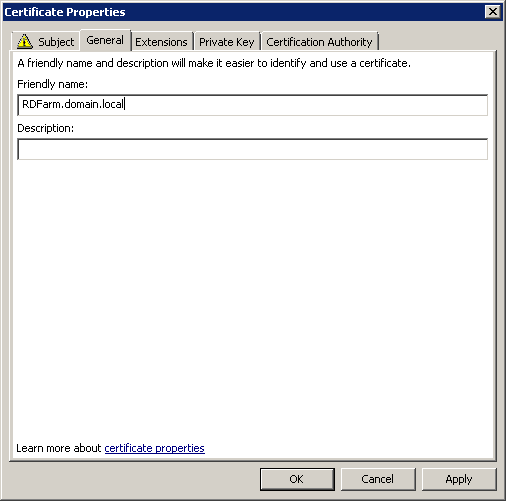

After receiving the certificate, export it to a pfx file - we will need it to configure the second server.
Now, on the Digital Signature tab, we can indicate our certificate:


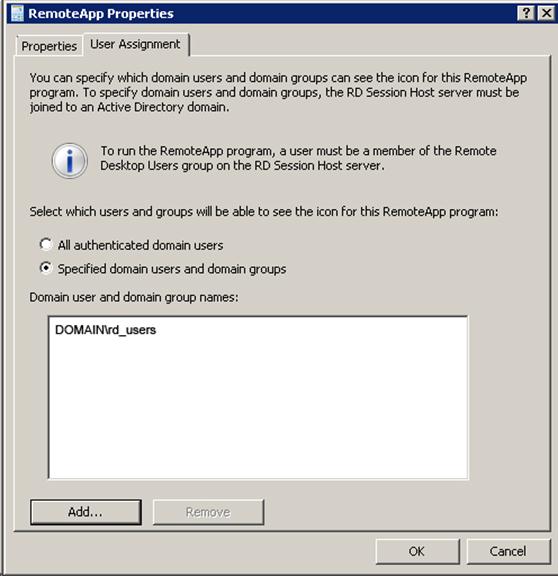
Click the “Properties” button and add to the list of users who can run our Calculator, the rd_users group.
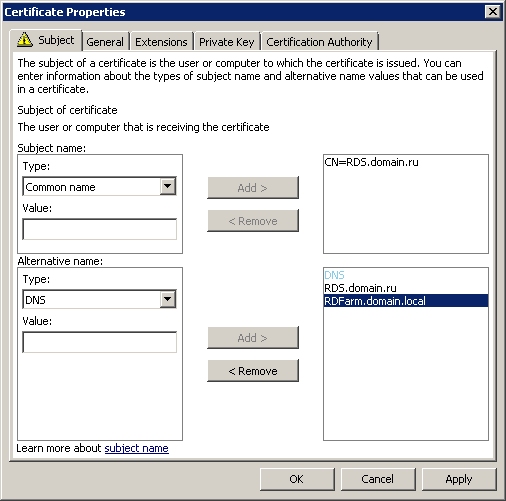

On the Private Key tab, be sure to indicate that the key can be exported.
After receiving the certificate, export it to a pfx file - we will need it to configure the second server.
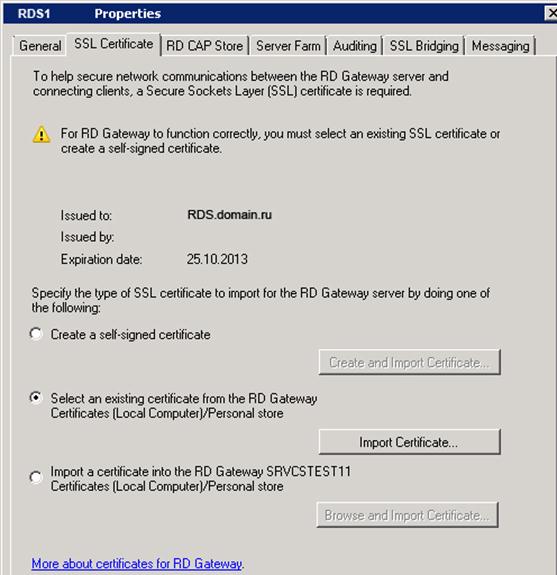
Now we specify this certificate in the properties of our Remote Desktop Gateway:
Go to the Server Farm tab, where we will add our RDS1 server to the gateway farm:
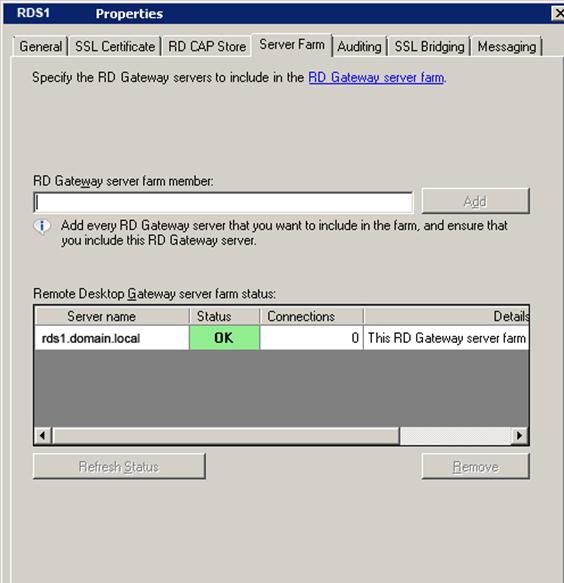
Please note that at this stage the status field does not have to have the “OK” status.
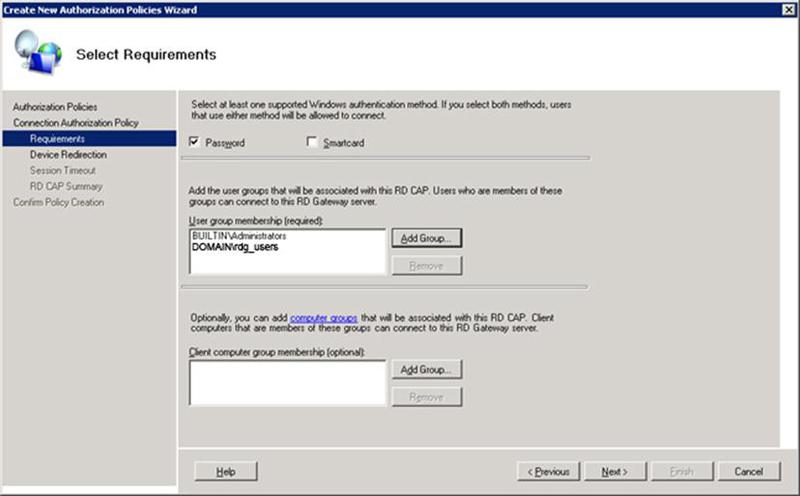
We add the rdg_users group to the list of authorized users to connect to, where we include all those who need access to terminal services.


We click on the “Select” button and specify the certificate with the Common Name of our farm - RDFarm.domain.local (it has already been installed on the server in paragraph 1.4).
The remaining parameters are not configurable.
Here, in the RD Session Host Configuration, we configure the licensing parameters.

- Remote Desktop Session Host (Remote Desktop Session Host)
- Remote Desktop Gateway
(Remote Desktop Web Access)
- Network Desktop Remote Access (NPS) - Network Policy Server (NPS)
When installing services, check “Require” NLA ”, we will configure other settings later. We reboot the server at the first request.

Specify the path to the pfx files containing the certificates and import them into the personal certificates of the RDS2 computer.
3.1 Install the RD Connection Broker role on the BROKER server.


We add all our possible RemoteApp resources: RDFarm.domain.local, RDS1.domain.local, RDS2.domain.local and RDS.domain.ru.


We include only 443 and 3389 TCP ports in the balancing.
3.8.2 Добавляем второй компьютер (RDS2) в NLB кластер
First you need to install our certificate with the Common Name "RDS.domain.ru" on the ISA server (this can be done in the same way as in the case of the RDS2 server, when we transferred the certificate to it with RDS1).
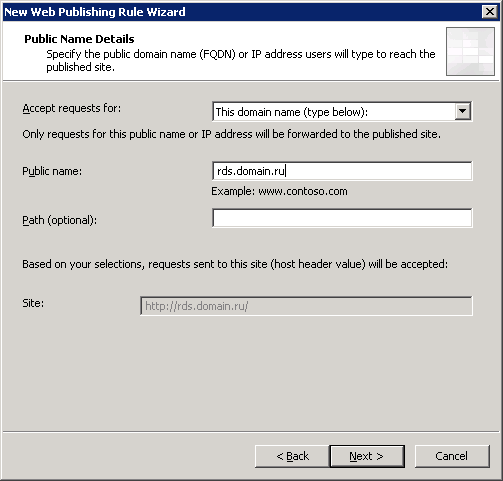
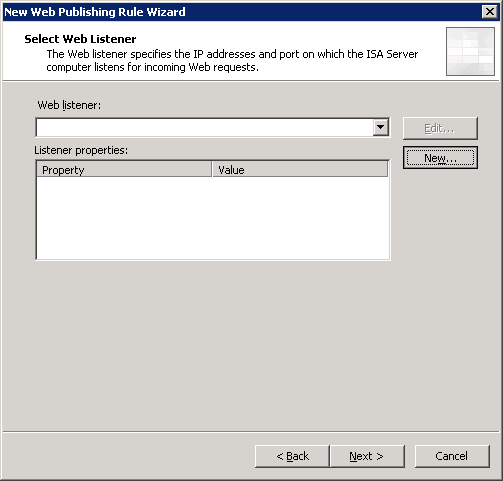
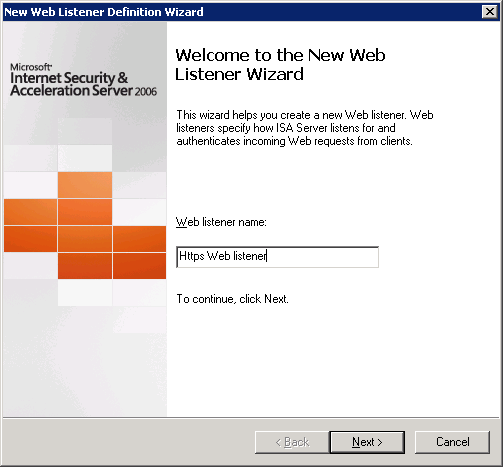
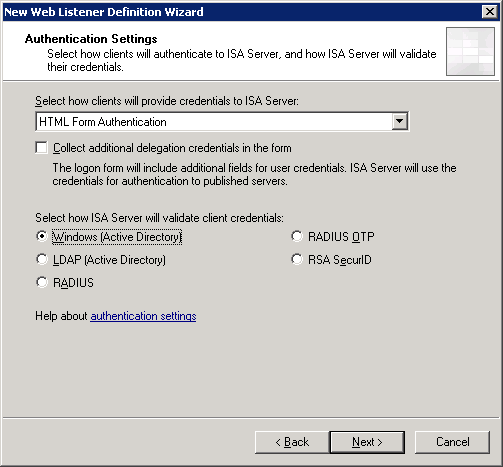
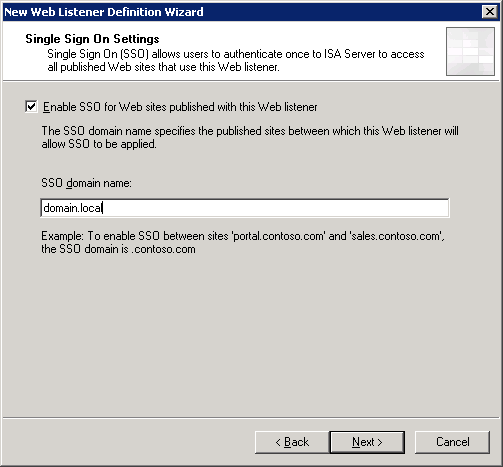
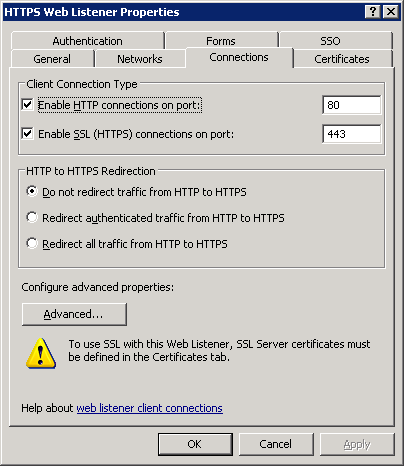
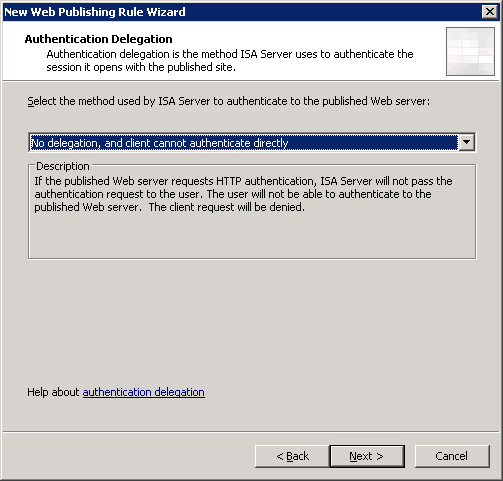
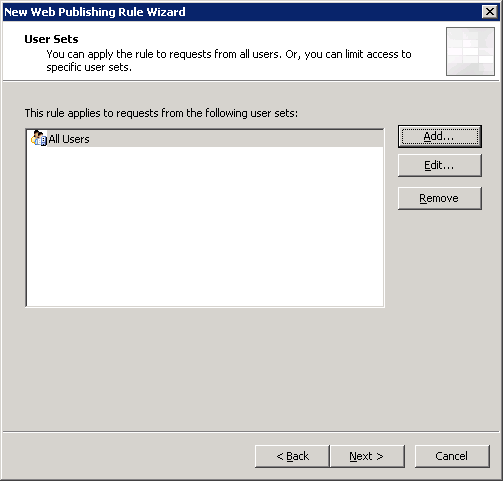
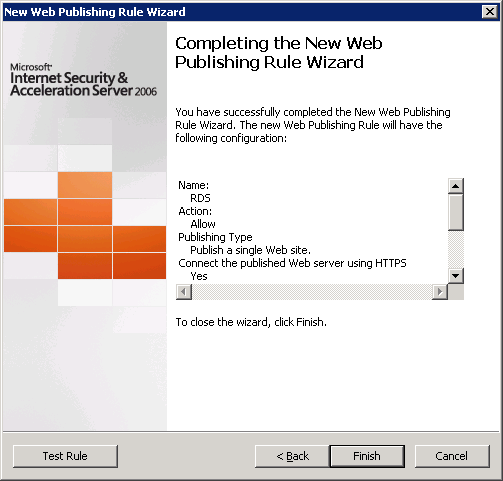
I will not consider this section in too much detail, but I will manage with only the most important screenshots with the settings for the publishing rule and the creation of a WEB listener:



Thank you for your attention.
As we can see, to implement such a scheme we will need three servers. Moreover, the role of a broker can be installed on our existing server, for example, on a file or print server. For clarity, we call our servers as follows:
As we can see, our domain name is domain.local. For access to terminal services outside the domain.ru domain name will be used. Thus, in our DNS domain.local domain we will need to create an additional zone named domain.ru, where we will then create an RDS.domain.ru record that will refer to the IP address of the terminal farm.
1. Installing terminal services on the RDS1 server.
1.1 Add the roles of “Remote Desktop Services” and “Network Policy and Access Services”. We select the following role services for installation:
- Remote Desktop Session Host (Remote Desktop Session Host)
- Remote Desktop Gateway
(Remote Desktop Web Access)
- Network Desktop Remote Access (NPS) - Network Policy Server (NPS)
When installing services, check “Require” NLA ”, we will configure other settings later. We reboot the server at the first request.
1.2 Create an RDFarm.domain.local record in the DNS of our domain, and assign the IP address 192.168.0.80 to it. This will be the internal address of our farm, as well as the address of the NLB cluster.
1.3 Create an RDS.domain.ru record in the DNS zone domain.ru of our domain, which we will assign to the same IP address as the cluster address - 192.168.0.80. This will be the external address of our farm through which remote users will log in.
1.4 We go into the snap-in Remote Desktop Services - RemoteApp Manager - RD Gateway and configure the settings as follows:
On the Digital Signature tab, specify the certificate that you must first request. To complete this step, your domain must have a certification authority (CA). On the RDS1 server, run mmc and add the Certificates (computer account) snap-in:
After receiving the certificate, export it to a pfx file - we will need it to configure the second server.
Now, on the Digital Signature tab, we can indicate our certificate:
1.5 Go to the Remote Desktop Services - RemoteApp Manager snap-in and in the RemoteApp Programs section and add one remote application. Let it be a calculator.
Click the “Properties” button and add to the list of users who can run our Calculator, the rd_users group.
1.6 Go to the Remote Desktop Services - RD Gateway Manager snap-in and configure the properties of RDS1 (Local). But before that you need to request another certificate (see clause 1.4), but this time with the Common Name of the external address - RDS.domain.ru.
On the Private Key tab, be sure to indicate that the key can be exported.
After receiving the certificate, export it to a pfx file - we will need it to configure the second server.
Now we specify this certificate in the properties of our Remote Desktop Gateway:
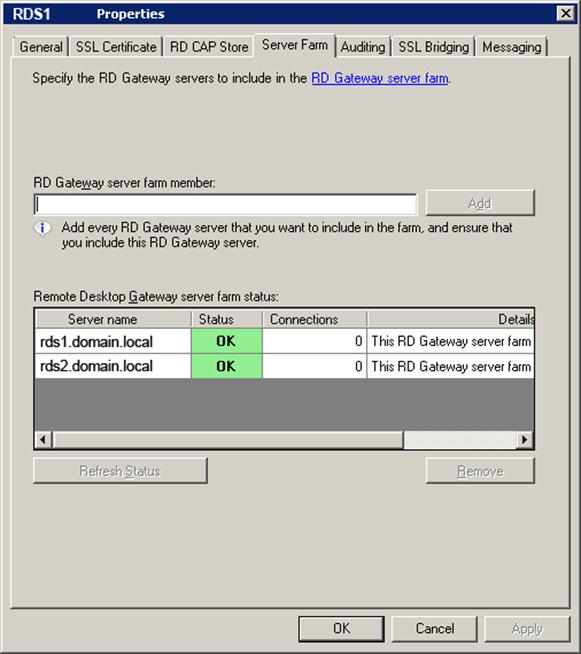
Go to the Server Farm tab, where we will add our RDS1 server to the gateway farm:
Please note that at this stage the status field does not have to have the “OK” status.
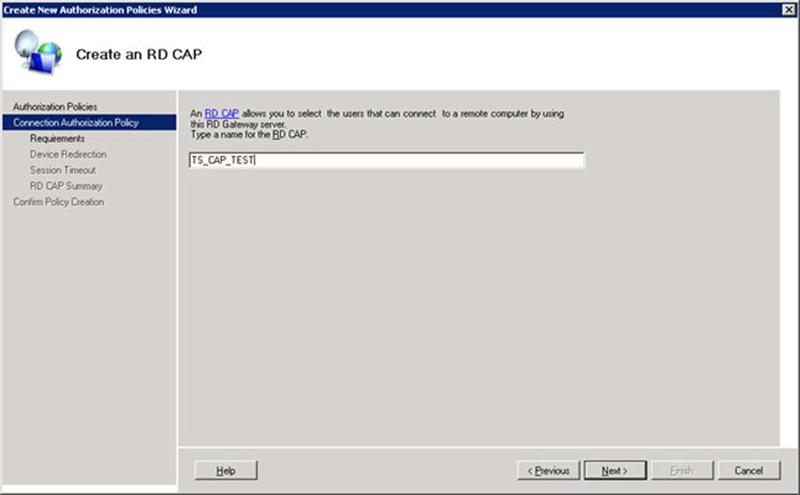
1.7 Go to the Remote Desktop Services - RD Gateway Manager - RDS1 (Local) - Policies - Connection Authorization Policies snap-in and create a connection authorization policy using the wizard:
We add the rdg_users group to the list of authorized users to connect to, where we include all those who need access to terminal services.
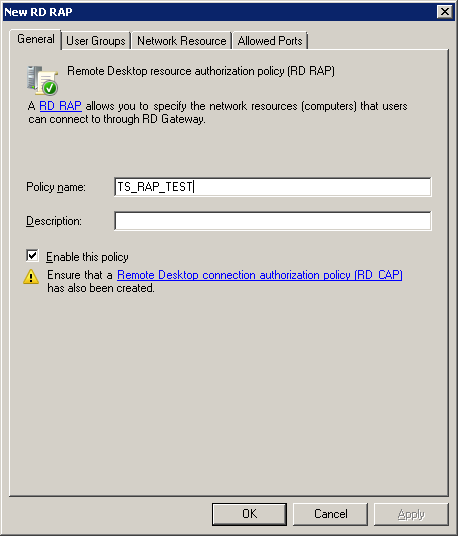
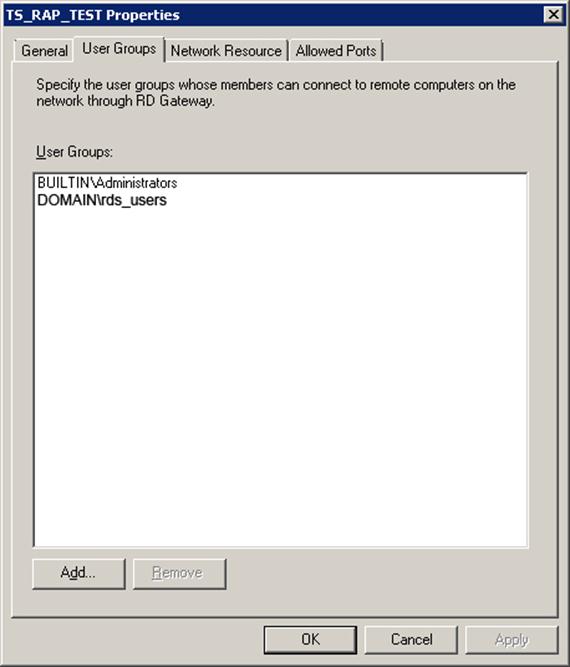
1.8 Go to the Remote Desktop Services - RD Gateway Manager - RDS1 (Local) - Policies - Resource Authorization Policies snap-in and create an application authorization policy bypassing the wizard (Create New Policy - Custom):
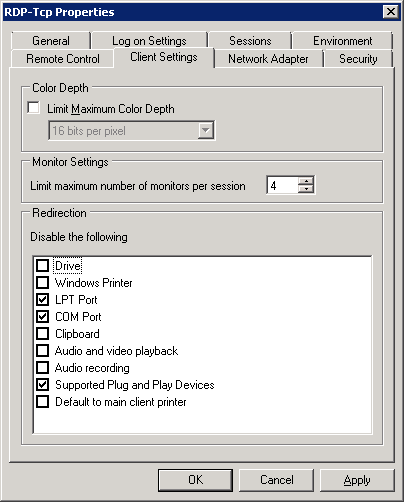
1.9 Go to the Remote Desktop Services - RD Session Host Configuration snap-in and configure the RDP-Tcp connection properties as follows:
We click on the “Select” button and specify the certificate with the Common Name of our farm - RDFarm.domain.local (it has already been installed on the server in paragraph 1.4).
The remaining parameters are not configurable.
Here, in the RD Session Host Configuration, we configure the licensing parameters.
1.10 To verify the correct configuration of the RemoteApp application, go to the localhost / RDWeb address
2. Installing terminal services on the RDS2 server.
2.1 Add the roles of “Remote Desktop Services” and “Network Policy and Access Services”. We select the following role services for installation:
- Remote Desktop Session Host (Remote Desktop Session Host)
- Remote Desktop Gateway
(Remote Desktop Web Access)
- Network Desktop Remote Access (NPS) - Network Policy Server (NPS)
When installing services, check “Require” NLA ”, we will configure other settings later. We reboot the server at the first request.
2.2 We configure the second RDS2 server in exactly the same way as our first server was configured, except that we do not need to request certificates anymore - they must be imported from the RDS1 server. To import certificates, run mmc and add the Certificates (computer account) snap-in:
Specify the path to the pfx files containing the certificates and import them into the personal certificates of the RDS2 computer.
3. Creating and configuring a terminal farm.
3.1 Install the RD Connection Broker role on the BROKER server.
3.2 Add the RDS1 and RDS2 servers to the local Session Broker Computers group on the BROKER server.
3.3 Add all three of our servers to the local TS Web Access Computers group on the RDS1 and RDS2 servers
3.4 On the BROKER server, add our RDS1 and RDS2 servers to the RD Web Access group (Admin Tools> Remote Desktop Services> Remote Desktop Connection Manager> Add RD Web Access Server).
3.5 First, on the RDS1 server, and then on RDS2, go to Remote Desktop Services> Remote Desktop Session Host Configuration and change the RD Connection Broker settings:
3.6 We configure remote applications RemoteApp to work with our farm. To do this, on the RDS1 and RDS2 servers, go to Remote Desktop Services> RemoteApp Manager and change the Server Name parameter:
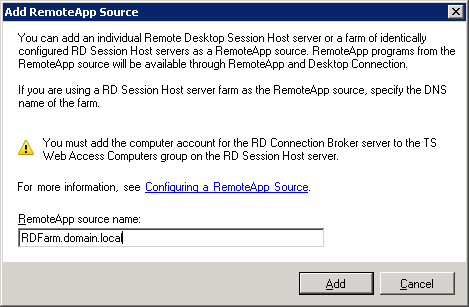
3.7 On the BROKER server, go to Remote Desktop Services> Remote Desktop Connection Manager> RemoteApp Sources and click the "Add RemoteApp Source ..." button:
We add all our possible RemoteApp resources: RDFarm.domain.local, RDS1.domain.local, RDS2.domain.local and RDS.domain.ru.
3.8 Create an NLB cluster.
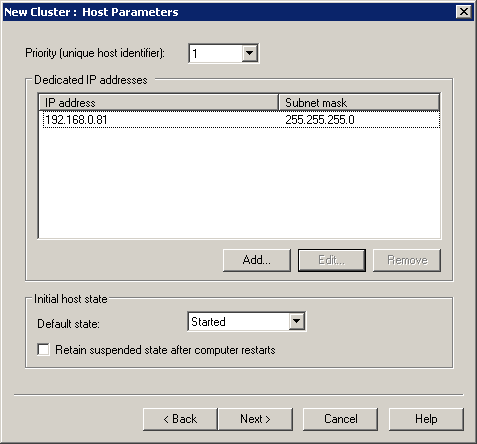
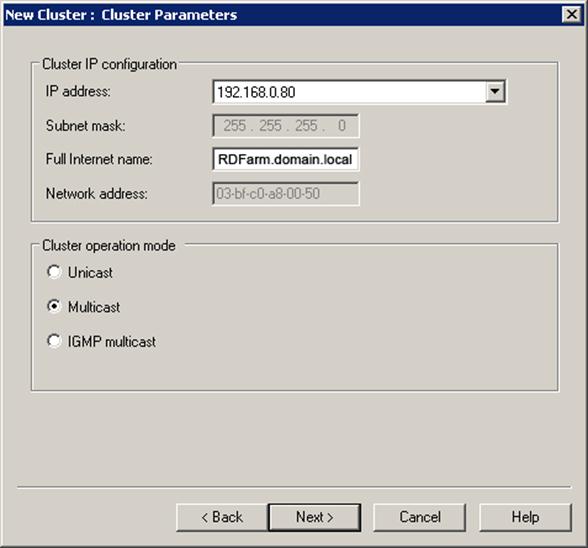
3.8.1 Install the Network Load Balancing component on the RDS1 and RDS2 servers. Next, open the Network Load Balancing Manager snap-in on the RDS1 server and create a cluster:
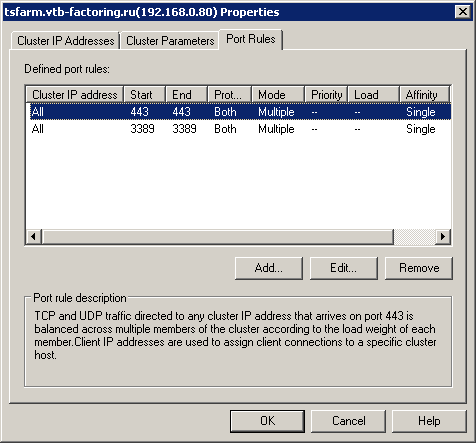
We include only 443 and 3389 TCP ports in the balancing.
3.8.2 Добавляем второй компьютер (RDS2) в NLB кластер
3.9 Удостоверяемся, что на серверах RDS1 и RDS2, в свойствах сервера RD Gateway Manager на закладке Server Farm указаны оба наших сервера:
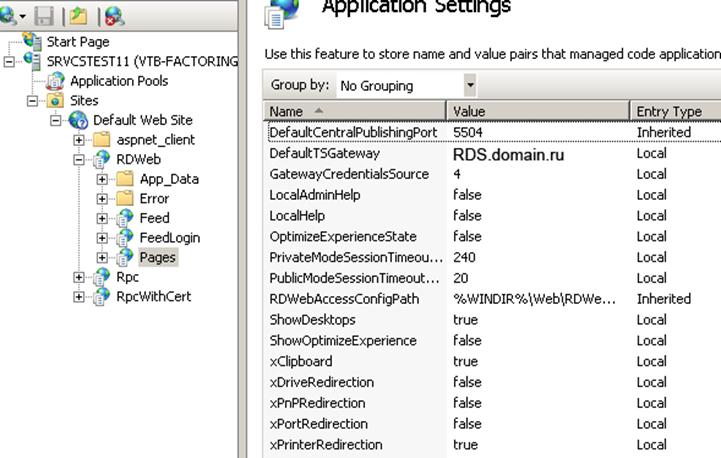
3.10 На серверах RDS1 и RDS2 заходим в оснастку IIS Manager, далее Sites – Default Web Site – RDWeb – Pages и справа жмем Application Settings, где присваиваем параметру DefaultTSGateway значение RDS.domain.ru:
4. Публикация фермы RemoteApp приложений на ISA Server.
First you need to install our certificate with the Common Name "RDS.domain.ru" on the ISA server (this can be done in the same way as in the case of the RDS2 server, when we transferred the certificate to it with RDS1).
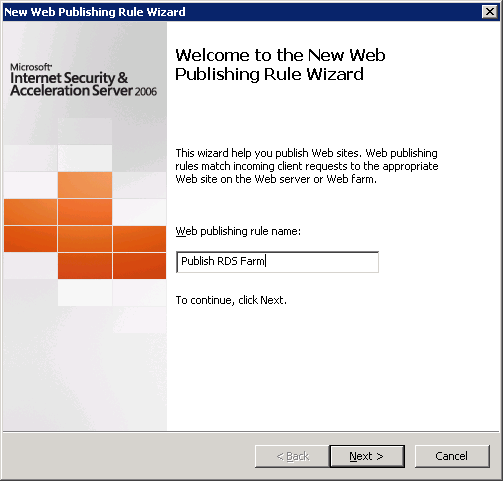
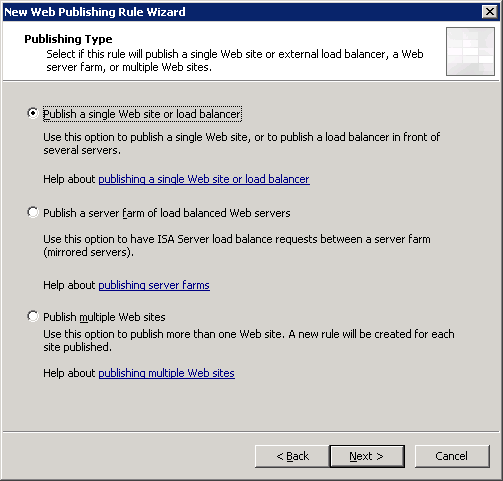
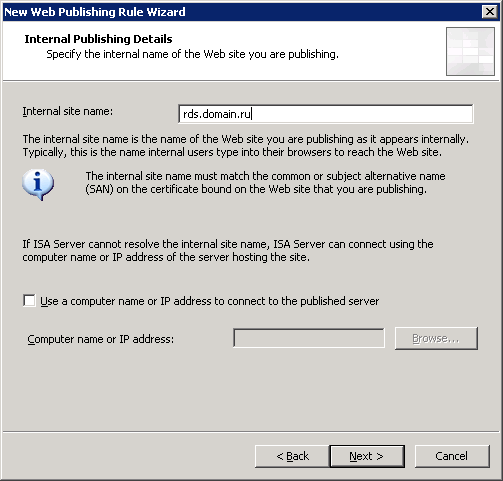
I will not consider this section in too much detail, but I will manage with only the most important screenshots with the settings for the publishing rule and the creation of a WEB listener:
Thank you for your attention.