September 13, 2011 at 21:09
Realistic landscape in Ogre 3D
Hey.
Having read some interesting articles on the Haber about one of the most powerful rendering engines Ogre3D , I decided to share my experience in modeling using it a realistic landscape with atmospheric effects, a water surface and lush vegetation. Under the cut - the recipe for screwing to Ogre all the libraries necessary for this.
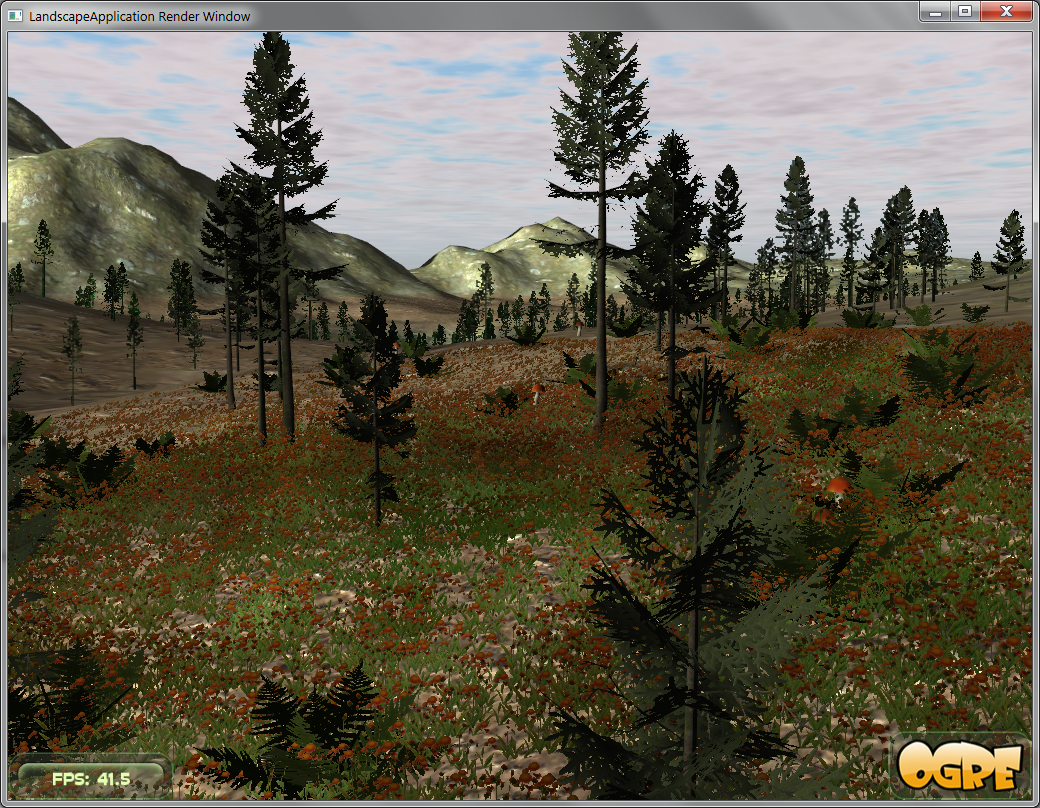
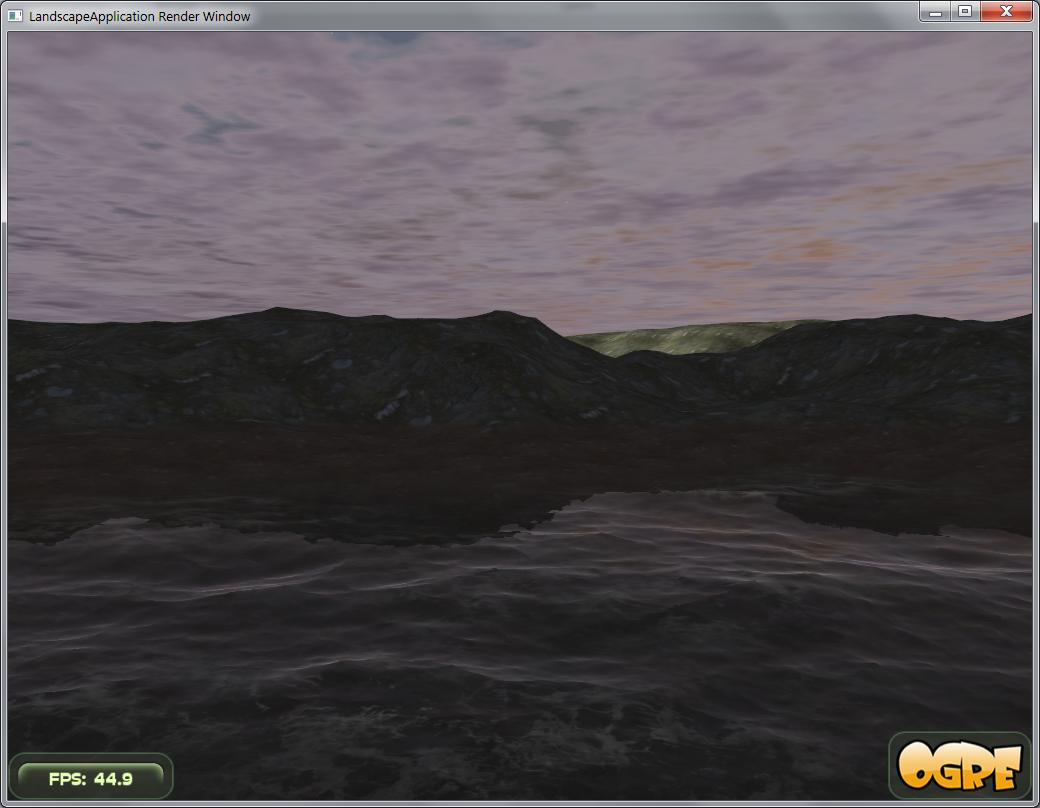
Looking ahead, the end result looks like this: Required libraries include:
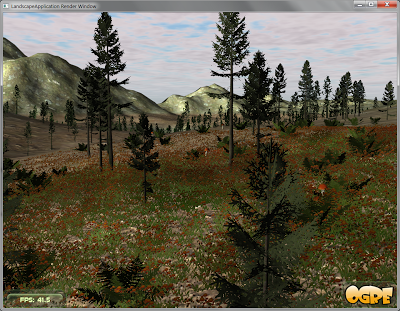
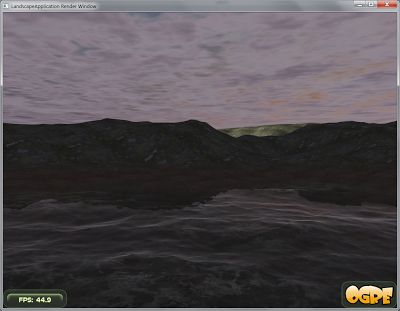
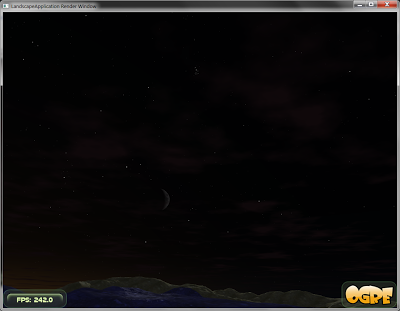
As the application’s skeleton, we will use the slightly modified Ogre Wiki Tutorial Framework - a common framework for guides from the ogre-wiki, since it is flexible enough to create applications of small complexity; in addition, it includes quite a lot of functionality, in particular, the movement of the camera along the WASD keys, mouse review, FPS counter and other useful things. For compilation, I used Microsoft Visual C ++ 2008 and the CMake build system (the latter will allow you to compile the project under any architecture supported by Ogre).
I posted all the sources on Github (however, in order not to mess with git, you can download them at this address). For compilation, you will need the branch 1.7 pre-assembled by the 2008th studio Ogre andCMake ; in order for the latter to correctly locate Ogre, you must add an environment variable
In addition, to run the test application, you will need two archives: media.zip with textures, models and other necessary things, it will need to be unpacked directly into the project directory; and configs.zip , which contains Ogre configuration files - you need to unzip it into the assembly directory.
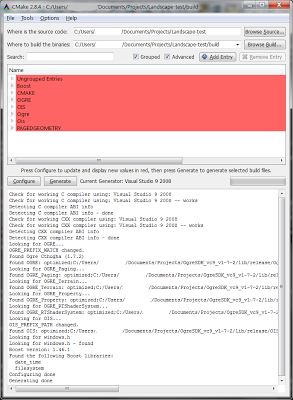
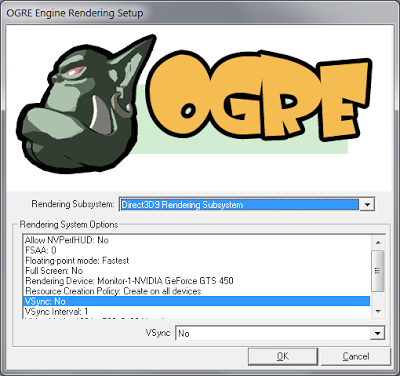
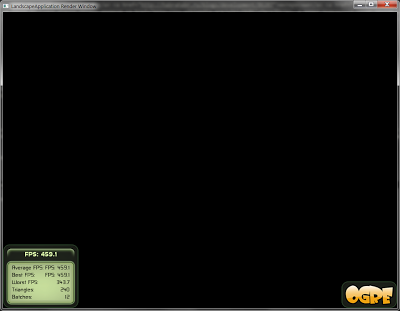
To compile the project, first run the CMake GUI and in the field “Where is the source code” select the directory with the project, and in the field “Where to build the binaries” - arbitrary, for example, you can select the build subdirectory of the project directory. Then press the buttonConfigure , select Visual Studio 2008 in the list of compilers, and if everything went fine and CMake did not swear at the absence of anything, click Generate : As a result, the Visual Studio LandscapeApp.sln solution file appears in the build directory, which you can work directly with - make changes to the code, compile and run the test project. Actually, after compilation and launch, we are greeted by the standard window for selecting the Ogre rendering subsystem: Having selected, for example, Direct3D9 Rendering Subsystem as such, click OK and we will see a black window with a lonely FPS counter, which is obviously off-scale - still, the scene is empty. By the way, the counter can be collapsed / expanded with the F key so that it does not interfere.
Well, as one famous politician said, “The main thing is to start!”
Caelum is an Ogre plugin distributed under the GNU Lesser GPL license for creating photorealistic atmospheric effects, such as the color of the sky, the sun, the moon and stars, taking into account the current time and observer coordinates, clouds, weather phenomena (rain, snow, fog), etc. d.
We’ll download the latest version of Caelum from the repository on Google Code , because, judging by the messages on the forum , this project has a new maintainer and there is a certain movement - new features are added to the project and old errors are fixed: To make it more convenient, I copied all the necessary sources to the tree test project, making minor changes to fix compiler warnings. Caelum authors use the CMake build system, so adding it to our build system is limited to the line
in the CMakeLists.txt file, by adding subdirectories
The code itself will need a little more change. To get started, include the Caelum header file in our main LandscapeApplication.hpp header file:
and include the appropriate namespace in the LandscapeApplication.cpp source code file:
Further, Caelum itself is a set of separate components for rendering the sky and atmosphere, which are controlled by the root class
And we will call the constructor in the method
The most important is the last parameter, which is a bitmask indicating which Caelum components we will use.
Render Target Listener Ogre:
Voila - we are greeted by a blue sky with a slowly declining sun, rare clouds and gray fog: We’ll tweak some of Caelum’s parameters for greater entertainment:
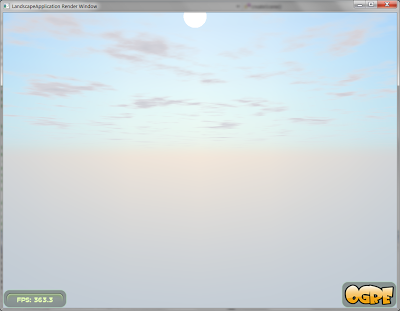
As a result, the sky looks like this: It's time to add the surface of the earth to our application so that the sun and moon have where to go.
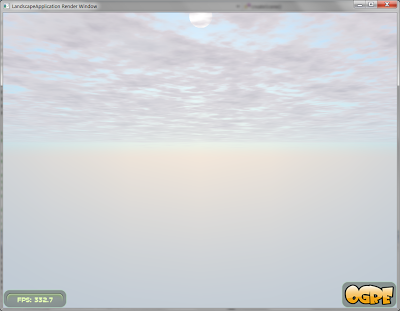

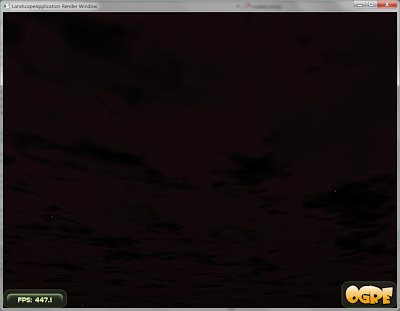
We will use the native Ogre terrain rendering subsystem ( Ogre Terrain System ) to add the earth's surface to our application. This system was created in 2009 by the creator of Ogre Steve Street to replace obsolete terrain rendering add-ons and is a completely separate optional component (nevertheless, from version 1.7 included in the Ogre delivery). The Ogre Terrain System includes everything you need to create small test applications like ours, and for huge worlds loaded into RAM with separate small pieces of pages - you can read more about this on the ogre forum, for example, here ; moreover, one of the GSoC'11 projects is improving the page loading mechanism.
First of all, let us know CMake about our intentions: in the CMakeLists.txt file, add
Now we’ll add to the method a
And, of course, add pointers
If no special parameters are specified, then the page with the coordinate (0, 0) will be loaded from the terrain_00000000.dat file, which I added to the above media.zip archive .
The result is not long in coming:
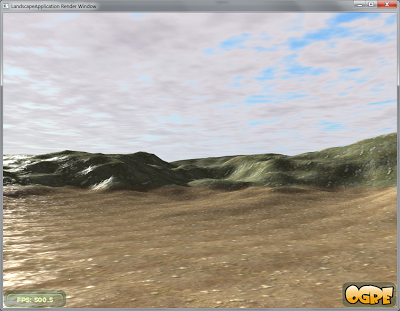
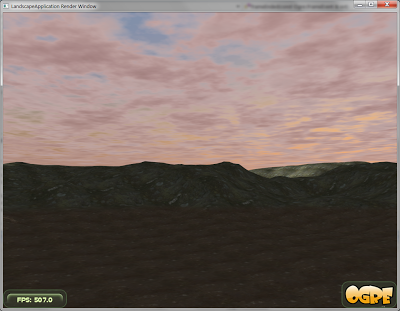
The most widely used library for rendering water surface using a projection grid in Ogre - Hydrax, is licensed under the GNU Lesser GPL.
Download from here (link at the bottom of the first post) archive, for further work you will need the Hydrax-v0.5.1 / Hydrax / src / Hydrax directory from it, which I copied into the tree of the test project.
Unfortunately, Hydrax does not support the CMake build system, so I had to write a Hydrax / CMakeLists.txt file for it, which, however, is only a little more complicated than simply listing the source and header files. To integrate Hydrax into the build system, mainly CMakeLists.txt, you need to add the following:
Next, to add water effects to our application, you need a properly initialized instance of the class
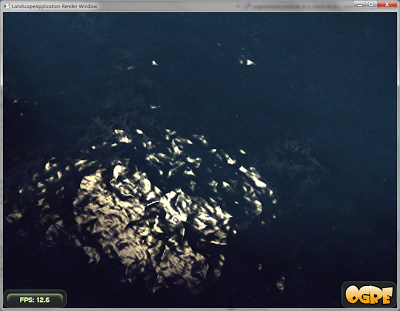
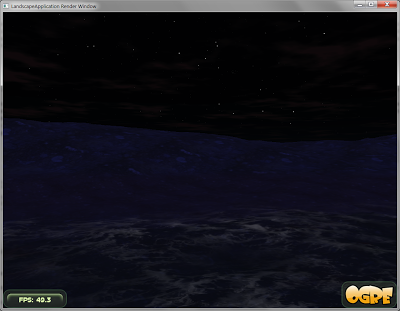
By launching our application, we observe an unexpected picture: Instead of water, some ink. What happened? The fact is that Caelum adjusts the fog related Ogre options so that they are most consistent with the atmospheric model used by Caelum. However, these options prevent the water from Hydrax from rendering properly. Twisting the Caelum options a little (namely, saying , i.e. reducing the density of the fog), you can make sure that the water created by Hydrax is actually in place: A careful adjustment of the fog parameters is beyond the scope of this article, so in our test application just turn off the fog:


Тут нас поджидает следующая неожиданность:

Такая нелицеприятная картина — результат того, что ландшафт, добавленный нами на третьем шаге, не является обычным объектом (entity) Ogre, поэтому Hydrax не учитывает его при расчёте водной поверхности. Для исправления этой ситуации достаточно добавить технику глубины в материал ландшафта:
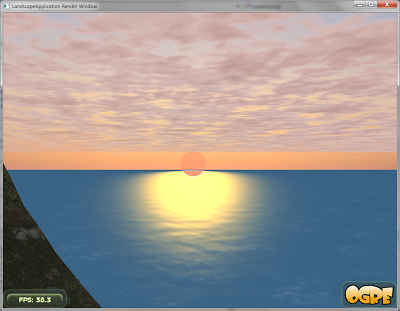
As a result, we get the following eye-pleasing picture: After carefully observing our application, we can conclude that Caelum and Hydrax do not even know about each other's existence - for example, after sunset and before the moon rises, caustics remain on the water , which physically does not can: In addition, the location of the sun glare on the water does not correspond to the actual position of the sun, moreover, the glare remains even after sunset: To solve this problem, we will use a slightly modified code responsible for C integration aelum and Hydrax, from the above Ogitor editor:


As a result, we get a romantic sunset and ... a couple of new artifacts: Firstly, when the camera moves on the horizon, long white stripes appear or disappear. This occurs because the water surface intersects the far clipping plane ( far clipping plane ) close enough that produces visible artifacts. The solution to this problem is nowhere simpler, just increase the distance to this plane:
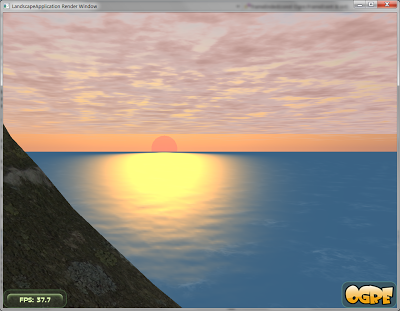
Secondly, the lower part of the sun, "gone" under the water, which should not be visible at all, has white edges that are striking. The root of this problem is the same as the landscape problem: the sun (and moon) are not ordinary Ogre objects; to fix it, you also need to add the depth technique to the material of these objects. The best place for this is the Sun.material and moon.material files in the media / Caelum directory; it is necessary to add the following paragraph to each material described in these files:
The media_fixed.zip archive with all necessary corrections can be downloaded here . After starting the application with them, everything falls into place:
The final touch is to add some flora to our cozy landscape. The Ogre Paged Geometry Engine library is the best suited for this, because it allows you to render huge quantities of small meshes at large distances, which is especially valuable for building, for example, a forest scene with trees, bushes, grass, stones, and so on and so forth. This library is distributed under one of the most liberal among free licenses - MIT (like Ogre itself).
The latest version of Paged Geometry can be downloaded at this address., again, I copied all the necessary files to the source tree of the test project. The library supports CMake, so in our CMakeLists.txt you need to add only a few lines: the location of the header files, the location of the library file and the location of the library source itself:
Further, in our application, we restrict ourselves to adding three types of objects:
To do this, add pointers to instances of the key class
Then we initialize these pointers with zeros, changing the constructor
In addition, we need a function that returns the height of the landscape at a point with the given x and z coordinates; By invoking this function, Paged Geometry will correctly arrange all its props on the ground. It will be the function that is needed, not the class method, because a pointer is implicitly passed to the class methods
Since this variable is initially equal
Finally, now you can add the initialization code of all the objects we need to the method
... and the finalization code to the destructor
(without this code, the application will crash with an error on exit).
Well and most importantly,
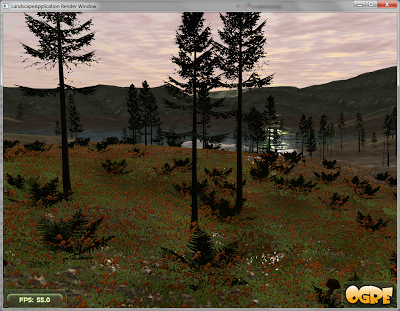
By launching the application, we can observe the pastoral forest landscape: ... well, no pitfalls await us here. The only thing worth paying attention to is the performance drop: despite a lot of techniques for improving performance (starting from the banal LOD

and ending with a pagination mechanism similar to that in the landscape subsystem and replacing real trees with sprites at large distances), Paged Geometry still requires careful adjustment of the number of displayed vegetation instances and image quality. Here again, we can recommend using the Ogitor editor, which has Paged Geometry support, making it easy to sketch vegetation in the right places (something like brushing with Paint) and adjust all the necessary parameters.
A fully compiled and ready to run test project can be downloaded here .
In gratitude to everyone who read to this place - a couple more nice screenshots:

And the video (it wasn’t made by me, but it was created using the libraries in question - Ogre, Hydrax and Caelum):
I also want to express my gratitude to habrayuzer Sergey ViruScD for help in preparing the article, Andrei engine9 for help in working with the Ogre engine and the creators of dumpz.org for excellent syntax highlighting.
UPD : Retook the screenshots with anti-aliasing enabled , thanks m1el for the comment.
Having read some interesting articles on the Haber about one of the most powerful rendering engines Ogre3D , I decided to share my experience in modeling using it a realistic landscape with atmospheric effects, a water surface and lush vegetation. Under the cut - the recipe for screwing to Ogre all the libraries necessary for this.
Looking ahead, the end result looks like this: Required libraries include:

- Caelum for atmospheric effects, namely sky and clouds;
- Hydrax for the water surface;
- Paged Geometry for vegetation, including, but not limited to trees, bushes, and grass.
Step One: Application Skeleton
As the application’s skeleton, we will use the slightly modified Ogre Wiki Tutorial Framework - a common framework for guides from the ogre-wiki, since it is flexible enough to create applications of small complexity; in addition, it includes quite a lot of functionality, in particular, the movement of the camera along the WASD keys, mouse review, FPS counter and other useful things. For compilation, I used Microsoft Visual C ++ 2008 and the CMake build system (the latter will allow you to compile the project under any architecture supported by Ogre).
I posted all the sources on Github (however, in order not to mess with git, you can download them at this address). For compilation, you will need the branch 1.7 pre-assembled by the 2008th studio Ogre andCMake ; in order for the latter to correctly locate Ogre, you must add an environment variable
OGRE_HOMEequal to the directory in which it is installed. In addition, to run the test application, you will need two archives: media.zip with textures, models and other necessary things, it will need to be unpacked directly into the project directory; and configs.zip , which contains Ogre configuration files - you need to unzip it into the assembly directory.
To compile the project, first run the CMake GUI and in the field “Where is the source code” select the directory with the project, and in the field “Where to build the binaries” - arbitrary, for example, you can select the build subdirectory of the project directory. Then press the buttonConfigure , select Visual Studio 2008 in the list of compilers, and if everything went fine and CMake did not swear at the absence of anything, click Generate : As a result, the Visual Studio LandscapeApp.sln solution file appears in the build directory, which you can work directly with - make changes to the code, compile and run the test project. Actually, after compilation and launch, we are greeted by the standard window for selecting the Ogre rendering subsystem: Having selected, for example, Direct3D9 Rendering Subsystem as such, click OK and we will see a black window with a lonely FPS counter, which is obviously off-scale - still, the scene is empty. By the way, the counter can be collapsed / expanded with the F key so that it does not interfere.


Well, as one famous politician said, “The main thing is to start!”
Step Two: Heaven
Caelum is an Ogre plugin distributed under the GNU Lesser GPL license for creating photorealistic atmospheric effects, such as the color of the sky, the sun, the moon and stars, taking into account the current time and observer coordinates, clouds, weather phenomena (rain, snow, fog), etc. d.
We’ll download the latest version of Caelum from the repository on Google Code , because, judging by the messages on the forum , this project has a new maintainer and there is a certain movement - new features are added to the project and old errors are fixed: To make it more convenient, I copied all the necessary sources to the tree test project, making minor changes to fix compiler warnings. Caelum authors use the CMake build system, so adding it to our build system is limited to the line
hg clone https://code.google.com/p/caelum
add_subdirectory(Caelum)
in the CMakeLists.txt file, by adding subdirectories
Caelum/main/includeand ${CMAKE_BINARY_DIR}/Caelum/main/includeto the list of included directories through the command include_directories, and adding Caelum to the list of linked libraries through the command target_link_libraries:The code
include_directories( ${OIS_INCLUDE_DIRS}

    ${OGRE_INCLUDE_DIRS}

    ${OGRE_SAMPLES_INCLUDEPATH}

    "Caelum/main/include"

    "${CMAKE_BINARY_DIR}/Caelum/main/include"
# ...
target_link_libraries(LandscapeApp ${OGRE_LIBRARIES} ${OIS_LIBRARIES} Caelum)
The code itself will need a little more change. To get started, include the Caelum header file in our main LandscapeApplication.hpp header file:
#include
and include the appropriate namespace in the LandscapeApplication.cpp source code file:
using namespace Caelum;
Further, Caelum itself is a set of separate components for rendering the sky and atmosphere, which are controlled by the root class
CaelumSystem. This class controls all components and update ( the update ) their internal state if necessary. Let's create an instance of this class, for this we add a pointer to it in our root class LandscapeApplication:The code
class LandscapeApplication : public BaseApplication

{
// ...
protected:

    virtual void createScene(void);

    Caelum::CaelumSystem* mCaelumSystem;

};
And we will call the constructor in the method
createScene:void LandscapeApplication::createScene(void)
{
mCaelumSystem = new CaelumSystem(mRoot, mSceneMgr, CaelumSystem::CAELUM_COMPONENTS_DEFAULT);
The most important is the last parameter, which is a bitmask indicating which Caelum components we will use.
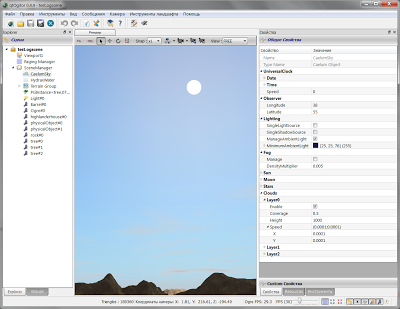
CAELUM_COMPONENTS_DEFAULT- The default set, it includes all stable components. CaelumSystemand its components have a huge number of settings, most of which are available from the code in the form of methods get/setand described in the documentation ; another, more obvious way of tuning is the 3D-editor Ogitor , created specifically for Ogre and supporting all the libraries described in this article (and some not described):
Final touch - to change the atmospheric effects over time, you need to update Caelum every frame; just add our CaelumSystem instance to the Frame Listener lists and
Render Target Listener Ogre:
    mCaelumSystem = new CaelumSystem(mRoot, mSceneMgr, CaelumSystem::CAELUM_COMPONENTS_DEFAULT);

    mRoot->addFrameListener(mCaelumSystem);

    mWindow->addListener(mCaelumSystem);
Voila - we are greeted by a blue sky with a slowly declining sun, rare clouds and gray fog: We’ll tweak some of Caelum’s parameters for greater entertainment:

The code
    // ...
    mWindow->addListener(mCaelumSystem);


    mCaelumSystem->getUniversalClock()->setTimeScale(100); // ускорим смену времени суток
    FlatCloudLayer* cloudLayer = // добавим ещё один слой облаков,
        mCaelumSystem->getCloudSystem()->createLayer(); // зададим:
    cloudLayer->setCloudCover(0.8f); //  плотность
    cloudLayer->setCloudSpeed(Vector2(0.0001f, 0.0001f)); //  скорость
    cloudLayer->setHeight(5000); //  и высоту
As a result, the sky looks like this: It's time to add the surface of the earth to our application so that the sun and moon have where to go.


Step Three: Earth
We will use the native Ogre terrain rendering subsystem ( Ogre Terrain System ) to add the earth's surface to our application. This system was created in 2009 by the creator of Ogre Steve Street to replace obsolete terrain rendering add-ons and is a completely separate optional component (nevertheless, from version 1.7 included in the Ogre delivery). The Ogre Terrain System includes everything you need to create small test applications like ours, and for huge worlds loaded into RAM with separate small pieces of pages - you can read more about this on the ogre forum, for example, here ; moreover, one of the GSoC'11 projects is improving the page loading mechanism.
First of all, let us know CMake about our intentions: in the CMakeLists.txt file, add
${OGRE_Terrain_LIBRARIES}to the list of linked libraries through the command target_link_libraries:target_link_libraries(LandscapeApp ${OGRE_LIBRARIES} ${OGRE_Terrain_LIBRARIES} ${OIS_LIBRARIES} Caelum)
Now we’ll add to the method a
LandscapeApplication::createScenecode for loading one page of terrain (I’ve taken from the Ogre Terrain example), which almost matches the code from Ogre Basic Tutorial 3 :The code
mCamera->setPosition(Vector3(1683, 50, 2116)); // направляем камеру
mCamera->lookAt(Vector3(1963, 50, 1660));


Vector3 lightdir(0.55f, -0.3f, 0.75f); // свет для статического освещения местности
lightdir.normalise();

Light* light = mSceneMgr->createLight("tstLight");

light->setType(Light::LT_DIRECTIONAL);

light->setDirection(lightdir);

light->setDiffuseColour(ColourValue::White);

light->setSpecularColour(ColourValue(0.4f, 0.4f, 0.4f));


mTerrainGlobals = OGRE_NEW TerrainGlobalOptions; // глобальные настройки местности
mTerrainGroup = OGRE_NEW TerrainGroup(mSceneMgr, // группа страниц местности
    Terrain::ALIGN_X_Z, 513, 12000);

mTerrainGroup->setOrigin(Vector3::ZERO);

mTerrainGlobals->setLightMapDirection(light->getDerivedDirection());

mTerrainGlobals->setCompositeMapAmbient(mSceneMgr->getAmbientLight());

mTerrainGlobals->setCompositeMapDiffuse(light->getDiffuseColour());

mSceneMgr->destroyLight("tstLight");


mTerrainGroup->defineTerrain(0, 0); // обозначаем наше намерение загрузить страницу с координатой (0, 0)
mTerrainGroup->loadAllTerrains(true); // собственно, загружаем все запрошенные страницы в синхронном режиме
mTerrainGroup->freeTemporaryResources(); // прибираемся
And, of course, add pointers
mTerrainGlobalsand to our main class mTerrainGroup:The code
#include

#include

class LandscapeApplication : public BaseApplication

{
// ...
protected:

    // ...
    Ogre::TerrainGlobalOptions* mTerrainGlobals;

    Ogre::TerrainGroup* mTerrainGroup;

};
If no special parameters are specified, then the page with the coordinate (0, 0) will be loaded from the terrain_00000000.dat file, which I added to the above media.zip archive .
The result is not long in coming:


Step Four: Water
The most widely used library for rendering water surface using a projection grid in Ogre - Hydrax, is licensed under the GNU Lesser GPL.
Download from here (link at the bottom of the first post) archive, for further work you will need the Hydrax-v0.5.1 / Hydrax / src / Hydrax directory from it, which I copied into the tree of the test project.
Unfortunately, Hydrax does not support the CMake build system, so I had to write a Hydrax / CMakeLists.txt file for it, which, however, is only a little more complicated than simply listing the source and header files. To integrate Hydrax into the build system, mainly CMakeLists.txt, you need to add the following:
The code
include_directories(

    # ...
    "Hydrax"

)

add_subdirectory(Hydrax)
# ...
target_link_libraries(LandscapeApp ${OGRE_LIBRARIES} ${OGRE_Terrain_LIBRARIES} ${OIS_LIBRARIES} Caelum Hydrax)
Next, to add water effects to our application, you need a properly initialized instance of the class
Hydrax::Hydrax:The code
// в файле LandscapeApplication.hpp
class LandscapeApplication : public BaseApplication

{
// ...
protected:

    // ...
    Hydrax::Hydrax* mHydrax;

};

// в файле LandscapeApplication.cpp
void LandscapeApplication::createScene(void)

{

    // ...
    mHydrax = new Hydrax::Hydrax(mSceneMgr, mCamera, mWindow->getViewport(0));

    Hydrax::Module::ProjectedGrid* mModule = new Hydrax::Module::ProjectedGrid( // модуль проекционной сетки
            mHydrax,  // указатель на главный класс Hydrax
            new Hydrax::Noise::Perlin(/* без особых параметров */),  // модуль для создания ряби
            Ogre::Plane(Ogre::Vector3(0,1,0), Ogre::Vector3(0,0,0)),  // водная поверхность
            Hydrax::MaterialManager::NM_VERTEX,  // режим карты нормалей
            Hydrax::Module::ProjectedGrid::Options(64));  // опции сетки
    mHydrax->setModule(mModule);

    mHydrax->loadCfg("HydraxDemo.hdx");

    mHydrax->create();

}
By launching our application, we observe an unexpected picture: Instead of water, some ink. What happened? The fact is that Caelum adjusts the fog related Ogre options so that they are most consistent with the atmospheric model used by Caelum. However, these options prevent the water from Hydrax from rendering properly. Twisting the Caelum options a little (namely, saying , i.e. reducing the density of the fog), you can make sure that the water created by Hydrax is actually in place: A careful adjustment of the fog parameters is beyond the scope of this article, so in our test application just turn off the fog:

mCaelumSystem->setGlobalFogDensityMultiplier(0.01)
void LandscapeApplication::createScene(void)

{

    // ...
    cloudLayer->setHeight(5000);

    mCaelumSystem->setManageSceneFog(Ogre::FOG_NONE);
Тут нас поджидает следующая неожиданность:

Такая нелицеприятная картина — результат того, что ландшафт, добавленный нами на третьем шаге, не является обычным объектом (entity) Ogre, поэтому Hydrax не учитывает его при расчёте водной поверхности. Для исправления этой ситуации достаточно добавить технику глубины в материал ландшафта:
void LandscapeApplication::createScene(void)

{

    // ...
    mHydrax->create();


    mHydrax->getMaterialManager()->addDepthTechnique(

        mTerrainGroup->getTerrain(0, 0)->getMaterial()->createTechnique());
As a result, we get the following eye-pleasing picture: After carefully observing our application, we can conclude that Caelum and Hydrax do not even know about each other's existence - for example, after sunset and before the moon rises, caustics remain on the water , which physically does not can: In addition, the location of the sun glare on the water does not correspond to the actual position of the sun, moreover, the glare remains even after sunset: To solve this problem, we will use a slightly modified code responsible for C integration aelum and Hydrax, from the above Ogitor editor:


Cat
// в файле LandscapeApplication.hpp
class LandscapeApplication : public BaseApplication

{
// ...
protected:

    virtual bool frameEnded(const Ogre::FrameEvent& evt);

    Ogre::Vector3 mOriginalWaterColor;

// в файле LandscapeApplication.cpp
void LandscapeApplication::createScene(void)

{

    // ...
    mHydrax->loadCfg("HydraxDemo.hdx");

    mOriginalWaterColor = mHydrax->getWaterColor();

    // ...


bool LandscapeApplication::frameEnded(const Ogre::FrameEvent& evt)

{

    Vector3 value = mCaelumSystem->getSun()->getSceneNode()->_getDerivedPosition();

    ColourValue cval = mCaelumSystem->getSun()->getBodyColour();

    mHydrax->setSunPosition(value);

    mHydrax->setSunColor(Vector3(cval.r,cval.g,cval.b));

    Caelum::LongReal mJulian = mCaelumSystem->getUniversalClock()->getJulianDay();

    cval = mCaelumSystem->getSunLightColour(mJulian,

        mCaelumSystem->getSunDirection(mJulian));

    mHydrax->setWaterColor(Vector3(cval.r - 0.3, cval.g - 0.2, cval.b));

    Vector3 col = mHydrax->getWaterColor();

    float height = mHydrax->getSunPosition().y / 10.0f;

    Hydrax::HydraxComponent c = mHydrax->getComponents();

    if(height < 0)

    {

        if(mHydrax->isComponent(Hydrax::HYDRAX_COMPONENT_CAUSTICS))

            mHydrax->setComponents(Hydrax::HydraxComponent(

                c ^ Hydrax::HYDRAX_COMPONENT_CAUSTICS));

    } else {

        if(!mHydrax->isComponent(Hydrax::HYDRAX_COMPONENT_CAUSTICS))

            mHydrax->setComponents(Hydrax::HydraxComponent(

                c | Hydrax::HYDRAX_COMPONENT_CAUSTICS));

    }

    if(height < -99.0f)

    {

        col = mOriginalWaterColor * 0.1f;

        height = 9999.0f;

    }

    else if(height < 1.0f)

    {

        col = mOriginalWaterColor * (0.1f + (0.009f * (height + 99.0f)));

        height = 100.0f / (height + 99.001f);

    }

    else if(height < 2.0f)

    {

        col += mOriginalWaterColor;

        col /= 2.0f;

        float percent = (height - 1.0f);

        col = (col * percent) + (mOriginalWaterColor * (1.0f - percent));

    }

    else

    {

        col += mOriginalWaterColor;

        col /= 2.0f;

    }

    mHydrax->setWaterColor(col);

    mHydrax->setSunArea(height);

    mHydrax->update(evt.timeSinceLastFrame);

    return true;

}
As a result, we get a romantic sunset and ... a couple of new artifacts: Firstly, when the camera moves on the horizon, long white stripes appear or disappear. This occurs because the water surface intersects the far clipping plane ( far clipping plane ) close enough that produces visible artifacts. The solution to this problem is nowhere simpler, just increase the distance to this plane:

mCamera->setFarClipDistance(1000000);
Secondly, the lower part of the sun, "gone" under the water, which should not be visible at all, has white edges that are striking. The root of this problem is the same as the landscape problem: the sun (and moon) are not ordinary Ogre objects; to fix it, you also need to add the depth technique to the material of these objects. The best place for this is the Sun.material and moon.material files in the media / Caelum directory; it is necessary to add the following paragraph to each material described in these files:
    technique HydraxDepth

    {

        scheme HydraxDepth

        pass

        {

            lighting off

            texture_unit

            {

                colour_op_ex modulate src_manual src_current 0 0 0

            }

        }

    }
The media_fixed.zip archive with all necessary corrections can be downloaded here . After starting the application with them, everything falls into place:

Step Five: Vegetation
The final touch is to add some flora to our cozy landscape. The Ogre Paged Geometry Engine library is the best suited for this, because it allows you to render huge quantities of small meshes at large distances, which is especially valuable for building, for example, a forest scene with trees, bushes, grass, stones, and so on and so forth. This library is distributed under one of the most liberal among free licenses - MIT (like Ogre itself).
The latest version of Paged Geometry can be downloaded at this address., again, I copied all the necessary files to the source tree of the test project. The library supports CMake, so in our CMakeLists.txt you need to add only a few lines: the location of the header files, the location of the library file and the location of the library source itself:
include_directories(

     # ...
    "PagedGeometry/include"

    "${CMAKE_BINARY_DIR}/PagedGeometry/include"

# ...
add_subdirectory(PagedGeometry)
# ...
target_link_libraries(LandscapeApp ${OGRE_LIBRARIES} ${OGRE_Terrain_LIBRARIES} ${OIS_LIBRARIES}

    Caelum Hydrax PagedGeometry)
Further, in our application, we restrict ourselves to adding three types of objects:
- herbs;
- trees;
- other vegetation (bushes, flowers and mushrooms).
To do this, add pointers to instances of the key class
Forests::PagedGeometry(and auxiliary Forests::GrassLoader) in our main class, not forgetting the necessary files for this:#include
#include
class LandscapeApplication : public BaseApplication
{
// ...
protected:
// ...
Forests::PagedGeometry *grass, *trees, *bushes;
Forests::GrassLoader* grassLoader;
};
Then we initialize these pointers with zeros, changing the constructor
LandscapeApplicationas follows:LandscapeApplication::LandscapeApplication(void) : grass(NULL), trees(NULL), bushes(NULL)
{
}
In addition, we need a function that returns the height of the landscape at a point with the given x and z coordinates; By invoking this function, Paged Geometry will correctly arrange all its props on the ground. It will be the function that is needed, not the class method, because a pointer is implicitly passed to the class methods
this, which the library will simply have nowhere to get from. Therefore, we need a global variable - a pointer to a class that manages a group of landscape pages, for the connection between the landscape itself and our function. Well, we realize our plan:static TerrainGroup* terrainGroup = NULL;
static float getTerrainHeight(float x, float z, void* userData)
{
OgreAssert(terrainGroup, "Terrain isn't initialized");
return terrainGroup->getHeightAtWorldPosition(x, 0, z);
}
Since this variable is initially equal
NULL, it must be initialized with a pointer to an instance of the class TerrainGroup, which we will make the next line after the landscape initialization code in the method createScene: terrainGroup = mTerrainGroup;
Finally, now you can add the initialization code of all the objects we need to the method
createScene:The code
    // трава
    grass = new PagedGeometry(mCamera);

    grass->addDetailLevel(160);  // уровень детализации: не рендерить траву дальше 60 единиц от камеры
    grassLoader = new GrassLoader(grass);

    grass->setPageLoader(grassLoader);

    grassLoader->setHeightFunction(getTerrainHeight); // функция, возвращающая высоту ландшафта в заданной точке
    GrassLayer* l = grassLoader->addLayer("3D-Diggers/plant1sprite");  // добавить слой травы
    l->setMinimumSize(0.9f, 0.9f);  // максимальный...
    l->setMaximumSize(2, 2);  //  ... и минимальный размер
    l->setAnimationEnabled(true);  // включить анимацию
    l->setSwayDistribution(7.0f);  // колебания травы от ветра
    l->setSwayLength(0.1f); // амплитуда колебаний - 0.1 единиц
    l->setSwaySpeed(0.4f);  // скорость колебаний
    l->setDensity(3.0f);  // плотность травы
    l->setRenderTechnique(GRASSTECH_SPRITE);  // рендерим с помощью спрайтов
    l->setFadeTechnique(FADETECH_GROW);  // при движении камеры трава должна медленно подниматься
    l->setColorMap("terrain_texture2.jpg");  // карта распределения цвета
    l->setDensityMap("densitymap.png");  // карта плотности
    l->setMapBounds(TBounds(0, 0, 3000, 3000));  // границы слоя
    // деревья
    trees = new PagedGeometry(mCamera);

    trees->addDetailLevel(150, 30);  // использовать батчинг на расстоянии между 150 и 180 единицами
    trees->addDetailLevel(900, 50);  // заменять модели спрайтами на расстоянии между 900 и 950 единицами
    TreeLoader2D *treeLoader = new TreeLoader2D(trees, TBounds(0, 0, 5000, 5000));

    trees->setPageLoader(treeLoader);

    treeLoader->setHeightFunction(getTerrainHeight);  // функция, возвращающая высоту ландшафта в заданной точке
    treeLoader->setColorMap("terrain_lightmap.jpg");  // карта распределения цвета
    Entity *tree1 = mSceneMgr->createEntity("Tree1", "fir05_30.mesh");  // загрузить модели деревьев
    Entity *tree2 = mSceneMgr->createEntity("Tree2", "fir14_25.mesh");

    trees->setCustomParam(tree1->getName(), "windFactorX", 15);  // параметры ветра
    trees->setCustomParam(tree1->getName(), "windFactorY", 0.01f);

    trees->setCustomParam(tree2->getName(), "windFactorX", 22);

    trees->setCustomParam(tree2->getName(), "windFactorY", 0.013f);

    // распределяем случайным образом 5000 копий деревьев
    Vector3 position = Vector3::ZERO;

    Radian yaw;

    Real scale;

    for (int i = 0; i < 5000; i++)

    {

        yaw = Degree(Math::RangeRandom(0, 360));

        position.x = Math::RangeRandom(0, 2000);  // координата Y не требуется, т.к. будет вычислена
        position.z = Math::RangeRandom(2300, 4000);  //  с помощью ф-ии getTerrainHeight, для быстродействия
        scale = Math::RangeRandom(0.07f, 0.12f);

        if (Math::UnitRandom() < 0.5f)

        {

            if (Math::UnitRandom() < 0.5f)

                treeLoader->addTree(tree1, position, yaw, scale);

        }

        else

            treeLoader->addTree(tree2, position, yaw, scale);

    }

    // кусты/грибы
    bushes = new PagedGeometry(mCamera);

    bushes->addDetailLevel(80, 50);

    TreeLoader2D *bushLoader = new TreeLoader2D(bushes, TBounds(0, 0, 5000, 5000));

    bushes->setPageLoader(bushLoader);

    bushLoader->setHeightFunction(getTerrainHeight);

    bushLoader->setColorMap("terrain_lightmap.jpg");

    Entity *fern = mSceneMgr->createEntity("Fern", "farn1.mesh");  // загрузить модель папоротника
    Entity *plant = mSceneMgr->createEntity("Plant", "plant2.mesh");  // загрузить модель цветка
    Entity *mushroom = mSceneMgr->createEntity("Mushroom", "shroom1_1.mesh");  // загрузить модель гриба
    bushes->setCustomParam(fern->getName(), "factorX", 1);  // параметры ветра
    bushes->setCustomParam(fern->getName(), "factorY", 0.01f);

    bushes->setCustomParam(plant->getName(), "factorX", 0.6f);

    bushes->setCustomParam(plant->getName(), "factorY", 0.02f);

    // распределяем случайным образом 20000 копий кустов и грибов
    for (int i = 0; i < 20000; i++)

    {

        yaw = Degree(Math::RangeRandom(0, 360));

        position.x = Math::RangeRandom(0, 2000);

        position.z = Math::RangeRandom(2300, 4000);

        if (Math::UnitRandom() < 0.8f) {

            scale = Math::RangeRandom(0.3f, 0.4f);

            bushLoader->addTree(fern, position, yaw, scale);

        } else if (Math::UnitRandom() < 0.9) {

            scale = Math::RangeRandom(0.2f, 0.6f);

            bushLoader->addTree(mushroom, position, yaw, scale);

        } else {

            scale = Math::RangeRandom(0.3f, 0.5f);

            bushLoader->addTree(plant, position, yaw, scale);

        }

    }
... and the finalization code to the destructor
LandscapeApplication:Finalization code
LandscapeApplication::~LandscapeApplication(void)

{

    if(grass)

    {

        delete grass->getPageLoader();

        delete grass;

        grass = NULL;

    }

    if(trees)

    {

        delete trees->getPageLoader();

        delete trees;

        trees = NULL;

    }

    if(bushes)

    {

        delete bushes->getPageLoader();

        delete bushes;

        bushes = NULL;

    }

    mSceneMgr->destroyEntity("Tree1");

    mSceneMgr->destroyEntity("Tree2");

    mSceneMgr->destroyEntity("Fern");

    mSceneMgr->destroyEntity("Plant");

    mSceneMgr->destroyEntity("Mushroom");

}
(without this code, the application will crash with an error on exit).
Well and most importantly,
Forests::PagedGeometryeach class instance needs to call a method update()on each frame so that our forest renders smoothly swaying under the gusts of a virtual wind:bool LandscapeApplication::frameEnded(const Ogre::FrameEvent& evt)
{
// ...
grass->update();
trees->update();
bushes->update();
return true;
}
By launching the application, we can observe the pastoral forest landscape: ... well, no pitfalls await us here. The only thing worth paying attention to is the performance drop: despite a lot of techniques for improving performance (starting from the banal LOD


and ending with a pagination mechanism similar to that in the landscape subsystem and replacing real trees with sprites at large distances), Paged Geometry still requires careful adjustment of the number of displayed vegetation instances and image quality. Here again, we can recommend using the Ogitor editor, which has Paged Geometry support, making it easy to sketch vegetation in the right places (something like brushing with Paint) and adjust all the necessary parameters.
A fully compiled and ready to run test project can be downloaded here .
In gratitude to everyone who read to this place - a couple more nice screenshots:


And the video (it wasn’t made by me, but it was created using the libraries in question - Ogre, Hydrax and Caelum):
I also want to express my gratitude to habrayuzer Sergey ViruScD for help in preparing the article, Andrei engine9 for help in working with the Ogre engine and the creators of dumpz.org for excellent syntax highlighting.
UPD : Retook the screenshots with anti-aliasing enabled , thanks m1el for the comment.