Free clouds from Amazon + Ruby on Rails. First impressions
- From the sandbox
- Tutorial
Since November 2010, Amazon has been providing a minimum cloud hosting package for free (for a period of 1 year and only for new users). For a long time I was going to feel what it is, and the freebie was the last straw. With a whole dedicated server, I never had anything to do. I moved to Linux just a few months ago, due to my interest in Ruby on Rails, so I'm a reference example for a curious teapot. I hope this article will be an ideal entry point to the clouds for dummies like me.
Signing up for Amazon Web Services is a trivial process. If you have a payment card for the Internet, you just need to fill out a form. If not, google a request like “Visa virtuon, e-card, internet card, banks,% your country name%” and, after reading the results, go to the bank. The closest to my house was the branch of Pravex Bank, the conditions there are quite acceptable, although there is no Internet banking. Card maintenance costs $ 3 per year, the minimum balance is $ 5. We activated it three days later, after an unsuccessful attempt to link it to an account, I had to call the bank hotline to allow authorization without CVV2 . Five minutes later, I started my first server.
The first impression of AWS - too many things - never figure it out! Dozens of FAQs, manuals, tabs and new obscure terms. Most of all I was helped not by jumping on the links, but by reading along the diagonal of this manual . Although there are 269 pages, but a lot can be skipped the first time, so do not be alarmed.
The most productive metaphor for understanding what AWS is and how its parts are interconnected is a data center. The account control panel is best imagined not as a shared hosting or shell dedicated server admin, but as software for automating the work of a regular, not cloud data center. That is, instead of calling the administrator to reboot the server, install 3 more of the same, or upgrade the hardware, you click on the buttons, and everything is done automatically in a few minutes instead of a few hours or days.
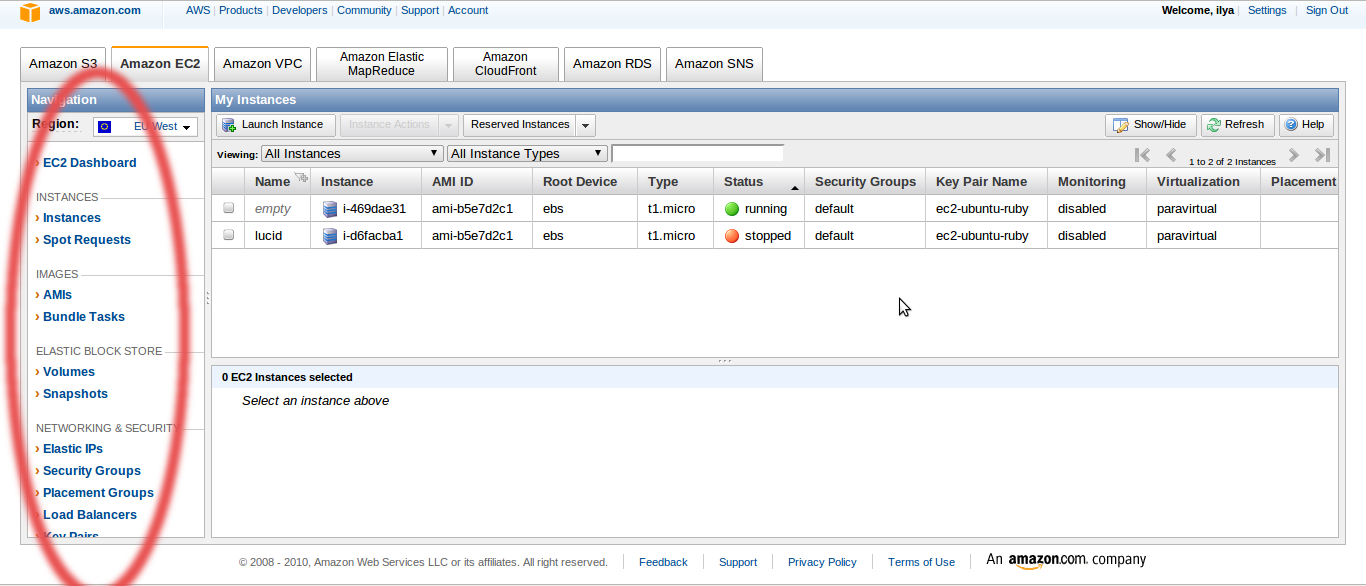
Instances is your server rack. AMIs are customized server images that you can install in your data center. Volumes - screws that can be inserted into any of the servers. Snapshots - backups of screws. Security Groups - firewalls, for each of which you can hide one or more servers.
How does it all work? The central object of all this cloud abundance is Amazon Machine Image, or AMI. AMIs come in two types - S3-backed and EBS-backed. EBS-backed is a virtual machine image with a virtual screw - EBS volume. S3-backed - a machine without a screw, a difficult legacy of those times when there were no EBS on Amazon and all the files had to be stored on S3. The S3-backed server cannot be turned off (stop) in the evening, and the next day in the morning it can be turned on (start), it can only be destroyed (terminate), and if necessary, created a new one (launch). All data that was not saved on S3 is lost. I did not delve deeply into this, since it is much easier to work with EBS-backed AMI, which from the point of view of the user is no different from a real machine, standing somewhere in the next room.
Amazon's servers store hundreds of server images for every taste, with almost any server OS and a bunch of options for pre-installed software. I chose the official image of bare Ubuntu Server 10.04 . Technically, all these AMIs areparavirtual machines XEN . In principle, you can create such an image yourself from scratch, but for me the server is just a stand for Ruby on Rails, so I did not waste my time, and so everything works fine. Before you start working, you should install the ec2-api-tools: package on the local machine
The server is controlled by SSH, the user name is ubuntu, the external IP address and domain name are visible on the panel or in the output of the ec2-describe-instances command, the keys are most easily generated in the AWS Management Console and saved on the local machine (in the sense of the ones I , dummies are the easiest, and the Jedi of the command line may be easier to accustom keys locally and upload to Amazon using a familiar chord). The Firewall (Security Group) by default closes everything at all, so before trying to connect, you need to open the22nd port. If you have a static IP, then for greater security, you can specify it in the Source (IP or group) field. To stop the machine when exiting an SSH session, simply write sudo poweroff, and it goes into stopped mode. If we want it to continue to work, we write exit.

The first pitfall that you need to pay attention to right away is that the free package includes 10 GB EBS-volume, and standard Amazon AMIs by default have a15-gig screw on board . In this case, the bare system takes less than 1G. The Internet is full of articles on how to expand the EBS section, but not a single sensible article on how to reduce it. As a rule, it is suggested to rsync the whole screw to a new smaller partition, but after that my system could not boot. I found the solution somewhere in the comments of some blog . And here I got to the grandmother! The fact is that dd I used the first time in my life. Of course, I forgot to specify the block size (by default - only 512 bytes). In addition, I had the intelligence to understand that system files + 9.3 gigabytes of zeros will be copied for a very long time, and I reduced the size of the file system to 1G. But to notify dd about this was not enough. And he did not care about file systems, and it stopped only when the 10-gigabyte partition ended . 10 gigs in pieces of 512 bytes is not a joke to you, but the free monthly limit of I / O operations on EBS volumes is only 1,000,000. In addition, in a hurry starting the second server, I forgot to change the default configuration of the standard AMI (m1.small, see what it is like below) to t1.micro, and this is also not free. Total: 22 cents per dd and 10 cents per hour m1.small instance.
After these manipulations, I saved my own version of AMI with a10 gigabyte screw (one click in the instance context menu). When you create AMI, a snapshot of the system is automatically done. Actually AMI - this is snapshot, only registered as a virtual machine and having an identifier of the form ami-xxxxxxxx. Unlike EBS volumes, payment for which is charged for the full amount, regardless of how much the files actually occupy, snapshots are stored in a compressed form and are made incrementally. So they take up little space on S3. You can run several instances from one AMI, each of them will have its own screw, so for storing application data, for example, the MySQL database, you will immediately need a separate server, but it will already cost money, so for now you can put MySQL on the same machine as the web server. In the case of a dedicated database server, you don’t even have to bother with the setting,Amazon has the ready . Another important point. When a machine is created, an EBS volume is created, and when it is destroyed (namely terminate, not stop!), It is destroyed by default. It is logical - they threw the server out of the rack, the screw also left. Indeed, for each volume of EBS money is dripping, regardless of whether the machine is turned on or not. But if you wish, you can get the screw from the server and leave it at home .
Now more about what these m1.small and t1.micro mean. Here is a list of all available configurations. We have one t1.micro ma-ah-ah-ah-ah-Lenkanuance. Unlike all other types, micro processor resources are variable. Until they touch it, it is twice as much as m1.small, but under load it quickly gets tired and falls below the baseboard. That is, you should not abuse the cron, convert the video or try to keep projects on it with a peak load of more than a few dozen requests per minute - it will drown. It felt like it worked smartly the first few seconds - more than enough to process any request to the site, or even several requests at once, but compiling the Ruby interpreter took a very, very long time. Small packets like Midnight Commander or small gems are installed at lightning speed, the web server starts three times faster than on my ThinkPad X100e. In my opinion, this is quite a reasonable compromise. Here people drove tests, they write that although it slows down,micro-instance is one and a half times cooler than small-instance.
Having dealt with the hardware of the server and the system, we move on to Ruby on Rails. I somehow didn’t have a relationship with RVM - at first I couldn’t install it for a long time, then some gems were buggy, so I installed Ruby 1.9.2-p0 from the source on my local machine. So I did here. At the same time, finally, our hands reached a heap of everything you need to install Rails3 + Ruby 1.9.2 + MySQL on Ubuntu 10.04:
I was inspired by the idea that I would have a real production server, and prepared to install some Apach, Nginx or Lighttpd, and then the Mongrel cluster, as it is written in smart Rails books. WEBrick doesn’t, in fact, drive on a real-real production server! Have to torment. But Phusion Passenger is, as it turned out, not just a passenger who travels on Apache and others. In standalone mode, it includes nginx. Actually, sudo gem install passenger is all you need to know. He himself finds where the application lies, and launches it without any picking in the configs. The user manual simply touches with its brevity. DTSTTCPW, however!
What is the result? Now I am gradually moving from the lamer poking through the links in the Amazon web face to ec2-api-tools. Here, in principle, nothing complicated - ec2-describe / run / start / stop / terminate-instances, ec2-describe / create / delete-volumes, etc. In the instructions, everything is intelligently described. Amazon Price Calculatorshows that a free package would cost about 20 bucks a month if it were paid. Its own dedicated server, plus the ability to experiment for a penny with a whole data center with two dozen servers, firewalls, load balancers and other goodies. The ability to raise any OS available in the form of public AMI in a couple of minutes and feel it alive. The ability to lift and drive a cluster with dozens of cores and hundreds of gigabytes of memory in the same few minutes - for only a few dollars per hour. In short, I am satisfied!
upd: When creating AMI from a snapshot, I had such a glitch: the instance seemed to start, but there was no connection. At the end of the system log, there were several lines of this kind:
It turns out that when creating the AMI, you must explicitly specify the kernel, something like this:
How to find out which kernel image is needed? Run the original, obviously working public instance, on the basis of which you built your server, and look at the kernel version in the ec2-describe-instances command
Signing up for Amazon Web Services is a trivial process. If you have a payment card for the Internet, you just need to fill out a form. If not, google a request like “Visa virtuon, e-card, internet card, banks,% your country name%” and, after reading the results, go to the bank. The closest to my house was the branch of Pravex Bank, the conditions there are quite acceptable, although there is no Internet banking. Card maintenance costs $ 3 per year, the minimum balance is $ 5. We activated it three days later, after an unsuccessful attempt to link it to an account, I had to call the bank hotline to allow authorization without CVV2 . Five minutes later, I started my first server.
The first impression of AWS - too many things - never figure it out! Dozens of FAQs, manuals, tabs and new obscure terms. Most of all I was helped not by jumping on the links, but by reading along the diagonal of this manual . Although there are 269 pages, but a lot can be skipped the first time, so do not be alarmed.
The most productive metaphor for understanding what AWS is and how its parts are interconnected is a data center. The account control panel is best imagined not as a shared hosting or shell dedicated server admin, but as software for automating the work of a regular, not cloud data center. That is, instead of calling the administrator to reboot the server, install 3 more of the same, or upgrade the hardware, you click on the buttons, and everything is done automatically in a few minutes instead of a few hours or days.
Instances is your server rack. AMIs are customized server images that you can install in your data center. Volumes - screws that can be inserted into any of the servers. Snapshots - backups of screws. Security Groups - firewalls, for each of which you can hide one or more servers.
How does it all work? The central object of all this cloud abundance is Amazon Machine Image, or AMI. AMIs come in two types - S3-backed and EBS-backed. EBS-backed is a virtual machine image with a virtual screw - EBS volume. S3-backed - a machine without a screw, a difficult legacy of those times when there were no EBS on Amazon and all the files had to be stored on S3. The S3-backed server cannot be turned off (stop) in the evening, and the next day in the morning it can be turned on (start), it can only be destroyed (terminate), and if necessary, created a new one (launch). All data that was not saved on S3 is lost. I did not delve deeply into this, since it is much easier to work with EBS-backed AMI, which from the point of view of the user is no different from a real machine, standing somewhere in the next room.
Amazon's servers store hundreds of server images for every taste, with almost any server OS and a bunch of options for pre-installed software. I chose the official image of bare Ubuntu Server 10.04 . Technically, all these AMIs areparavirtual machines XEN . In principle, you can create such an image yourself from scratch, but for me the server is just a stand for Ruby on Rails, so I did not waste my time, and so everything works fine. Before you start working, you should install the ec2-api-tools: package on the local machine
sudo apt-get install ec2-api-tools.The server is controlled by SSH, the user name is ubuntu, the external IP address and domain name are visible on the panel or in the output of the ec2-describe-instances command, the keys are most easily generated in the AWS Management Console and saved on the local machine (in the sense of the ones I , dummies are the easiest, and the Jedi of the command line may be easier to accustom keys locally and upload to Amazon using a familiar chord). The Firewall (Security Group) by default closes everything at all, so before trying to connect, you need to open the
The first pitfall that you need to pay attention to right away is that the free package includes 10 GB EBS-volume, and standard Amazon AMIs by default have a
After these manipulations, I saved my own version of AMI with a
Now more about what these m1.small and t1.micro mean. Here is a list of all available configurations. We have one t1.micro ma-ah-ah-ah-ah-Lenkanuance. Unlike all other types, micro processor resources are variable. Until they touch it, it is twice as much as m1.small, but under load it quickly gets tired and falls below the baseboard. That is, you should not abuse the cron, convert the video or try to keep projects on it with a peak load of more than a few dozen requests per minute - it will drown. It felt like it worked smartly the first few seconds - more than enough to process any request to the site, or even several requests at once, but compiling the Ruby interpreter took a very, very long time. Small packets like Midnight Commander or small gems are installed at lightning speed, the web server starts three times faster than on my ThinkPad X100e. In my opinion, this is quite a reasonable compromise. Here people drove tests, they write that although it slows down,micro-instance is one and a half times cooler than small-instance.
Having dealt with the hardware of the server and the system, we move on to Ruby on Rails. I somehow didn’t have a relationship with RVM - at first I couldn’t install it for a long time, then some gems were buggy, so I installed Ruby 1.9.2-p0 from the source on my local machine. So I did here. At the same time, finally, our hands reached a heap of everything you need to install Rails3 + Ruby 1.9.2 + MySQL on Ubuntu 10.04:
sudo apt-get install libxml2 libxml2-dev libxslt1-dev gcc g++ build-essential libssl-dev libreadline5-dev zlib1g-dev linux-headers-generic libsqlite3-dev mysql-server libmysqlclient-dev libmysql-ruby


wget ftp.ruby-lang.org//pub/ruby/1.9/ruby-1.9.2-p0.tar.gz

 tar -xvzf ruby-1.9.2-p0.tar.gz

 cd ruby-1.9.2-p0/

 ./configure —prefix=/usr/local/ruby

 make && sudo make install


export PATH=$PATH:/usr/local/ruby/bin #Это надо добавить в .bashrc

 sudo ln -s /usr/local/ruby/bin/ruby /usr/local/bin/ruby

 sudo ln -s /usr/local/ruby/bin/gem /usr/bin/gem


echo «gem: —no-ri —no-rdoc» > $HOME/.gemrc

 sudo gem install tzinfo builder memcache-client rack rack-test erubis mail text-format bundler thor i18n sqlite3-ruby mysql2 rack-mount rails


ruby -v

 rails -v
I was inspired by the idea that I would have a real production server, and prepared to install some Apach, Nginx or Lighttpd, and then the Mongrel cluster, as it is written in smart Rails books. WEBrick doesn’t, in fact, drive on a real-real production server! Have to torment. But Phusion Passenger is, as it turned out, not just a passenger who travels on Apache and others. In standalone mode, it includes nginx. Actually, sudo gem install passenger is all you need to know. He himself finds where the application lies, and launches it without any picking in the configs. The user manual simply touches with its brevity. DTSTTCPW, however!
What is the result? Now I am gradually moving from the lamer poking through the links in the Amazon web face to ec2-api-tools. Here, in principle, nothing complicated - ec2-describe / run / start / stop / terminate-instances, ec2-describe / create / delete-volumes, etc. In the instructions, everything is intelligently described. Amazon Price Calculatorshows that a free package would cost about 20 bucks a month if it were paid. Its own dedicated server, plus the ability to experiment for a penny with a whole data center with two dozen servers, firewalls, load balancers and other goodies. The ability to raise any OS available in the form of public AMI in a couple of minutes and feel it alive. The ability to lift and drive a cluster with dozens of cores and hundreds of gigabytes of memory in the same few minutes - for only a few dollars per hour. In short, I am satisfied!
upd: When creating AMI from a snapshot, I had such a glitch: the instance seemed to start, but there was no connection. At the end of the system log, there were several lines of this kind:
modprobe: FATAL: Could not load /lib/modules/2.6.16-xenU/modules.dep: No such fileIt turns out that when creating the AMI, you must explicitly specify the kernel, something like this:
ec2-register -n image_name -d image_description --root-device-name /dev/sda1 -b /dev/sda1=snap-XXXXXXXX::false --kernel aki-XXXXXXXXHow to find out which kernel image is needed? Run the original, obviously working public instance, on the basis of which you built your server, and look at the kernel version in the ec2-describe-instances command