Introduction to org-mode emacs
- Transfer
In fact, this is not even a translation, but a free presentation of my thoughts on this topic, after familiarizing myself with the indicated source. That is - processing. Some things that seemed obvious were deliberately excluded from the text. Some that seemed useful are added.
Introduction
It was described pretty well here .
How to connect it
If you have version 22 and higher, you already have it installed. If not, install the new version. :)
Activation
Paste the next thing in our ~ / .emacs
(require 'org-install)And from then on, we will be sure that we have all the most basic things. What is "org-store-link" and "org-agenda" will be determined further.
(add-to-list' auto-mode-alist '("\\. org $". org-mode))
(define-key global-map "\ C-cl"' org- link-store)
(define-key-global map "\ C-ca" 'agenda-org)
(setq org-log-done t)
The author believes that it would be nice to make a separate daddy for * .org files.
Basic things
Create and operate a new .org file
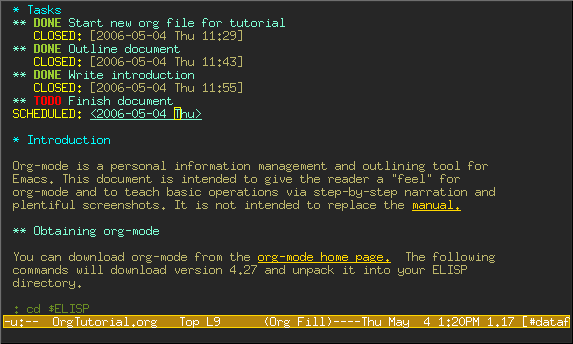
Just start the .org file in the intended folder, open it with emax. And if you have everything that we wrote above in .emacs, then org-mode will automatically turn on.
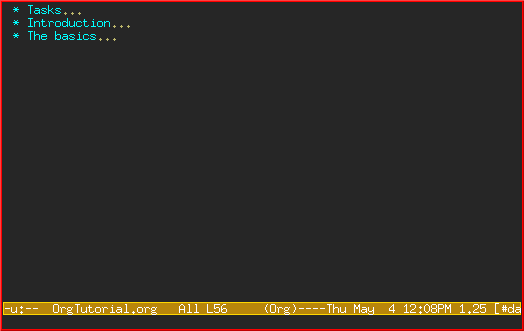
Just a task sheet (headline)
It looks like this:
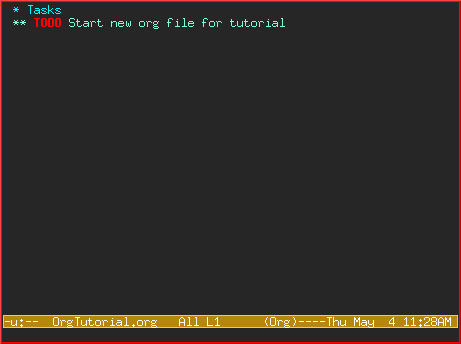
headline is what is marked with an asterisk. It's good that there was a spur on the official Org-Mode website that helped find the team: M + RET that this headline creates. So that every time you do not reach for an asterisk, you can use it. To create a headline of another level, we must first create a headline of the first, and, being in it, press M + S + (left / right arrow). It is clear that he will refuse to create a zero level for us. It is noteworthy that M + RET creates a headline of the same level with the previous one. And if the level is first, it will jump over one line.
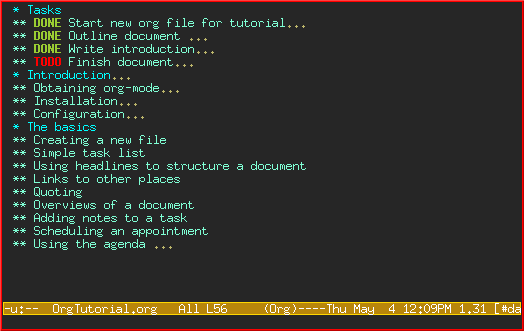
If later we want to mark any of the heldines as a task to be completed, just press C + c C + t. Having pushed the combination again, we will see that the task changes its status from TODO to DONE, and everything will look like this:
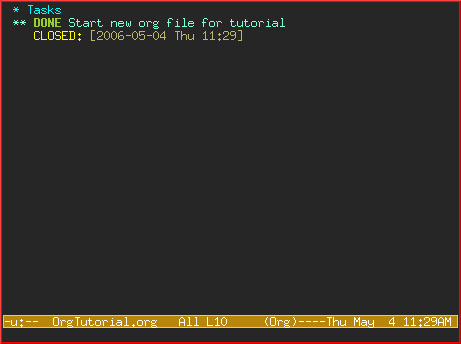
And if you click again (third time), then any status will be removed - only the closing mark and the headline inscription will remain.
We use headlines to structure the document
Sometimes, the best way to describe your ideas is to outlining them.
And here is how it might look in practice:
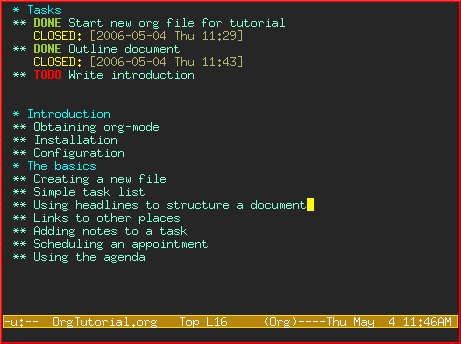
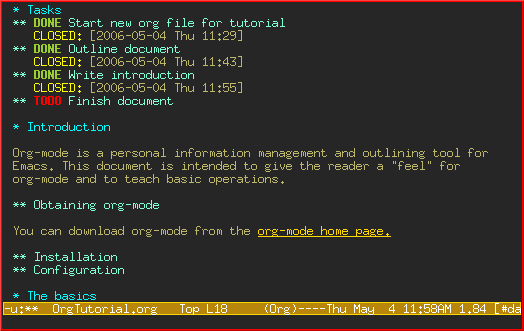
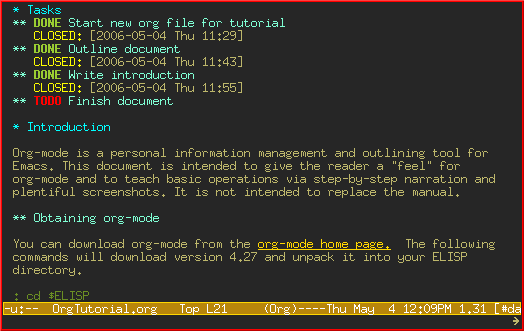
Now let's do the filling
You can easily add any text under your headings (all the same headlines):

Links to other places
In order to create a link, it is enough to use such a template - [[link] [description]].
And this is how it will look during editing:

And after editing, only the description itself remains:
To create a link, you can still use the combination C + c C + l. In the mini-buffer, emacs will offer to write the link first, then after pressing RET, create it. While in the mini-buffer, you can also press TAB to view what types of links are.
To open newly created links, you need to point to the link and poke C + c C + o. Or C + u C + c C + o - if you want to open it in another window.
For fun, you can go to another file, press C + c l there. And the link to this file will fit in the link store. By going to any of our .org files, we can extract any stored links from this repository using the same C + c C + l command.
The most observant readers could already notice that this command is exactly the one that we entered in ~ / .emacs at the beginning.
Document Overview
When you feel that you want to slightly reduce the amount of writing, you can press shift-TAB and it will work like this:
Note that now only the first level headings are displayed.
And when we press this one more couple of times, it will unfold to us more and more:
And more:
Let's try some cool stuff.
Before we finish, let's try to master: the global TODO list (global TODO list), scheduling, and the agenda in org-mode. All this is used for different types of display of TODO things - with different priorities, from different .org files, for convenience.
Installation
To begin with, we need to set the variable org-agenda-files, which will tell org-mode, in which files we should look for TODO, and the scheduled things.
Let's imagine that we have 3 .org files: one for work, one for home, one for school.
Then we must add the following to our ~ / .emacs file:
(setq org-agenda-files (list "~ / org / work.org"
"~ / org / school.org"
"~ / org / home.org"))
Global TODO Sheet
Poke Cc at to enter it. Org-mode will scan all org-agenda-files and present a list of all active TODO pieces:

There you can move the cursor to any TODO thing, and press t to mark it as complete (DONE). Or press RET to enter it and jump to that place and to the file where it is located.
Scheduling Tasks and Using the Agenda
Let's try to hover over any task. When you press C + c C + s, a calendar opens where we can select any date:
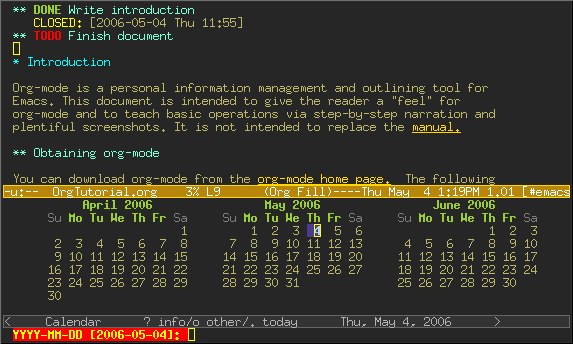
After we do this and press RET, a note will appear under the task, “planned” (SCHEDULED), with the date:
We can also use C + c C + d, for designation of "deadlines" (DEADLINE), by a similar principle.
Now save our file and press C + ca a. The schedule for this week will be displayed:
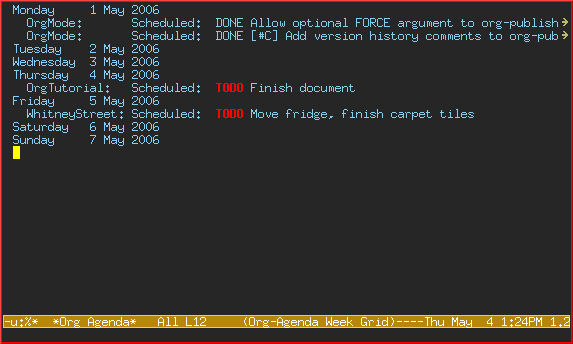
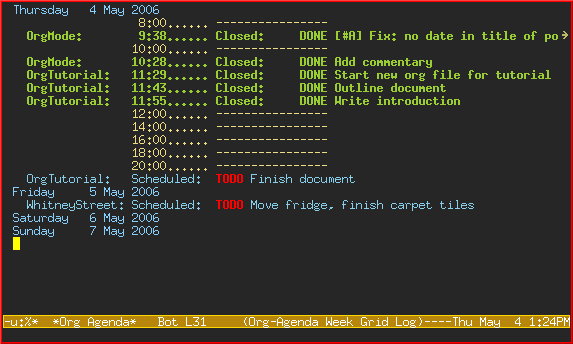
Now we can press l (like Leonid) to turn on the “log” view. It will look something like this:
Conclusion
This was just a summary of the features of emacs Org-Mode. In order to get more detailed information about him, below I have provided several links.