We get the Internet via USB from a computer on Android

The article is relevant for 2010, modern Android can do this with one “tick” in the settings
After buying HTC Hero, I had a question: how to get Internet access on a device through a computer? With my previous Toshiba G900 communicator running WindowsMobile 6, everything was simple: I installed the “mobile device center” and the Internet appeared on the communicator. “This function is not needed,” you say, because now there are many Wi-Fi access points through which you can connect with two clicks. But personally, I don’t have Wi-Fi points (I have a laptop, but Android does not detect Ad-Hoс networks). Therefore, I was saddened by the lack of this feature. All my attempts to find manuals on this topic were unsuccessful. So I decided it myself.
Attention: To work as a sheath, root user
Installing a network between your device and a computer
There are two ways:
- Built-in USB Tether (for devices with Sence and may have some more
- USB Tether implemented by third-party software.
In this article, I will consider the second method, since it is more universal.
And so, we need the Wired Tether program, which can be downloaded by clicking on the QR code, or by reading it from the phone:
 (268 KB)
 After clicking on the screen in the Wired Tether program, a new network connection with the communicator appears on Windows, received via DHCP settings:
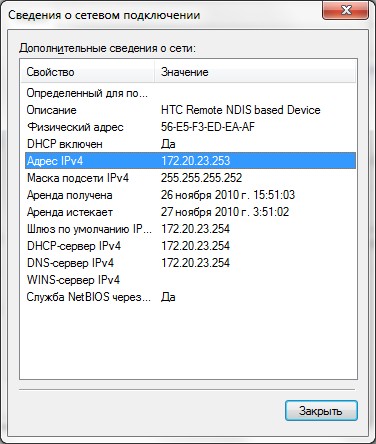
For example, my communicator network is Android USB, and my Internet connection for sharing is Internet. In the future I will use these notation.
We disconnect the Internet connection, in the connection properties we make it available for Android USB:

Go to the Android USB settings and change its IP and mask to 172.20.23.253 / 255.255.255.252, and do the rest empty:
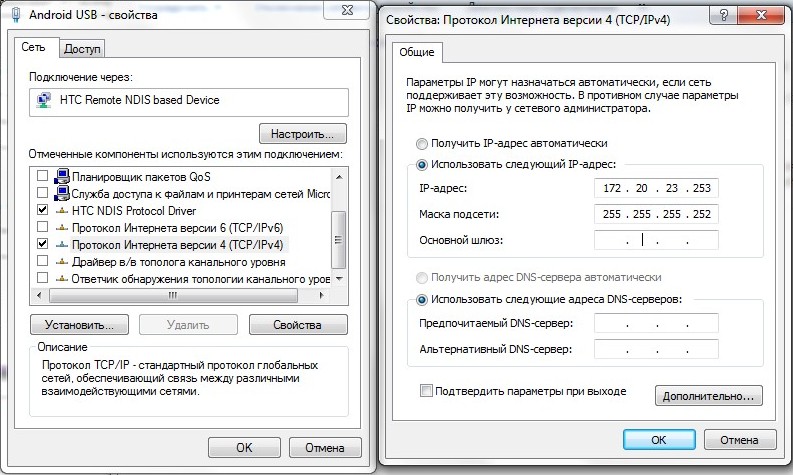
The goal of manually changing the IP address is to remove the default gateway.
We try Ping communicator (it is under ip - 172.20.23.254)
C:\Users\MainNika>ping 172.20.23.254

Обмен пакетами с 172.20.23.254 по с 32 байтами данных:

Ответ от 172.20.23.254: число байт=32 время<1мс TTL=128
Configuring the communicator
For the convenience of working with scripts, take the GScript Lite program:
 (56.4 KB)
 Create a new script in the GScript Lite program, and write there: 8.8.8.8 is the DNS server from google. I love to use it, so I use it here. You can use any DNS server that you want. Setup is complete, you can test:
ifconfig rmnet0 down

ifconfig usb0 up

route add default gw 172.20.23.253 dev usb0

setprop net.dns1 8.8.8.8
- Connect USB
- Turn on the Wired Tether program, turn on the connection
- Turn on GScript Lite, execute the script we created
- ???
- PROFIT!
Well, to make sure, let's go to 2ip.ru :

To disconnect, just restart the mobile connection.
All. Now you can climb a lot in the market, Download from there a mountain of useful and not only software.
upd: For those who cannot cope with setting up routing on Windows, I can recommend WinRoute from Kerio. It also works through it, and all its configuration is to indicate a network connected to the Internet. Screenshot
upd2: I rewrote the article, it became universal and without problems. Thanks to Corwin for pointing out the error in the script leading to the invalid argument