Unlock Xbox 360 at home. Just for fun!
Having never been a gamer, the console still took for the sake of fan. Why an Xbox and not a PS3? The answer lies on the surface - the possibility of unlocking. We will not discuss the moral side of this action, do not feed the geek with bread - let me pick a new piece of iron.
Unlocking is not particularly difficult, but on the latest revisions of the console with Lite-On drives ( FW Revision 93450C ) you can’t do without an iron mod to enter the drive into Vendor Mode. To produce an iron mod, you can go in several ways - The MRA Hack, The Xecuter Probe II, The Xecuter LT Switch, Vampire & Rebuild Board, Vampire w / o Rebuild Board.
The mra hack- The simplest scheme that you can assemble yourself without any special costs. You will need a mounting knife, a pair of wires, a 20 Ohm resistor and a switch for the possibility of operational contact breaking. A big minus of this method is that after the firmware it will be necessary to restore all the cut tracks on the printed circuit board.
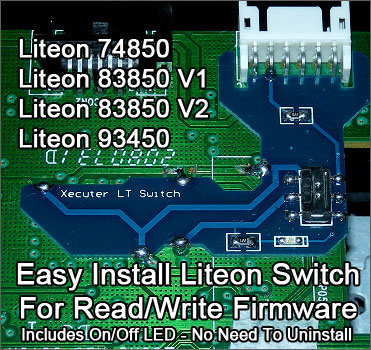
I chose the most rational and cheapest option - Xecuter LT Switch . The plus is that after soldering over the motherboard and unlocking the console, you don’t need to restore anything, just switch the switch to Normal from the Read / Write mode. Such a solution cost me about 4 GBP excluding delivery in some English online store for modding.
There are still a couple of unresolved issues. Firstly, I don’t have a monitor at home, secondly, I don’t have Windows on any of the computers, thirdly, all my computers are portable, so there’s nowhere to connect a SATA cord. Well, I have Aspire Revo working as my home server, a couple of issues are solved from here, the HDMI image is output to the TV, and the drive is connected to the Revo eSATA-SATA by a cord. What to do with Windows? On Devo, Debian GNU / Linux works and did not want to repartition the partitions by putting Windows in the neighborhood. Not a problem! There are wonderful distributions right for this case from aleks200059, windows that work from a USB drive. Wonderful!
Ordered Xecuter LT Switch , XCM 360 Case opening tool and eSATA-SATAlace. Russian Post, as always, slows down, but there’s nothing, we have nowhere to rush, the console is taken for a fan, not for games. Parcels go unusually long from all Asian corners, the last parcel arrived 61 days after the order, if my memory serves me right. From England, the package arrived in a couple of weeks. It seems that the last six months, parcels from China and Hong Kong have deliberately slowed down, but oh well ...
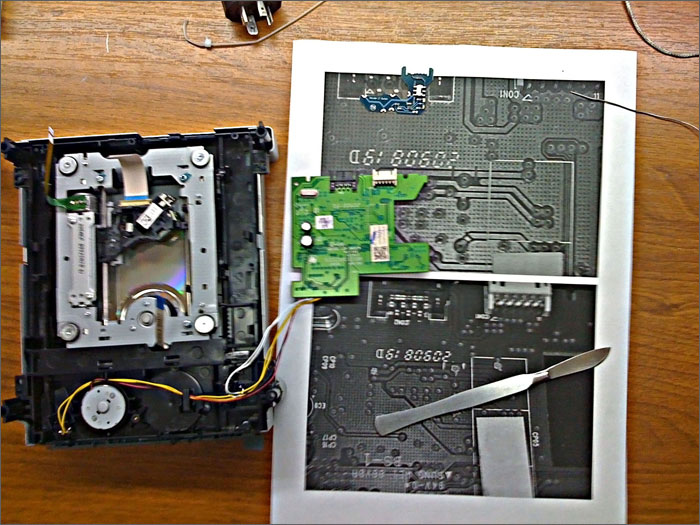
The console was dismantled in about 10 minutes using the XCM 360 Case opening tool, although you could easily do without it, as it turned out. While disassembling, he noted to himself what a typical PC assembly is at the console, I really want to cry. Microsoft is such a Microsoft ... Take an example from the same Sony or something. The next day, the drive was taken to work. Disassembled in a couple of minutes, you need to unscrew the 4 screws on the bottom cover of the drive, disconnect the 3 loops and unscrew the 2 screws on the board. By sliding the latch to the right, we can pull out the board and start working on it. We cut the tracks and clean the areas in the places indicated in the photo: Solder the overlay:
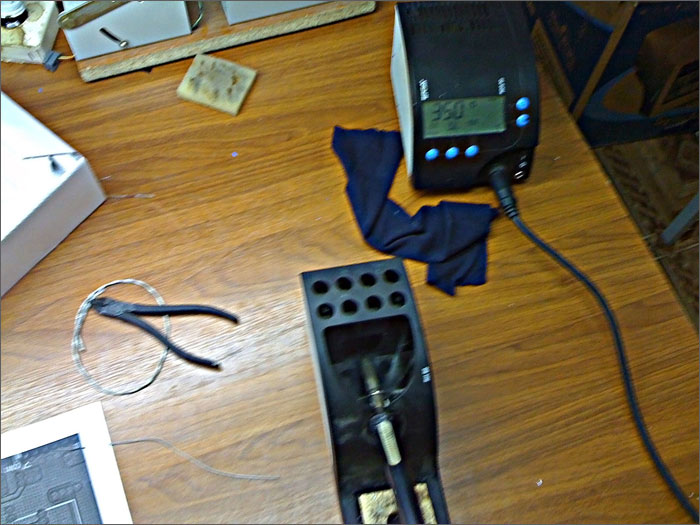


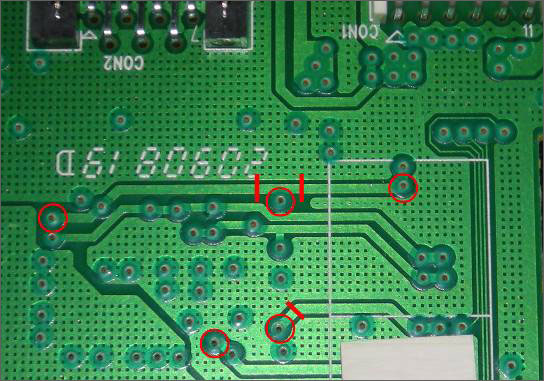
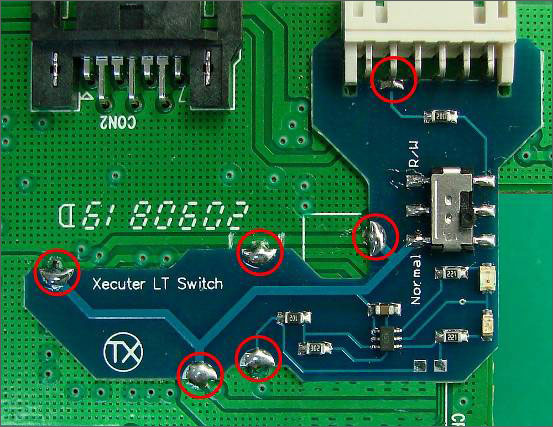
With the help of a soldering station, the drive was soldered pretty quickly without any problems during the lunch break. Ringing the track with a calm soul, he assembled the drive and carried it home. Yes, be careful when connecting the cables, I managed to connect a wide cable with great difficulty, it enters the connector very tightly, I was afraid to break it, but nothing happened. Two narrow ones connect without any problems.

Proceed to unlock
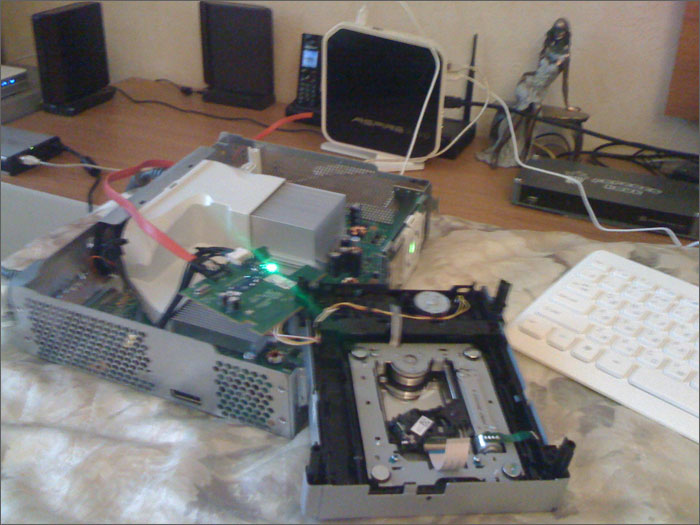
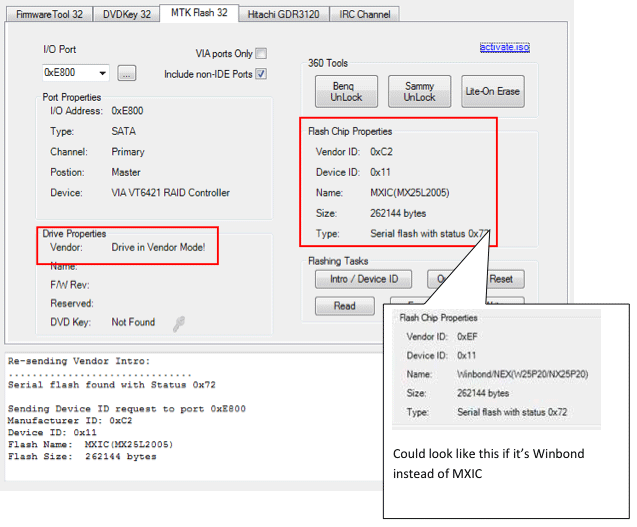
Turn the switch on the Xecuter LT Switch to Normal and connect the drive to the SATA cord. We insert the power cord, the main thing is not to confuse the position of the power connector, when disassembling it is best to mark with a marker in which position it is connected. Turn on the console. Download the latest version of the Jungle Flasher program, launch it and go to the MTK Flash 32 tab. The drive did not want to be detected, as a result, it worked only in SATA Mode - Native IDE, in AHCI it didn’t. For those who are not in the know, this mode is set in the BIOS. Turn off the power to the console. We translate the switch on the Xecuter LT Switch to the R / W position, press the Intro / Device ID button in the program , answer Yes, ask Yes

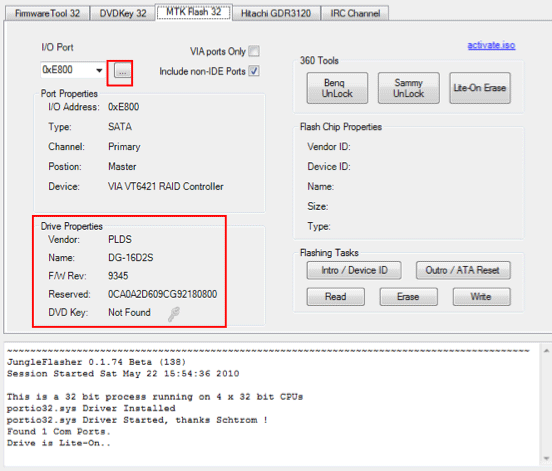
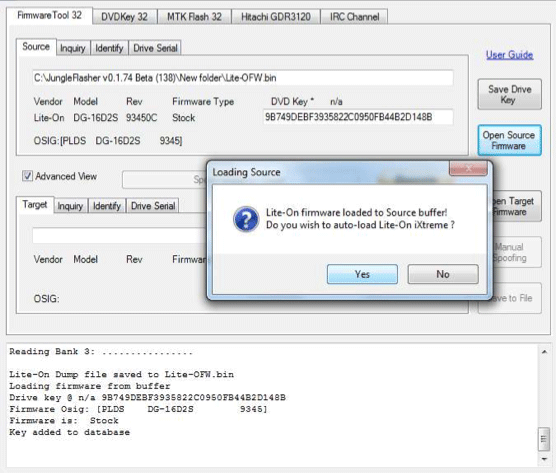
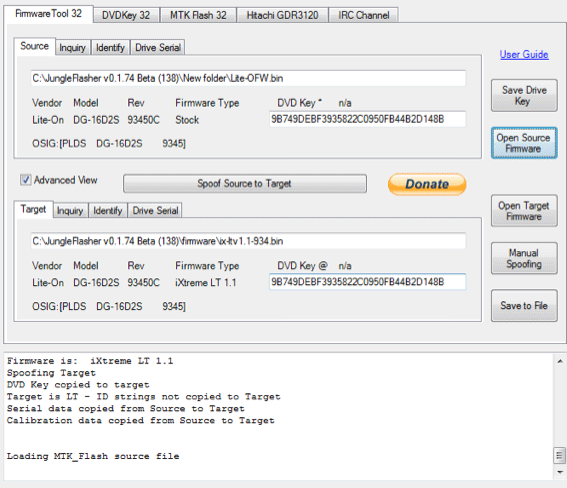
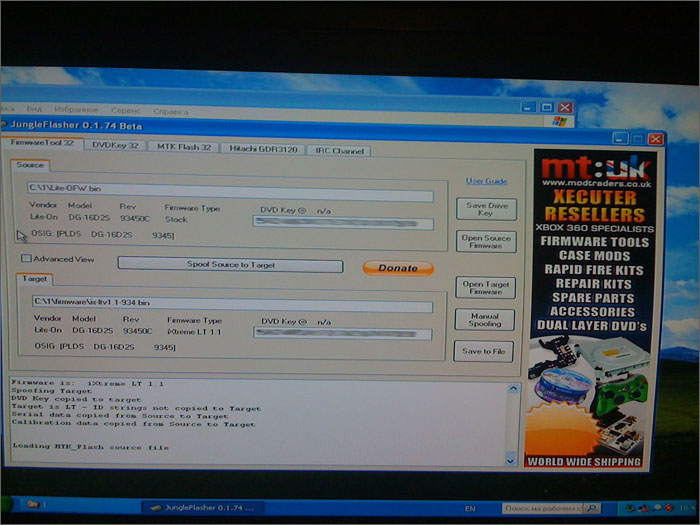
. Turn on the power button again and turn the switch on the Xecuter LT Switch to Normal. After that, your drive will enter Vendor Mode, and the Serial flash will be in status 0x72 . Now press the Read button and save the read original firmware of the drive. Keep this firmware in a safe place! You will still need it if you suddenly decide to alter the drive again. The read firmware will be automatically loaded into the FirmwareTool 32 tab after you click Yes . There will be automatic spoofing of the read key from the original firmware to the modified one, in my case it is iXtreme Lite Touch (LT) 1.1 . How it looks on the screen: Press the button
Write and wait for Write Verified OK status ! , this means that all 4 memory banks have been successfully reflash. Now we need to bring the drive from Vendor Mode to normal mode, for this we press the Outro / ATA Reset button . That's it, your drive will reflash. Turn off the console, disconnect the SATA cable from the PC, connect the native SATA cable from the console, turn on the console and test the freshly flashed drive. That's it. We assemble the console and use as intended. Good luck


