 April 14, 2010 at 00:43
Work with Visual Studio Team Foundation Server 2010

This article will be useful for those who have not installed or used Visual Studio Team Foundation Server before. TFS can be part of a very complex infrastructure that includes reports, integration with SharePoint, multiple domains, distributed databases, etc., but I'm not going to cover these areas. My main task is to help deal with the basic elements of TFS (version control system, bug and task tracking system and automatic assembly system) and start using this system.
Foreword
First, let's look at why Team Foundation Server? TFS was created to integrate development tools for faster and more comfortable work. You can integrate different systems together:
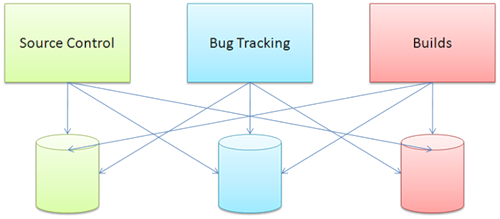
In this case, each system has its own data warehouse, its own set of identification data, its own commands and tools. Of course, this is possible, but when working with such a system, it will take a lot of time to switch between components and support.
TFS is a system that integrates all the necessary components together.
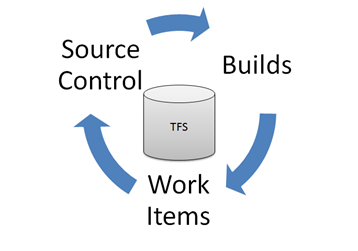
Such integration covers the most common scenarios. On a typical day, I will add and edit the source code, make assemblies, test them, log the errors found and correct them. When the entire workflow takes place in one integrated environment, then each of the elements of the process can be connected. For example, if I copy files to the repository in which I fixed the error, then I immediately want to make a note about this in the report. TFS installed in the “Basic” configuration allows you to do everything that was described above. The full version of TFS includes: automatic testing, deployment of a virtual laboratory and verification of application architecture:
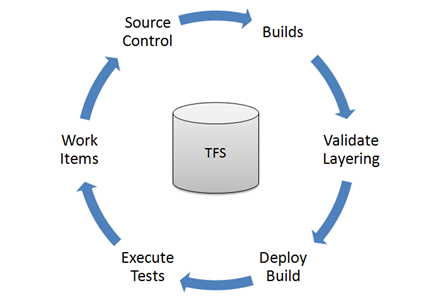
Depending on the need, you can use only part of the components.
There are many ways to access TFS functionality. If you are a programmer, then you will probably feel comfortable using Visual Studio. If you are a tester, you can use the new Team Explorer as a client, without having to install Visual Studio. If you are a project manager, you can access information through a web browser or Excel, Microsoft Project, or even MOSS.
Install TFS 2010
Looking ahead, I will say that this process has become, as never before, simple. Therefore, I decided not to publish detailed installation instructions (if problems arise with the installation, I recommend reading the article Installing Visual Studio Team Foundation Server 2010 ), and limit myself to only theoretical knowledge.
Consider the main advantages that the new version of TFS offers.
1. Requirements - the most important restrictions that have historically been passed from version to version have been removed.
- TFS 2010 can be installed on a domain controller. TFS developers realized that many small organizations do not have the ability to use dedicated servers. Now, if you have only one server, which is a domain controller, email server, etc., you can now install TFS 2010 on this server !!!
- TFS 2010 can be installed on personal operating systems - TFS 2010 is installed on Vista and Windows 7 Home Premium and higher. And of course, server operating systems are supported (Windows 2003, Windows 2008 and Windows 2008 R2). Now you have the opportunity to run the version control server directly on your work laptop.
- TFS 2010 can run on both 32 and 64 bit operating systems!
2. Installation . Installing TFS has been a sore spot for many years. Now this flaw has become a virtue. The TFS 2010 installer has three installation modes: Basic, Standard, and Advanced. An especially big breakthrough was made in the “Basic” mode. In fact, this mode turned into an installation on the principle of Next -> Next -> Next, which allows you to install and configure TFS 2010 in 20 minutes or even less (provided that the computer already has .NET 4.0 and MSSQL Express). Basic mode allows you to automatically install and configure IIS (if it is not already installed), MSSQL Server (if it is not already installed) and install and configure TFS 2010 directly. The biggest nuisance in this process is that after installing .NET 4.0, you must restart the computer. But believe me, the result is worth it!
After installing TFS in the "Basic" mode, you get: a version control system, a bug tracking system and an assembly automation system (continuous integration is as easy as shelling pears!). The complete set lacks components: SharePoint and reporting. These elements are present in the “Standard” mode. Another good news is that you have already installed TFS 2010 “Basic” and now you can simply add components as needed, without having to completely reinstall the system.
Version Control System in TFS 2010
And so after you have gained sufficient theoretical knowledge and installed TFS 2010, it's time to get started. In this chapter, I will discuss the basics of using the version control system that TFS 2010 provides.
It is assumed that you already have TFS 2010 installed on your computer and have Visual Studio 2010.
And so, the first thing we need to do is connect Visual Studio to TFS. To do this, use the main menu (Team) or the link on the home page: the
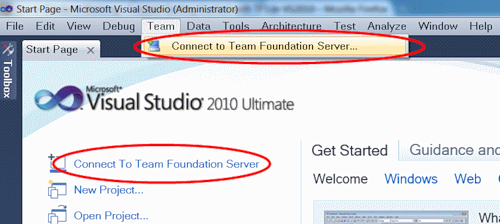
system will ask you to specify the address of the existing TFS. In my case, my Windows 7 laptop is called dionnis-pc.
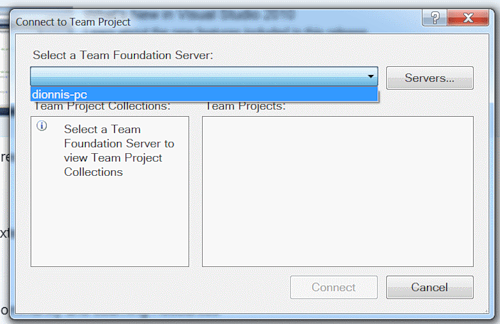
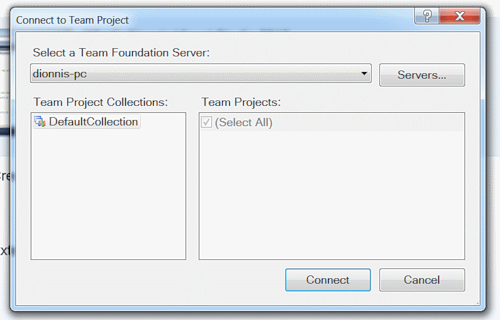
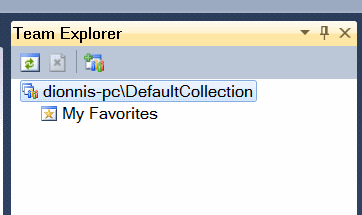
After that, the Team Explorer window should contain the name of the connection to the server and DefaultCollection. But at the moment we do not have more than one added project.
In this case, for example, I use the Enterprise Library code, but in fact, it was possible to restrict myself to a standard application (File, New Project, Windows Forms). If you now try to add the project to the repository of the version control system, then Visual Studio will throw an error: The

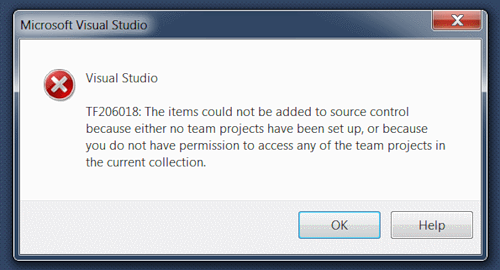
error means that you need to create a project in TFS, which will have all the components necessary for your work. And so, we first need to create a new project:
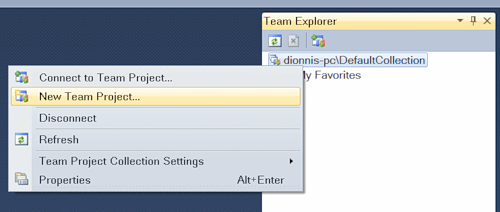
In the next dialog box, specify the name of the project and a brief description of it:

Now Visual Studio asks you to specify the methodology that we will use when developing our application. The default is Agile (agile development methodology), but you can also choose CMMI. For additional information on methodologies, I recommend reading the MSDN. I recommend staying with Agile if you don’t know what is right for you or if you use one of the flexible development methodologies (such as TDD).
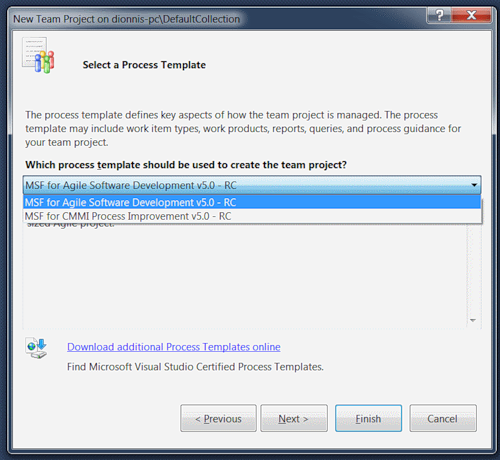
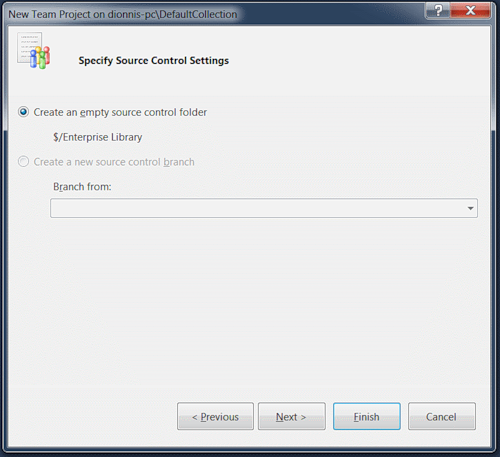
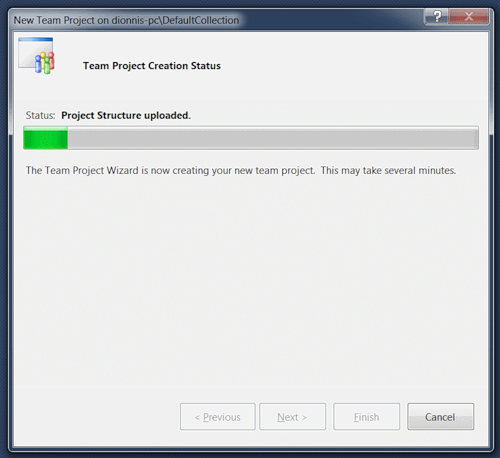
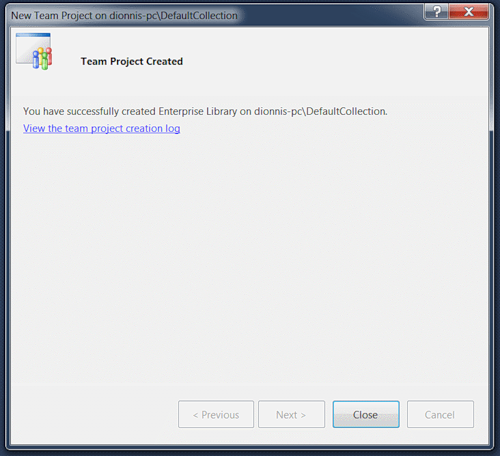
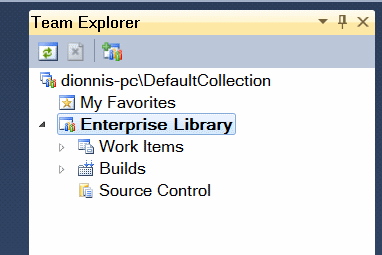
And so, finally, Team Explorer displays the elements of the current project: Work Items, Builds and Source Control.
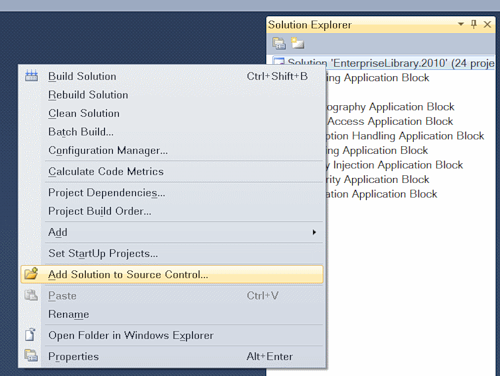
Now you can add your project to the repository.
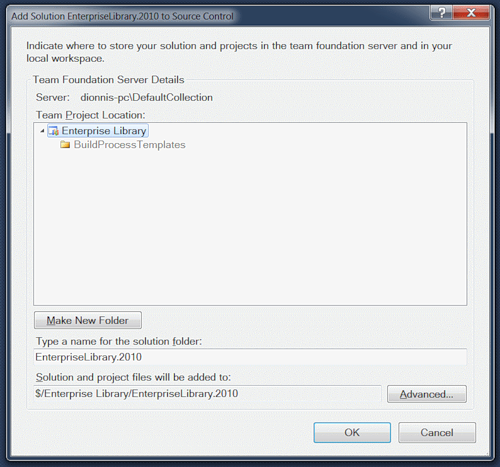
Now you need to specify the folder in which our data will be stored.
Upon successful completion, Solution Explorer will mark the files that claim to be placed in the repository with the “+” symbol. You will also see a list of actions that must be performed in order to put your application in the repository. Just add a comment and click Check-In:
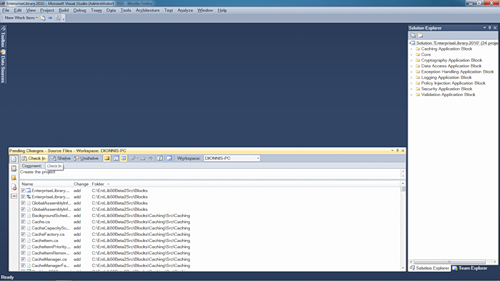
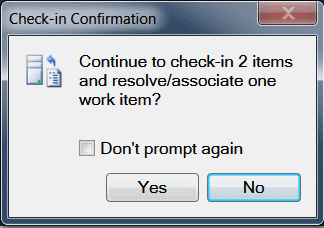
The process of adding files to the repository must be confirmed:
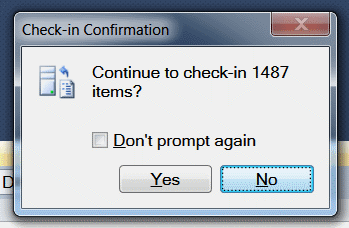
And so, congratulations! You have added your project to the repository!
Error Tracking System in TFS 2010
After we figured out how to work with the version control system, it's time to consider the principle of the bug tracking system.
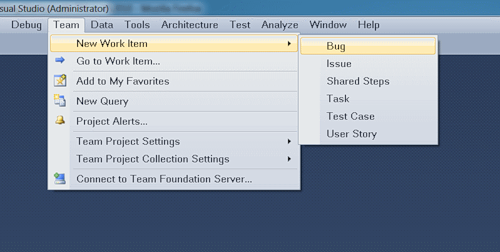
Error and task entries in Visual Studio relate to work items. You can create one of the types of work items directly from the Team Explorer panel in Visual Studio. The same can be done using the web interface or the Visual Studio Test and Lab Management tools. In our case, I use the Team Explorer panel:
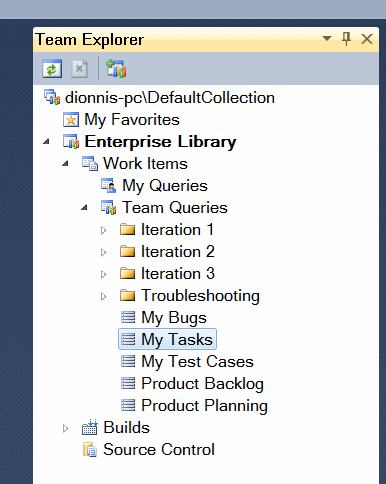
Since we just started working on the project, there should not be any entries in the list.
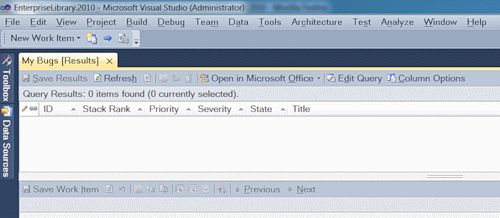
Let's add an error message:
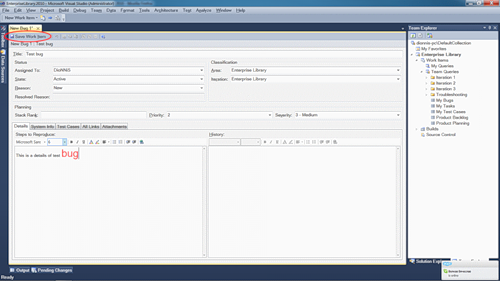
Now if you update the list of errors, you can see the record just created.
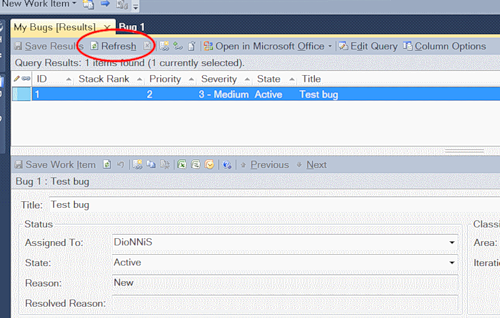
Let's now add a more real error message.

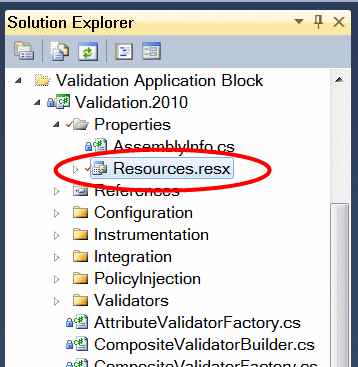
Now you need to fix the error. To do this, download the file from the repository for editing:
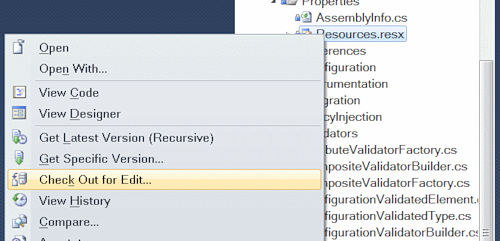
If everything went smoothly, then the file will contain a mark about accessibility for editing.
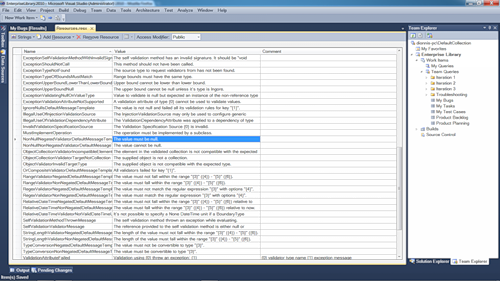
After editing, the Pending Changes panel in Visual Studio itself will display a list of files that have undergone changes.
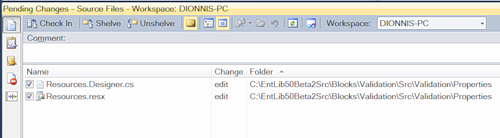
Since we corrected the error, we need to make a note of this:

After you have noted the corrected error and added a comment, you can safely copy the files to the repository:
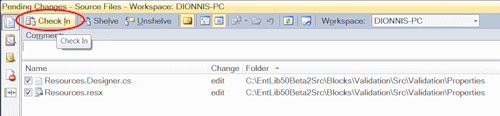
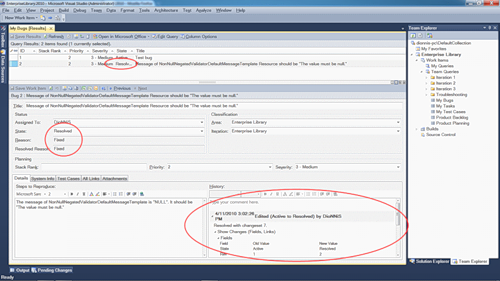
Now you can verify that the error status has been changed and get additional information about the details of the correction.
Another way to work with TFS
You can access the project work items using the web interface. To do this, simply use the address of your server:
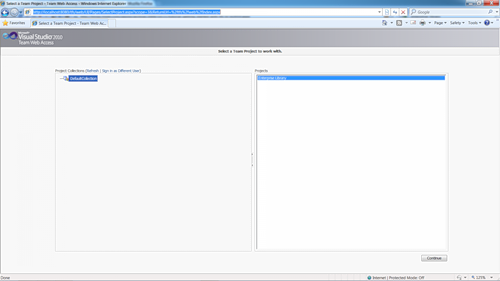
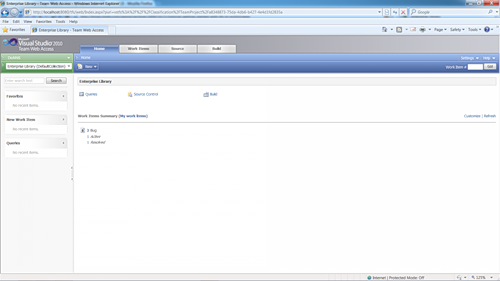

This method may be most effective for people who are not used to working with Visual Studio. It is also possible to use Excel and Microsoft Project.
Assemblies in TFS 2010
For a complete (minimum) kit, it’s not enough just to learn how to work with assemblies. This chapter of the article is called upon to fight against this gap.
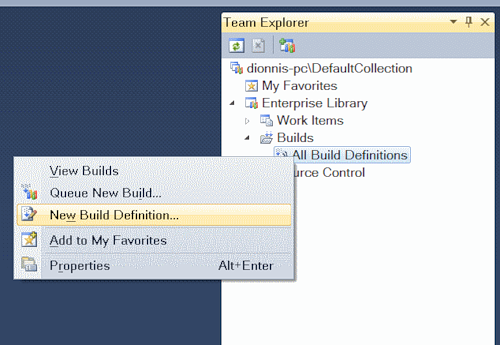
First you need to determine the assembly parameters. To do this, use the already familiar Team Explorer panel in Visual Studio.
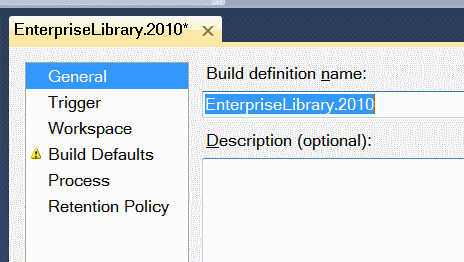
Here I want to consider a little of the possible parameters.
Of particular interest is the Trigger tab. On this tab, you can set events on the basis of which assemblies will be assembled:
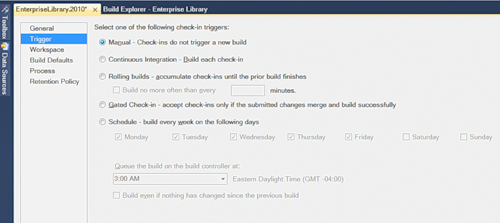
- Manual – сборка задается вручную, по требованию.
- Continuous Integration – сборка происходит сразу после check-in’а (после копирования файлов в репозиторий). Данный метод очень эффективен, если вы хотите делать сборки не дожидаясь объединения изменений.
- Rolling builds – метод, при котором все изменения будут собираться пока выполняется предыдущая сборка. Данный метод рекомендуется использовать, если у вас очень большой проект и сборка занимает много времени (больше, чем скорость с которой вносятся изменения).
- Gated Check-in – данный метод позволяет быть уверенным, что все изменения корректно компилируются, до того как файлы попадут в основной репозиторий.
- Scheduled - a method in which you set the schedule by which assemblies occur. For example, in many companies it is good practice to create daily assemblies.
With such a rich set of options, you can create all kinds of assemblies based on your needs.
The next important tab when setting up the assembly is the tab - Build Defaults. Here you need to specify the folder in which the result will be placed after assembly.
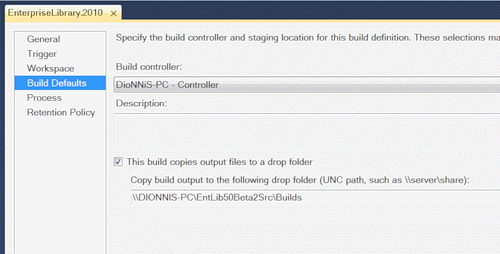
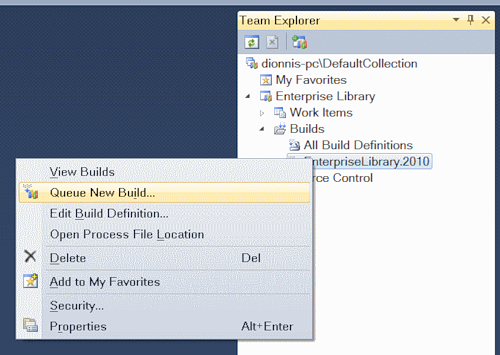
Now you can save the assembly parameters and make sure that it has become available in the Team Explorer panel. Let's add a new assembly to the execution queue.

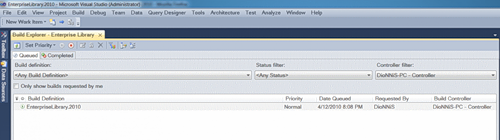
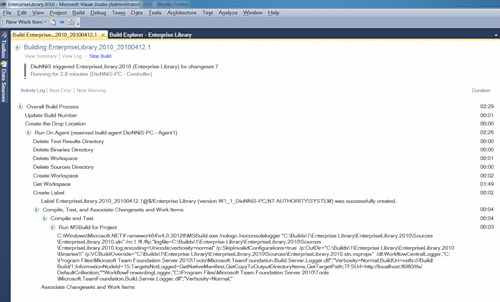
If you double-click on the assembly in the queue, you will see detailed information about the execution.
After a while, the result will appear.
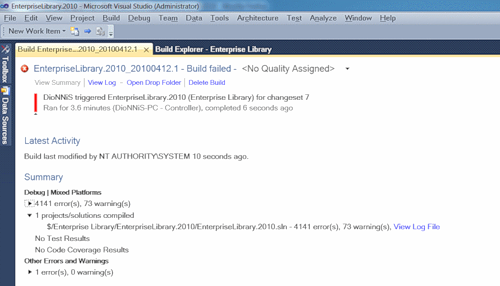
In my case, the result was not comforting, but it does not matter now. Hope you will be all right! This report provides detailed information about all errors and warnings that were found, so from this report you can immediately go to the code that caused the error.
And so, we looked at the tools that TFS offers for building assemblies. Now you are fully prepared to provide a minimum life cycle for your product using TFS.
This concludes the article on TFS and wish you more interesting projects!
And most importantly - do not forget to enjoy programming!
If you liked the article, vote for it here.









