How to shoot macro video
I think many of you have seen my soldering video tutorials . But many wanted to know how and what it was shot. In PM I’m tired of answering every time, so I won’t keep a secret.
Everything was filmed with a camera. It gives better video quality than a standard digital video camera of equal price. Yes, and he has better optics in this regard. He also writes directly to a USB flash drive, and the fact that the recording duration is short is not critical.
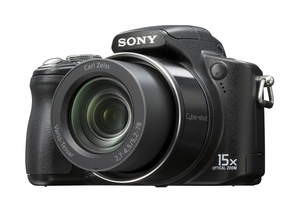
I have a Sony H50, here it is:
I think any digital camera will roll if only it had a macro mode. And with the ability to zoom in macro mode. It seems that everyone knows how.
But I need to shoot not static pictures, but a process. And here two problems arise.
1. Operational space. If I stick a lens on the chip, then I will not crawl a soldering iron to it. So you need to shoot from afar, but in macro mode.
2. Flux, or rather its spray. I did not smile at wiping the delicate optics from the spray of alcohol-rosin solutions. So between the camera and the process should be protective glass.
The problem was solved by making a mega tripod. A monitor mount was purchased. The most common, for a thousand rubles, in some kind of large hardware store. The suspension was tightly screwed to the table with screws, nevertheless the hinges were tightened more tightly, in some places it was necessary to replace plastic washers with leather gaskets impregnated with rosin. To get tighter.
Holes in the die were drilled and a bolt from a conventional photo tripod was inserted into one of them. The camera was already screwed to it. In order not to crawl, he put a leather pad.
Now we need to lengthen the macro. You can do this with an external lens - it also protects the camera lens from splashes.
I took the lens from the carrier and out of its own hardware banged artful hinged fasteners, allowing me to move the lens as I like, adjusting the sharpness. And the board itself was clamped in a hinged yoke of Proxxon. Also, putting any garbage like a compact disc under a yew, I made them higher or lower, thereby further adjusting the sharpness. Below, on a stand, a fan blowing smoke is fixed.
My camera has a hinged screen, so you can bend it and provide yourself with a good overview.
Because fotik I have one ability to remove the complete assembly failed, turn on the imagination :)

Tyts are bigger than
Z.Y.
In which blog to poke this entry? But I didn’t find anything suitable.
Moved to DIY
UPD
Here is an example recording. The width of this chip is about 1cm. Lead Thickness 0.3mm
But this is not the limit of increase. Actually, you can increase it so that the rough housing of the microcircuit will be on the whole frame and each tubercle will be visible.
Everything was filmed with a camera. It gives better video quality than a standard digital video camera of equal price. Yes, and he has better optics in this regard. He also writes directly to a USB flash drive, and the fact that the recording duration is short is not critical.
I have a Sony H50, here it is:
I think any digital camera will roll if only it had a macro mode. And with the ability to zoom in macro mode. It seems that everyone knows how.
But I need to shoot not static pictures, but a process. And here two problems arise.
1. Operational space. If I stick a lens on the chip, then I will not crawl a soldering iron to it. So you need to shoot from afar, but in macro mode.
2. Flux, or rather its spray. I did not smile at wiping the delicate optics from the spray of alcohol-rosin solutions. So between the camera and the process should be protective glass.
The problem was solved by making a mega tripod. A monitor mount was purchased. The most common, for a thousand rubles, in some kind of large hardware store. The suspension was tightly screwed to the table with screws, nevertheless the hinges were tightened more tightly, in some places it was necessary to replace plastic washers with leather gaskets impregnated with rosin. To get tighter.
Holes in the die were drilled and a bolt from a conventional photo tripod was inserted into one of them. The camera was already screwed to it. In order not to crawl, he put a leather pad.
Now we need to lengthen the macro. You can do this with an external lens - it also protects the camera lens from splashes.
I took the lens from the carrier and out of its own hardware banged artful hinged fasteners, allowing me to move the lens as I like, adjusting the sharpness. And the board itself was clamped in a hinged yoke of Proxxon. Also, putting any garbage like a compact disc under a yew, I made them higher or lower, thereby further adjusting the sharpness. Below, on a stand, a fan blowing smoke is fixed.
My camera has a hinged screen, so you can bend it and provide yourself with a good overview.
Because fotik I have one ability to remove the complete assembly failed, turn on the imagination :)
Tyts are bigger than
Z.Y.
Moved to DIY
UPD
Here is an example recording. The width of this chip is about 1cm. Lead Thickness 0.3mm
But this is not the limit of increase. Actually, you can increase it so that the rough housing of the microcircuit will be on the whole frame and each tubercle will be visible.