Making Shockmount for Yeti Microphone
In this article I will talk about how to make a decent-looking shockmount for a Yeti microphone from Blue Microphones. The fact is that the network has a fairly large number of guides on the manufacture of shock mounts for different microphones, but these products, as a rule, have a rather controversial appearance, and the company one has a rather high cost (6,990 rubles). Therefore, when it occurred to me that a shockmount was still necessary, it was decided to manufacture the product from scratch.

If you are interested - please under the cat.
Immediately for myself, I decided that the shock mount would be made by laser cutting. The basis was taken by the corporate shokmaut for Yeti, many photos of this accessory were found and revised on the net.

It became clear that it was very large for my desk, and the design was somewhat complicated for full copying - so it was decided to reduce and simplify. How everything should look in my head almost immediately, so the microphone was immediately carefully measured in all the necessary places, the site of the company in my city was found, which seemed to be engaged in laser cutting plywood, plexiglass and acrylic up to 10 mm thick and after finding out which As they need files with a project to be cut, a layout has been sketched in CorelDRAW.
A simple microphone stand and a metal adapter screw with 3/8 "to 5/8" thread was also ordered for AliExpress (Yeti is fixed with a 5/8 screw) - I did not find it, because when I saw the adapter, I realized that need to).
After examining the photo on the site, I figured that the shock mount could be fixed to the stand simply with nuts, replacing the native rod for mounting the microphone with a suitable screw.

It remained to wait for the Chinese parcels, check the mounting dimensions for mounting the rack (they had to be made the same size with the holes for lacing to avoid confusion). Three weeks later, the rack was received, I was convinced that the stock can be easily replaced with an M6 screw and corrected the layout of CorelDRAW.
Here's what happened in the end:

The outer ring is thicker - it must be made sufficiently strong, since it will account for all the weight of the structure. Thirty-two holes allow you to attach it to the rack in any convenient position and at the same time reduce its weight, which is also important, given the weight of the microphone.
While the desk was in the mail, the company engaged in laser cutting in my city had disappeared somewhere and I had to say goodbye to thoughts of white acrylic shokumount. He was rescued by a familiar turner, who, having learned about the problem, offered to make everything from getinaks, a piece of which had long been lying around with him. After making some changes to the drawings, I got ready-made parts with screws and metal posts (I did not order them, the turner said he did not need to bother and did them too):

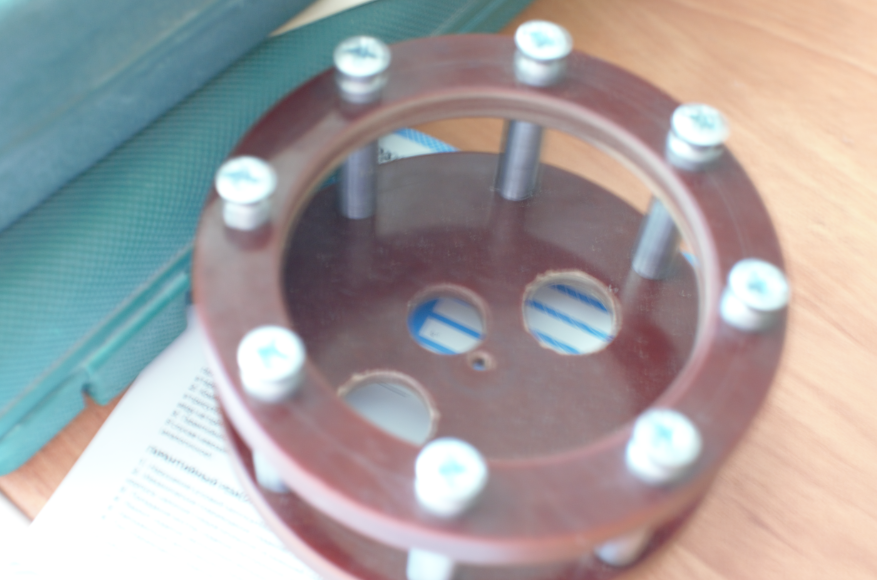
Control assembly before grinding and painting (I apologize for the quality, but only such a photo has survived):
The parts were ground with fine sandpaper and coated with ordinary automotive quick-drying enamel from a can on several layers.
It seemed to me that an ordinary cord would be enough to attach the ring holder to the outer ring of the shock mount. But after the test complete assembly it turned out that nothing. Too troublesome was the alignment of the entire design of stretch marks:

I went to a local musical instrument shop and asked for a shockmount for a karaoke microphone to inspect. Before that, I was in this store, asked for a shockmount of the required size (which naturally wasn’t there, but it’s good, otherwise you wouldn’t read this article), and even held a few shokmonts in my hands. But then I didn’t pay attention to the cord, and should immediately be puzzled by this issue, since the cord is almost the main part of the shockmount. Upon detailed examination, it turned out that the cord, although tightly tight enough, retains some elasticity. Searches in the Russian-language Internet did not give an answer to the question what kind of cord is needed and had to go to the English-language forums. It turned out that a certain elastic cord is used, known in our stores as “Hungarian” or a hat cord, which is also used when sewing windbreaker jackets. It turned out that it costs from 3 to 10 rubles per meter and can be of different thickness and density. Bought the most expensive and dense of the three millimeter.
Finally, I had three painted parts on my hands, three meters of a cord, eight metal posts (length 30 mm, diameter 10 mm, through-thread M6) and sixteen M6 screws with a cap 8 mm high with a turned brook for the cord and I decided to make a video about build and write this article:
With the video, everything didn’t go smoothly either - initially I wanted to wrap metal racks with a black shrinking wobber that had long been at home. On one side lay a finished hairdryer, a cambric and a knife, were immediately put on gloves, but the cambric was apparently already too old and refused to heat up. It was necessary to do as it is and remove this unfortunate part of the video during installation.
I hope my experience will be useful to someone. I would be happy to hear suggestions and criticisms both for the article and for the video, after all, this is my first experience.
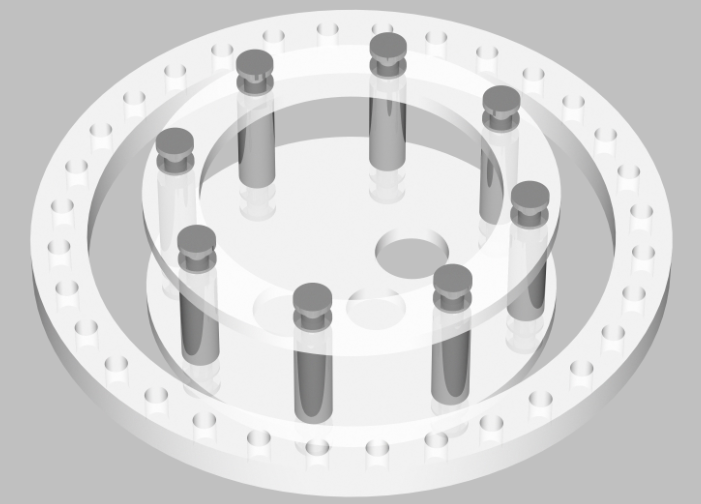
PS: I attach an image of what was conceived during the design (which was the result - the very first image in the article):
PPS: Thanks to the comments, one , two and three, I realized that it is possible to make a shock-mount method using 3D printing. So if you need a Shockmount and you have access to a 3D printer, you can print the details.
If you are interested - please under the cat.
Immediately for myself, I decided that the shock mount would be made by laser cutting. The basis was taken by the corporate shokmaut for Yeti, many photos of this accessory were found and revised on the net.
It became clear that it was very large for my desk, and the design was somewhat complicated for full copying - so it was decided to reduce and simplify. How everything should look in my head almost immediately, so the microphone was immediately carefully measured in all the necessary places, the site of the company in my city was found, which seemed to be engaged in laser cutting plywood, plexiglass and acrylic up to 10 mm thick and after finding out which As they need files with a project to be cut, a layout has been sketched in CorelDRAW.
A simple microphone stand and a metal adapter screw with 3/8 "to 5/8" thread was also ordered for AliExpress (Yeti is fixed with a 5/8 screw) - I did not find it, because when I saw the adapter, I realized that need to).
After examining the photo on the site, I figured that the shock mount could be fixed to the stand simply with nuts, replacing the native rod for mounting the microphone with a suitable screw.
It remained to wait for the Chinese parcels, check the mounting dimensions for mounting the rack (they had to be made the same size with the holes for lacing to avoid confusion). Three weeks later, the rack was received, I was convinced that the stock can be easily replaced with an M6 screw and corrected the layout of CorelDRAW.
Here's what happened in the end:
Outer ring: thickness 10 mm, diameter 170 mm, rim width 15 mm, thirty-two holes with a diameter of 6 mm.
Inner ring: thickness 5 mm, diameter 110 mm, rim width 15 mm, eight holes with a diameter of 6 mm.
Ring for mounting the microphone: thickness 5 mm, diameter 110 mm, eight holes with a diameter of 6 mm, a hole for mounting with a diameter of 16 mm and two for connections with a diameter of 20 mm.
The outer ring is thicker - it must be made sufficiently strong, since it will account for all the weight of the structure. Thirty-two holes allow you to attach it to the rack in any convenient position and at the same time reduce its weight, which is also important, given the weight of the microphone.
While the desk was in the mail, the company engaged in laser cutting in my city had disappeared somewhere and I had to say goodbye to thoughts of white acrylic shokumount. He was rescued by a familiar turner, who, having learned about the problem, offered to make everything from getinaks, a piece of which had long been lying around with him. After making some changes to the drawings, I got ready-made parts with screws and metal posts (I did not order them, the turner said he did not need to bother and did them too):
Control assembly before grinding and painting (I apologize for the quality, but only such a photo has survived):
The parts were ground with fine sandpaper and coated with ordinary automotive quick-drying enamel from a can on several layers.
It seemed to me that an ordinary cord would be enough to attach the ring holder to the outer ring of the shock mount. But after the test complete assembly it turned out that nothing. Too troublesome was the alignment of the entire design of stretch marks:
I went to a local musical instrument shop and asked for a shockmount for a karaoke microphone to inspect. Before that, I was in this store, asked for a shockmount of the required size (which naturally wasn’t there, but it’s good, otherwise you wouldn’t read this article), and even held a few shokmonts in my hands. But then I didn’t pay attention to the cord, and should immediately be puzzled by this issue, since the cord is almost the main part of the shockmount. Upon detailed examination, it turned out that the cord, although tightly tight enough, retains some elasticity. Searches in the Russian-language Internet did not give an answer to the question what kind of cord is needed and had to go to the English-language forums. It turned out that a certain elastic cord is used, known in our stores as “Hungarian” or a hat cord, which is also used when sewing windbreaker jackets. It turned out that it costs from 3 to 10 rubles per meter and can be of different thickness and density. Bought the most expensive and dense of the three millimeter.
Finally, I had three painted parts on my hands, three meters of a cord, eight metal posts (length 30 mm, diameter 10 mm, through-thread M6) and sixteen M6 screws with a cap 8 mm high with a turned brook for the cord and I decided to make a video about build and write this article:
With the video, everything didn’t go smoothly either - initially I wanted to wrap metal racks with a black shrinking wobber that had long been at home. On one side lay a finished hairdryer, a cambric and a knife, were immediately put on gloves, but the cambric was apparently already too old and refused to heat up. It was necessary to do as it is and remove this unfortunate part of the video during installation.
I hope my experience will be useful to someone. I would be happy to hear suggestions and criticisms both for the article and for the video, after all, this is my first experience.
PS: I attach an image of what was conceived during the design (which was the result - the very first image in the article):
PPS: Thanks to the comments, one , two and three, I realized that it is possible to make a shock-mount method using 3D printing. So if you need a Shockmount and you have access to a 3D printer, you can print the details.
Links
» Threaded bushing
» Screws
» Microphone stand
» Adapter screw with 5/8 "to 3/8" thread
» Project from CorelDRAW