MS SQL Backup: A couple of useful Commvault features that not everyone knows about
- Tutorial

Today I’ll tell you about two Commvault features for MS SQL backup that are undeservedly bypassed: granular recovery and Commvault plugin for SQL Management Studio. Basic settings will not be considered. The post is more likely for those who already know how to install an agent, configure schedules, politicians, etc. I talked about how Commvault works and what it can do in this post .
Granular recovery
The table level restore option has appeared in the Subclient properties relatively recently. It allows you to enable the ability to restore tables from the database, while not restoring the entire database from backup. This is convenient when you know where exactly the error or data loss. At the same time, the base itself is large and it will take a long time to restore it all.
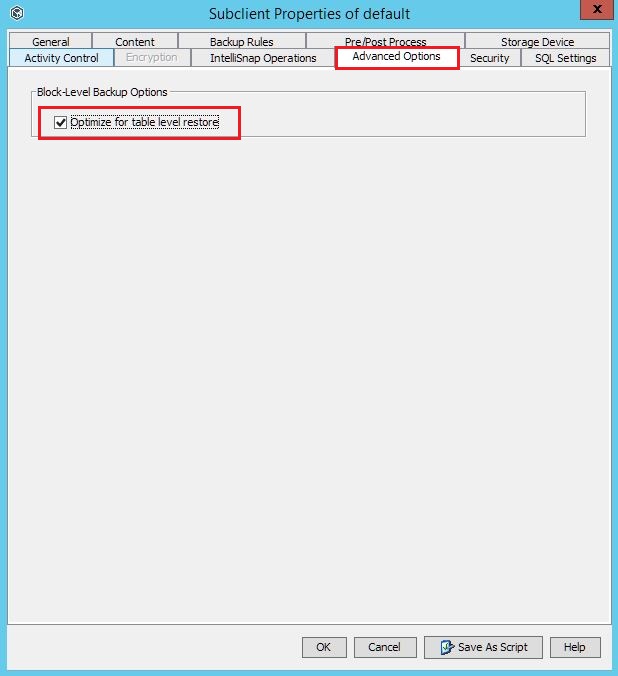
This option has limitations:
- Tables cannot be restored to the original database, only to another.
- All tables are restored to the dbo schema. A table cannot be restored to a user schema.
- Only a local SQL server account with system administrator rights is supported.
- The target server where we are restoring the table should be running on Windows.
- In addition to SQL Agent, Media Agent and Java Runtime Environment must be installed on the target server.
- The database should use Recovery model in Full mode.
- If the option of granular database recovery is enabled, the ability to run differential backup jobs disappears.
The table-level-restore option is disabled.

The table-level-restore option is disabled.
In my practice, there was a case when the client had the following schedule configured for the SQL server: one full backup once a week and 6 differential backups on weekdays. He turned on the table-level-restore function, and tasks for differential backup worked out with an error.
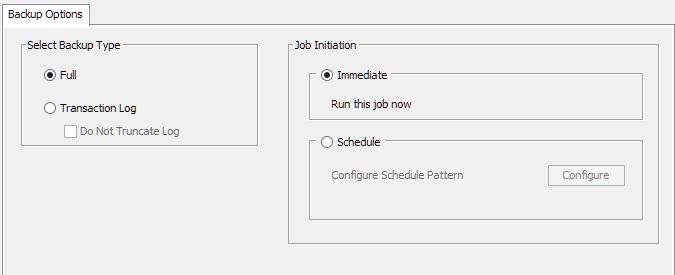
Let's see what the recovery itself will look like.
1. We start recovery on the necessary agent.
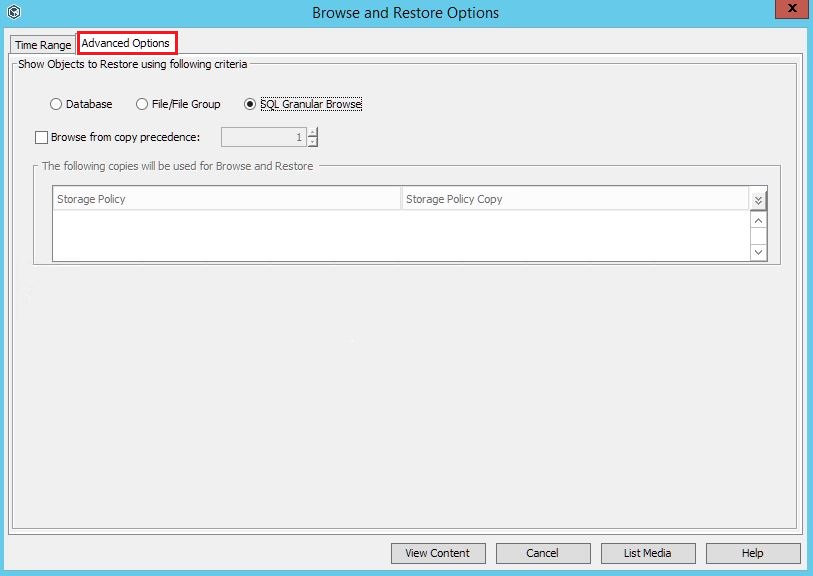
2. In the window that appears, go to the Advanced Options tab . Select SQL Granular Browse - View Content.
3. In the list that opens, select the base from which we will restore the table, and click Restore Granular .
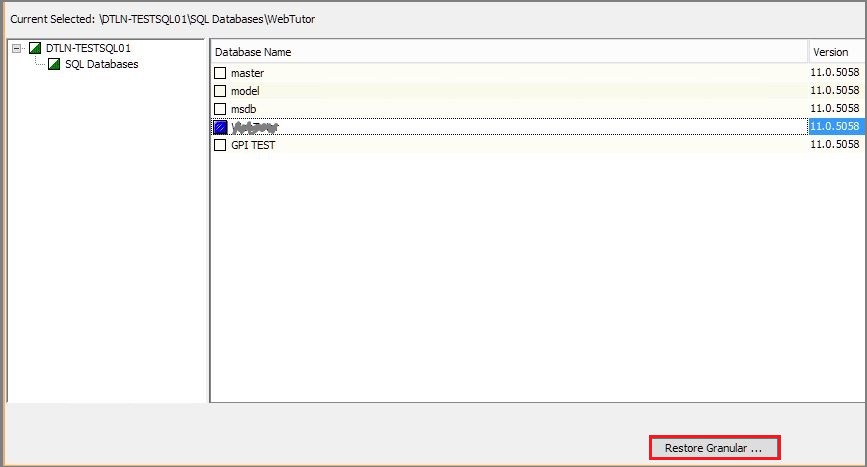
4. In the dialog box, configure the mount point of the database from the backup files (something like Instant Recovery technology).
We indicate:
- name for the temporary database;
- how long to keep this recovery point in days;
- server where we will mount the database. Only servers that meet all the necessary conditions mentioned above will be available in the list: with Windows OS, installed Media Agent and Java Runtime Environment, etc.
Click OK.

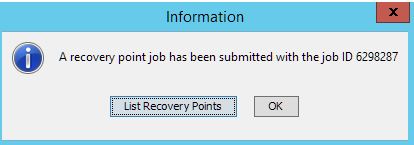
5. In the new window, click on List Recovery Points.
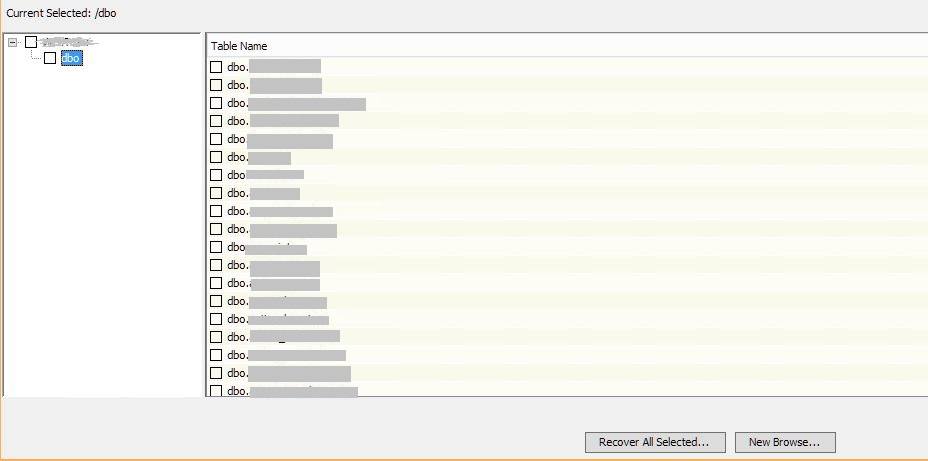
6. A list of mounted recovery points opens. If the database is large, then you have to wait. Then click Browse . A window will appear for viewing tables from the selected database.

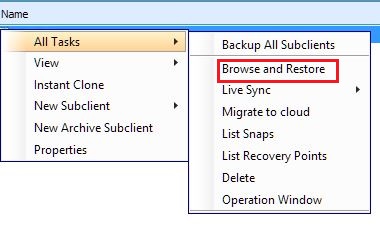
While the list is being formed, often the dialogue Recovery Points are closed, and then they cannot return there again. It's simple: right-click on the SQL server instance where the process of mounting the restore point was started. Go to All Tasks and select List Recovery Points.

7. If there are many tables, it will take some time to display them. For example, for a 40 GB database, a list is formed about ten minutes. Select the desired table, click Recover All Selected.
8. In the new window, select the base where we will restore the table (s). In our case, this is the GPI TEST base.
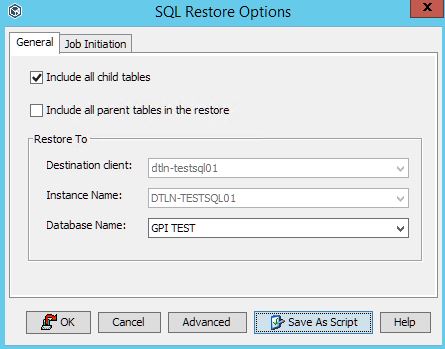
9. After the recovery is complete, the selected tables will appear in the GPI TEST database.

After restoring the table to a temporary database, it can be transferred to the original database using Management Studio.
Commvault Plug-in for SQL Management Studio
Database administrators do not always have access to the backup system (IBS). Sometimes you need to do something urgently, but the administrator of the IBS is not in place. Using the Commvault plugin for SQL Management Studio, the DBA will be able to perform basic backup and restore operations.
| QL Management Studio Version | Command |
| SQL 2008 R2 | CvSQLAddInConfig.exe / i 10 / r |
| SQL 2012 | CvSQLAddInConfig.exe / i 11 / r |
| SQL 2014 | CvSQLAddInConfig.exe / i 12 / r |
| SQL 2016 | CvSQLAddInConfig.exe / i 13 / r |
| SQL 2017 | CvSQLAddInConfig.exe / i 14 / r |
Versions of SQL servers that support the Commvault Plug-in and commands that activate the plug-in. The plugin is supported only on a 64-bit version of Windows.
1. We execute the command that corresponds to our version of SQL server:

2. Now backup and restore options are now available in Management Studio. To do this, right-click on the desired database.
Thus, the administrator, therefore, had the opportunity to directly interact with backups of this database without the Commvault console and calls to the administrator of the IBS.
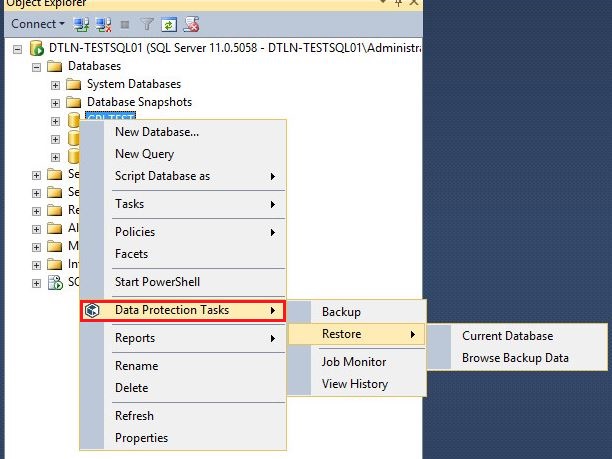
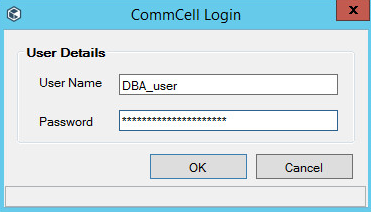
3. When starting any of the available functions of this menu, a window will appear asking for the login and password. To connect to CommServe, use SSO or any other account from the Security section in Commserve (Commcell login).

4. If the credentials were entered correctly and there are enough access rights, the DBA can:
- start an extraordinary backup (Backup);
- restore the database from backup (Restore);
- View the history of completed tasks (View History) and the progress of tasks in progress (Job monitor).
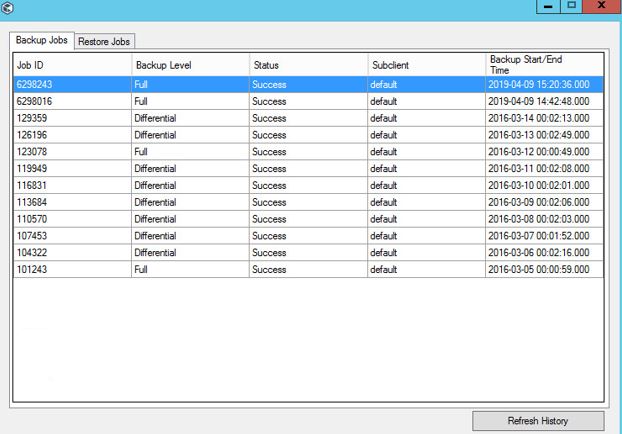
This is how Management Studio looks like the history of completed backup jobs for the selected database.
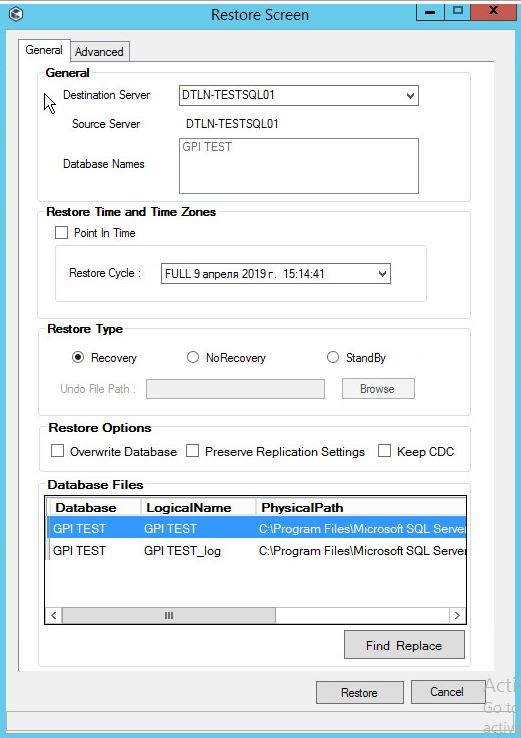
Menu for database recovery. It does not even differ from the console menu.
That's all about these two SQL Agent features from Commvault. I will add that backups using Commvault are more suitable for those who have dozens of servers running with several instances and databases, all this, possibly at different sites, and require setting up different schedules, depths, etc. If you have a couple of servers, then for backup is enough and regular means of MS SQL.
A source