New Year in Sysadminya, or How to collect the holiday geek indicator yourself

Stanislav Mushinsky, Mail.Ru Group Technical Support Specialist
Hello everyone! Today I will tell you how to collect from improvised materials what can be called an indicator of the New Year mood.
This idea came to me after a friend showed me a map of Russia found on the Internet, created from motherboards. Big cities on it were illuminated by diodes, and in the middle was a monitor. As far as I remember, the card played the role of an advertising logo. Admiring the implementation, I jokingly said that you can create something similar without much effort and from improvised means. And then the joke became a reality.
I suggested making a logo or phrase from the motherboard - something related to the profile of our work, so that I could hang it in the reception room . For example, the phrase we liked “How can I help?” Could be implemented as a separate motherboard for each letter with a backlight.

But later a more successful idea came up - to create a “dog”. Such as in the picture above.
To begin with, we decided to postpone non-working motherboards. The process took a long time, partly because for some magical circumstances (karma?), Broken motherboards are rare. In two months, we were able to accumulate only two “mothers,” and then the second was removed from a very old, non-operational computer. After that, they decided to go to the warehouse and look for system units to be decommissioned.
They didn’t really think about the size of the model - they simply laid out A4 sheets on a floor with a 5x4 matrix, and put all the motherboards on top, thereby receiving 13 motherboards + small parts that will be cut from the remains of the boards. We fitted the “@” symbol and printed it.

Having cut out the pieces from paper, I marked out all the motherboards and immediately ran into the most important problem - what to cut out? At first I decided to “gash” the
Having cut the necessary “Aquarium” out of the box from the system unit, I wrapped it all in plastic and smoothly proceeded to cut the boards. The process dragged on due to the possibility of doing this only in your free time and the presence of laziness, which is approximately equal
 , since time is short and laziness exceeds all standards, the likelihood of a quick implementation of this project is extremely small. But still in a month it turned out to keep within.
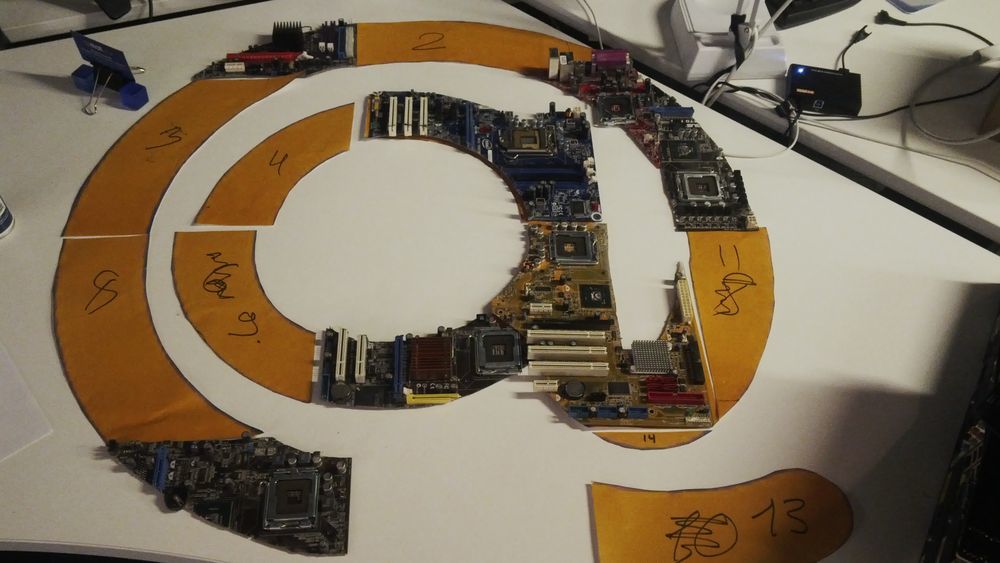
In the process of work, these were the initial stubs.
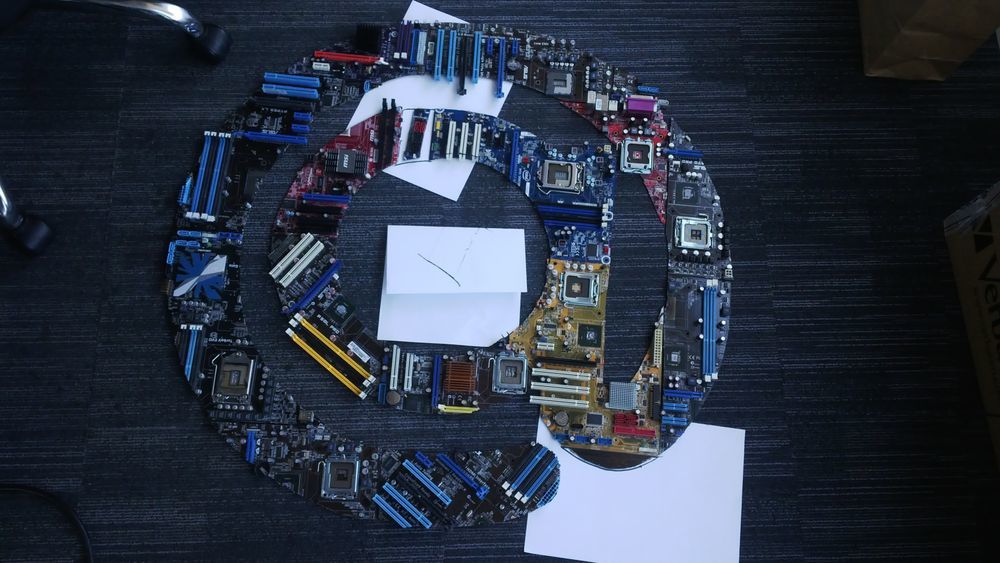
Completely sawn parts. Sheets of paper marked the parts that need to be finalized.
They decided to use a piece of pressed plywood, painted white, measuring one meter per meter, as the basis on which “@” will be held. The wooden frame for the construction was made to order by the head of our department.
The boards were fastened to the plywood with the help of the legs holding the motherboards in the system units. So that they did not fall out, I had to fill the holes with glue and only then screw the fasteners themselves.

For one of the motherboards, a through hole was made through which the LED strip and the power supplied to the cooler (on the same motherboard) were brought out. The power supply is organized very simply: as much as possible isolated the standard cooler power contacts and soldered two wires to it, which subsequently will come to the power supply from the LED strip. Thus, the cooler is connected to the native contact on the motherboard. The LED strip was placed exactly between the boards and the plywood base, which was realized thanks to the legs on which the motherboards are held.
Then I connected a standard set of wires and peripherals, which is in any system unit. Another friend came up with a good idea - to draw a plywood-like pattern on a plywood.

The only difficulty was that the LED strip was already fixed, and technical education and a sense of beauty required to fulfill the drawing in accordance with GOST.

The work was almost completed - all that was left to hang it, but then the "creative artist of the project" suggested the final idea: put in the middle of the monitor, on which, depending on the day and wishes, you can display anything.
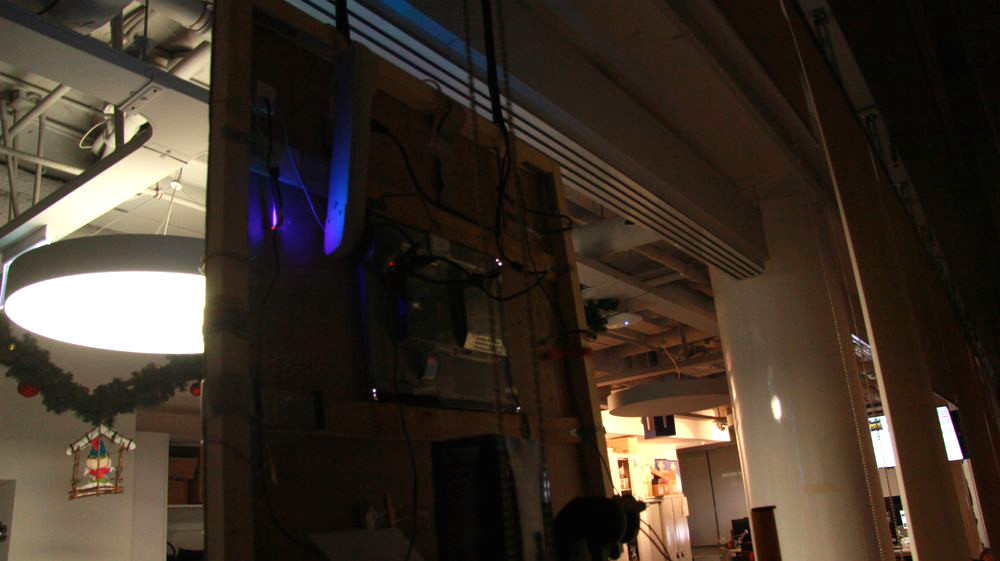
Two boards were used as fasteners, fixed on a wooden frame running along the perimeter of the wire that holds the monitor and four cardboard boxes supporting it to the desired height. Now, even if you turn all this creation upside down with the monitor, it will not fall (still, it was not part of the main functionality).

Total
13 motherboards, two metal disks, one monitor, one cooler, LED strip and five months of operation (although you could keep it in a week) and a pretty character is ready.
In the creation of this creation participated:
- mastermind - 1 pc.;
- creative artist - 1 pc.;
- lessor of the engraving machine - 1 pc .;
- Leading engineer of the woodworking project - 1 pc.;
- spray gun tenant - 1 pc.;
- a factor complicating the development process is an infinitely large number.
To be continued…