MQTT protocol and MQTT client open source project on Delphi
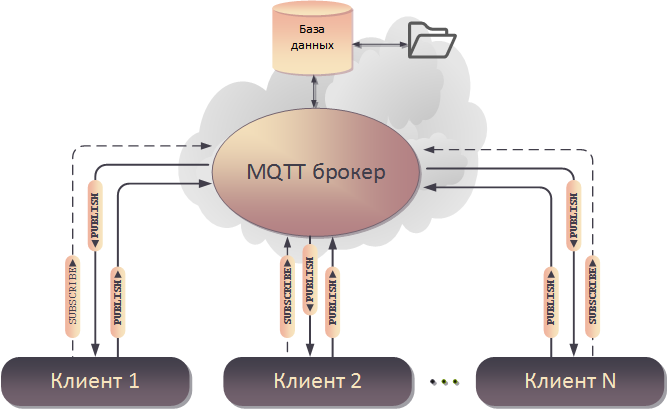
The MQTT protocol is used for messaging on the Internet of things. First of all, it is interesting because it is supported by the largest providers of cloud services, such as IBM, Microsoft, Amazon.
You can get an account in these services for free, set up a service for receiving MQTT messages there and watch the life of your devices through these services, for example, in a smart home. Also, through these services, devices can communicate with each other.
A demonstration of client connection to the MQTT service of the IBM Bluemix cloud is included.
Short description.
MQTT is extremely primitive: with a short header, without integrity control, it does not impose any restrictions on the structure, encoding or data scheme. The only data requirement in each packet is that they must be accompanied by an information channel identifier. This identifier in the specification is called Topic Name or a simpler topic. Data is sent to packets over TCP. The amount of data in a packet can be from one byte to 268,435,455 bytes. Very flexible! Although public cloud services impose more stringent restrictions, up to several kilobytes.
The MQTT protocol requires a data broker. This is the central idea of technology. All devices send data only to the broker and receive data only from him too. A broker is a program that acts as a TCP server with a dynamic database.
The broker's database in particular contains a table with all received packages with indexing by topics of these packages. Upon receiving the package, the broker sends it to all devices on the network according to their subscription. In order for the device to receive something from the broker, it must subscribe to the topic. Topics arise dynamically upon the subscription or upon the arrival of a packet with this topic. You can also unsubscribe from the topic. Thus, topics are a convenient mechanism for organizing relationships of different types: one to many, many to one, and many to many. If the package does not have a subscriber, then it is discarded. If the subscriber is not connected, then the package is either immediately deleted in the broker's database, or it waits for the subscriber to connect for some time specified in the configuration. The behavior is determined by the QoS attribute of the packet.
What else is important here.
• Devices are the first to establish contact with a broker. Those. devices may be located behind network address translators (NATs) and may not have static IP addresses and this will not interfere with communication.
• SSL protocol can be used to encrypt traffic. But you can work without SSL even with IBM services, which makes debugging easier.
• In extremely difficult cases, MQTT brokers allow you to connect to them through the WebSocket protocol on port 80.
• The port of the standard MQTT protocol can also be arbitrarily changed.
• Both the client / clients with a graphical user interface and the broker can be located on the same computer. Those. the solution can be absolutely local and scale to global with one click.
• Different brokers can connect with each other by subscribing to messages from each other.
• The concept of topics fits well with NoSQL database technology. For the same purpose, cloud services encourage users to use JSON data encoding.
Open projects
The choice of MQTT brokers is quite large. But strangely enough there are practically no convenient clients with a window user interface under Windows. And such a client for mastering the MQTT protocol is simply necessary because there are many practical nuances of brokers working outside the specifications and all of them need to be studied and tested somehow.
It was decided to implement the MQTT client on Delphi.
Google for Delphi can only offer the TMQTTClient component. But this is an old and not working component. Most other clients written in Java, Erlang, Haskell, Javscript in Delphi are very difficult to integrate.
Found the only suitable project - Mosquitto
Written in pure C-i. It compiles for different operating systems. It has project generation scripts for Visual Studio. At the exit under Windows we get dll files with the implementation of client and broker functionality. The use of C is encouraging in terms of speed. And dynamic libraries written in C easily connect to Delphi programs.
Delphi itself, represented by Embarcadero RAD Studio XE8, is a very powerful tool for creating flexible and convenient user interfaces for Windows, especially if it is equipped with the packages DevExpress, TeeChart, RxLib, FireDAC, etc.
Necessary tools
We will need the MS Visual Studio 2015 development environment . It will compile the Mosquitto project and all supporting projects on which Mosquitto depends . Alternatively, Mosquitto for Windows can be compiled using the Cygwin package , but Visual Studio seemed more convenient.
To generate Visual Studio project files, you need to download and install the Cmake utility . Source cmake.org
And of course you need RAD Studio XE8 . Additionally, in RAD Studio, the DevExpress VCL component package version no lower than 14.2.2 must be installed. Although this is not of fundamental importance, the user interface design can be easily remade for standard RAD Studio components.
Software Installation Procedure
Mosquitto depends on several third-party projects, these are:
• OpenSSL v 1.0.2e . Source - http://slproweb.com/download/Win32OpenSSL-1_0_2e.exe
• Pthreads v 2.9.1 . Source - ftp://sourceware.org/pub/pthreads-win32/pthreads-w32-2-9-1-release.zip
• Libwebsockets v 1.4 . Source - https://github.com/warmcat/libwebsockets
Download these projects.
We do not compile OpenSSL , but immediately take the two necessary files from there: libeay32.dll and ssleay32.dll from the bin directory . It often happens that they are already installed on the computer from other projects. This must be checked.
Pthreadswe also don’t compile, but take the already compiled pthreadVC2.dll file from the dll \ x86 directory .
Libwebsockets comes without pre-compiled files and without a project for Visual Studio, but it has a CMakeLists.txt configuration file . In this case, using the Cmake utility, we generate the Visual Studio project file in a separate directory (libwebsockets_VS_proj directory). And then opening the generated project file in Visual Studio, compile. We get the websockets.dll file that we need .
After all the previous steps, you can compile the Mosquitto project. Here, you will also first need to generate the Visual Studio project file (Mosquitto_VS_proj directory) from the attached CMakeLists.txt configuration file . The generated project does not quite work, you will have to change the paths to some external header files and libraries, include some macros in the project, and modify the source code a little. As a result, we get the mosquitto.dll file .
For simplicity, all files and the directory structure with the mentioned projects are contained in the archive file attached to the article.
Along with the client library, compiling the Mosquitto project gives us the executable file of the MQTT broker - mosquitto.exe .
Thus, we get immediately both the client and the MQTT broker, i.e. almost everything you need to organize an effective Internet of things.
Creating a MQTT Client Project in Delphi
To integrate the mosquitto.dll library into Delphi, you need to create a library function declarations module on Object Pascal . To do this, the file conversion has been performed mosquitto.h file MOSQUITTO.PAS .
The client project is very simple, consists of only 4 source files. The client demonstrates connecting and disconnecting, forming a will ( Will ), sending data with the PUBLISH package to the broker, receiving data with the PUBLISH package from the broker, subscribing and unsubscribing.
The program saves all the connection attributes, referred to by the term profile in the profile table stored on disk. The logs of received and sent PUBLISH packets are also stored separately on the disk .
Customer Use Method
Run the file TMQTTC.exe .
In order to have someone to communicate the test run broker team Run_mosquitto.cmd in directory Mosquitto_1_4_5_bin . For convenience, the broker is configured to connect without SSL and password verification.
Fill in the fields as in the screenshot.
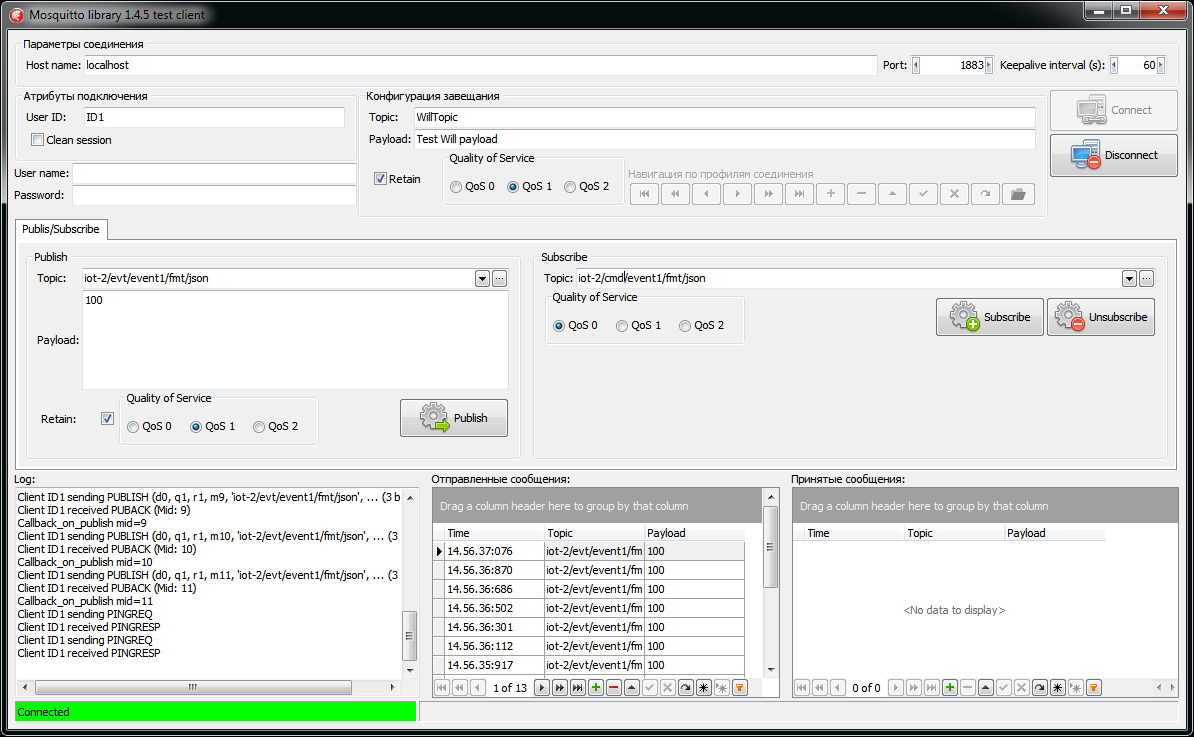
Password and username are optional. In the navigator, click the commit button to save the data in the table. Then click the Connect button .
After the connection, publish and subscribe commands become available. Commands PING client Mosquitto generates automatically.
In order for the client to get something, you should once again run the TMQTTC.exe program with a different client identifier and subscribe one client to receive data from another.
Connect to IBM Bluemix
The first thing to do is to get an account in Bluemix
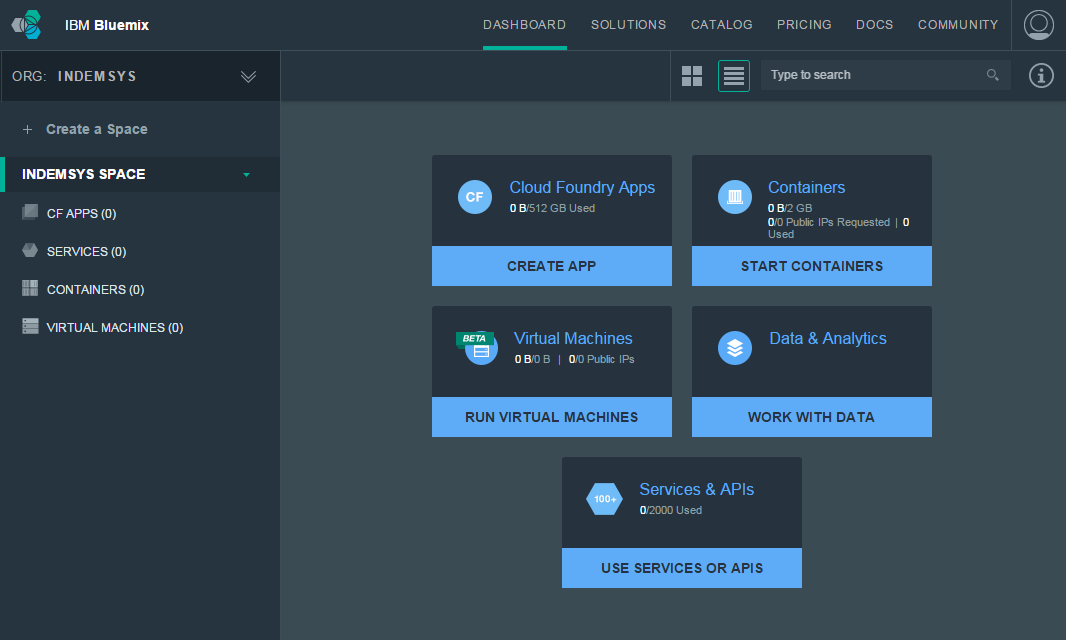
Having received an account, we go to our control panel on Bluemix . Here you must immediately switch to the US South region . To do this, click on the account icon in the upper right corner and change the value in the Region field . There are three regions in total, but US South gives you the opportunity to experience most of the services. Next, create Space . The screen should look like a crinshot below. Here, the organization INDEMSYS and Space INDEMSYS SPACE are created .
Now click on CATALOG in the top menu. We go down to the bottom and selectInternet of Things Foundation .
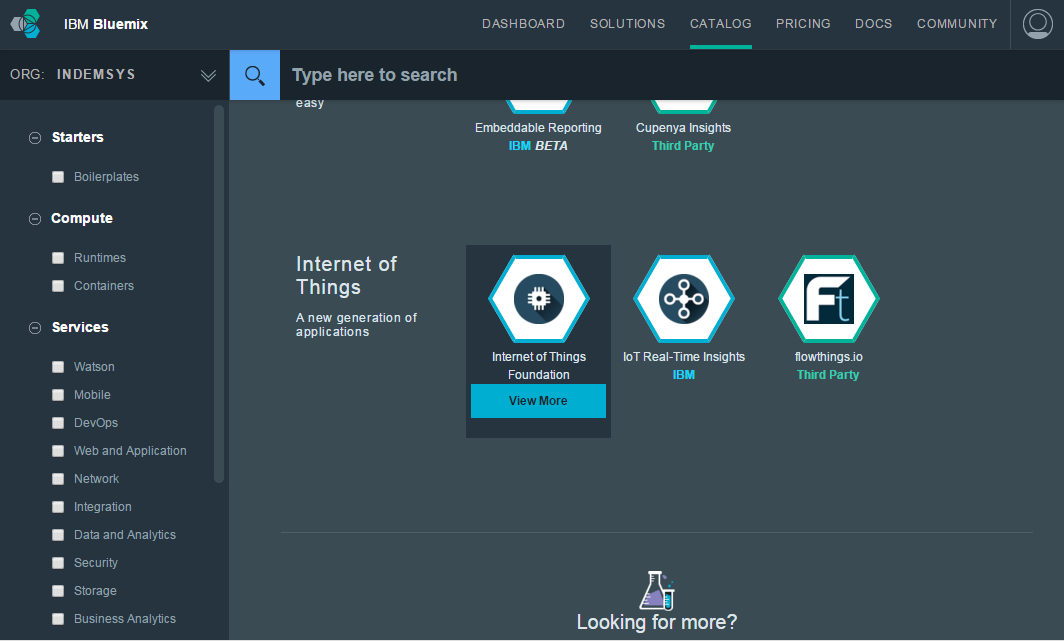
We do not change the proposed fields by default and click Create
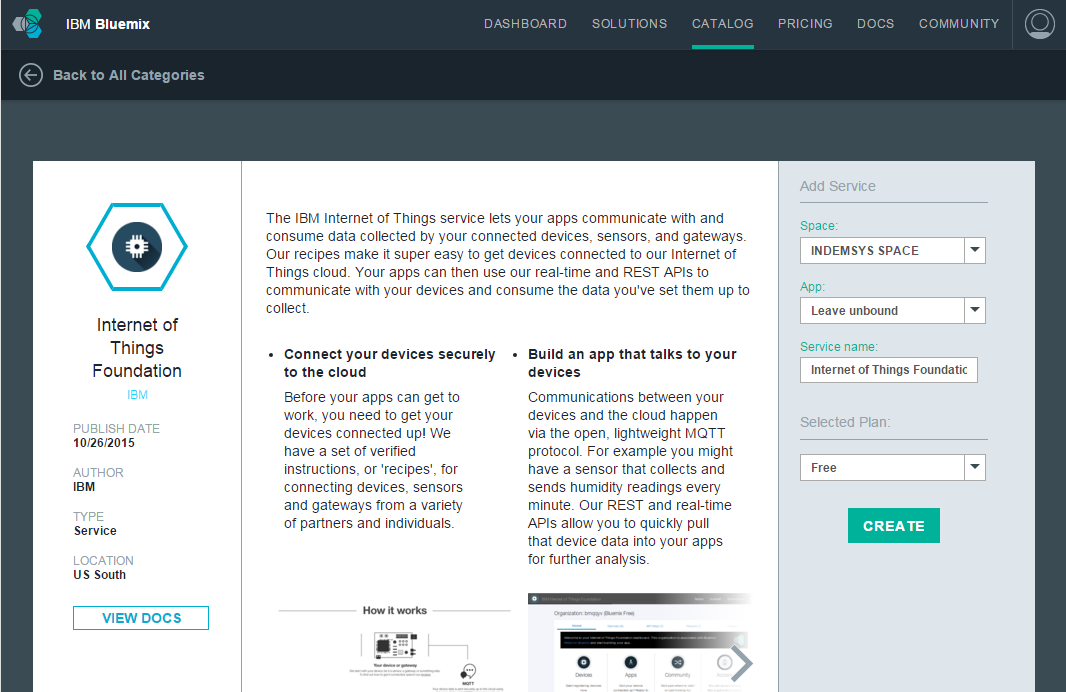
Internet of Things Foundation - this is a service that includes the MQTT broker and the user interface to it.
After creating in the window that appears, click the button labeled Launch dashboard .
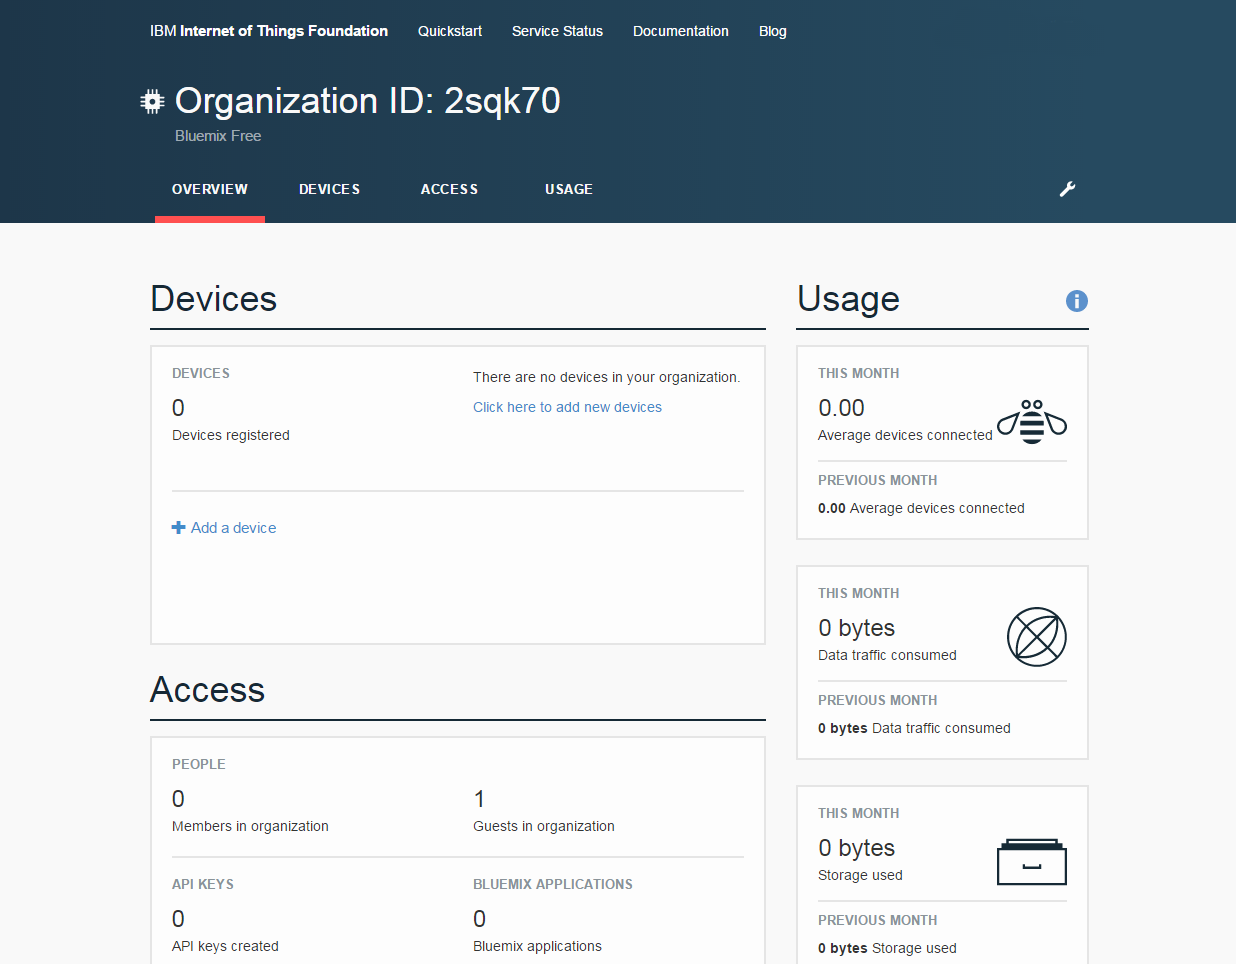
This is an IoT control panel. Now we need to create devices. Click Add device . In the dialogs that appear, create a device type ( Create device type ). Give it the name Type1, do not fill in the remaining fields for simplicity. Click Next -> Next -> Create -> Next. Name the device Device1. Next Next -> Next -> Next -> Add. As a result, we get the following window:
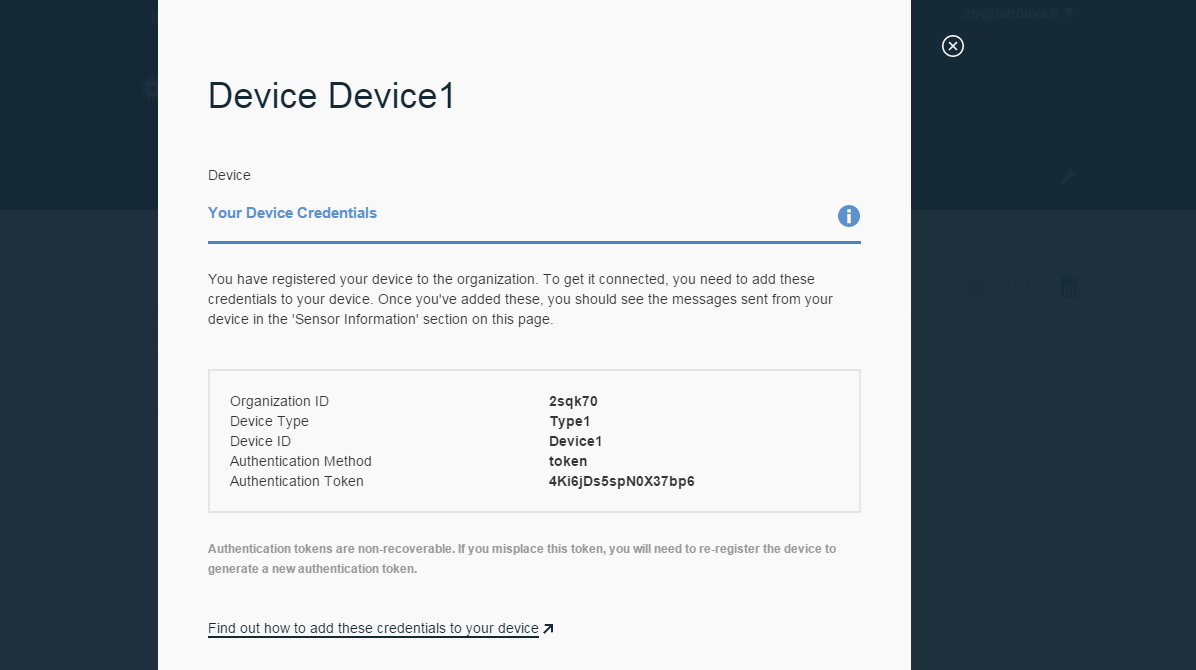
That's it, here we got all the details for connecting our first device to the MQTT broker Bluemix .
We’ll test whether our client can connect to it. Enter the details in the client window.
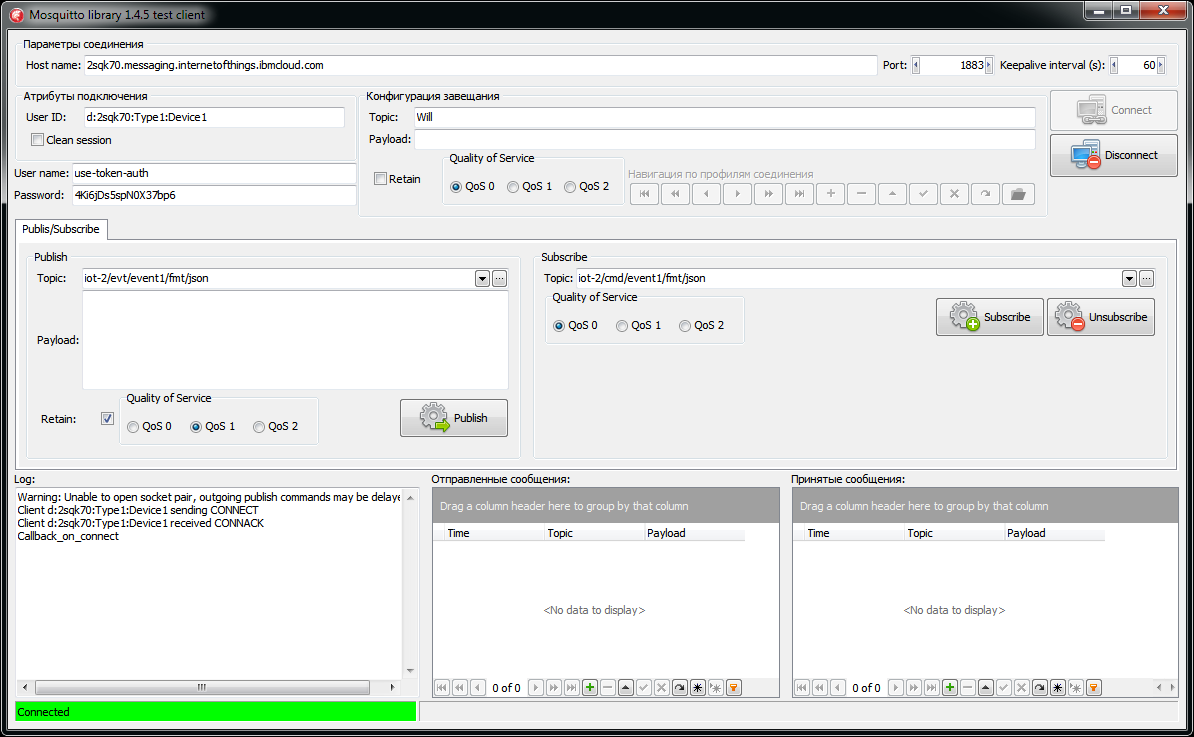
As you can see, the client successfully connected to Bluemix . Here you should pay attention to the host name. It starts with the Organization ID obtained when creating the Internet of Things Foundation . The User ID field is also composite and is encoded as: d : < Organization ID >: < Device Type >: < Device ID >. User Name field contains a fixed stringuse-token-auth .
Message topics for the Bluemix broker , unlike the Mosquitto broker , cannot contain arbitrary data. They are encoded according to certain rules. These rules should be studied in the documentation of the Internet of Things Foundation . The screenshot shows one of the possible valid topics.
Project Repository: https://github.com/Indemsys/Delphi_MQTT_mosquitto