Management of a curtain on the RS-485 interface. Part 2: add WiFi
We completed the minimum task - we tested how the AKKO AM72E motor works via the RS485 interface . Now we can command sunlight by sending electrons through wires. The obvious next step is the transition from control with the help of elementary particles to control with the help of vibrations, i.e. radio waves. The spells we will use in this case depend on the magic that we choose.
Any wireless technology would be suitable for our purposes, but I wanted to control the curtains from my smartphone. In this case, it is advisable not to install any additional programs. I will connect to my home WiFi network and control the electric curtain using a browser. Drive, through the RS485-UART adapter I will connect to the ESP8266. You can very well go your own way and use, for example, a WiFi router.
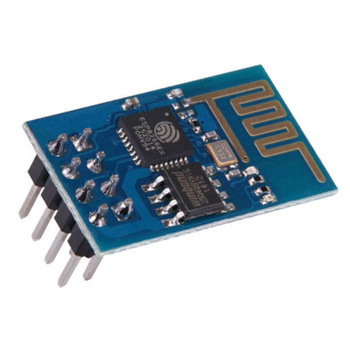
ESP-01 for today, is the most budget module with WiFi. It costs so little that if you need to control several motors, we can not pull the wires from one motor to another, but simply connect each to its own module. In this case, we will not need to give each AM72E its own address - you can contact the address ESP-01. We are interested in the ESP8266 not only for its low price and small size, but also for the fact that there are very few resources on it and it will take a lot of effort to shove something that will work into it.
I will not describe how to connect and upgrade the ESP8266 firmware. How to do this correctly can be found here .
Under Windows, to program the ESP8266, you can use either the Arduino IDE, and then we write in C (well, almost), or NodeMcu, and you can write in Lua. There are other options too, but they do not suit us.
No, we’re in no hurry to upload NodeMcu. The firmware needs to be prepared. Resources on ESP-01 are not enough so that we can forget about them if we want to raise a Web server. There is flash ROM on the board - a place where all our files will be stored - 512 KB. This is already extremely small, but we will not rest on the lack of resources in flash, but in RAM. The ESP8266 SoC has a 64KB RAM area for program code, and 96KB for data. At startup, data from the flash is loaded into RAM. If we fill the NodeMcu stock firmware and look at the amount of available memory, we will see this:
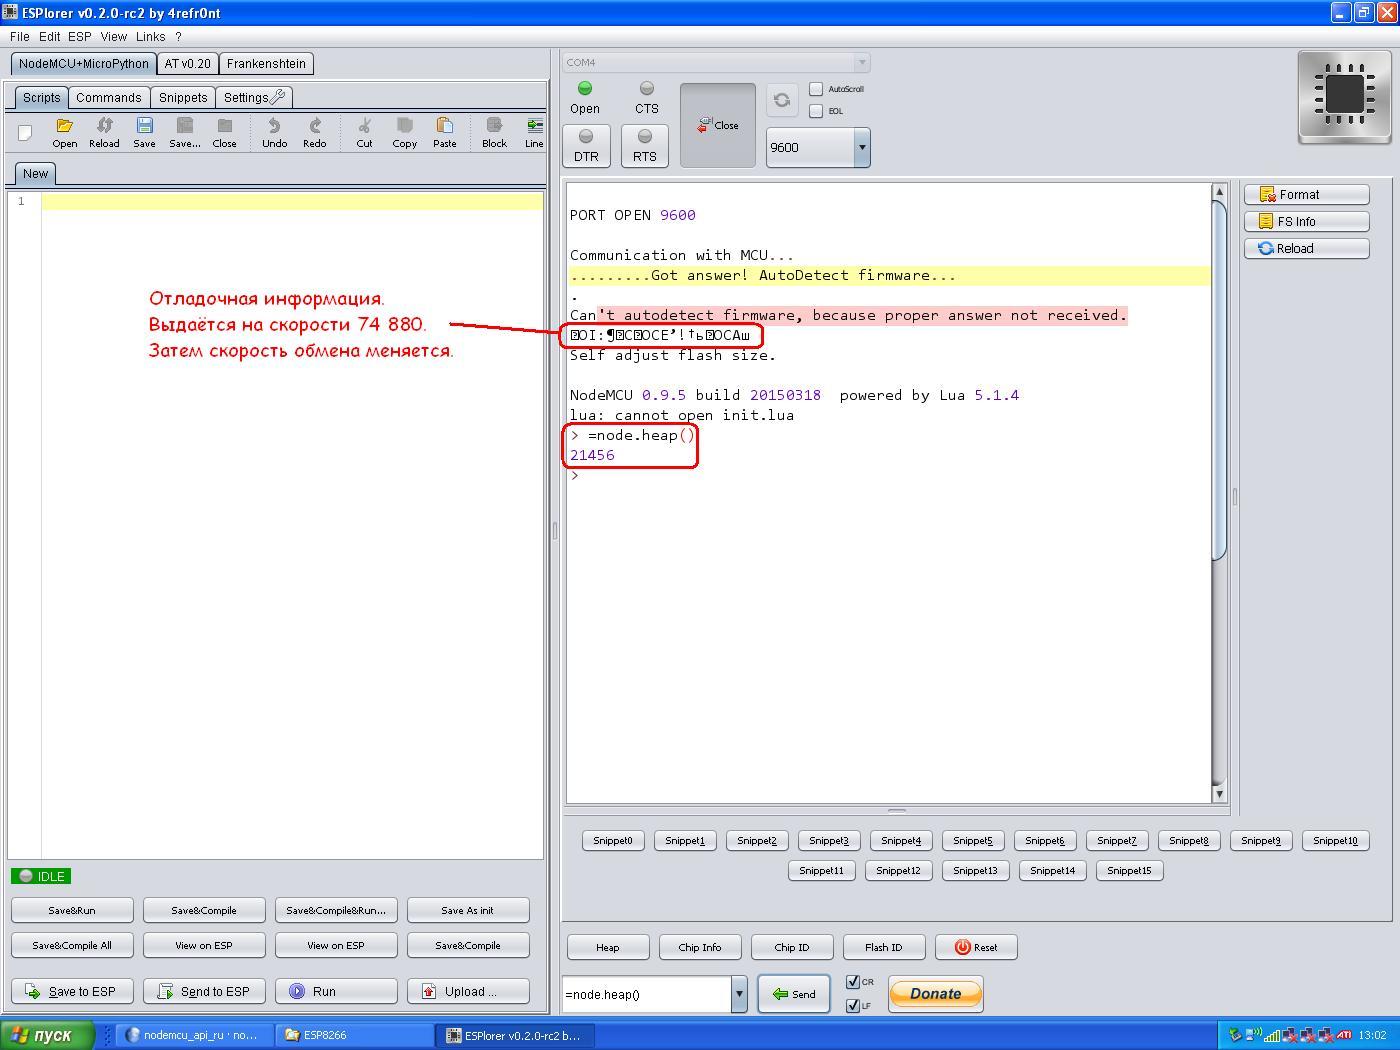
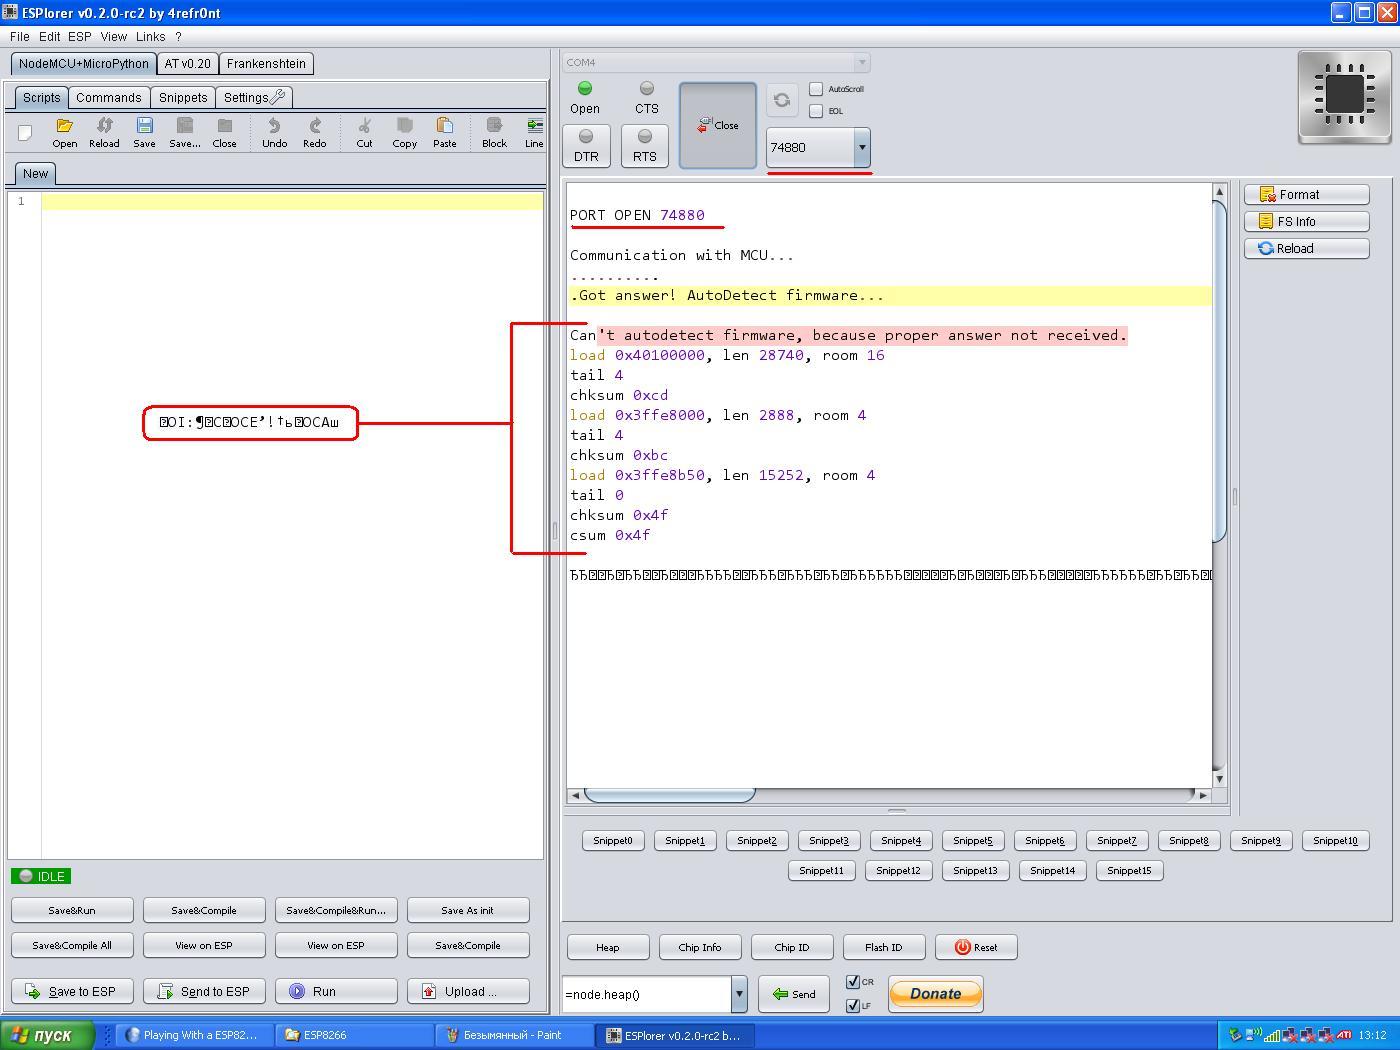
21 kb! With such volumes, you have to save every byte! We also see some garbage after the line “Can't autodetect firmware, because proper answer not received”. This is debugging information, issued at a speed of 74,880, then the speed changes. Here's how it looks at the right speed:
Nothing interesting.
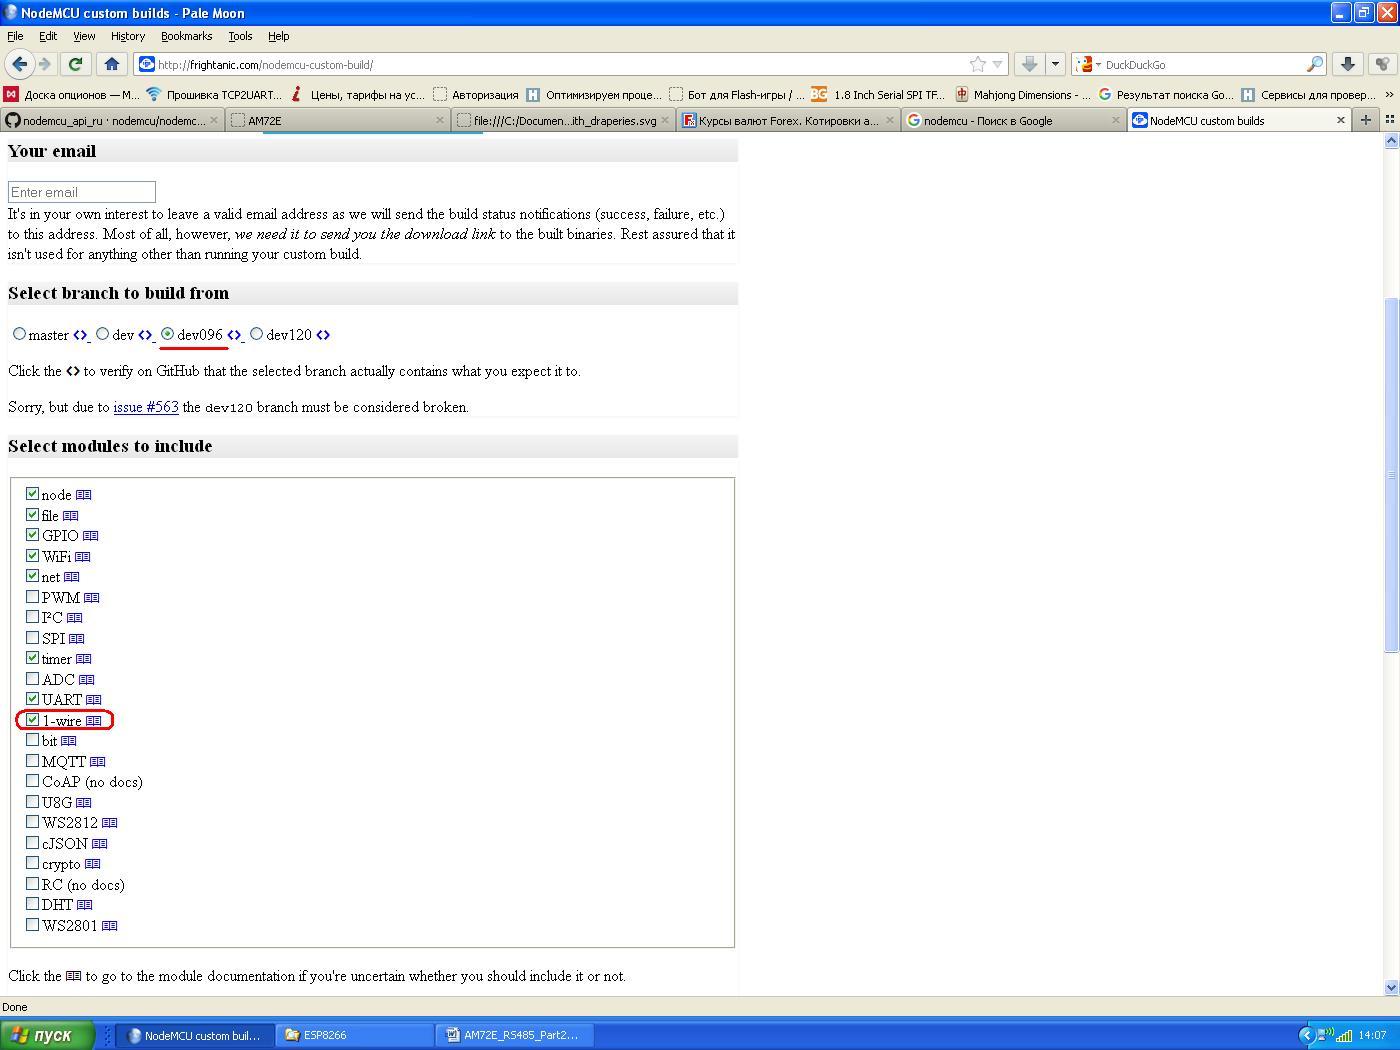
First, increase the amount of available RAM. To do this significantly, you can rebuild the firmware yourself. Source codes are available, but you don’t feel like shoveling the whole project just for the sake of testing. In addition, this will have to be done under Linux. Not that it is very difficult, but if we are distracted, we will never end. You can adjust the firmware here: frightanic.com/nodemcu-custom-build .
I switched the checkbox to dev096 and put an additional check mark next to 1-ware in the plug-in selection window. I turned on this module because of one function - CRC16 calculation. Here it is:
You, of course, can enable or disable those modules that you need. Now enter the email into the form and click on the “Check the build status” button. A one-time email is fine too. We wait a few minutes, and in a letter we get a link to the files with the firmware. Firmware in which you can only work with integers will save you a flash with a dozen kilobytes. I poured one. But you can make another choice. Let's see why we tried so hard:
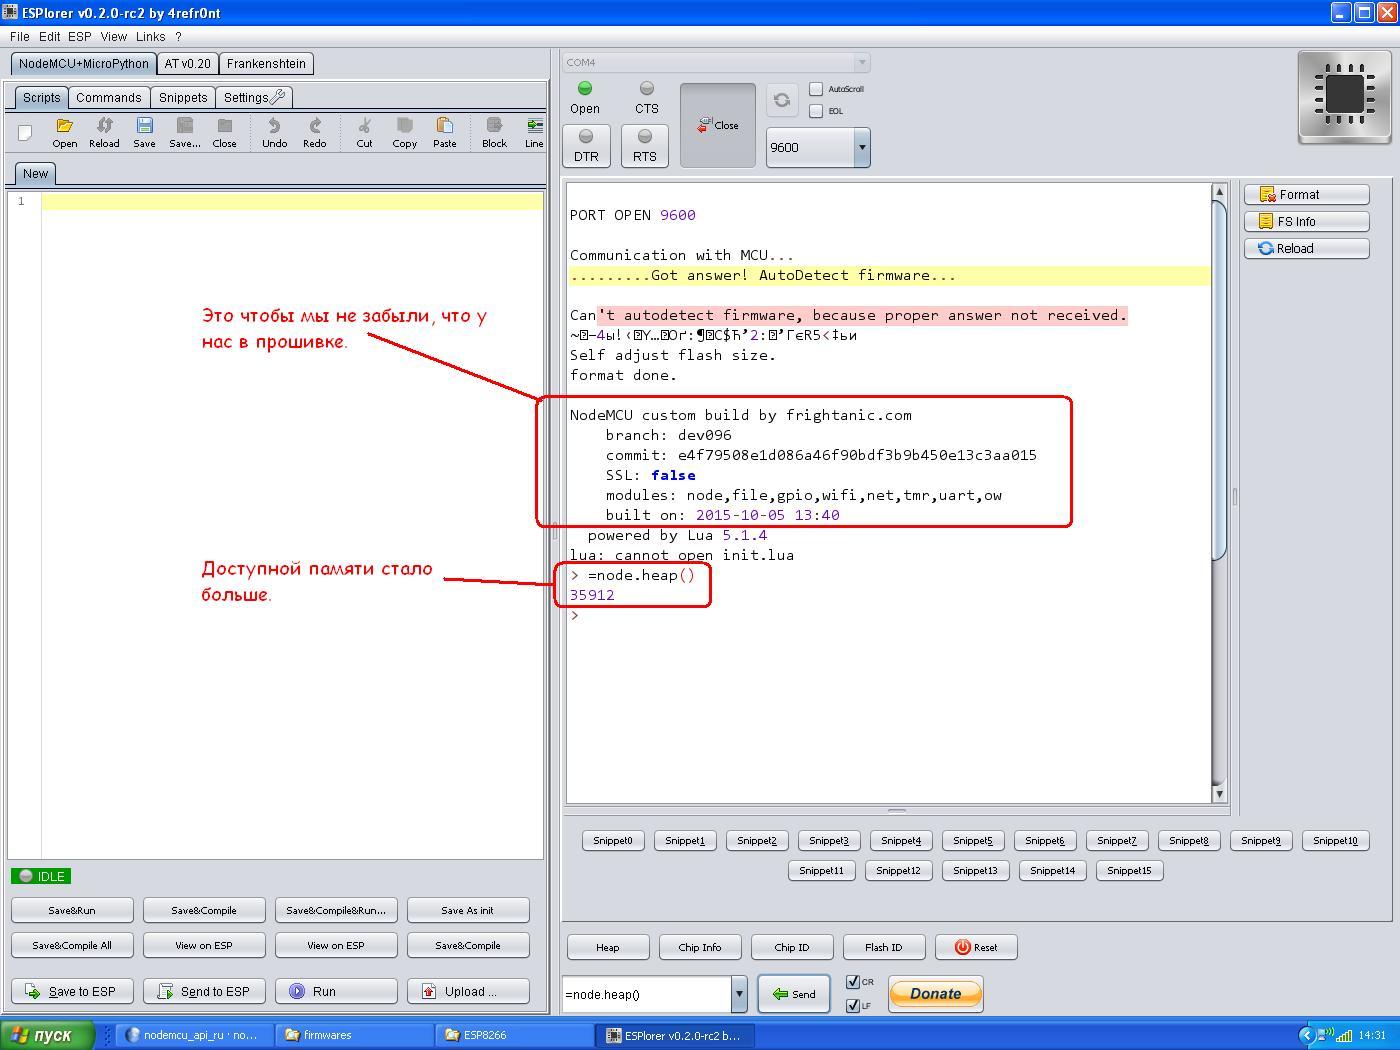
Now 35 kB of RAM is available to us.
Before we move on to programming, let's go back briefly to the UART-RS485 adapter. To the part of it that is responsible for the transmission-reception switching. To resistor R1. When loading, the ESP8266 sets all the GPIO pins to the input mode, and then the program determines in which mode each GPIO will work. It turned out that at the time of loading, the contact TX_UART (U0TXD) should be at a high level, otherwise the program recorded in flash will not start. Without R1, when a TX pin is polled, a low level will be read and the ESP8266 will “hang” until the adapter is reconnected.
You can refuse the entire receive-transmit switching scheme by using one of the GPIO pins. But there are few available GPIOs on the ESP-01, and perhaps they will find another application in your project. In addition, with the switching scheme, the adapter we made can be used, for example, with a router that does not have a GPIO.
The project consists of three files: data, index.html and init.lua. It is more correct to consider this not as a project, but as a prototype. For example, there is no authorization, except when connected to a router. And I'm not at all sure that the server on the ESP8266 is able to withstand attacks. The code does not check in any way, except when connected, is there a network connection or it has disappeared. There is no code that will automatically restart the ESP8266 if the program freezes. The last two tasks are easily solved, but the project would have become more complicated.
You need to edit the data file - enter the name and password of your WiFi network there. By connecting the ESP8266 to the network, we will be able to control the curtains via the Internet. After you finish debugging init.lua, set the debug variable to false, or delete it altogether. So less garbage will be strewed in UART. If this is not done, then the drive may not work. In addition, AKKO AM72E will still not be able to understand what you are writing to him. In this case, the log function and all lines in which it is mentioned in init.lua can also be deleted.
Let us return to the topic of saving resources. The data file, with my network name and password, occupies 1643 bytes in memory. If you haven’t guessed yet, then this file is a regular lua file. It can be compiled. After compilation, the same file already takes 1040 bytes. You can do the same with init.lua. The file size can be further reduced. It is necessary to throw out all unnecessary from it, first of all, comments and spaces. The file thus becomes poorly readable, but if we need more space, we have to go for it. This is a common practice. In the end, no one will appreciate the beautiful and proper design of your code. Well, maybe competitors when your code gets to them. But the truncated functionality will be immediately noticeable. Especially if there is anything to compare. When devices with few resources are programmed, priorities change. This is often why programs written in C for embedded systems are poorly readable. Everything is complicated by shifting everything that is possible onto the preprocessor. If you start a project in C and postpone it for a couple of months, then you may need a decent time to figure out your own code. Less attention is paid to code maintenance, as in three to five years, new iron appears and everything has to be rewritten again due to the changed architecture.
After I manually deleted everything unnecessary from the data file, it began to occupy 705 bytes. At the same time, the size can still be reduced by several tens of bytes, if the variables are given not meaningful names, but names from one letter (yes, yes, this is not at all what we are taught at school). After compiling it, the data.lc file takes up 728 bytes in flash - oops! It even happens!
There is nothing much to say about index.htm. I also added a picture in svg format to him. You can do it too. Just fill curtain.svg into the flash with another file.
Init.lua - the main project file. There are comments in the file itself, and if something is not clear, you can start line-by-line execution and generally experiment until completely clarified. In addition to UARTA, there is still switching LEDs connected to GPIO2. Files upon upload by the server are read from the flash and transferred in blocks of 512 bytes. This reduces the size requirements of available RAM.
This is not in the code, but if it becomes necessary to calculate CRC16, then this is done with the ow.crc16 (buf, crc) command. For example, if you type:
= ow.crc16 ('\ 85 \ 00 \ 00 \ 03 \ 01', 0xFFFF) on the command line, we get
:
15593
You just need to remember, send the low byte first, and then the high.
Here's what happened:
There should be a video)
Any wireless technology would be suitable for our purposes, but I wanted to control the curtains from my smartphone. In this case, it is advisable not to install any additional programs. I will connect to my home WiFi network and control the electric curtain using a browser. Drive, through the RS485-UART adapter I will connect to the ESP8266. You can very well go your own way and use, for example, a WiFi router.
ESP-01 for today, is the most budget module with WiFi. It costs so little that if you need to control several motors, we can not pull the wires from one motor to another, but simply connect each to its own module. In this case, we will not need to give each AM72E its own address - you can contact the address ESP-01. We are interested in the ESP8266 not only for its low price and small size, but also for the fact that there are very few resources on it and it will take a lot of effort to shove something that will work into it.
I will not describe how to connect and upgrade the ESP8266 firmware. How to do this correctly can be found here .
Under Windows, to program the ESP8266, you can use either the Arduino IDE, and then we write in C (well, almost), or NodeMcu, and you can write in Lua. There are other options too, but they do not suit us.
No, we’re in no hurry to upload NodeMcu. The firmware needs to be prepared. Resources on ESP-01 are not enough so that we can forget about them if we want to raise a Web server. There is flash ROM on the board - a place where all our files will be stored - 512 KB. This is already extremely small, but we will not rest on the lack of resources in flash, but in RAM. The ESP8266 SoC has a 64KB RAM area for program code, and 96KB for data. At startup, data from the flash is loaded into RAM. If we fill the NodeMcu stock firmware and look at the amount of available memory, we will see this:
21 kb! With such volumes, you have to save every byte! We also see some garbage after the line “Can't autodetect firmware, because proper answer not received”. This is debugging information, issued at a speed of 74,880, then the speed changes. Here's how it looks at the right speed:
Nothing interesting.
First, increase the amount of available RAM. To do this significantly, you can rebuild the firmware yourself. Source codes are available, but you don’t feel like shoveling the whole project just for the sake of testing. In addition, this will have to be done under Linux. Not that it is very difficult, but if we are distracted, we will never end. You can adjust the firmware here: frightanic.com/nodemcu-custom-build .
I switched the checkbox to dev096 and put an additional check mark next to 1-ware in the plug-in selection window. I turned on this module because of one function - CRC16 calculation. Here it is:
You, of course, can enable or disable those modules that you need. Now enter the email into the form and click on the “Check the build status” button. A one-time email is fine too. We wait a few minutes, and in a letter we get a link to the files with the firmware. Firmware in which you can only work with integers will save you a flash with a dozen kilobytes. I poured one. But you can make another choice. Let's see why we tried so hard:
Now 35 kB of RAM is available to us.
Before we move on to programming, let's go back briefly to the UART-RS485 adapter. To the part of it that is responsible for the transmission-reception switching. To resistor R1. When loading, the ESP8266 sets all the GPIO pins to the input mode, and then the program determines in which mode each GPIO will work. It turned out that at the time of loading, the contact TX_UART (U0TXD) should be at a high level, otherwise the program recorded in flash will not start. Without R1, when a TX pin is polled, a low level will be read and the ESP8266 will “hang” until the adapter is reconnected.
You can refuse the entire receive-transmit switching scheme by using one of the GPIO pins. But there are few available GPIOs on the ESP-01, and perhaps they will find another application in your project. In addition, with the switching scheme, the adapter we made can be used, for example, with a router that does not have a GPIO.
The project consists of three files: data, index.html and init.lua. It is more correct to consider this not as a project, but as a prototype. For example, there is no authorization, except when connected to a router. And I'm not at all sure that the server on the ESP8266 is able to withstand attacks. The code does not check in any way, except when connected, is there a network connection or it has disappeared. There is no code that will automatically restart the ESP8266 if the program freezes. The last two tasks are easily solved, but the project would have become more complicated.
You need to edit the data file - enter the name and password of your WiFi network there. By connecting the ESP8266 to the network, we will be able to control the curtains via the Internet. After you finish debugging init.lua, set the debug variable to false, or delete it altogether. So less garbage will be strewed in UART. If this is not done, then the drive may not work. In addition, AKKO AM72E will still not be able to understand what you are writing to him. In this case, the log function and all lines in which it is mentioned in init.lua can also be deleted.
Let us return to the topic of saving resources. The data file, with my network name and password, occupies 1643 bytes in memory. If you haven’t guessed yet, then this file is a regular lua file. It can be compiled. After compilation, the same file already takes 1040 bytes. You can do the same with init.lua. The file size can be further reduced. It is necessary to throw out all unnecessary from it, first of all, comments and spaces. The file thus becomes poorly readable, but if we need more space, we have to go for it. This is a common practice. In the end, no one will appreciate the beautiful and proper design of your code. Well, maybe competitors when your code gets to them. But the truncated functionality will be immediately noticeable. Especially if there is anything to compare. When devices with few resources are programmed, priorities change. This is often why programs written in C for embedded systems are poorly readable. Everything is complicated by shifting everything that is possible onto the preprocessor. If you start a project in C and postpone it for a couple of months, then you may need a decent time to figure out your own code. Less attention is paid to code maintenance, as in three to five years, new iron appears and everything has to be rewritten again due to the changed architecture.
After I manually deleted everything unnecessary from the data file, it began to occupy 705 bytes. At the same time, the size can still be reduced by several tens of bytes, if the variables are given not meaningful names, but names from one letter (yes, yes, this is not at all what we are taught at school). After compiling it, the data.lc file takes up 728 bytes in flash - oops! It even happens!
There is nothing much to say about index.htm. I also added a picture in svg format to him. You can do it too. Just fill curtain.svg into the flash with another file.
Init.lua - the main project file. There are comments in the file itself, and if something is not clear, you can start line-by-line execution and generally experiment until completely clarified. In addition to UARTA, there is still switching LEDs connected to GPIO2. Files upon upload by the server are read from the flash and transferred in blocks of 512 bytes. This reduces the size requirements of available RAM.
This is not in the code, but if it becomes necessary to calculate CRC16, then this is done with the ow.crc16 (buf, crc) command. For example, if you type:
= ow.crc16 ('\ 85 \ 00 \ 00 \ 03 \ 01', 0xFFFF) on the command line, we get
:
15593
You just need to remember, send the low byte first, and then the high.
Here's what happened:
There should be a video)