February 21, 2017 at 15:07
Browse Electronics Education Kits for Kids (7+)

An interesting and affordable educational set on electronics for children is probably the dream of any parent who wants to captivate a child with something “real”.
The direction of popularization of technical creativity among children was among the interests of our hackspace, and from the moment of our formation (3 years ago) we followed the situation in this area - and during this time several interesting educational kits for children appeared on the Russian market.
We took for review kits based on prototyping boards, which provides a quick start - it allows you to get a working circuit without the need for soldering, the developers of the kits are Russian companies, and the target age is from 7 years.
The review will include three sets, from Amperka , Cyberphysics and Master Kit:
- Children's electronic designer Amperka Mikronik
- Cyberphysics. Fundamentals of Electronics. Start
- Designer Master Kit NR03, ABC of electronics engineer - Fundamentals of circuitry
We provided these kits to the hackspace participant, and he and his brother (7 years old) made TestDrive of all the kits, and this is a first-person story:
Hello everyone! My name is Anton and I want to talk about how, from a good colleague, my brother and I got three sets for reviewing electronics and circuitry for review.
A little about me: 25 years old, IT engineer diploma. Knowledge in electronics ends with a university course. Sometimes I hold a soldering iron in my hands (mainly to solder the wires), I know what this or that element is for, if I remember or find a formula, I can calculate something for the circuit.
Brother, 7 years old, is in first grade. He likes to play with designers, but does not like to assemble himself. He is interested in computers, phones, tablets and other modern things.
Micronic Set
So, the first set that I reviewed was Mikronic. It so happened that I began to collect it alone. I met a neat-looking box, inside of which lay neatly laid out bags and a brochure with diagrams. Prior to that, I read reviews of sets from Amperka (and even worked with one such) and therefore the performance seemed to me very similar. And not in vain, it really turned out to be a set from Amperka. The brochure is very colorful, everything is drawn with a soul, quite understandable, although I would not mind the concepts and a bit of theory.


Having laid out all the bags on the table and opening the brochure, he began to collect the schemes. Upset the lack of batteries in the kit, because it’s not always possible to find three finger-type batteries at home. The terminal block was also very moody - it was necessary to strip the wires additionally, but it still turned out to be difficult to fix them inside the terminal block. It was not very convenient to get the terminal block from the breadboard, so every time I was tormented by disconnecting one of the power wires.
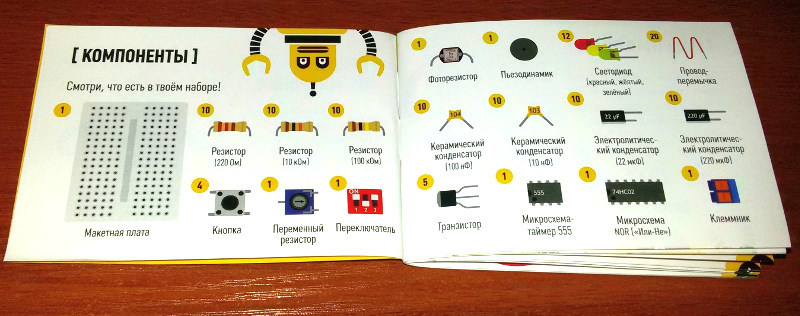

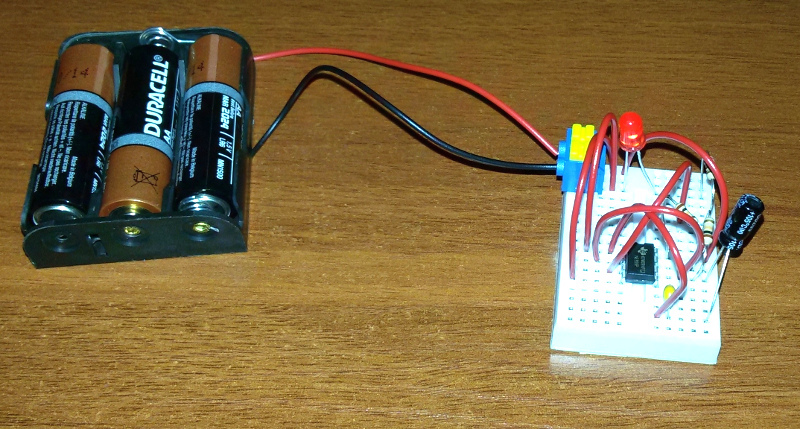
The breadboard itself was small, and the jumpers large. There were no problems with the assembly of the first circuits, although I had to periodically correct and rearrange the elements, because there was no contact with the breadboard. Reaching the circuit with a timer 555 ran into unexpected difficulties. The assembled circuit did not work. Spent about 20 minutes on a careful study of the circuit, reassembled it twice from scratch. And, finally, after the next time, when I moved all the elements - the circuit began to work as it should.
Another unpleasant feature that arose when assembling the kit back - it was inconvenient to fold all the bags. There is not enough space, the box lid hardly closed.
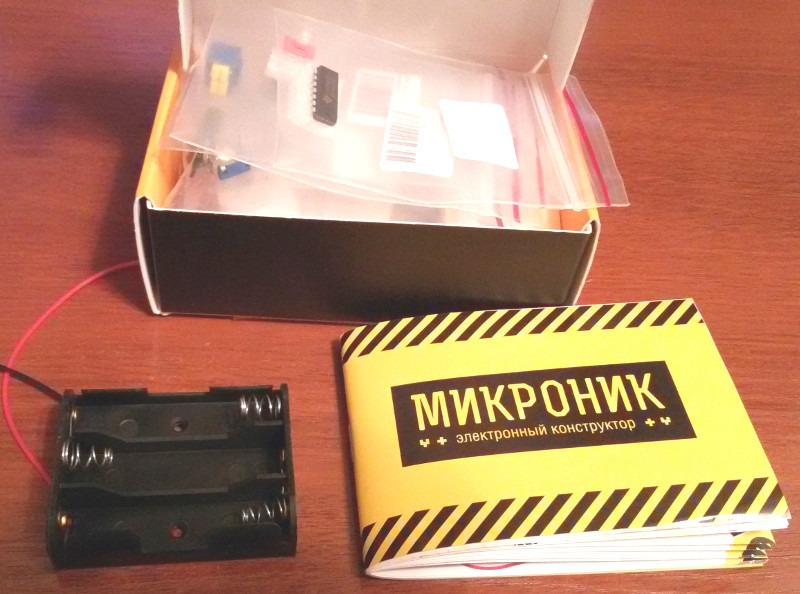
On the whole, the impressions remained positive - judging by the price tags, the set is the most inexpensive, and on the whole it justifies its price - everything is arranged in bags, everything is signed, the brochure is clear and colorful, but the breadboard seemed to me a little small and the feeling that the elements in the breadboard do not hold well, because sometimes they had to be corrected to make contact.
List of Micronics Recruitment Projects
Lamp
Multi-colored lights
Keg with electricity
Telegraph
Dimmer
Traffic light
Silly lamp
Magic fingers
Code lock
Lighthouse
Smart lamp
Stroboscope
Railway experiment
Klaxon
Themenvoks
Alarm
Almost a piano
Timer
Switch for the corridor
Hunting for a duck
Multi-colored lights
Keg with electricity
Telegraph
Dimmer
Traffic light
Silly lamp
Magic fingers
Code lock
Lighthouse
Smart lamp
Stroboscope
Railway experiment
Klaxon
Themenvoks
Alarm
Almost a piano
Timer
Switch for the corridor
Hunting for a duck
Cyberphysics Set
On the second day, my brother connected to work with the kit. We were met by a large colorful box with a bunch of smaller boxes inside. While I was looking at the brochure, I walked through the boxes - everything was neatly laid out, everything was signed, everything was in separate bags. I noticed that the elements are arranged in boxes, too, for good reason: separately resistors, separately semiconductors, separately capacitors, and so on.

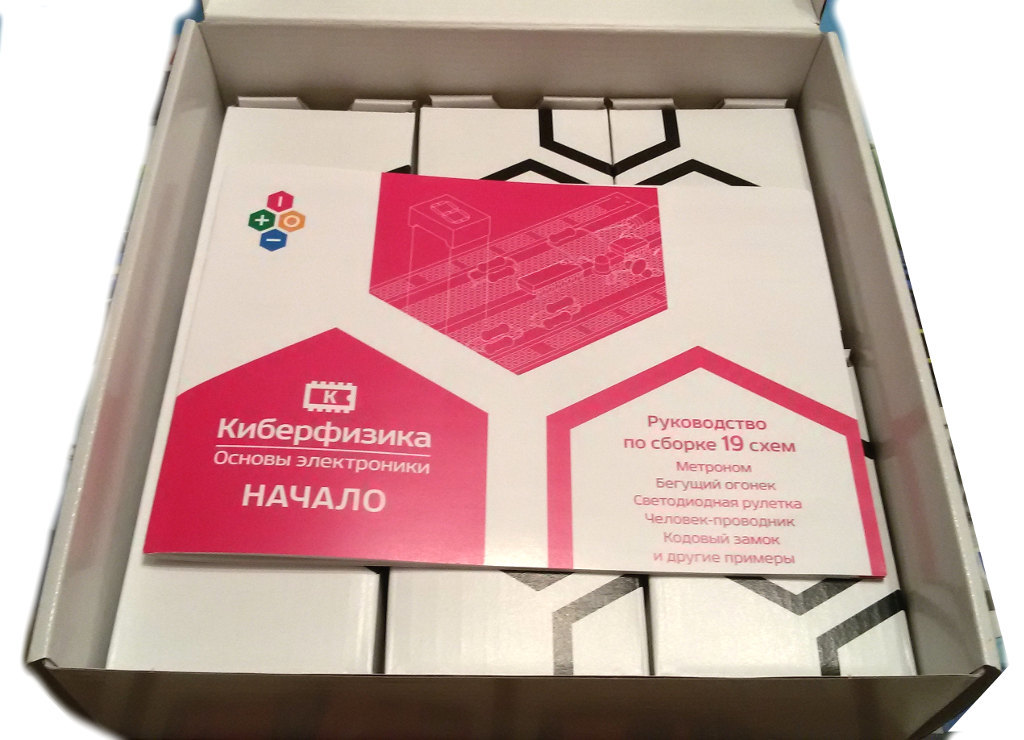

The brochure turned out to be quite informative, there is a list of elements needed to assemble each circuit, a circuit diagram and a circuit for assembly on a breadboard. The brother quickly realized that it was necessary to look at what elements were needed for the circuit and to get the necessary elements from the corresponding bag.
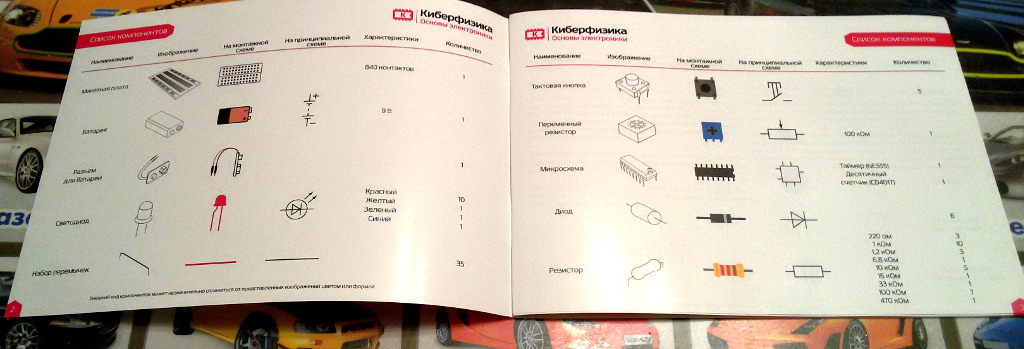

I was pleased with the size of the breadboard - a lot of space for creativity. I assembled the first circuit with one LED, then, by analogy, my brother added other LEDs. With a little help from me, we collected other schemes.

The next day, his brother himself calmly collected various sketches, except that sometimes he asked for help when he missed the conclusions of the elements. For the first day, half of the schemes were collected, and I thought that it would be necessary to search the Internet for even simpler schemes, for the future I
had only positive impressions from the set - everything was done at a high level, even a child can understand. Of the shortcomings, I can only highlight a relatively high price (compared to Mikronik), but if you look at the prices of the elements separately and the price of the corresponding training materials, the question disappears - the price becomes quite adequate.
List of Cyberphysics Electronics Fundamentals Projects
The very first scheme. Power indicator.
Light Morse Code.
Button traffic light.
Soft dim light. Dimmer, or dimmer. Potentiometer.
Stupid lamp. Photoresistor.
Piggy bank for electric charge. Capacitor.
The conductor man. Bipolar transistor.
Security alarm on one transistor.
The obstinate light. RC chain.
Automatic night light.
Symmetric multivibrator with two transistors.
Acquaintance with the most popular microcircuit - the 555 timer. Assembling the layout of the traffic light at the railway crossing.
Light theremin. Active buzzer.
Metronome on the NE555 chip.
Push the light. The microcircuit is a CD4017 ring counter.
Running on the spot. The running light machine.
Police flasher. The blue and red LEDs alternately flash quickly three times, like a real flasher in a police car.
LED tape measure. Almost like in a casino.
Code lock model.
Light Morse Code.
Button traffic light.
Soft dim light. Dimmer, or dimmer. Potentiometer.
Stupid lamp. Photoresistor.
Piggy bank for electric charge. Capacitor.
The conductor man. Bipolar transistor.
Security alarm on one transistor.
The obstinate light. RC chain.
Automatic night light.
Symmetric multivibrator with two transistors.
Acquaintance with the most popular microcircuit - the 555 timer. Assembling the layout of the traffic light at the railway crossing.
Light theremin. Active buzzer.
Metronome on the NE555 chip.
Push the light. The microcircuit is a CD4017 ring counter.
Running on the spot. The running light machine.
Police flasher. The blue and red LEDs alternately flash quickly three times, like a real flasher in a police car.
LED tape measure. Almost like in a casino.
Code lock model.
Masterkit Set
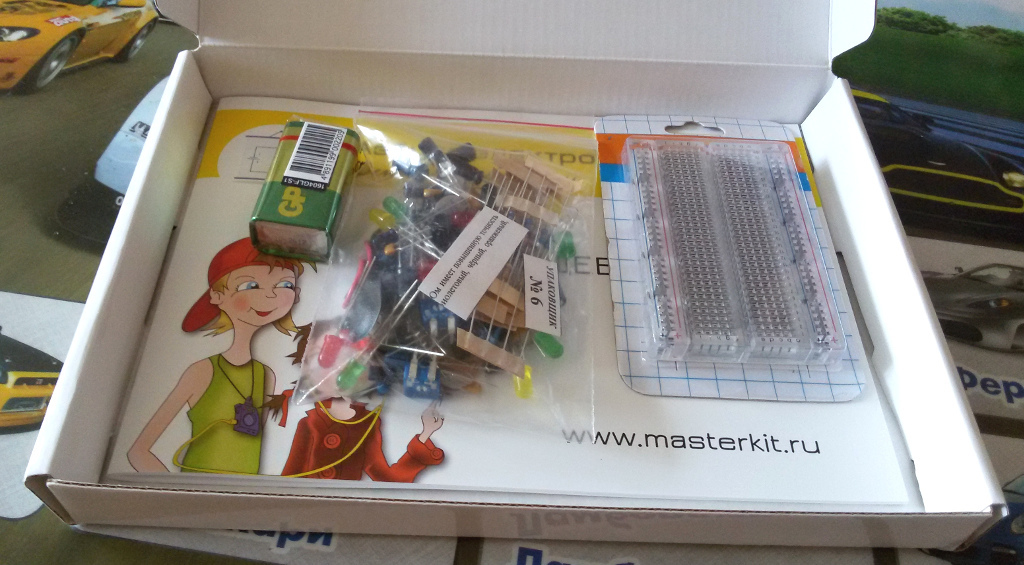
On the third day, we decided to see what kind of set we represent Masterkit. It is also a fairly large box with design in the style of school books. Inside was a brochure, a breadboard, a battery and ... one bag with a scattering of items.
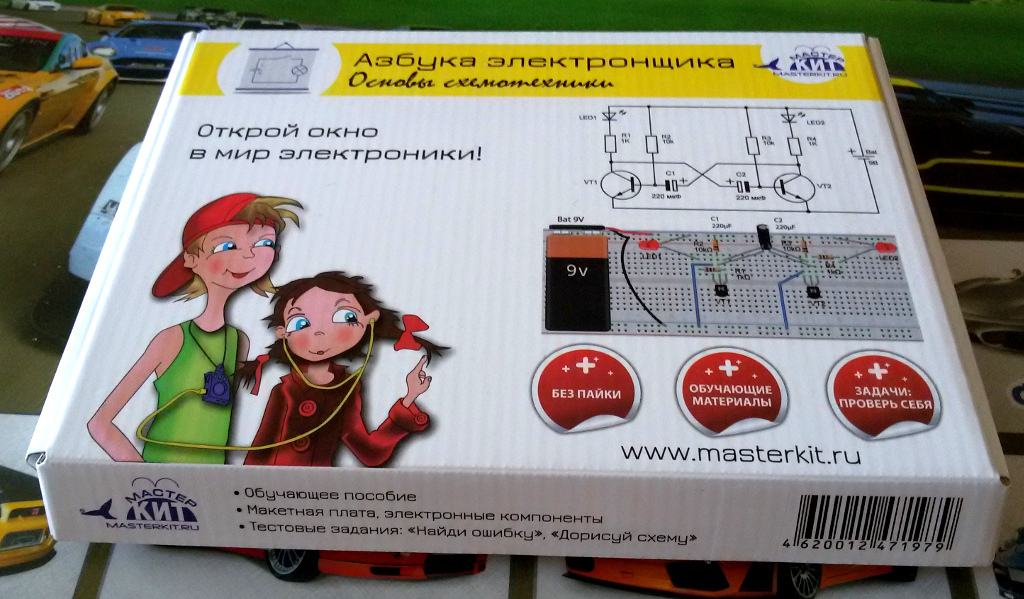
Personally, I liked the presence of the theoretical part in the brochure. Here, both the formulas for calculating the resistance, and the formulas for calculating the capacitance of capacitors and the statement of the theory personally seemed to me more understandable and enjoyable.


I was not very pleased with the battery connection pad - after dialing Cyberphysics, it turned out to be very inconvenient to connect the wires - they kept trying to bend and not get inside the breadboard. It felt like the elements were inserted better into the breadboard itself, but the transparent plastic was not very practical compared to white - it's hard to see where the element is connected. It was also strange to connect the battery to the breadboard on the diagrams - we connect the positive contact to the negative bus. Brother also had to explain that the designation of the tires “+” and “-” is only for convenience.
The circuits described in the brochure are basically identical, except that an infrared sensor is added here, which added interest.
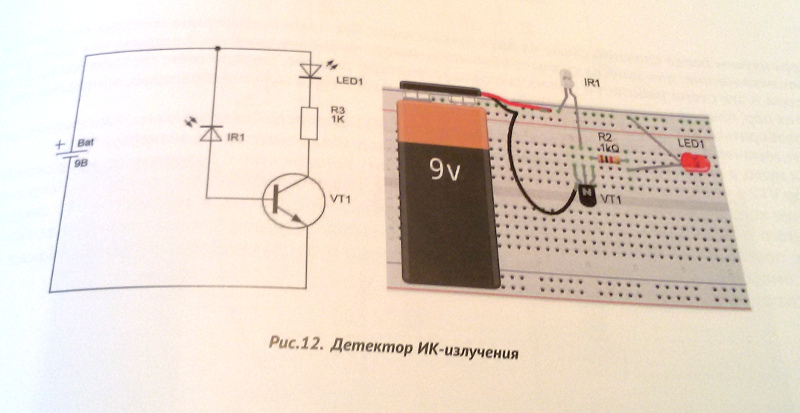

In the set, I liked the brochure with the theoretical part and the language of presentation, but all the advantages blocked the following disadvantages:
- packing all the elements in one bag
- a little strange power connections
- a bad block for connecting the battery to the breadboard
conclusions
Since the goal was to compare the three sets, it is more convenient to present them in the table: In
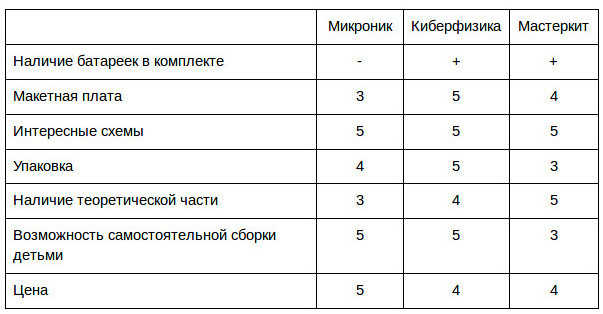
total, I would prefer the Cyberphysics set to start practicing electronics and circuitry, because it has everything you need to start and there is the potential for further study of the schemes yourself. But other kits may also be of interest to electronics.