December 26, 2016 at 14:31
Budget video surveillance for fisted "dummies"
Soon there will be 7 years from the moment of writing the article " Video surveillance under Ubuntu for" dummies "(ZoneMinder)." Over the years, it has been adjusted and updated more than once in connection with the release of new versions, but the cardinal problem, namely, the cost of IP video cameras, remained the same. It was bypassed by digitizing analog streams and emulating IP cameras using a USB "webcam".
The situation has changed with the advent of Chinese cameras standard ONVIF 2.0 (Open Network Video Interface Forum). Now you can configure any camera that meets the standard using ONVIF Device Manager .
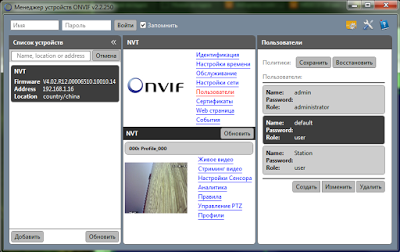
Moreover, you can immediately see the addresses and parameters of the broadcast streams from the camera. Yes Yes. Now, at least 2 streams, not counting the sound. One archive is in maximum quality, the other is a worker in lower resolution.
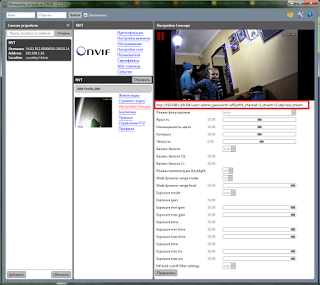
* All pictures are clickable.
I will tell on the example of the MISECU IPC-DM05-1.0 camera. I bought it on Black Friday at a price of 1059.15 rubles. Now they have raised the price and I would rather have acquired GADINAN . What's in the other, one and the same. In any case, the hardware of my camera is defined as hi3518e_50h10l_s39 no matter what logo is written on the box. The dome camera, in fact, is a ball “on a rope” that can be easily removed from the holder holder. If you order, please note that the power supply must be purchased separately (DC 12V / 2A). I used a power supply from a burned-out Chinese desktop clock. Unfortunately, there is no sound or position control in the camera. For this purpose, some kind of baby monitor like thisor this one . The main thing is that the name would contain the word Onvif.
After unpacking and turning on, you need to set the IP address of each camera (by default, everyone has a fixed 192.168.1.10) so that they do not conflict with each other. This can be done in ONVIF Device Manager or with the standard utility General Device Manage that comes with it, on a mini CD. Next, set the time zone, date display options and name for each camera. We create users with the rights "only for viewing".
The web camera interface, CMS programs and the cloud interface in the browser are exactly the same, inconvenient and require IE with ActiveX.
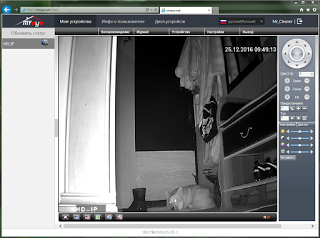
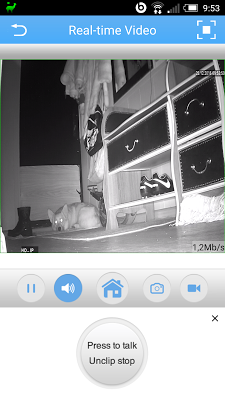
Fortunately, they can be successfully replaced by the XMeye application installed on Android or iOS. But first you need to make our camera visible to the cloud. To do this, open the port on which Onvif (8899) runs on your switch. In my case, it is NAT Setting-Virtual Server. If there are several cameras, then leave the internal port for each IP the same, and change the external port by a couple of values. Further, the camera itself will knock on the cloud and present its individual CloudID. You will only need to add it to your profile in the cloud.
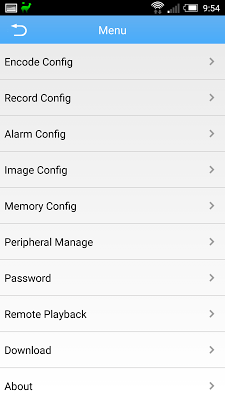
Actually, the camera itself can already detect movement, stream video and send allarma. Together with the cloud service XMeye is a ready-made monitoring service.
If you want to have your own registrar with archives, and you love Windows, then install free iSpy , or SecurOS Lite (up to 32 cameras) or the free version (up to 8 cameras) of Xeoma . By the way, the latter has versions for Mac OS X, Linux including ARM and Android.

There should be no problems with the settings, so you can no longer read. The rest of the article is written for Linux.
I was pleasantly surprised to find in Zoneminder v.1.30.0 a wizard for configuring ONVIF cameras. It allows you to connect to the console any of the streams coming from the camera, depending on the hardware capabilities and operator needs.
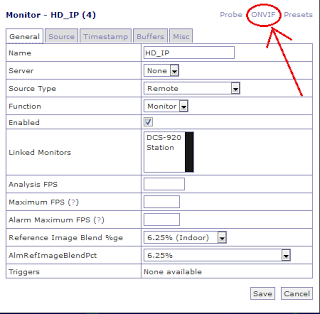
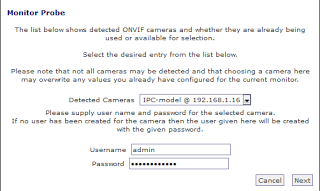
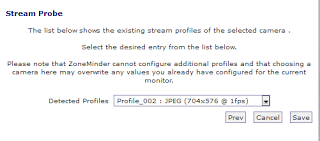
Installing and configuring Zoneminder has never been an easy task. The latest version was particularly moody and requires the preliminary installation of the LAMP web server, followed by a number of additional steps . Therefore, I will give the old "Jedi" way to connect the camera for older versions:
1. Determine the addresses of the streams through ONVIF Device Manager or Xeoma. You should get something similar:
or
Remember to replace the asterisks (*) with your data.
2. Check the addresses in the VLC player. Menu-Media-Open IRL
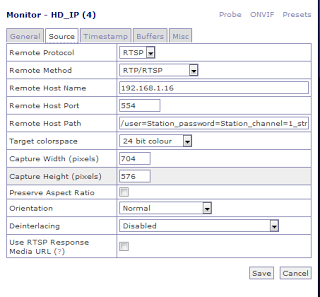
3. Add a new monitor with the options:
Good luck.
The situation has changed with the advent of Chinese cameras standard ONVIF 2.0 (Open Network Video Interface Forum). Now you can configure any camera that meets the standard using ONVIF Device Manager .

Moreover, you can immediately see the addresses and parameters of the broadcast streams from the camera. Yes Yes. Now, at least 2 streams, not counting the sound. One archive is in maximum quality, the other is a worker in lower resolution.

* All pictures are clickable.
I will tell on the example of the MISECU IPC-DM05-1.0 camera. I bought it on Black Friday at a price of 1059.15 rubles. Now they have raised the price and I would rather have acquired GADINAN . What's in the other, one and the same. In any case, the hardware of my camera is defined as hi3518e_50h10l_s39 no matter what logo is written on the box. The dome camera, in fact, is a ball “on a rope” that can be easily removed from the holder holder. If you order, please note that the power supply must be purchased separately (DC 12V / 2A). I used a power supply from a burned-out Chinese desktop clock. Unfortunately, there is no sound or position control in the camera. For this purpose, some kind of baby monitor like thisor this one . The main thing is that the name would contain the word Onvif.
After unpacking and turning on, you need to set the IP address of each camera (by default, everyone has a fixed 192.168.1.10) so that they do not conflict with each other. This can be done in ONVIF Device Manager or with the standard utility General Device Manage that comes with it, on a mini CD. Next, set the time zone, date display options and name for each camera. We create users with the rights "only for viewing".
The web camera interface, CMS programs and the cloud interface in the browser are exactly the same, inconvenient and require IE with ActiveX.

Fortunately, they can be successfully replaced by the XMeye application installed on Android or iOS. But first you need to make our camera visible to the cloud. To do this, open the port on which Onvif (8899) runs on your switch. In my case, it is NAT Setting-Virtual Server. If there are several cameras, then leave the internal port for each IP the same, and change the external port by a couple of values. Further, the camera itself will knock on the cloud and present its individual CloudID. You will only need to add it to your profile in the cloud.

Actually, the camera itself can already detect movement, stream video and send allarma. Together with the cloud service XMeye is a ready-made monitoring service.

If you want to have your own registrar with archives, and you love Windows, then install free iSpy , or SecurOS Lite (up to 32 cameras) or the free version (up to 8 cameras) of Xeoma . By the way, the latter has versions for Mac OS X, Linux including ARM and Android.

There should be no problems with the settings, so you can no longer read. The rest of the article is written for Linux.
I was pleasantly surprised to find in Zoneminder v.1.30.0 a wizard for configuring ONVIF cameras. It allows you to connect to the console any of the streams coming from the camera, depending on the hardware capabilities and operator needs.

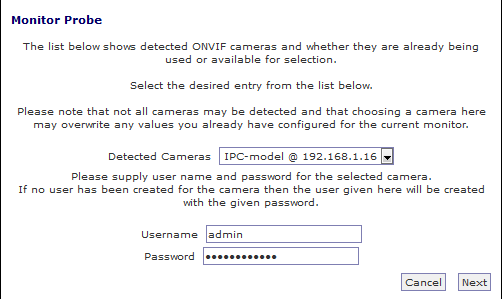

Installing and configuring Zoneminder has never been an easy task. The latest version was particularly moody and requires the preliminary installation of the LAMP web server, followed by a number of additional steps . Therefore, I will give the old "Jedi" way to connect the camera for older versions:
1. Determine the addresses of the streams through ONVIF Device Manager or Xeoma. You should get something similar:
rtsp://192.168.1.4/onvif1or
rtsp://192.168.1.1*/user=****_password=****_channel=1_stream=1.sdp?real_streamRemember to replace the asterisks (*) with your data.
2. Check the addresses in the VLC player. Menu-Media-Open IRL
3. Add a new monitor with the options:
Source Type -Remote
Remote Host Path -rtsp://192.168.1.1*/user=****_password=****_channel=1_stream=1.sdp?real_stream

Good luck.