Recovering SSDs on a SandForce SF-2XXX Controller
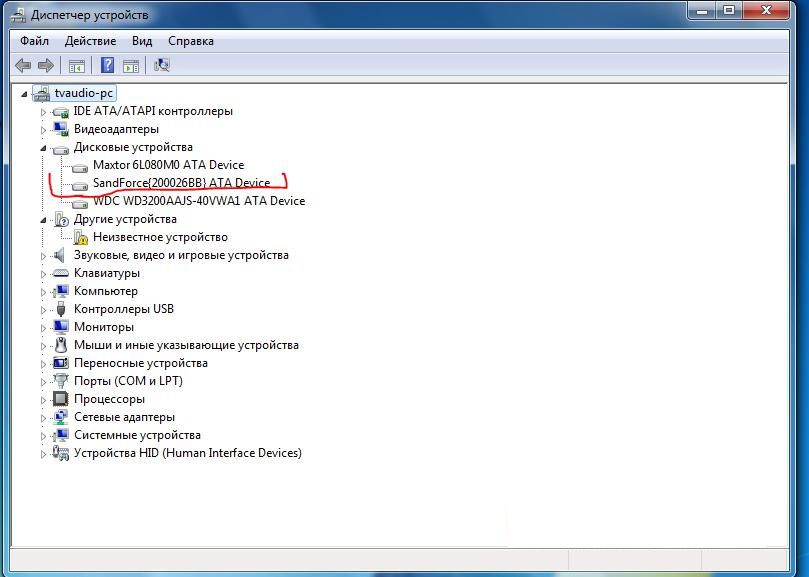
Here I will tell you how to recover disks that are defined as sandforce {200026BB} or that are not detected at all.
It all started with the fact that they gave me an SSD, which was defined as sandforce {200026BB}, a search for information on this disease brought me to the topic of the boardroom forum, where they discussed ways to resuscitate them. But there was no specific manual on how to do everything and where to download, as a result, using Google I found a Chinese manual, and to some extent this article is a translation of this manual plus my successful experience. I will not post direct links to the necessary software yet. I don’t know if this can be done in this case, if you say yes, I’ll add them to the article, but in any case there are a lot of tips, baidu to help you.
So, what do we need:
1.A screwdriver (it will be necessary to disassemble the disk to find out how it is)
2. FW_Worksheet_SFI_SF-2000_140120_Confidential_Gold (table where you should find the configuration ID by your chip and memory)
3. Fedora 14 32bit distribution , I used RFRemix 14.1 LiveDVD (OS where it runs all manipulations, Fedora 14 is necessary)
4. SF_Genesis_v1.5.2 (software for preparing the firmware and directly the controller firmware)
5. * .lic file (the license used to unpack the packages with the firmware contains IDs that will be unpacked. I found only on the network 3 files.)
6. FW_PPRO_5_8_2_Release.906190.release(firmware package, there are packages of other versions, this one is taken as an example)
In short, the algorithm is this: you will find out your ID in the table, check if there is such an ID in the license, if not, look for another license, if so, use this license unpacks the package with firmware and flash it.
In more detail:
1. We disassemble the SSD:
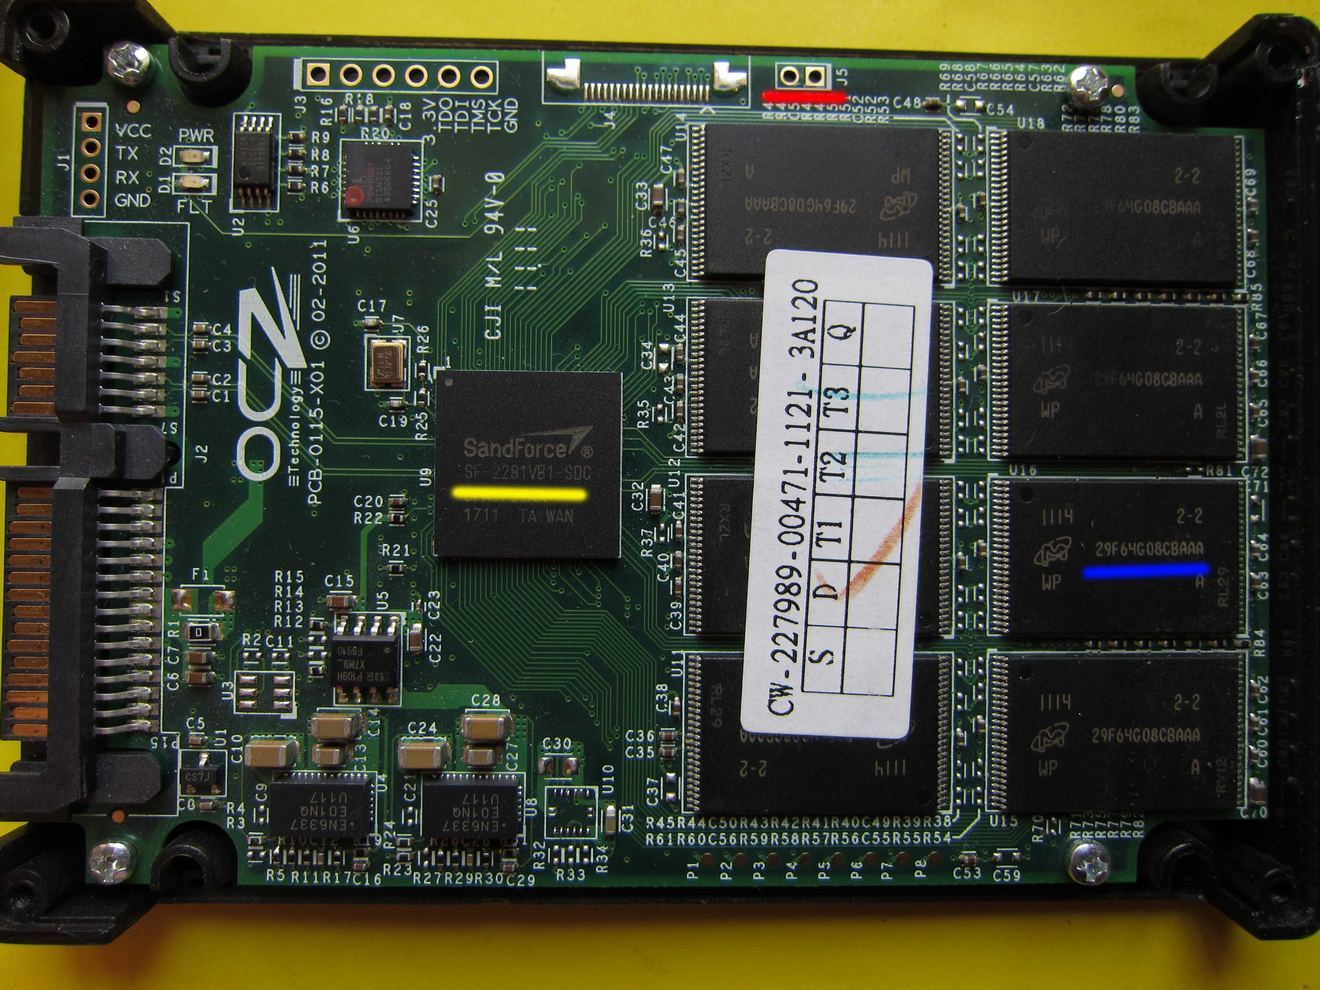
We look at the chip (yellow), here it is SF-2281, memory (blue) 29F64G08CBAAA 16pcs. (8 at the top and bottom). We are looking for our configuration in the table:

Remember.
2. Connect the disk to the computer, boot into Fedora. If your SSD is not detected (and you are sure that it is not a matter of power or a signal line), then before connecting it is necessary to close two contacts (highlighted in red), after turning on the computer, open it. Usually, they always look that way.
3. In the OS, you need to install additional programs:
lsscsi-0.23-2.fc14.i686
mailx-12.5-1.fc14.i686 (if you have RFRemix 14.1 LiveDVD, then you do not need it)
sg3_utils-1.29-1.fc14.i686
smartmontools- 5.40-5.fc14.i686
4. We are looking for our configuration in the license:
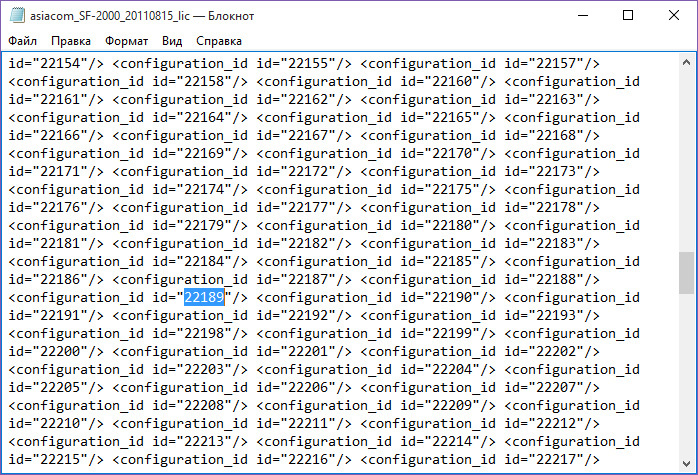
We are lucky to have it, if it is not, then this is a big problem. The fact is that such licenses are given only to disk manufacturers, and they are not in the public domain. You cannot just change the file, because it contains a checklist, which still needs to be decrypted. In my case it was, but the man from the boardroom helped me.
5. Run the program SF_OEM_PackageManager :

Distribution Firmware Package File - a package with firmware, select it.
License file- path to the license.
Destination Folder - where firmware will be unpacked.
Customer ID and Diagnostic Unlock Key - fill in as in the picture below.
Firmware Revision Override String - firmware version, in our case 5.8.2.
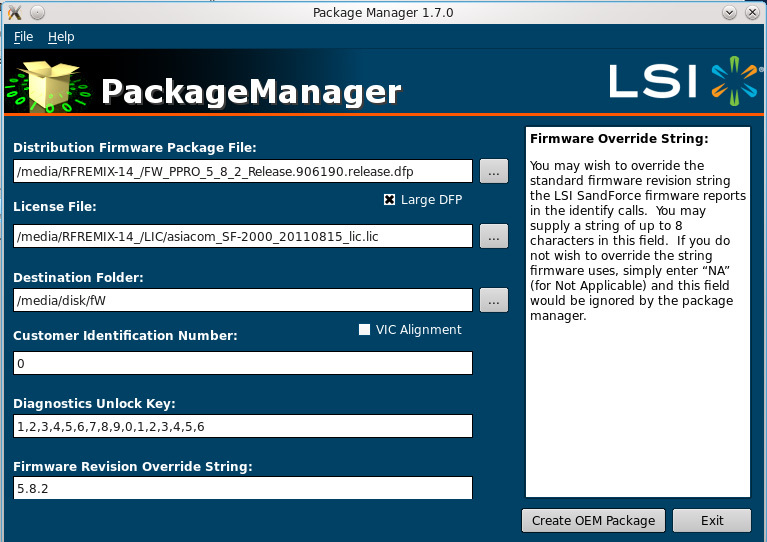
Click Create OEM Package and wait for the unpacking to complete.
6. Run the SF_ConfigurationManager program (you can skip this step). The configurator requires you to specify the file for editing, it is located where we unpacked the firmware, in the Configuration_Files folder and with the name of our configuration:
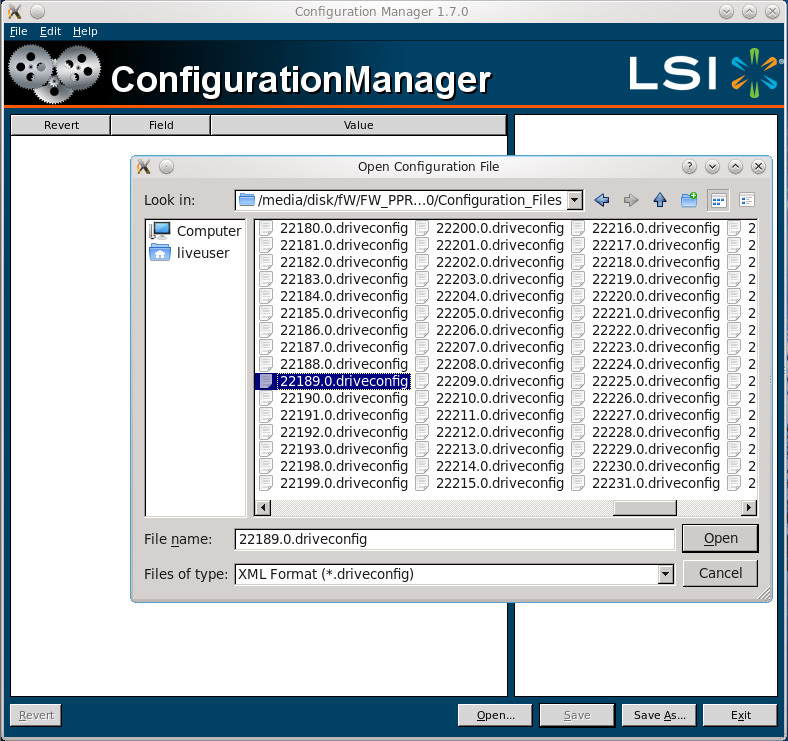
Open the file:
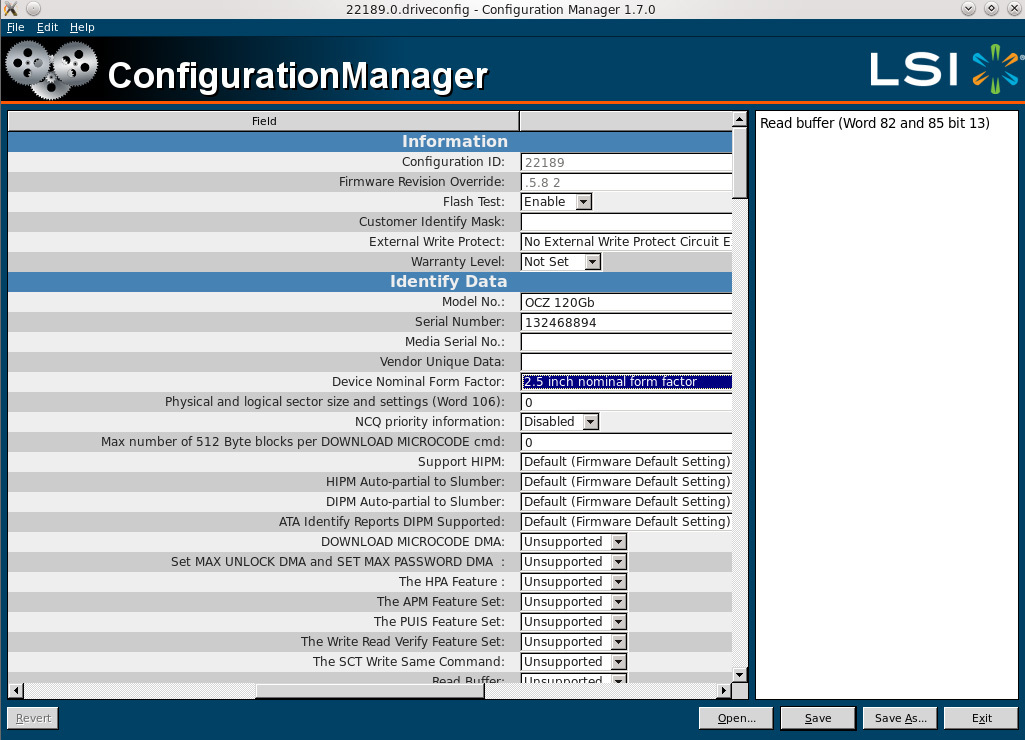
Here I change Model No. - name displayed OS, serial number - any, Device Nominal Form Factor- form factor, the rest is up to you. Click save and exit the program.
7. Run the console, enter su , enter lsscsi , which will show which address our drive is hanging on:
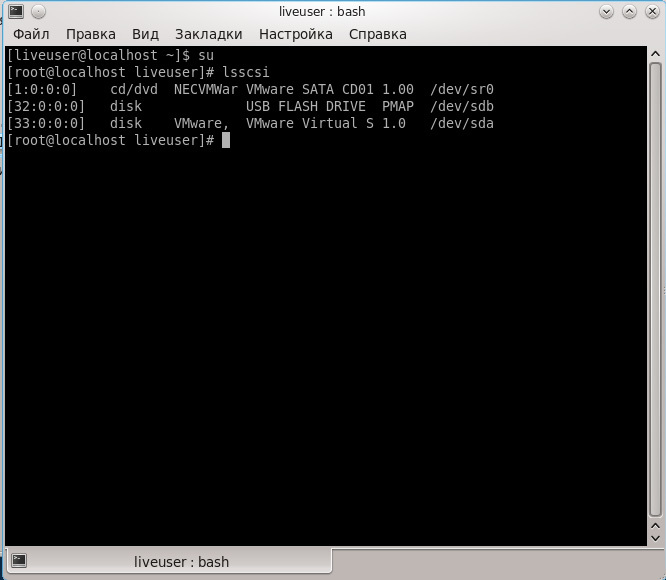
I don’t have it in the virtual machine, but you should have a drive named sandforce {200026BB}, remember its address, let it be 2: 0: 0-0. Next, transfer the SF_Genesis file to the console and write the arguments to it:
SF_Genesis –PROCESS_SSD [disk address] [path to the * .mfp file, which is in the folder with the unpacked firmware] [path to the file that we edited in SF_ConfigurationManager] 12345 www_123 log = [path to the log file]
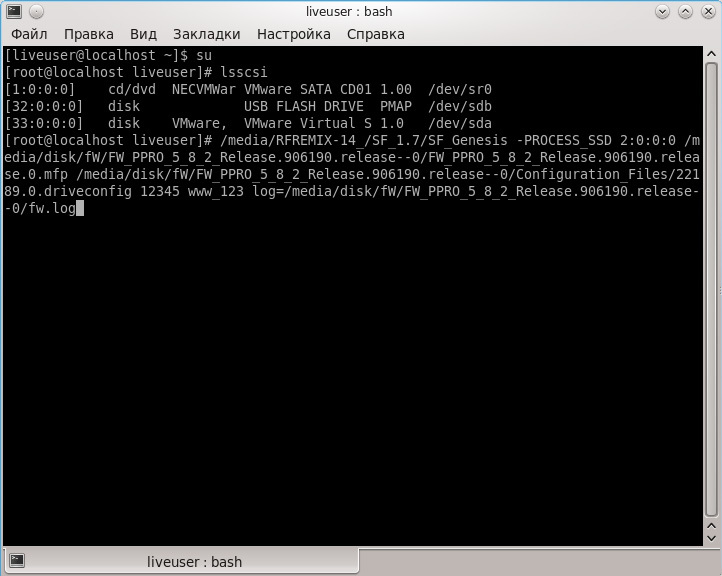
Press Enter and wait for the cherished inscription PASS , if we received FAIL, then you need to disassemble the log and look at what point the error occurred, in most cases errors occur due to carelessness.
Basically, all the movement on this topic takes place in Chinese forums, but still I advise you to familiarize yourself with the topic on the board, if you have any questions, you can write to me. Thanks for attention.
PS: I apologize for my tongue-tied tongue and in advance for spelling.
