Adding Stream from IP Camera to Your Site

Currently, the field of online broadcasts is developing more and more actively, namely the transmission of video and audio stream in real time to a large number of users (devices) via the Internet. For example, a football match, surgery, product presentation, all this can be the plot for an online broadcast.
The sources of the broadcast signal can be webcams, IP-cameras, video cameras, smartphones, network streamers and media servers. You can view the broadcasts both from a computer and from mobile devices: smartphones, tablets. Next, we will consider the IP camera as a broadcast source, as one of the most affordable and common solutions.
A user who wants to embed a stream from an IP video camera into his website must choose a method for organizing an online broadcast. When writing this article, I used the Axis IP camera to demonstrate. Similarly, you can use cameras from other manufacturers.
Method 1. Broadcast video stream from IP camera directly
This is the easiest way to broadcast, since it only requires an IP camera and a network connection, preferably (but not necessarily), with a static IP address. The IP address can be either external or internal / local (in this case, port forwarding on network equipment will be required). To display the online stream on the site, the html code of the IP camera player must be added to the page code.
For the Axis P1425-LE camera as an example, the sequence of steps will be as follows:
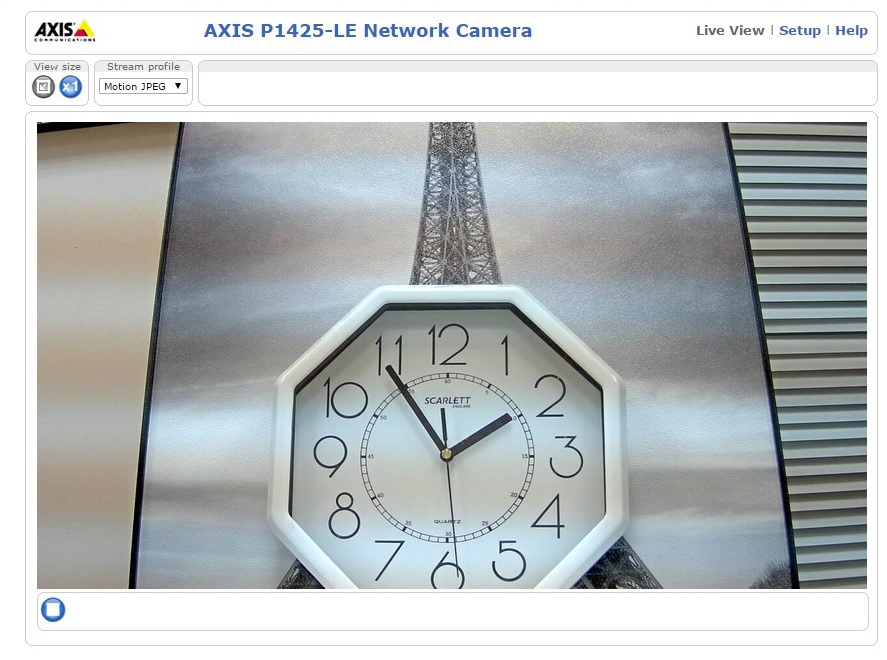
1) Go to the Live-View page of the camera:
2) Copy the player’s html code to the video camera from the source code of the camera page (right-click on the image from the camera and select Inspect element):
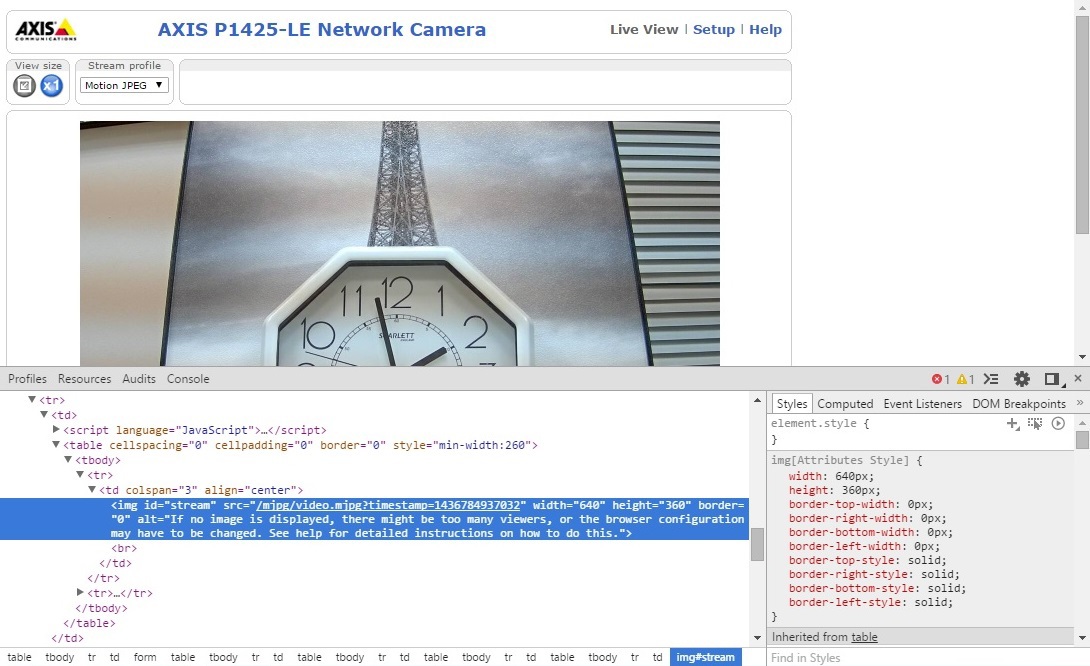
3) In the html-code, we enter information about the IP address of the camera in the form of IP-address / morehtml-code and remove the code fragment “? timestamp = 1436262599830” to receive an online stream, and not a single screenshot (timestamp is a time stamp generated by the camera that indicates a specific video frame at a particular point in time, that is, in fact, it is a single screenshot frame). The main objective of this manipulation is to obtain the address of the stream from the camera.
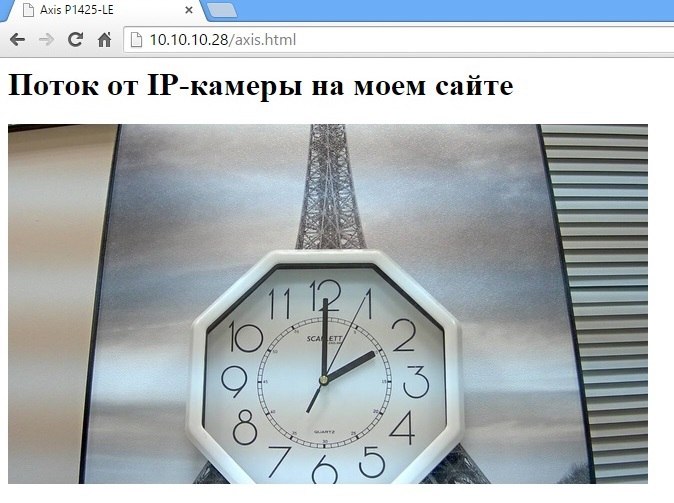
4) The resulting line is inserted into the code of your site at the desired location of the player. An example of my site:

And the result:
The main advantages of this method are: ease of implementation, no additional costs. However, this method has the following disadvantages:
- receiving online stream in motion JPEG format. This format is demanding for bandwidth and often gives a "slowdown" image. To receive a stream, for example, in H.264 format, it may be necessary to install an additional video player (browser plug-in) on the client device, which is not always convenient;
- due to the often existing restrictions on the camera connection channel, significant restrictions may arise on the number of simultaneous connections;
- the maximum number of connections is limited by the processor performance of the camera (usually 4-6 viewers);
- as a rule, to record the broadcast you need to use additional software;
- limited cross-platform: to view the stream from the camcorder, you may need to install additional software, especially relevant for mobile devices;
- low security: the IP address of the camera is available in the source code of the page.
Method 2. Organizing your own media server
A media server is designed to receive media streams from various sources or media files and distribute them for viewing on various user platforms. A distinctive feature of media servers is the support of sources of various formats. Then the signal in the required format is transmitted to the client devices using the required protocol.
In addition to the main function of organizing the broadcast of signals, the media server can provide additional functionality: restricting access to the broadcast, placing video and audio files on the server and providing access to them, recording broadcasts and more.
The most popular media servers include:
 Flash Media Server. It is a commercial product of Adobe Systems. There are several versions of this product that differ in cost, the number of simultaneous connections and the actual set of functionality. There is also a free version for developers with a limit on the maximum number of simultaneous connections equal to 10. Information on installing, configuring and administering the service here .
  Wowza streaming engine. The free version allows you to connect 10 clients at the same time, the commercial version has no restrictions. Wowza supports broadcast protocols RTP / RTSP and others, which gives it an additional advantage over other media servers. Also, using the API provided by developers, it is possible to independently create additional server functionality. Information on setting up IP cameras in Wowza here .
  Erlyvideo . There are also two versions of this software - paid and free. The main feature of this product is its modularity and scalability. Wide server functionality is implemented on the basis of modules that can be purchased separately. Server setup documentation is here .
We can separately mention two free media server projects: nginx-rtmp and red5.
The undoubted advantages of organizing your own media server include cross-platform, unlimited recording of broadcasts and an almost unlimited number of online viewers compared to the first method. But in order to install and configure a media server, relevant competencies, powerful servers to serve a large number of visitors and an initial budget are required. Therefore, for those who, when organizing an online broadcast, they need minimal financial costs, resistance to influx of visitors, the third method is suitable.
Method 3. Using the online broadcast service
Currently, online broadcasting services are becoming increasingly popular. These services provide the functionality of a media server from the cloud.
Among the benefits of using online broadcast services:
- resistance to a large number of visitors,
- ease of creating and moderating an online broadcast,
- Broadcast recording capabilities
- rich analytics and additional features.
As a rule, such services add extra functionality to paid tariffs. At the same time, the ability to insert broadcasts on your website and customize the player is also often included in a paid service package.
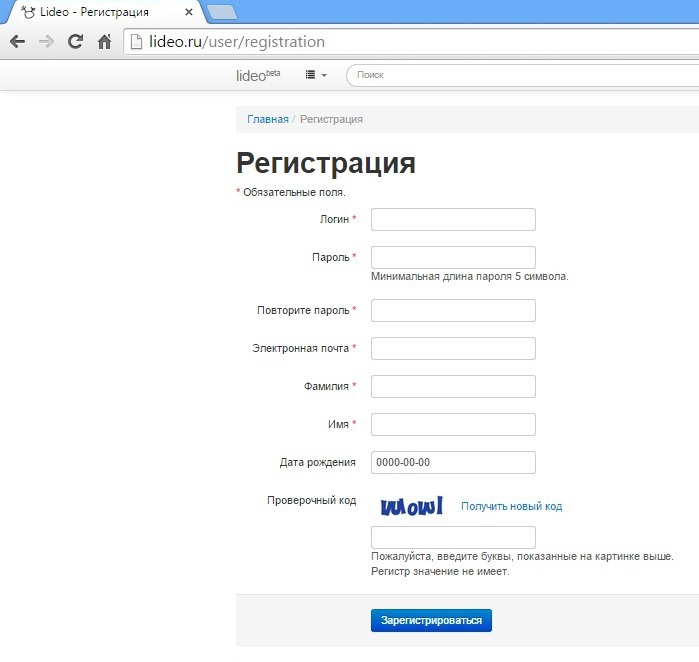
As an example, I will consider the free Lideo service .
Work with him begins with standard registration:
After registration, the user gets access to the full functionality of the service. These are:
1) Organization of broadcasting from various sources: IP-cameras, webcams, video cameras of smartphones, computer desktop.
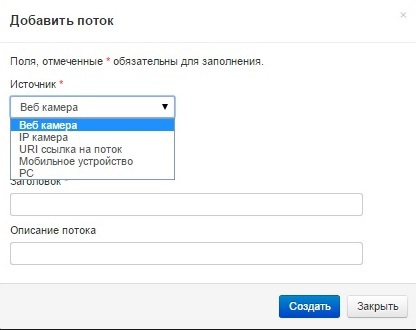
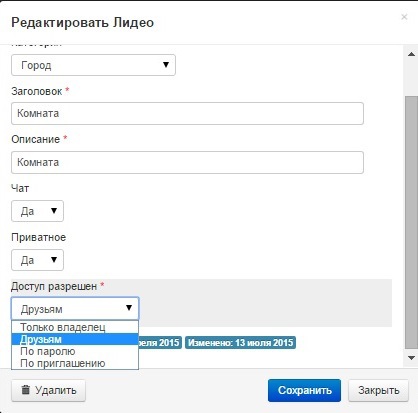
PS It should be noted that broadcasts (streams) are created in special containers called Lideos. There can be many broadcasts in one Lideo. This is convenient in terms of the distribution of broadcasts by topic.
2) Restriction of access to Lideo with broadcasts, for example, by password or by the list of friends.
3) No restrictions on the simultaneous number of views and the number of broadcast sources
4) Cross-platform: does not require installation of additional software on the user's device to view the broadcast.
5) No restrictions on the resolution of the stream received from the video camera. You can stream with a resolution up to FullHD.
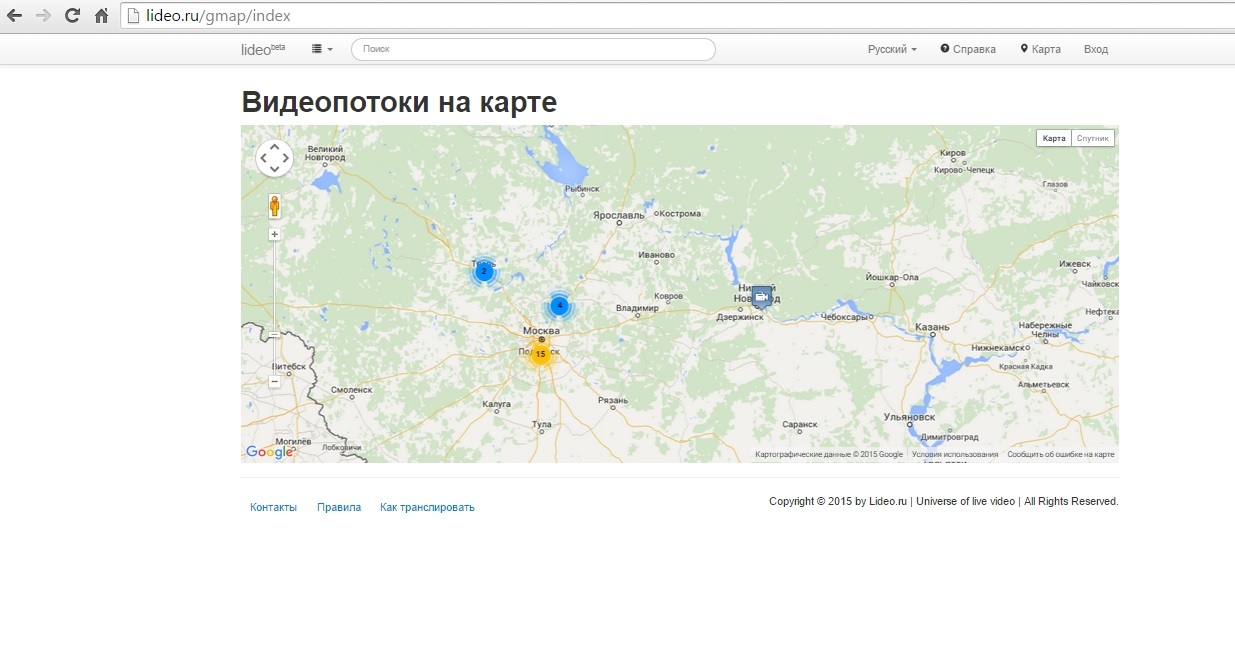
6) The display of online broadcasts on the world map is very clear and convenient.
7) The presence of the functionality of the social network. Each registered user has a wall, the ability to create a list of friends and chat with them.

But back to the task of adding broadcasts from an IP camera to your site using the Lideo service. It is solved in a few steps:
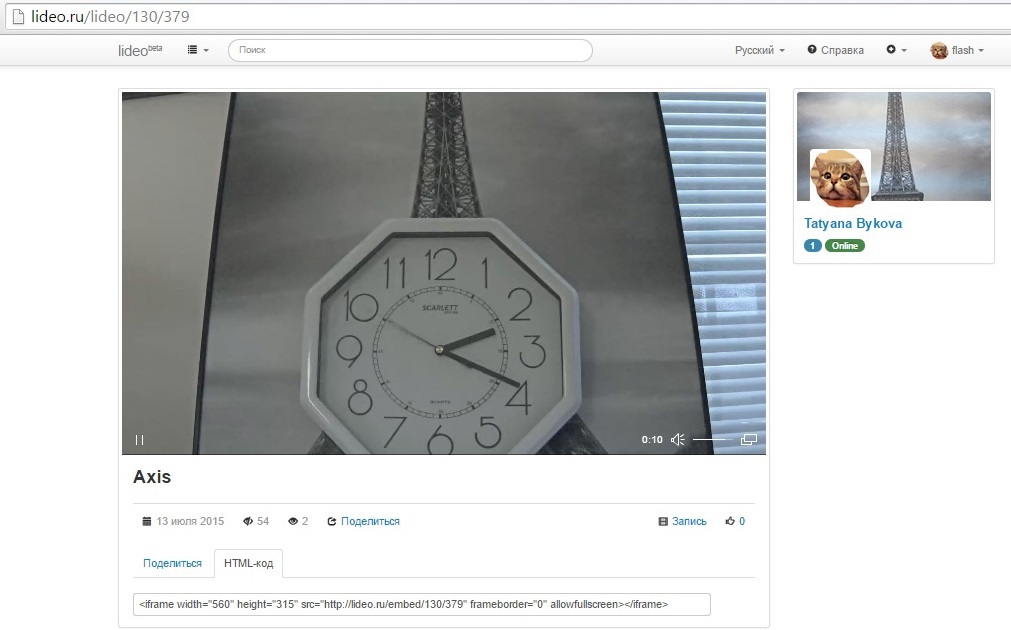
1) You need to create a video stream from the IP camera:
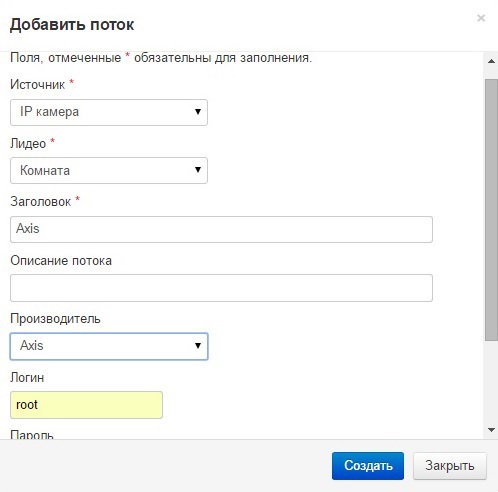
2) Click "Share / HTML code" to get the html code to add to your site. The Lideo service generates the html code itself, additional manipulations with the code and knowledge of the specifics of its formation are not required.
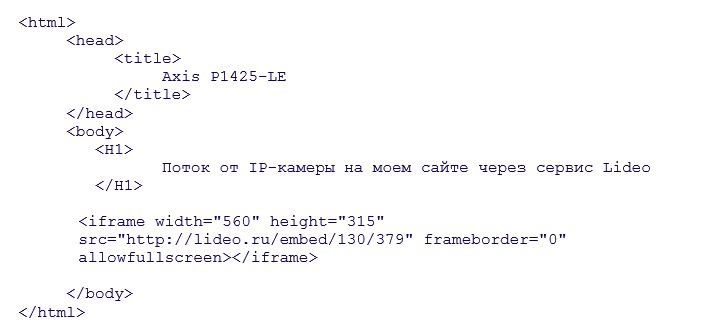
3) Add the generated html code to your site, for example:
As a result, we
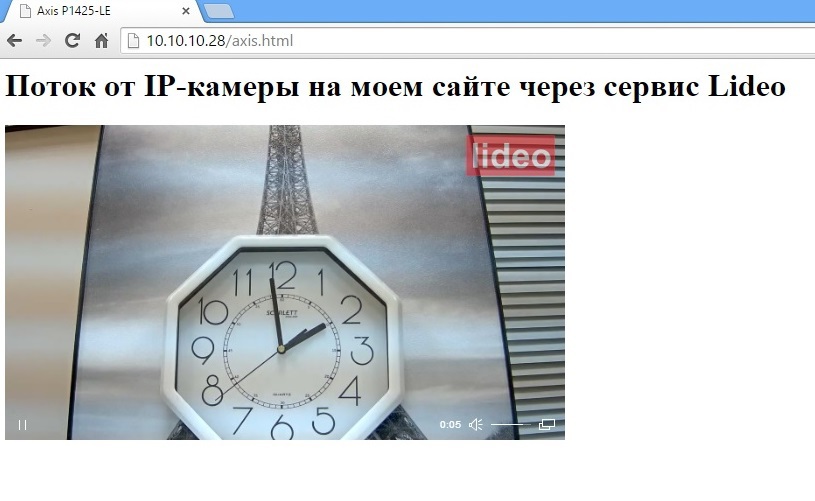
want to note once again that this way of adding a stream from the IP camera to your own site makes it accessible to a large number of visitors, allows you to view the broadcast from various devices, and improves security by hiding the IP camera interface.